Win
Mac
UniFab All-In-One (Lifetime)
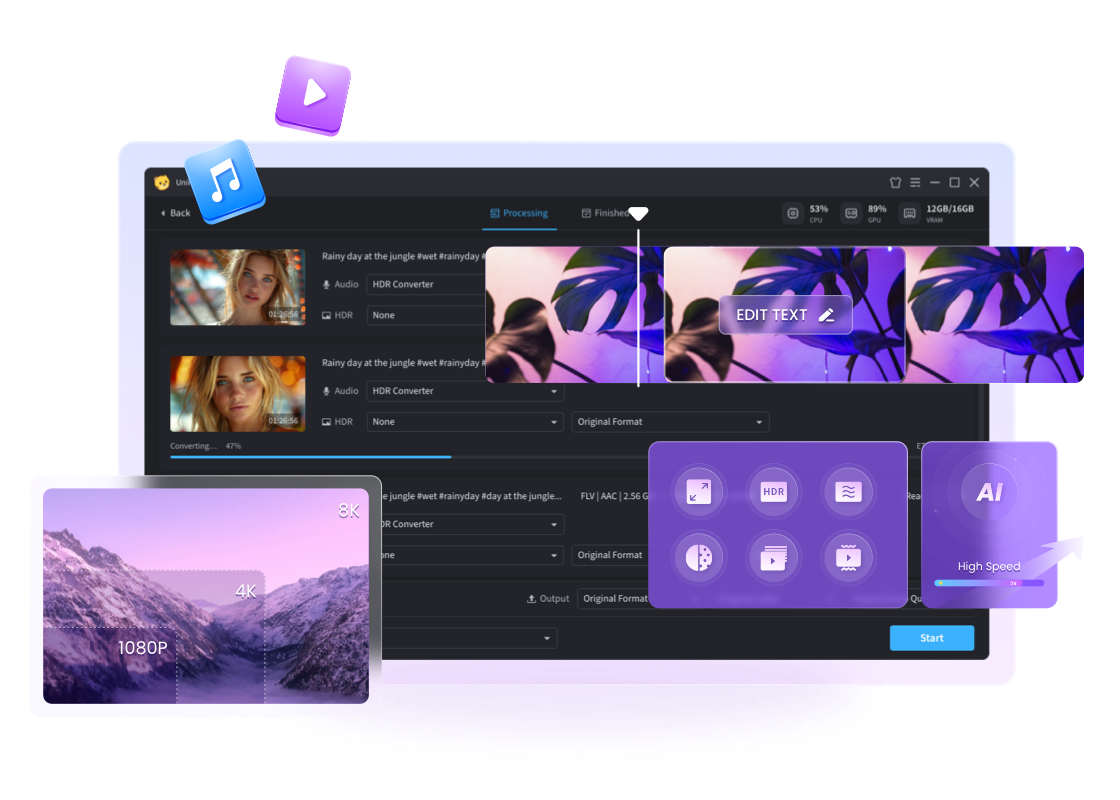
One-stop AI-powered solution for video & audio enhancement, featuring 4K/8K/16K upscaling, SDR to HDR, noise reduction, colorization, subtitle generation, audio upmixing, 1,000+ formats conversion, and more.
Last Update: May 26, 2026
100% Safe & Clean
4.9(752)
Products included (Lifetime)
Restoration
Stabilizer AI $109.99
Video Colorizer AI $129.99
Deinterlace AI $89.99
Audio Upmix AI $99.99
Popular Utility Tools
Subtitle Generator AI $109.99
TV Show Converter $89.99
Vocal Remover AI Free
Video BG Remover AI Free
Video Upscaler Al - FabCloud $129.99
HDR Upconverter AI - FabCloud $129.99
Enhancement
Video Upscaler AI HOT$129.99
Face Enhancer AI $129.99
HDR Upconverter AI $129.99
Video Translator AI - FabCloud $149.99
Smoother AI $89.99
Denoise AI $109.99
RTX RapidHDR AI $129.99
RTX Rapid Upscaler AI $129.99
VideoRefiner AI - FabCloud $149.99
RTX Rapid Denoiser AI NEW$109.99
VideoRefiner AI NEW$149.99
UniFab MyCombo (Lifetime)
You can choose 4 single products from all UniFab products according to your needs.
Start from$199.99
Customize Now
UniFab's Star Products: Fully Enhance Your Videos with Super Handy Tools
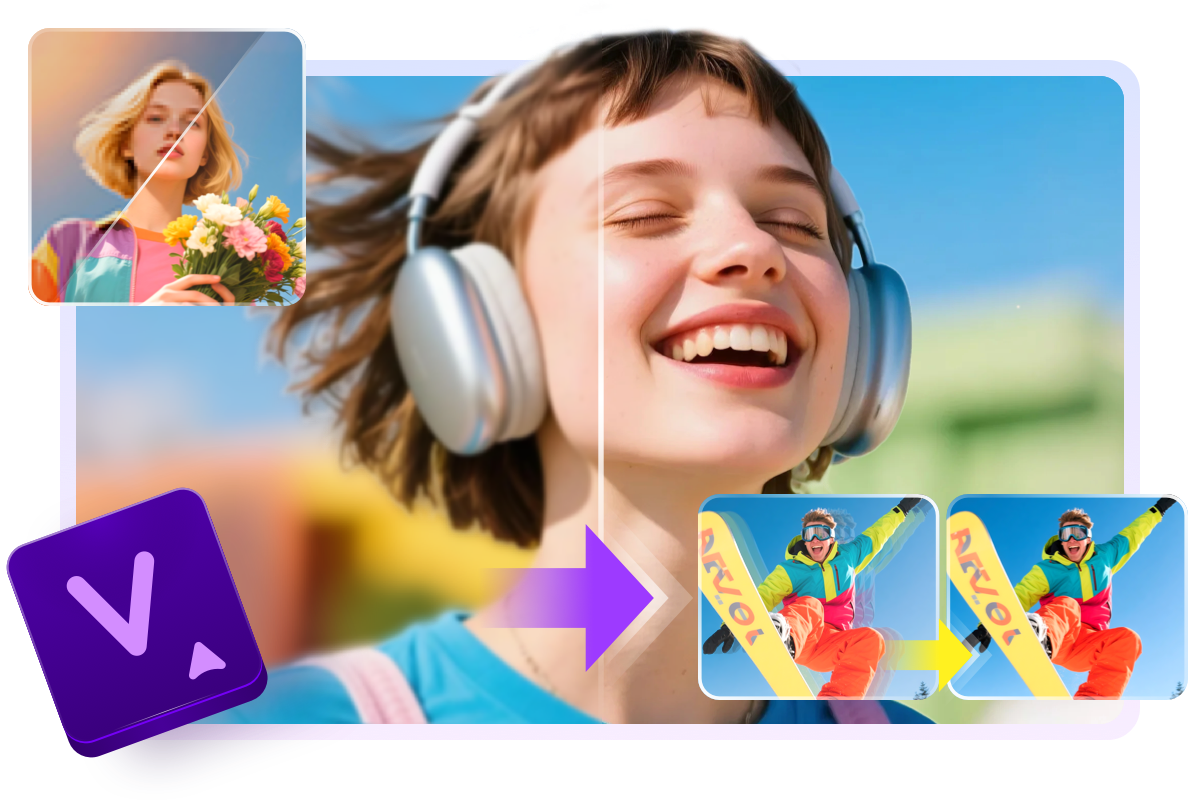
Video Enhancer AI
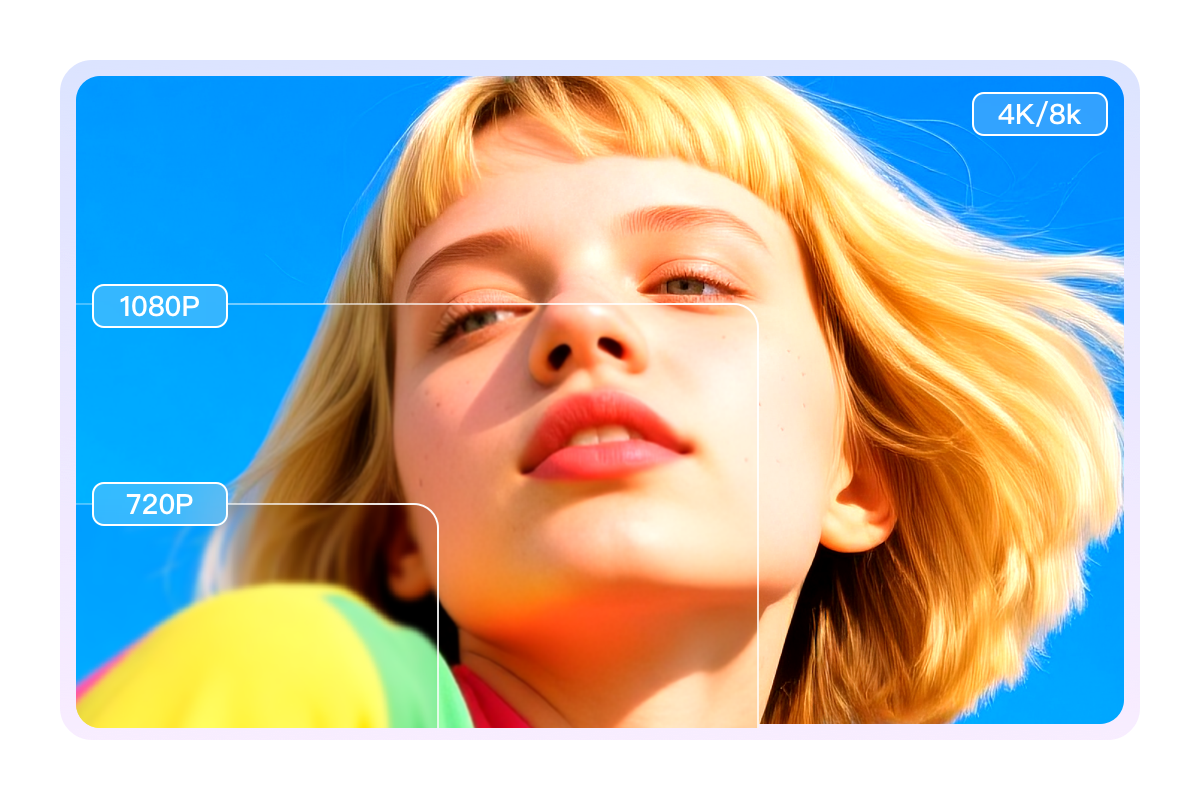
Upscale Videos Up to 16K with Detail Enhancement
Boosts your videos from low resolution to 1080P, 4K, 8K, and even 16K. UniFab AI intelligently detects and fixes issues like compression artifacts, noise, and blur — delivering crystal-clear results for all video types.
- Upscale up to 16K resolution
- Universal & Animation Models
- Detail & clarity enhancement
Discover how AI can transform your videos. Learn More>
- Upscale up to 16K resolution
- Universal & Animation Models
- Detail & clarity enhancement
Discover how AI can transform your videos. Learn More>
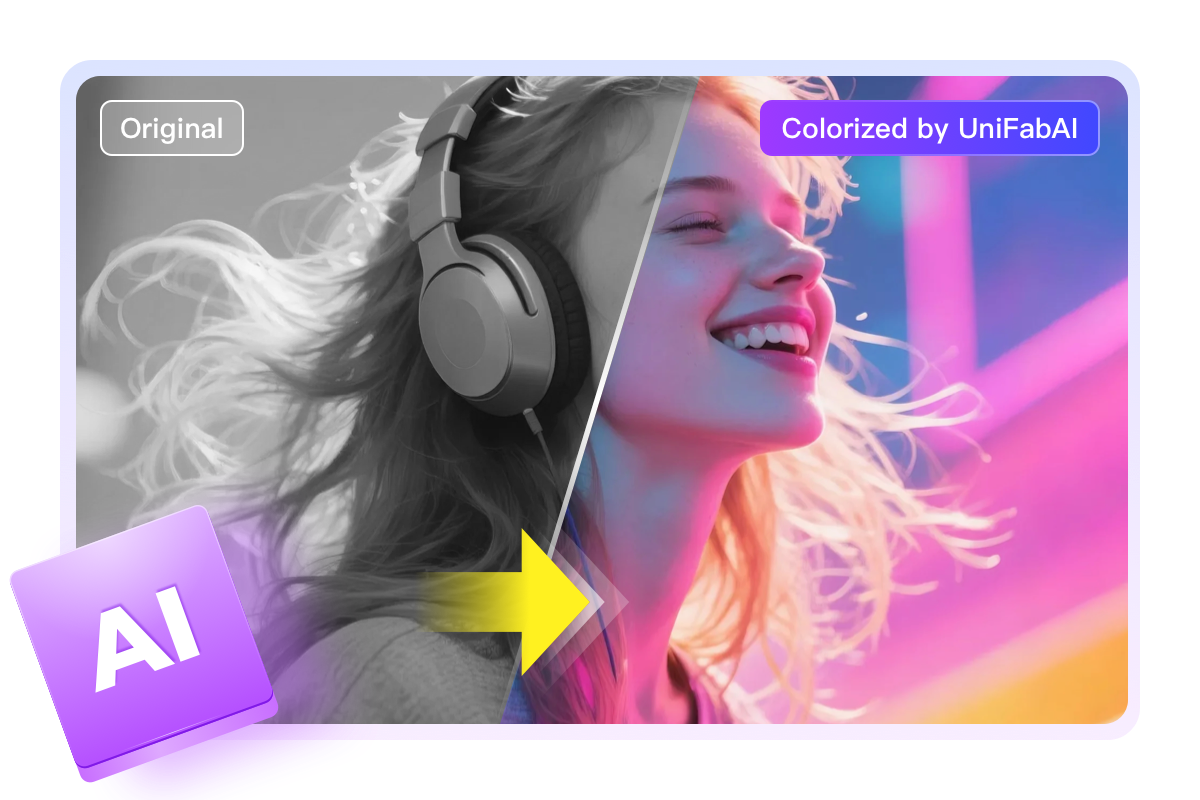
Video Colorizer AI
Add Realistic Colors to Black & White Videos
Bring old or monochrome videos to life by adding natural, vivid colors instantly. UniFab Video Colorizer AI uses advanced AI models to analyze each frame and apply consistent, realistic colorization for any video type.
- AI-powered automatic colorization
- 4 unique color styles for customized looks
- Maintain color consistency across frames
See how AI can revive your B&W videos. Learn More>
- AI-powered automatic colorization
- 4 unique color styles for customized looks
- Maintain color consistency across frames
See how AI can revive your B&W videos. Learn More>
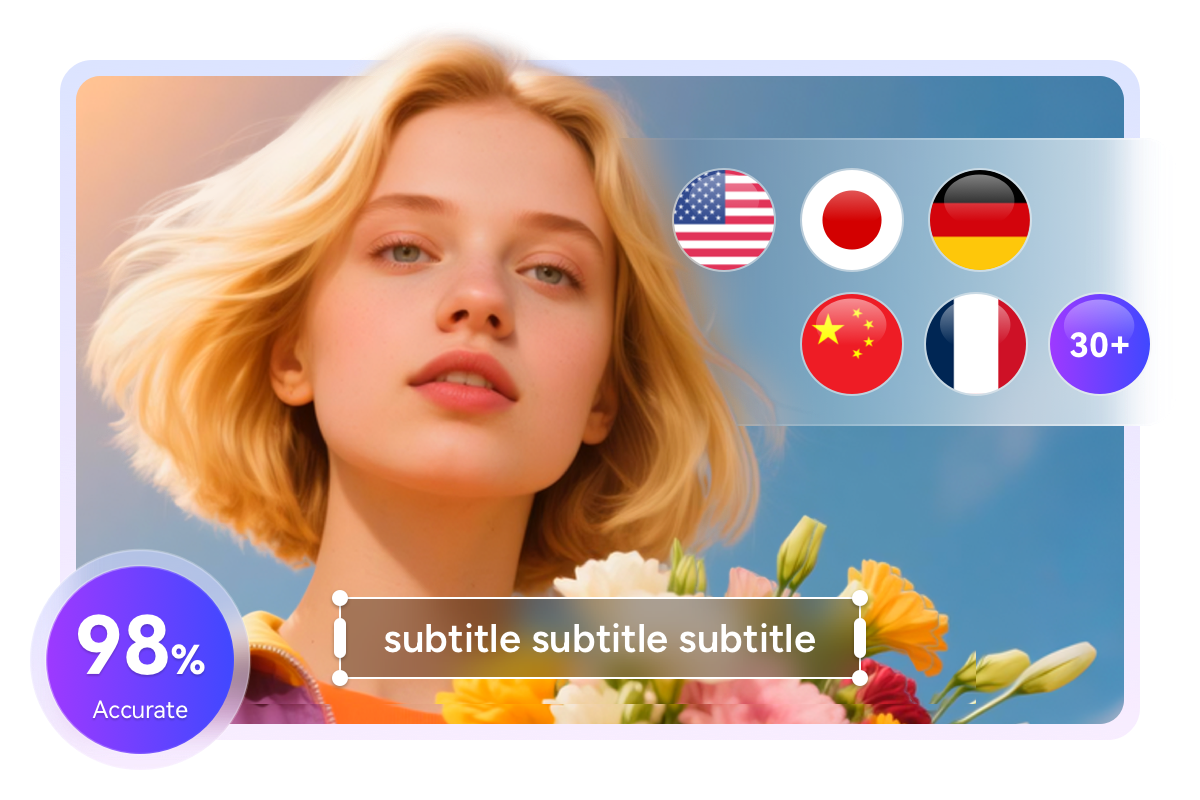
Subtitle Generator AI
Subtitle Generation: 98% Accuracy, 30+ Languages
UniFab Subtitle Generator AI not only quickly generates accurate subtitles but also provides natural, fluent translations across multiple languages. Enhance your videos' accessibility and engagement.
- 98% speech-to-text accuracy
- Supports over 30 languages
- Time-synced .srt subtitle files
Make your videos accessible to everyone. Learn More>
- 98% speech-to-text accuracy
- Supports over 30 languages
- Time-synced .srt subtitle files
Make your videos accessible to everyone. Learn More>
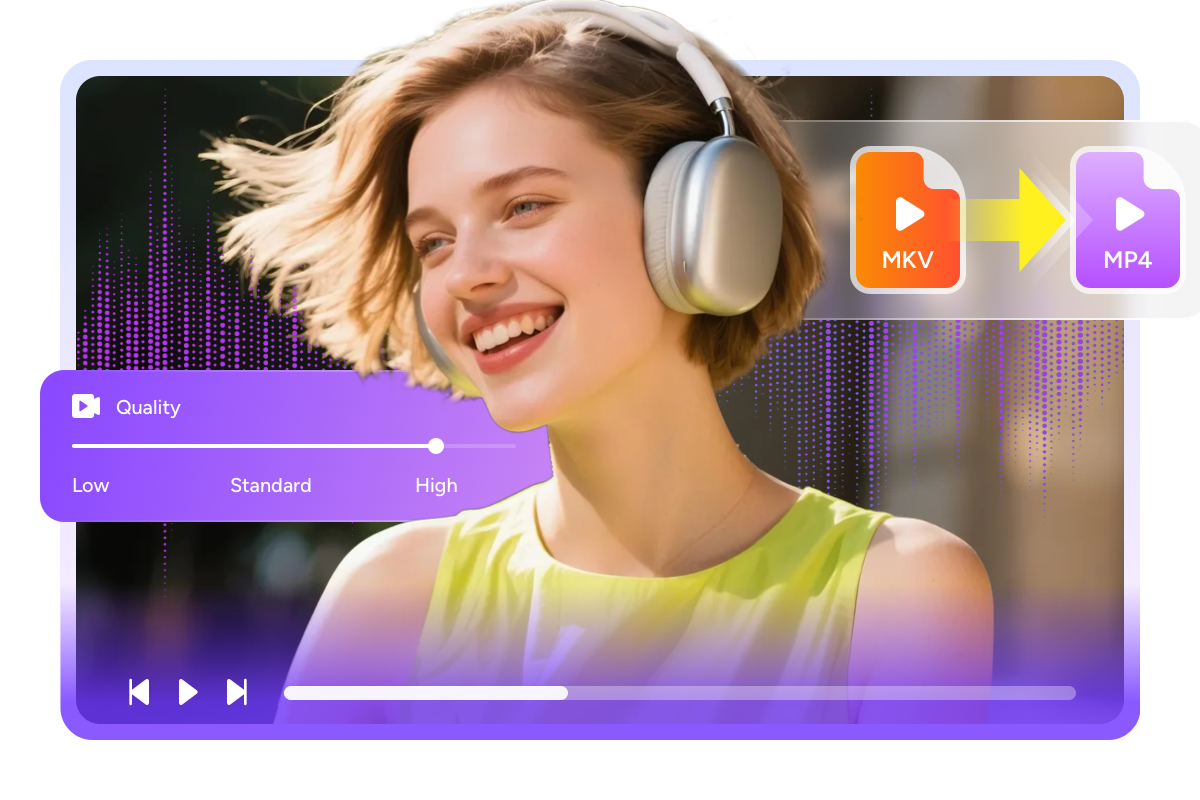
Video Converter
Convert Videos to 1000+ Formats for Any Device
UniFab Video Converter supports a wide range of formats and devices, ensuring fast, seamless conversion. Batch processing lets you efficiently convert large or multiple files without quality loss.
- Supports 1000+ video and audio formats
- Batch conversion for multiple files at once
- Built-in video editor with customizable settings
Convert and optimize your videos effortlessly. Learn More>
- Supports 1000+ video and audio formats
- Batch conversion for multiple files at once
- Built-in video editor with customizable settings
Convert and optimize your videos effortlessly. Learn More>
Explore More UniFab Tools You'll Want to Try
UniFab Studio
AI Video Enhancement Suite for Ultimate Quality Boost
UniFab Studio combines all the powerful video enhancement tools in a single app. Upscale resolution, convert SDR to HDR, smooth motion, remove noise, deinterlace footage, and more.
- One-stop video enhancement tool
- Supports all types of videos
- Fast GPU-accelerated processing
Elevate your video quality effortlessly. Learn More>
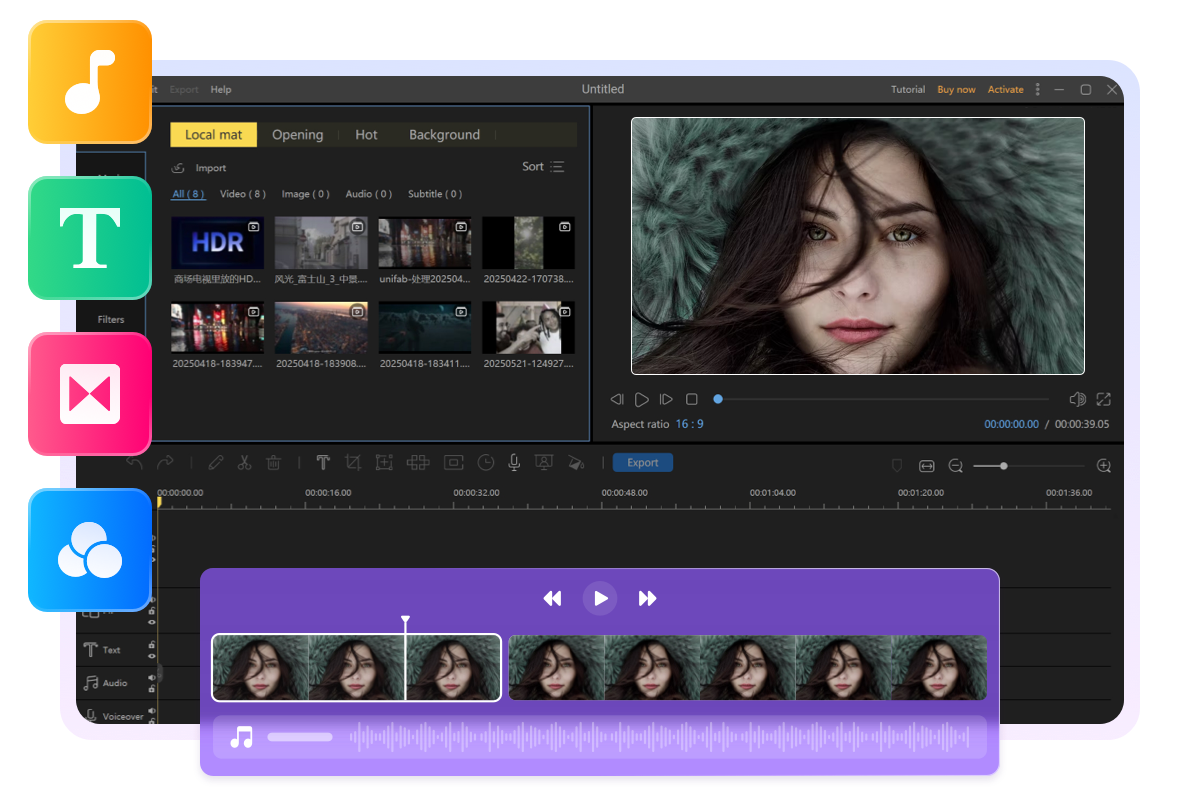
UniFab Video Editor
Edit Videos with Ease — Cut, Trim, Merge, and More in One Tool
UniFab Video Editor offers an intuitive interface for quick, efficient video editing. Whether you're trimming clips, merging scenes, or adding simple effects, it's perfect for fast everyday edits.
- Timeline-based editing with real-time preview
- Lightweight and beginner-friendly interface
- Export videos in a variety of formats and ratios
Simplify your video editing workflow. Learn More>
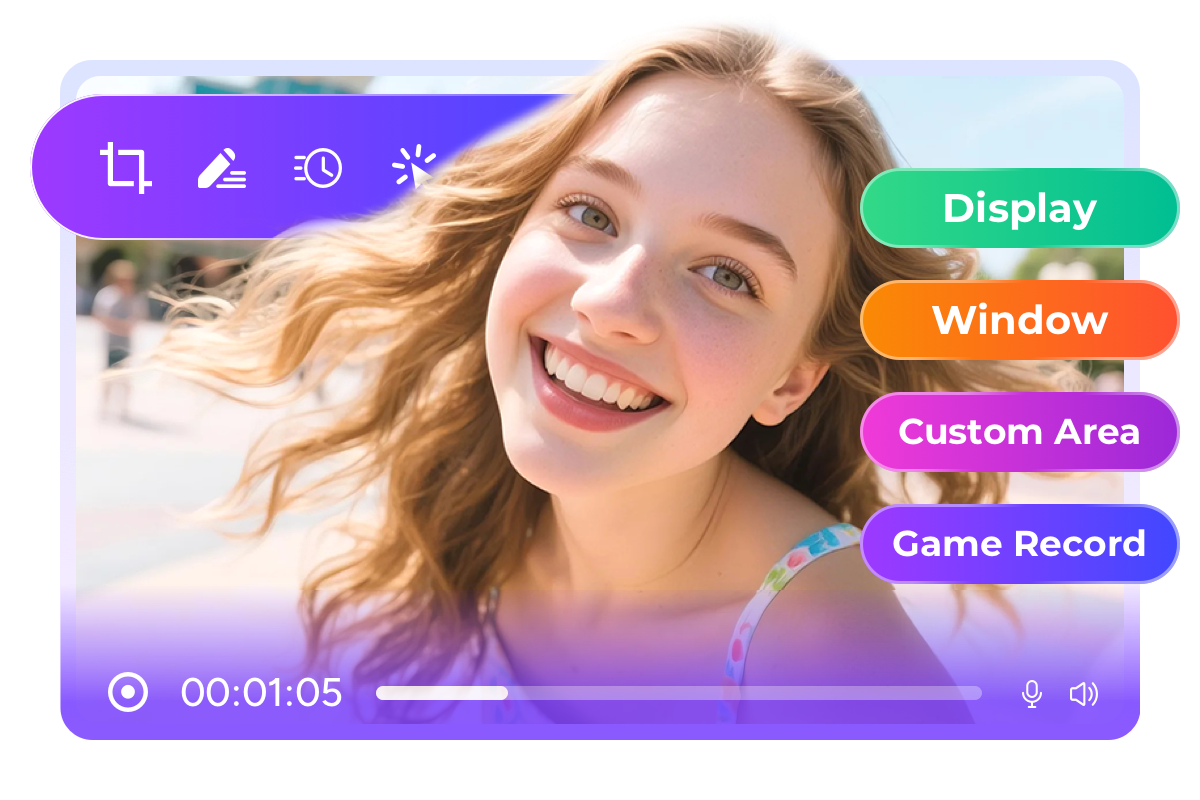
UniFab Screen Recorder
Smooth HD Screen Recording with Audio and More
UniFab Screen Recorder lets you easily capture meetings, tutorials, gameplay, and live streams in ultra-HD and smooth high frame rates with versatile recording modes.
- 4 modes: full screen, window, custom area, game
- Ultra HD & 60 FPS high-performance recording
- Picture-in-picture & audio capture support
Smooth, High-Quality Recording Made Easy. Learn More>
Enjoy a Flawless Video Enhancement Journey
GPU Acceleration
Powered by NVIDIA, AMD, and Intel GPU acceleration for lightning-fast processing.
Batch Processing
Save time with one-click batch conversion for multiple videos or entire libraries.
AI Technology
Harness the power of AI to intelligently and automatically enhance your videos.
Seamless Import
Directly load video files from DVDFab or StreamFab, streamlining editing workflow.
Trusted by Over 80 Million Users Worldwide

E
Ethan
FilmmakerThis all-in-one solution covers everything I need—upscaling, colorization, subtitles, and more. The user-friendly interface means less hassle and more creative freedom. It’s become an essential part of my editing toolkit.
M
Mia
EducatorThe subtitle generator is incredibly accurate, capturing speech with high precision. The translation feature sounds natural, which is perfect for my international students. It’s made creating accessible content effortless.
J
Jason
Video EditorThe conversion speed is impressive, and with support for over 1,000 formats, I can handle any client request. Plus, batch processing means I save hours every week. This tool is a game changer!
S
Sophia
Marketing SpecialistUniFab’s GPU acceleration lets me process multiple videos simultaneously with lightning-fast speed. The all-in-one features save me from switching between apps, making my workflow smooth and efficient.
M
Mark
Content CreatorUniFab transformed my old videos with stunning 4K upscaling. The AI detail enhancement made a huge difference, and the interface is so intuitive—even beginners can get great results quickly.
L
Liam
GamerI love how the denoise and HDR upscaling make my gameplay videos look crisp and vibrant. Recording and editing is seamless, and the GPU acceleration really speeds things up without sacrificing quality.
Get Started Enhancing Your Video Quality with UniFab Now!
Standard Price:$499.99
Final Price:
$319.99
Try for Free
100% Safe & Clean
FAQ
- Is a free trial available?
- Can I use UniFab across multiple devices?
- If I purchase UniFab All-In-One, will I have access to future upgrades?
- What are the system requirements of UniFab?