How To Record Twitch Stream For Offline Viewing
Summary: Being a live video streaming service, Twitch covers almost anything that users wish to watch from cooking, gaming, tutorials, music, and Q&A sessions. But sometimes, users feel the need to download or record Twitch streams for offline viewing due to some or other reasons. Today, we will have a look at some of the best solutions that will help you record your Twitch stream on your device. Read below to know more.
Best Way to Record Twitch Stream
The main features of Twitch are the incapability to post old streaming videos that users have created earlier to earn ad revenue. If users wish to post some of their earlier videos, they need to have a downloader that can download users’ earlier videos, thereby allowing them to post users their videos again. And StreamFab Twitch Downloader is the best way to know how to record your stream on Twitch.
Among the different methods that you will see to know how to download or record your favorite videos or episodes on Twitch, StreamFab Twitch Downloader is the best tool. This downloader is by far the most versatile and functional solution, sufficing all your downloading requirements.
Features of the StreamFab Twitch Downloader
Read below to know some of the major benefits and advantages of this tool:
- With StreamFab Twitch Downloader, users can get rid of the process of copy-pasting URLs since the device comes with an in-built practical browser.
- MP4 format is the most used format since it makes sure that high transferability and compatibility are achieved among different devices. That is why StreamFab Twitch Downloader downloads all the videos in this format by default.
- The downloaded videos have a premium quality when it comes to the video and the audio of the Twitch live streams.
- Users can download subtitles in their favorite languages in the form of SRT files which are automatically added later in the video when played.
- Users can enjoy the ad-free binge-watching experience with the StreamFab Twitch Downloader.
- Users can make full use of the Batch Mode feature by downloading a number of playlists or episodes at once.
- StreamFab Twitch Downloader comes with a practical and user-friendly application together with a lightning-speed downloading process.
How to Record Twitch Stream using StreamFab Twitch Downloader
Follow the below steps to know how to use StreamFab Twitch Downloader for Twitch live stream record.
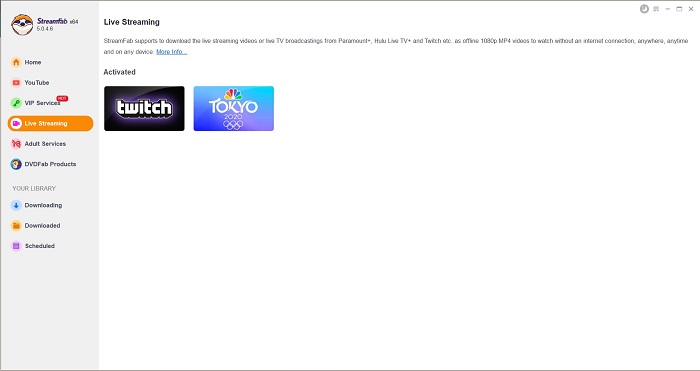
Step 1: Download and open the tool. Tap the Live Streaming section on the left. Now, on the right, open the Twitch website from the supported services.
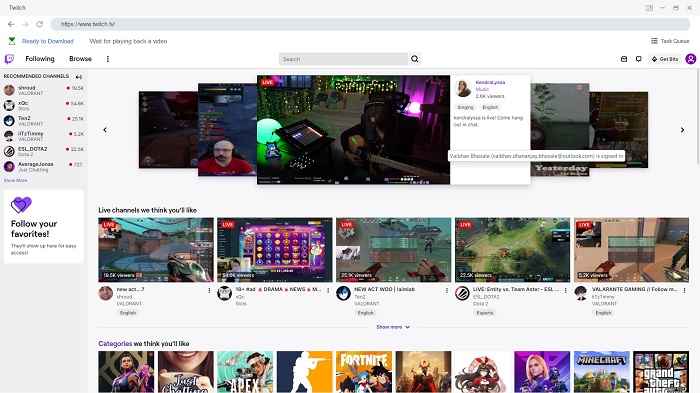
Step 2: Next, users can log in to their account on Twitch and search for the video that they need to download. Once you click on the video, it will start playing
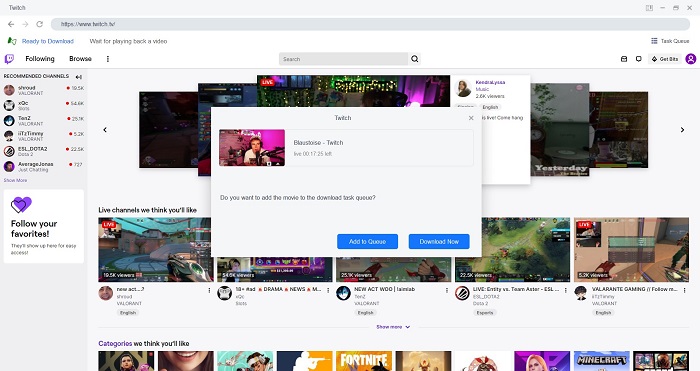
Step 3: As soon as the video starts playing, a pop-up window will be shown on the screen. All you need to do is click the Download Now button on that window to start downloading the video.
Other Ways to Record Twitch screen
If StreamFab Twitch Downloader is not an option for you, there are many free tools that can help you record most Twitch subs in one stream. These programs are free of cost, but come with some restrictions and will not offer you the ultimate experience that comes with StreamFab Twitch Downloader. Below is the list of free tools that can help you record Twitch Stream. Read below to know more.
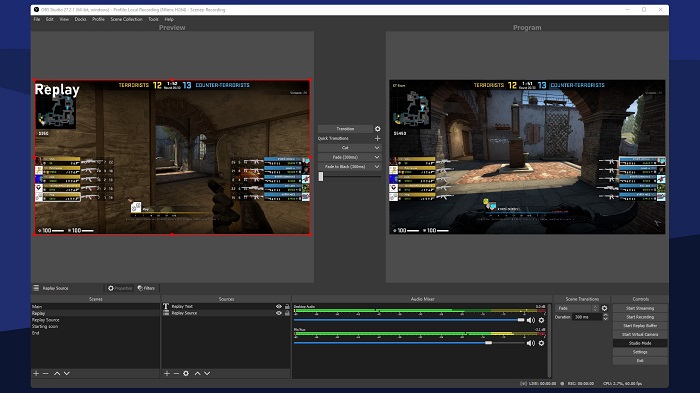
1. Record Twitch Streams Using OBS Studio
OBS Studio is one of the most famous open-source tools compatible with Windows, macOS, and Linux operating systems. The tool is majorly used for live streaming and screen recording. With this tool, users can download streaming video easily and quickly. On the other hand, it is not simple for new users to manage this tool. If you are a newbie, users need to better check the tutorials before using this tool.
How to record your stream on Twitch with OBS Studio:
Step 1: Download and open OBS Studio on your device.
Step 2: Now, navigate to the Settings section at the top of the screen.
Step 3: Next, tap the Settings icon again to select a location to save your recordings.
Step 4: Go back to the main window on OBS Studio and right-click below the Sources tab.
Step 5: Open Twitch and choose the stream that you wish to record.
Step 6: Next, place your cursor over Add option and add either Window Capture or Monitor Capture to your sources.
Step 7: After that, users can tap on the Start Recording option to record and download Twitch streams on their screen.
Step 8: When done recording, click the Stop Recording option, and then the recording will be downloaded on your device.
2. Record Twitch Streams Using VLC Media Player
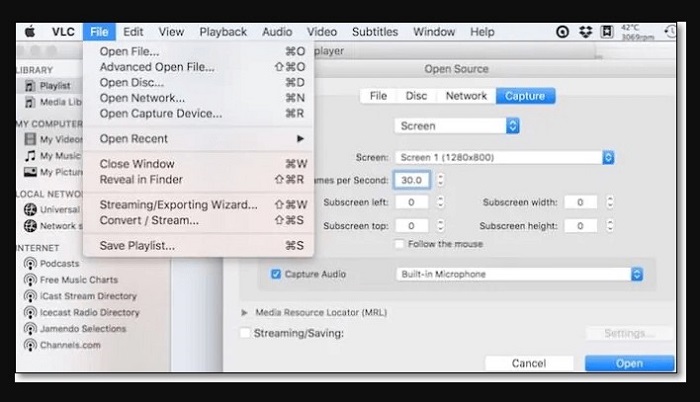
VLC is not just a media player but also a recorder that can help you with the most viewed Twitch stream record task. This tool lets users capture different live streaming videos and audio swiftly. If users have a VLC Media Player and need to record their Twitch stream, they can use it to do so.
How to record twitch stream using VLC:
Step 1: Download and install Livestreamer on your device.
Step 2: Next, launch VLC Media Player on your device.
Step 3: Now, launch Command Prompt and type livestreamer.
Step 4: Here, users can tweak the URL to a specific channel.
Step 5: In addition to this, users can select a high, low, or source to record a Twitch stream.
Step 6: After opening the stream of the VLC player, users can tap on the recording option on the left to start recording the Twitch stream instantly.
Step 7: Once finished, select the stop option to finish recording the stream.
3. Record Twitch Stream with QuickTime Player
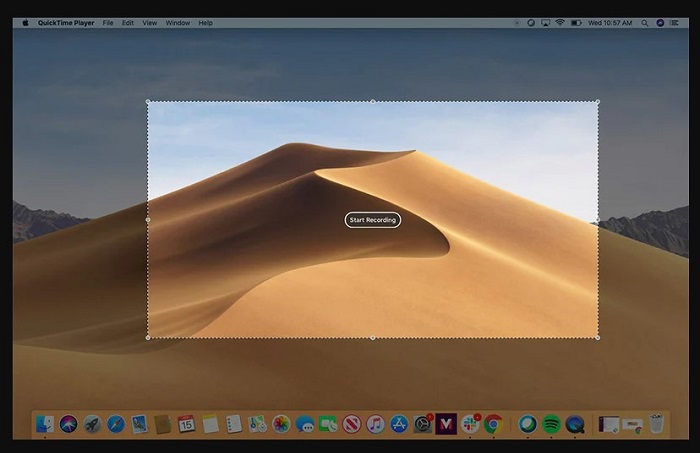
QuickTime Player is a tool that comes pre-installed in every Mac and users can download it on Windows, as well. The tool allows users to play video/ audio, record screen, and share them. Users can record their Twitch game using this tool too.
How to record twitch stream using QuickTime Player:
Step 1: Download and open QuickTime Player in your machine.
Step 2: Next, tap File and select New Screen Recording option.
Step 3: Here, users can personalize recording options by clicking the arrow in the dropdown menu next to the record button.
Step 4: In addition to this, users will get to tweak microphone settings where they can select None to record a screen without audio.
Step 5: Users can select Built-in Microphone: Internal Microphone to record Twitch stream with sound.
Step 6: Now, open up the Twitch stream you wish to record and click the record option.
Step 7: The player will offer options to record the entire screen or just a portion of the screen by dragging a specific part of the stream.
Step 8: To end screen recording, click the stop option in the menu bar.
Step 9: To save Twitch streams, tap on File and then click save. Give your file a name and store it to any folder you wish.
4. Record Twitch Stream with Windows 10 Xbox App
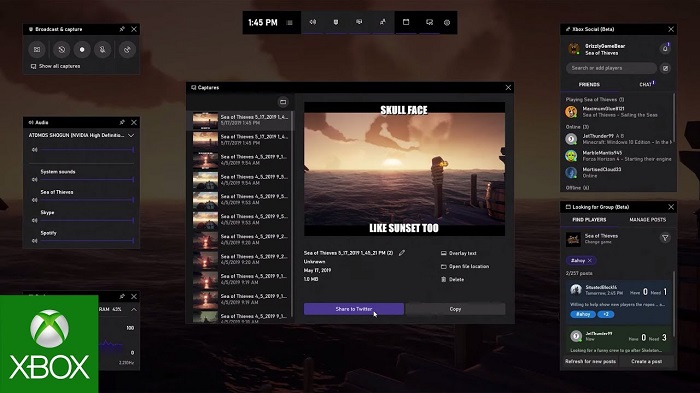
Windows 10 has an in-built screen recording feature within the Xbox app named Game Bar. Users can use this feature to record their Twitch stream.
How to record twitch stream using Windows 10 Xbox App:
Step 1: Press the Windows key + G to open the Game Bar.
Step 2: Open your settings by clicking the cog icon on the start menu.
Step 3: Navigate to Gaming and turn on the Recorder game clips, screenshots, and broadcast using Game Bar option. Here, users can personalize the Xbox Game Recorder shortcut commands to stop and start recording and take screenshots.
Step 4: Open the Twitch stream you wish to record and make sure to close or minimize other window applications to avoid any errors.
Step 5: Click on the recording button (red dot) to begin the recording.
Step 6: Users can also start recording without launching the Game Bar if they are all set by pressing Windows key + Alt + R.
Step 7: To end the recording, tap on the stop option in the recording panel. Or, users can use the Windows key + Alt + R keys on the keyboard to end recording.
Step 8: When finished recording, a notification will appear claiming that the video has been downloaded and saved.
Step 9: Users can click on that alert to open the Captures folder where the recordings are saved.
Step 10: Users can also find their recording in the same folder by going to This PC >> Videos >> Capture folder in File Explorer.
5. Save Twitch Streams on VOD
Also dubbed "Video On Demand," VOD is an option that Twitch offers for users to save portions of their streams in storage so that both they and their viewers can access those highlights later easily. If users wish to turn their streams into long-term episodes, this must be the easiest method. Next, users can upload the videos they saved to other platforms too. It is worth noting that this feature only lets users protect their own videos. If you are a subscriber, you can use any of the methods mentioned above. Let us have a look at the steps that need to be followed.
Step 1: Sign in to your Twitch account and navigate to Creator Dashboard on the main screen.
Step 2: Tap on Preferences and click the Channel tab.
Step 3: Next, users need go to the Channel Settings section.
Step 4: Tap on the Profile icon from the main page to launch another menu.
Step 5: Click on Settings and select the Channel and Videos section.
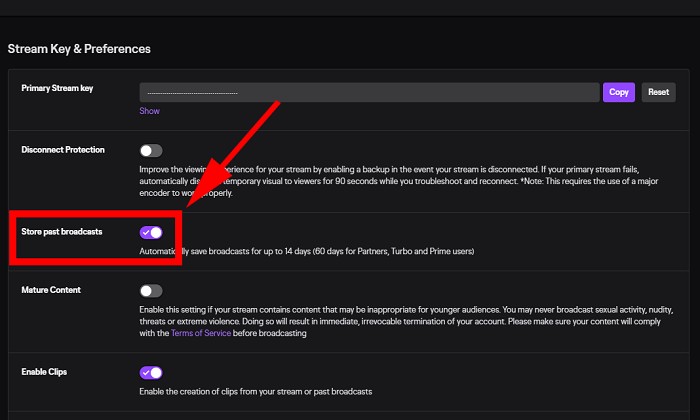
Step 6: In the Stream Key and Preferences section, users can find an option named Store Past Broadcasts. Make certain that this option is turned on.
Step 7: Tap on the three-line option again and tap Content >> Video Producer option.
Step 8: Next, tap the three-dot lines behind the video and select to download it on your device.
FAQs
What is the highest viewed Twitch stream?
Blevins is the highest viewed Twitch Stream with more than 600,000 views at the same time.
Conclusion
In a nutshell, we just had a look at different methods that can be used to record Twitch streams. Users can use any of the methods to record and download their stream. But the best method is to use StreamFab Twitch Downloader. The tool is a third-party downloader that helps users download broadcasts and live streams from the live streaming platform Twitch.
