
How to Compress Videos Files Without Quality Loss?
Summary: Here you can learn how to compress video files without sacrificing quality on windows, mac, etc. Also, we will discuss how DVDFab Video Convertor can compress your video files. So, read on to learn more.
Table of Contents
As video files get larger, it is difficult to compress files without losing quality. Video compression is a process that reduces the file size of your video without compromising quality. This can be done by reducing your video's bitrate, codec, or resolution. Compressing your video can make it smaller and more manageable, ideal for sharing online or via email.
This guide will show you how to compress video files without quality loss on windows and mac. We'll also introduce you to a powerful video compressor - UniFab Video Converter and other third-party software. So, without further ado, let's get started.
Part 1: The 4 Best Video Compressors Review
1. UniFab Video Converter
UniFab Video Converter
Key Features:
- Support to convert any video to 1000+ video and audio formats
- Convert or compress videos to any video format without quality loss
- Offer customized settings and a built-in video editor to make your video
- Convert multiple videos with the Batch Mode
Install and launch the UniFab Video Converter on your device first.
Select the video/file you want to compress, and add it into UniFab Video Converter.
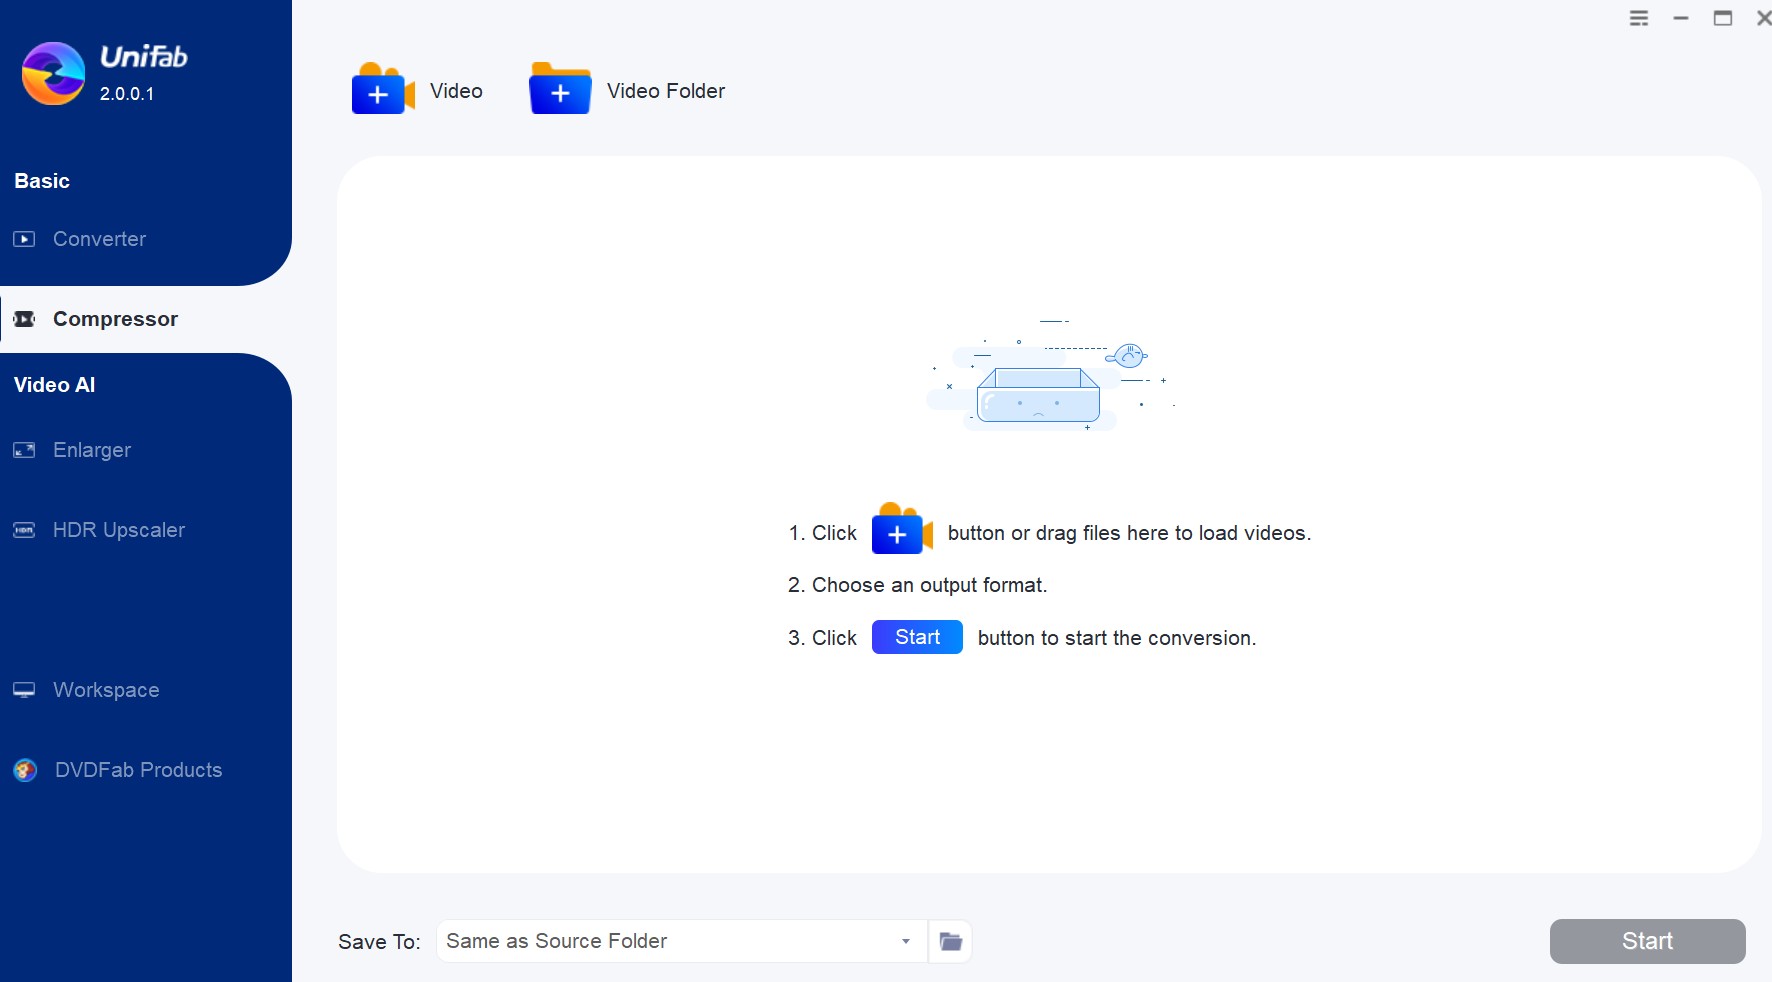
Choose 'File Size', customize 'Format' or 'Settings', and click the Start button to begin the process.
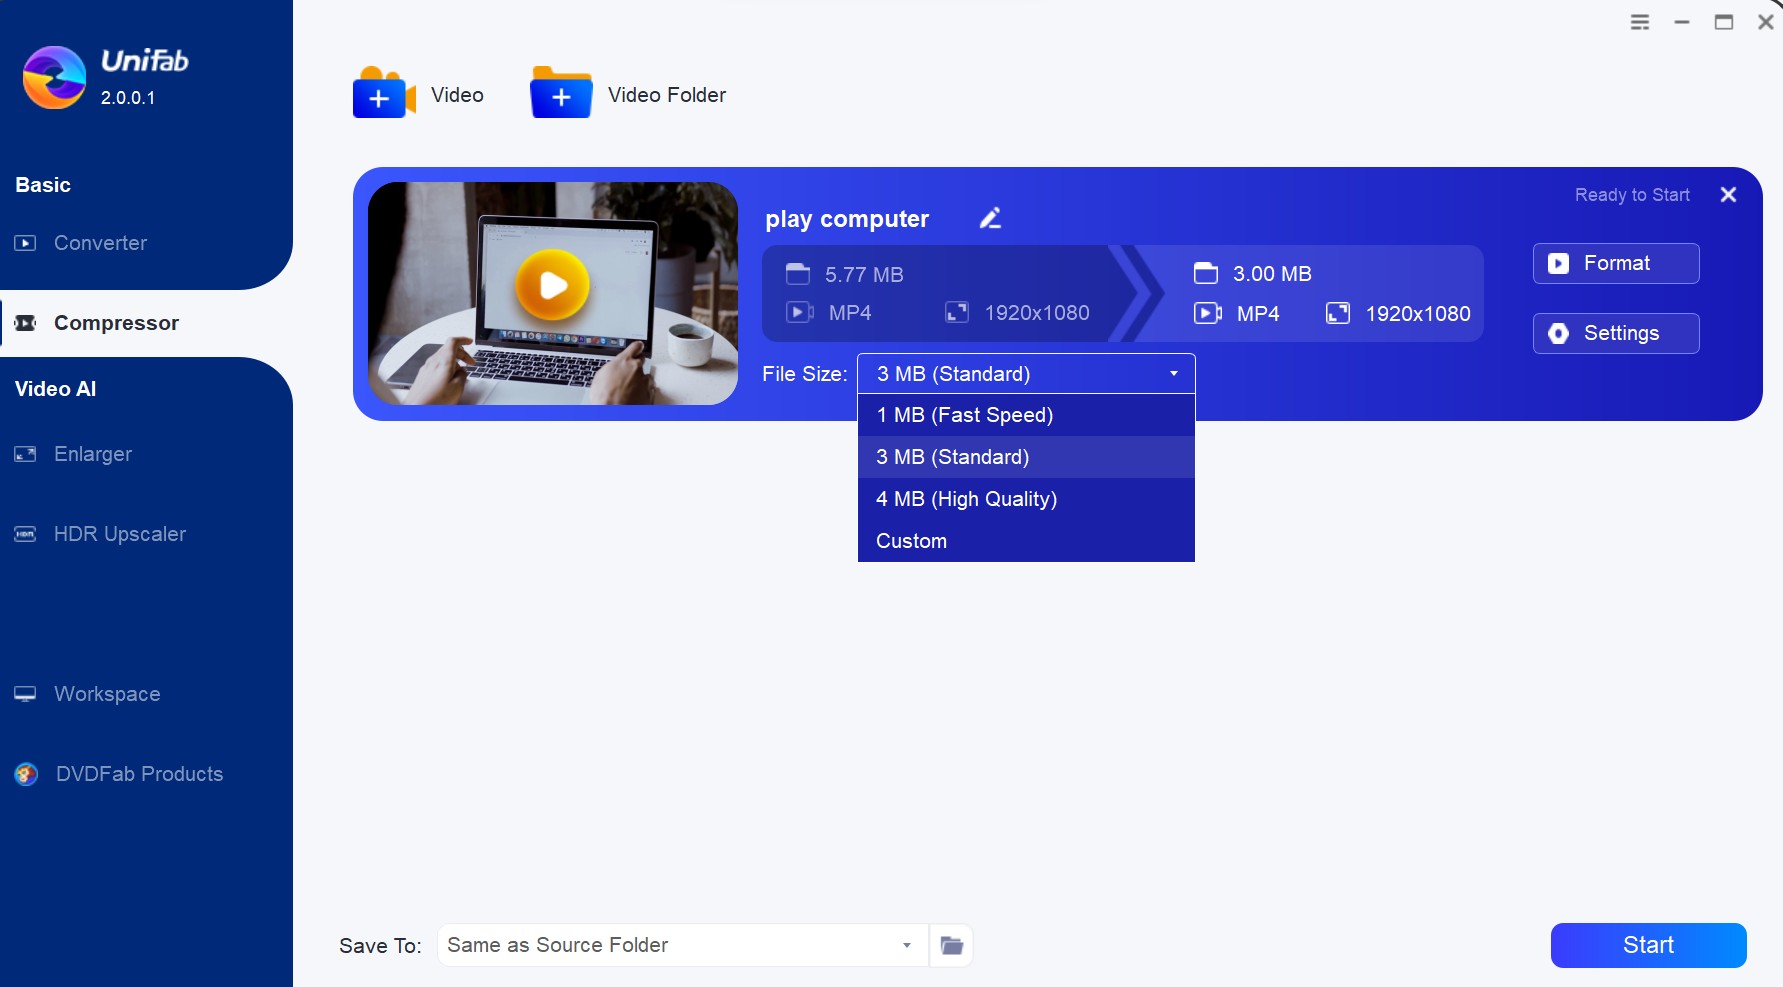
2: VideoProc Video Compressor
Key Features:
- Provides 47x real-time fast video conversion/compression speed with full hardware acceleration tech.
- Supports 420+ output formats and profiles. Batch convert / size.
- Changes resize cuts, merges, rotates, changes speed, affects, etc.
- A screen recorder, video/music downloader, subtitle extractor.
- Easy to use, drag and drop without loss of quality.
VideoProc is an easy and fast solution to convert and compress any video, including 4K and larger videos. All features of this app come with user-friendly UI and navigation. You can easily compress your videos on slow computers without crashing and freezing. Most importantly, it gives you trial time before purchase. You can convert and compress short videos for free without functional limitations.
It is known for providing 47x real-time fast video conversion/compression speed with full hardware acceleration technology. This makes it a very desirable choice for users looking for an easy and fast solution to compress their videos. VideoProc not only compresses video files but also converts them into different formats and profiles. This makes it a very versatile tool that can be used for various purposes. You can also batch convert and resize your videos with this app.
There are a variety of ways that you can compress files with VideoProc. You can change, resize, cut, merge, rotate and change the speed of your videos with this app. It also affects the quality of your videos in different ways.
It also has a built-in screen recorder that you can use to record your screen and compress the recorded video simultaneously. This is a very convenient feature that not many other compressors offer. It also offers a video downloader as well as a music downloader. You can use these features to download videos and music from the internet and compress them simultaneously.
The subtitle extractor is another useful feature that allows you to extract subtitles from a video and compress them separately. This is a handy feature for those who want to compress their videos without losing any subtitles.
VideoProc is very easy to use. You can compress your videos by simply dragging and dropping them into the app. You don't have to worry about losing any quality when compressing your videos with VideoProc. It offers a very fast and easy solution to compress your videos without any loss in quality. So, if you are looking for an easy and fast way to compress your videos, then VideoProc is the best option for you.
Pros:
- It comes with a free trial.
- Offers a fast and easy solution to compress video files.
- It has a user-friendly interface.
- It offers a variety of features like video conversion, screen recording, video and music downloader, subtitle extractor, etc.
Cons:
- The free trial version has some functional limitations.
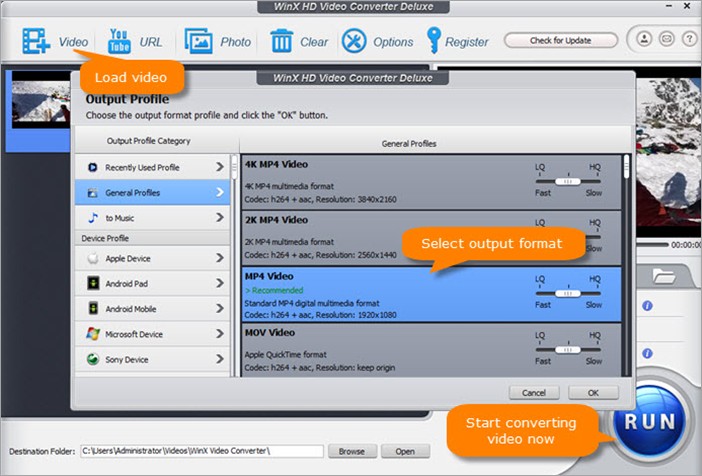
3: WinX HD Video Converter Deluxe
Key Features:
- Compress video files by up to 90% without sacrificing quality.
- Any video format and codec can be converted.
- Download videos from YouTube and more than 1000 more websites.
- In only a few clicks, you can edit video footage.
This is an excellent program for reducing the size of your video files without any noticeable loss in quality. WinX HD Video Converter Deluxe can convert any video format and codec and download videos from YouTube and more than 1000 other websites. In only a few clicks, you can also edit your video footage. This program is worth trying if you want to compress your video files without any hassle.
WinX HD Video Converter Deluxe takes advantage of the High-Quality Engine and Deinterlacing tech, which can compress video files without sacrificing quality. This program is also very fast, thanks to the support of GPU acceleration. With this feature enabled, WinX HD Video Converter Deluxe can convert video files up to 47 times faster than in real-time. This means that you won't have to wait long for your video files to be converted.
Overall, if you are looking for a program to compress your video files, WinX HD Video Converter Deluxe is worth trying. The program is very easy to use, and it can compress your video files by up to 90% without any noticeable loss in quality.
Pros:
- It compresses video files without sacrificing quality.
- It has easy operations that a child can use it.
- It has a very high speed of conversion.
- It can convert any video format and codec.
Cons:
- It is a little expensive.
- The free version only supports five-minute video compressions.
4. Windows built-in Video Editor App
Compressing a video file is a great way to save space on your computer or make sure a video file will play on a device with limited storage. You can compress files Windows 10 using the built-in Video Editor App. To do this, follow these steps:
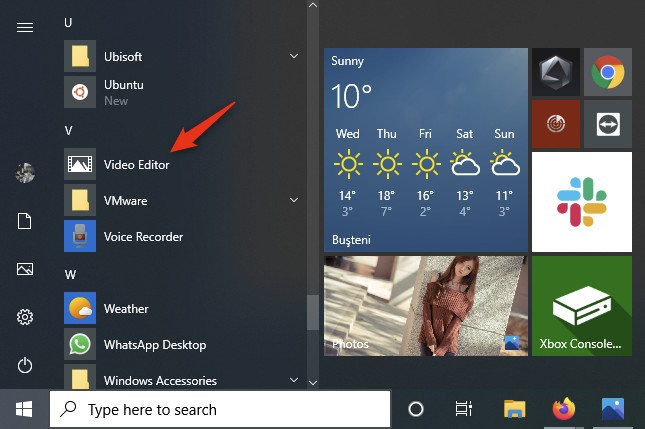
1. Open the Video Editor App by clicking on the Start Menu and searching for "Video Editor."
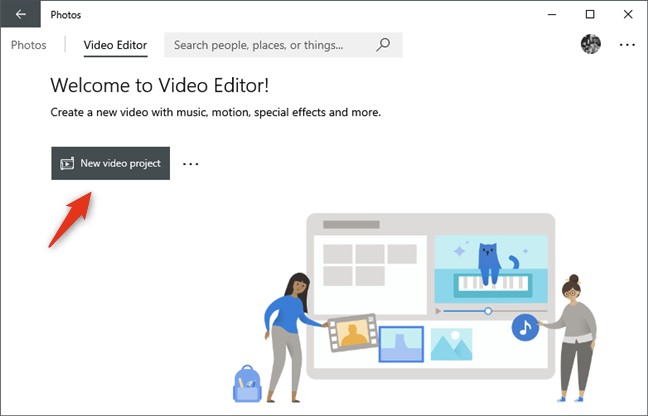
2. Click on the "New Project" button.
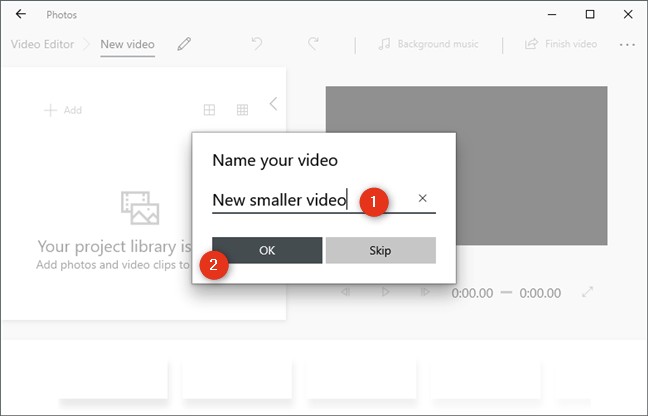
3. Select a name for the new video you're creating and click OK.
4. Click on "Add Videos" and select the video file you want to compress. You can also drag and drop the video file that you want to compress.
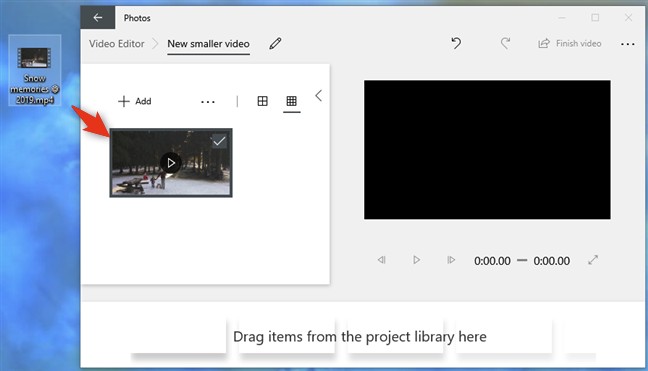
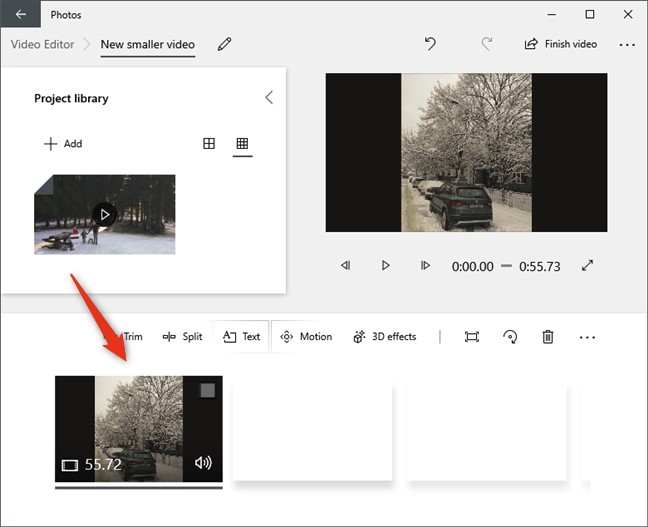
5. Drag the video from the Project library to the bottom of the storyboard in the Video Editor window.
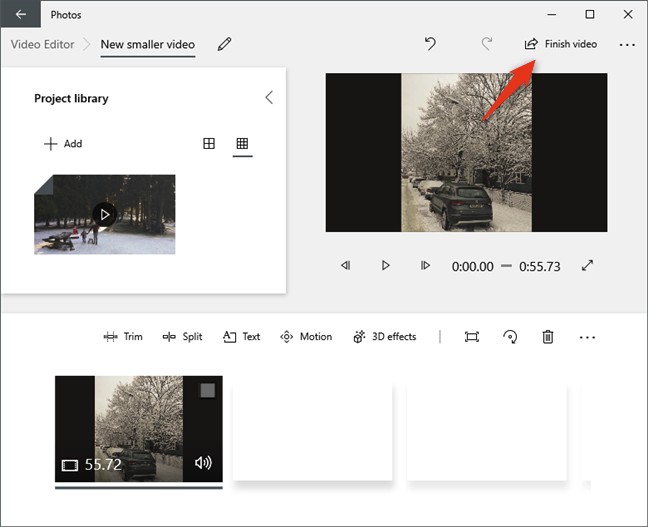
6. Finally, in the top-right corner of the Video Editor window, click or tap the "Finish video" button in the top-right corner to compress a video.
7. You are asked about "Video Quality" here. Select the pre-selected option, which should be "High 1080p (recommended)."
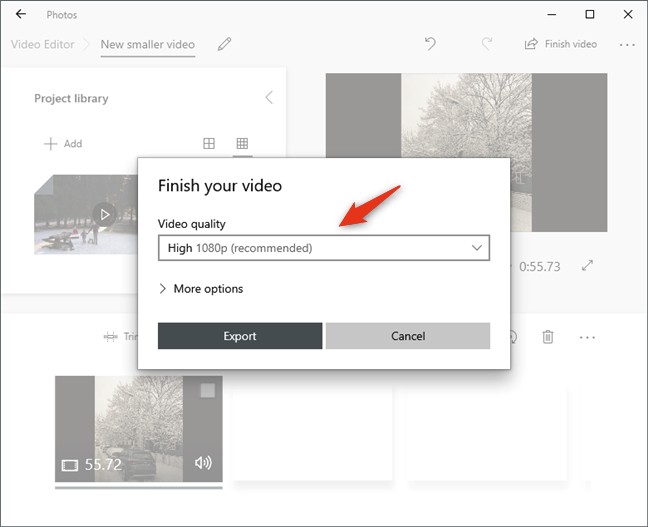
8. Select Medium 720p or Low 540p to reduce the video's size. The Medium 720p setting reduces the size of the video while maintaining its quality.
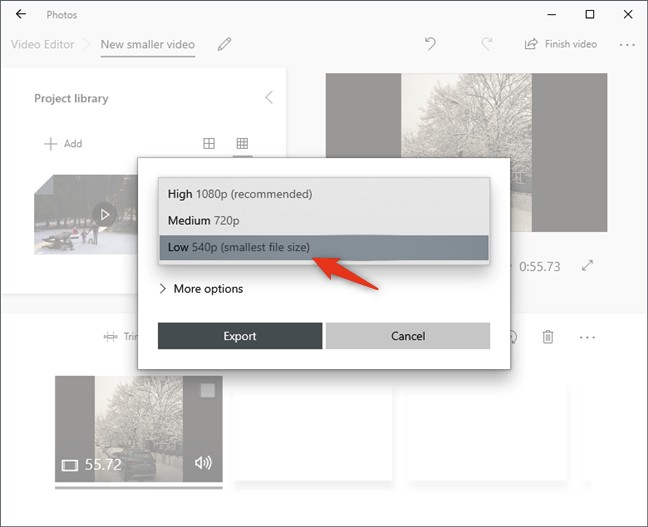
9. Click Export and select the location on your Windows 10 PC where you want to save the compress video.

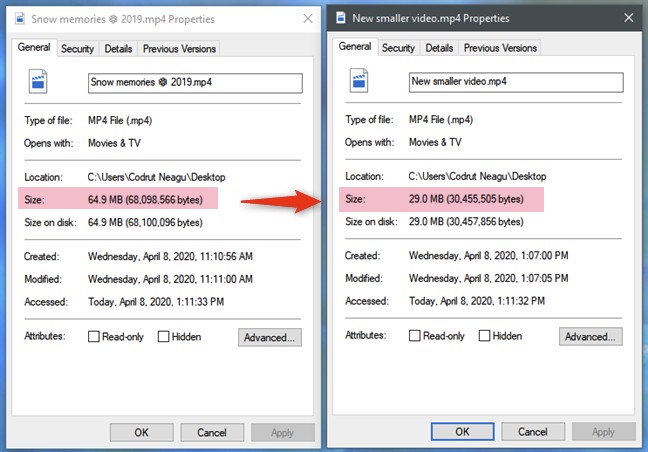
The converted video file can be much smaller depending on the length and quality of the original video. Using the Low 540p setting, we converted a 65MB video file into a 29MB video using Video Editor.
Part 2: How to Compress Files on Mac?
Your Mac comes with built-in tools that you can use to compress video files. To compress video files on Mac, you can use either QuickTime Player or iMovie. Let’s take a look at how to compress video files using both methods:
Method 1: Compress Video Files on Mac by iMovie.
iMovie is a video editing tool that is available on all Mac computers. To compress files using iMovie, follow these steps:
- Firstly, open the iMovie app on Mac.
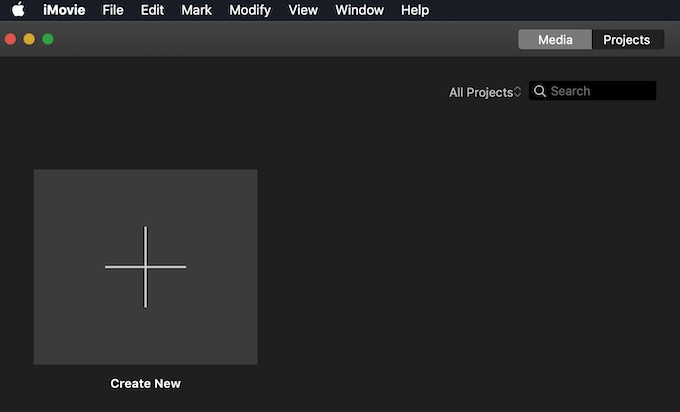
- Click on the Create New icon to start a new project.
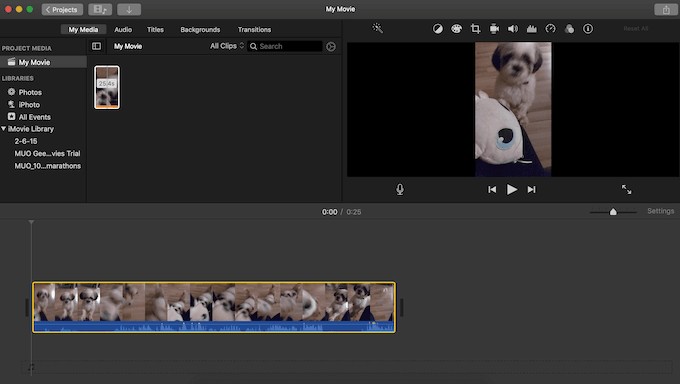
- You can import media files from the File menu or drag and drop them directly into the app.

- To compress the desired video, go to the File menu and then select Share.
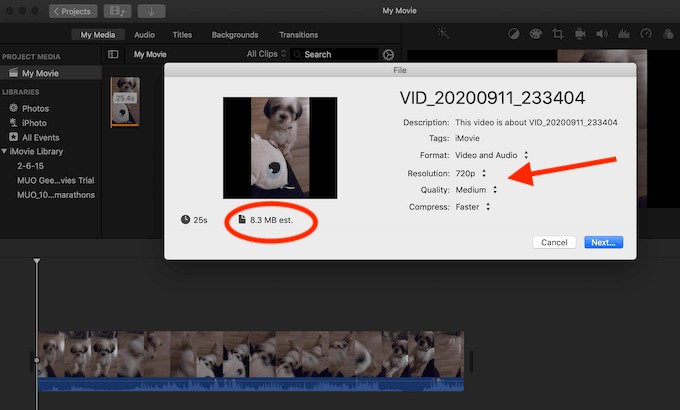
- Choose one of the available options according to your goal. In addition, you can also choose to set the resolution and quality yourself if you choose the File option. You'll also see the video's size in the same window.
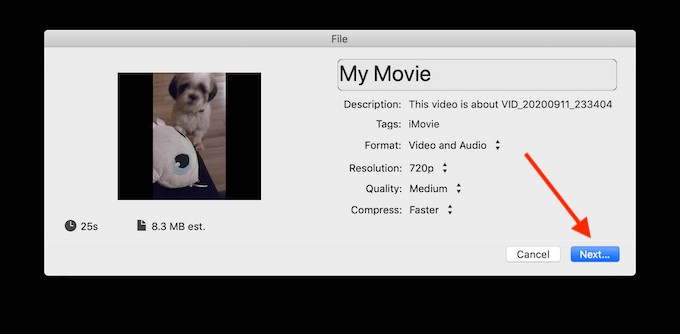
- To save the clip, select Next... once you are satisfied with the video settings. Once you have selected a location, click Save.
Method 2: Compress Video Files on Mac by QuickTimePlayer.
The QuickTime player is a media player that comes installed on all Mac computers. To compress a video file using QuickTimePlayer, follow these steps:
- First, open the QuickTimePlayer app on your Mac.

- Select the video you would like to compress and open it.
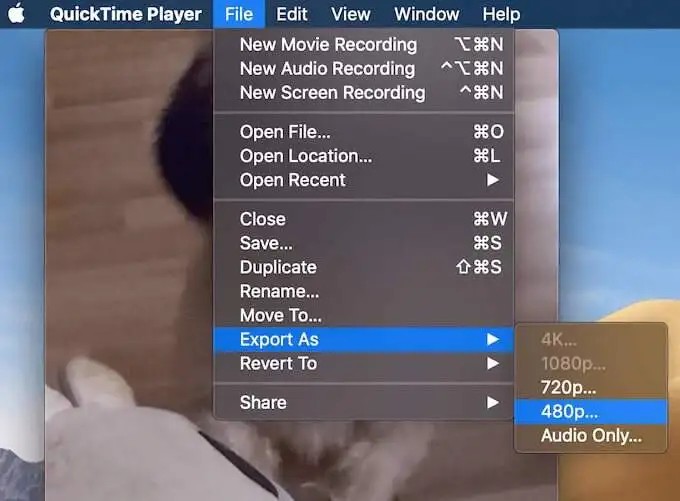
- Choose File > Export As from the ribbon menu. You can export your file in any of these formats, including 4K, 1080p, 720p, or 480p, or export just the audio.
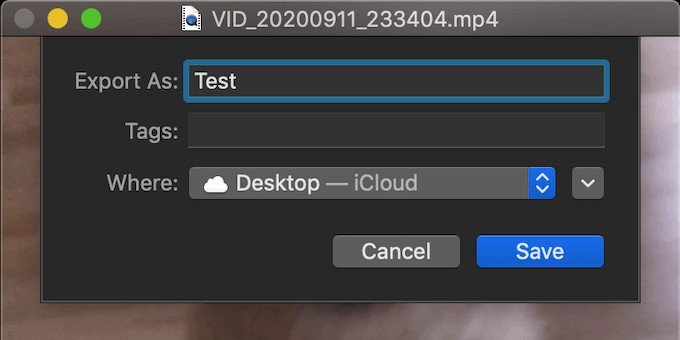
- After selecting your desired quality, click Export As, choose the destination, and save the video.
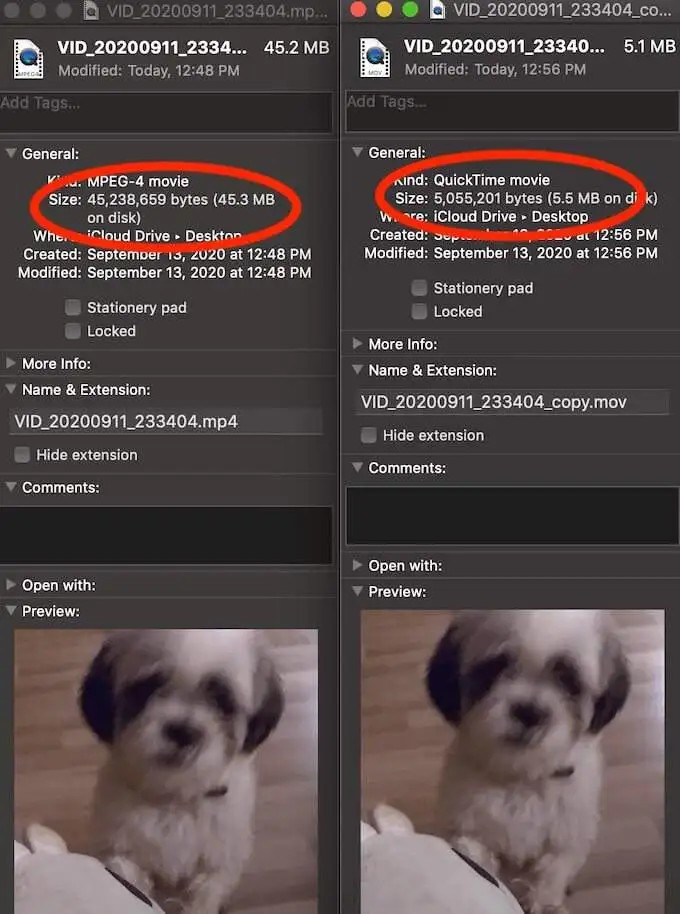
To see how much your video shrank, you can right-click and choose to Get Info from both the imported and exported videos.
Part 3: How To Compress Video files For Email?
You just created a video, and it's time to send it to your family and friends. But the file is too large to attach to an email! What can you do? There are a few ways that you can compress video files for email. One of the most common ways is to create a zip file. So, how do you create a zip file?
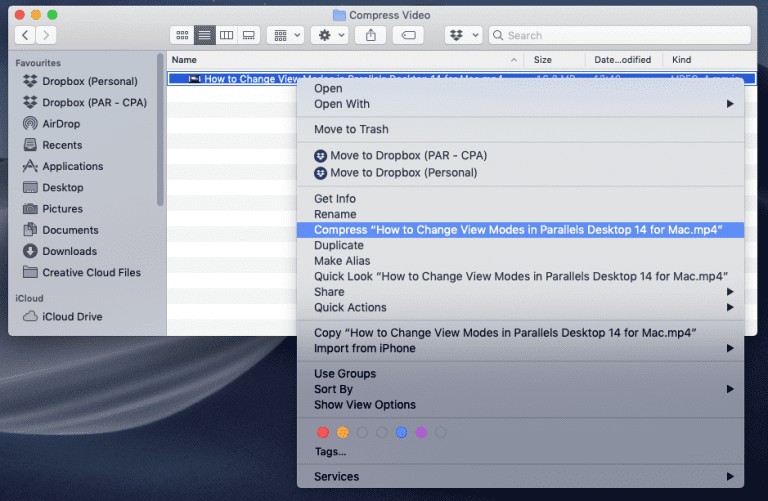
Creating a Zip File on Windows and Mac:
1. Right-click on the file or folder that you want to compress.
2. Select "Send To."
3. Choose "Compressed (zipped) Folder." Mac users choose “Compress name”.
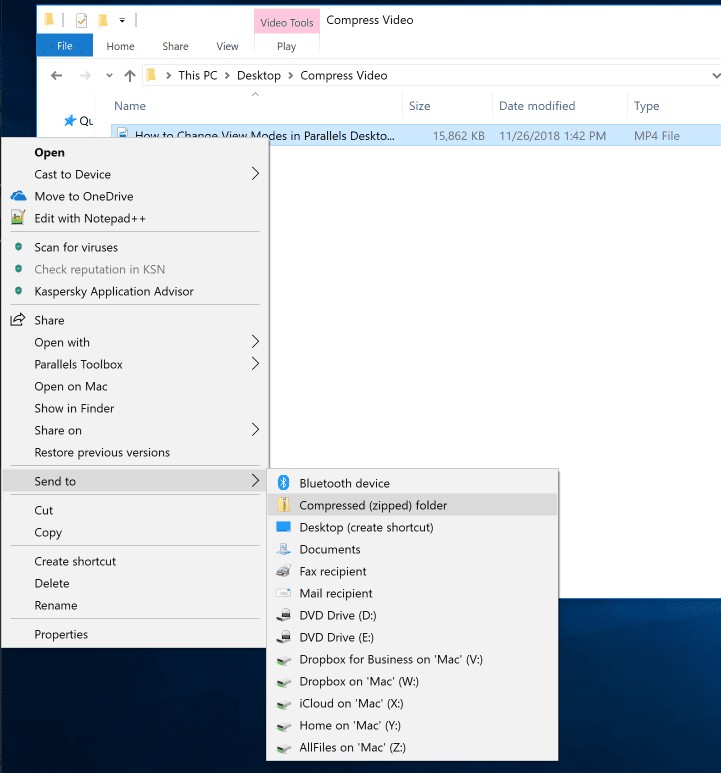
4. A new zipped folder will be created with the same name as the file or folder you compress.
Part 4: Frequently Asked Questions:
A: Video compression is a reduction in the size of a video file without affecting the quality of the video. The file is compressed by removing redundancies and unnecessary data. This can be done by reducing the bitrate, the rate at which the video is encoded.
A: PDF files can be compressed using several methods. One is to use PDF compressors, which are available online. Another way is to compress the file by reducing the quality of the images. This can be done in Adobe Acrobat by going to File > Save As Other > Reduced Size PDF.
A: There are two types of video compression- lossy and lossless. Lossy compression removes data that is not essential to the quality of the video, while lossless compression doesn't remove any data.
A: If you want to send or store a video file, you might need to compress it first. Video files can be very large, and compressions can reduce the file size by up to 90%. This can be helpful if you're limited on space or bandwidth.
The Bottom Line
There are many ways to compress video files without losing quality, but the most common and effective method is to use a UniFab Video Converter. This software can compress video files without any noticeable loss in quality. Moreover, you can also use other video compressors mentioned above. However, use the right settings while compressing the videos to get the best results.
So, that's all about compressing videos without quality loss. We hope that this guide was helpful for you and you were able to compress your video files without any hurdles.
 Can Wii Play DVDs? Best Methods to Watch DVD on Your Wii!
Can Wii play DVDs? This is probably the most frequent question asked by Nintendo Wii lovers. And you might be disappointed to find out that the answer is No. But thanks to the advancement of technology, you can play DVDs on a Wii as long as you get the right method.
 15 Best Video Enhancers to Increase Video Quality | 2025 Update
Looking for a feasible AI video enhancer software? Discover the top-rated video enhancer software through real user experiences. Our detailed guide and handpicked list will help you make an informed choice.
 Best Alternative to Remini Photo Enhancer 2025
You must have got an idea about what we will be discussing today by reading the title itself. Well, as you have deduced that we will be speaking about the best alternative of Remini AI photo enhancer, wouldn’t it be nice if just have a brief look at Remini first?
 Can Blu-ray Players Play 4K Ultra HD?
Can I play 4K movies on my Blu-ray player? If you are wondering "Can Blu-ray plays 4K" and "Will 4K Blu-ray play on a regular Blu-ray player", you are on the right page! This post offers the optimal solution to watch your 4K movies on a standard Blu-ray player when you have no 4K Blu-ray player at hand. Read on for more details.