How to Edit Video Online Freely?
Summary: Here we will be looking at only free tools to edit videos online and will go step by step to do all types of editing possible with these online tools.
So you got a few videos that you want to share with your friends or followers online but want to do some changes before letting it go public? Put effects, remove some unwanted portions but are not sure how to do that? Fret not, in this article we will introduce you to some tools that will help you edit videos online and also show you the steps required for it. These tools got you covered if you don’t want to install video editing software on your computer and want to do all edit videos online.
Part 1: How to Edit Video Online Freely?
We will be looking at only free tools to edit videos online and will go step by step to do all types of editing possible with these online tools. Let’s begin.
Movie Maker Online
This is a feature rich editor to edit video online. It is powered by ads and you won’t be able to use it if you are using an adblocker. It has a lot of features and it makes sense that the developers should get some reimbursement for their hard work.
The features available can be overwhelming if you are not reading the instructions mentioned on the same page. There are a lot of Help links available that inform you about the functionalities.
1. Add components: At the top of the webpage you will find a button “own Videos Photos Music”. Use it to add your media files to the interface. You can also use the Stock Photos and Royalty free audio files available on the website to add in your video.
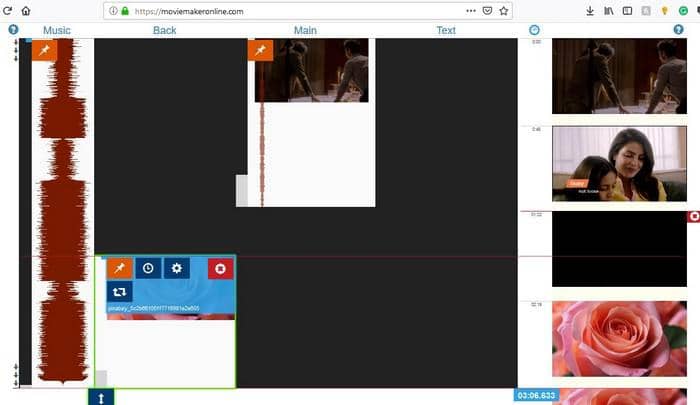
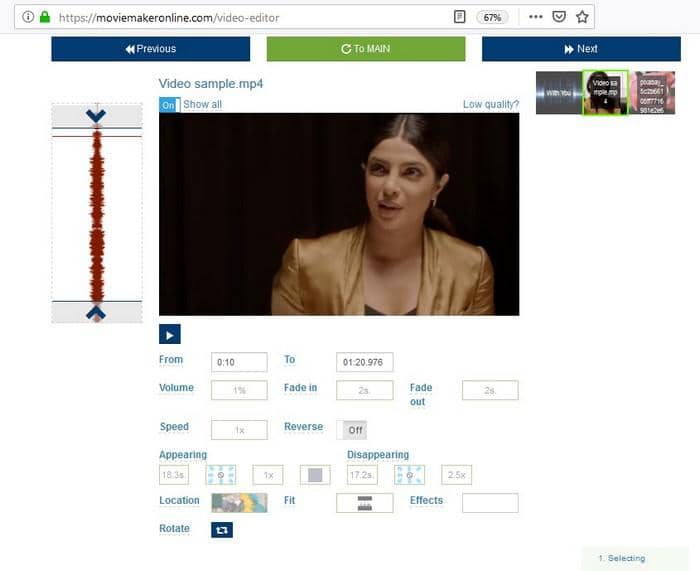
2. Once all components are added, you click on them and use the Tools button to open their respective editors. If you open the Video editor, you will see the section where you can specify the start and end time to trim the video, volume settings, playback speed, toggle to reverse the video playback, rotation and more.
3. In the same way, you can open Audio editor and Image editor to do changes on the media. Once you are done, use the “To Main” button to revert to the homepage where all your work is visible.
4. To drag the media to their proper place of appearance in the video timeline, you need to hover over the file and use the Pin button to enable dragging. For “Back”, you can use both Images or Videos which you can drag to and fro from the Main timeline too.
5. Once all files are at the proper place in the timeline, use the Make Video button to start generation of your output media file.
It will take some time to process the output video and once it is done you can download the video. There is a lot more you can do to edit video online with Movie Maker Online, everytime you use it, you will definitely find something new to explore.
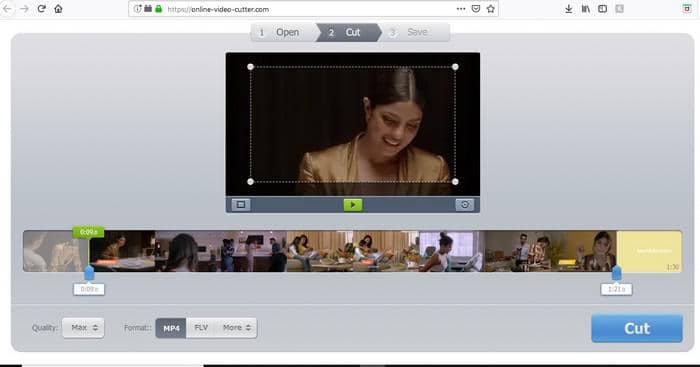
Online Video Cutter
This is an website to edit video online where you can perform the basic Trim, Rotate and Crop task on your video. Upload the video and crop, trim and/or rotate it. The tool is completely free to use and you can download the processed video in MP4, FLV, AVI, 3GP or MPG format. You can also specify the quality of your video by specifying the size of the video.
ClipCharm
ClipCharm works only on Google Chrome browser. It has a lot of tools but many of them are available only under a premium account. However, for a majority of users, the free account lets you edit videos online in whatever way you are planning to. To edit video online, sign up for the service and upload your video. Drag it to the timeline to break the video it frames and enable it for editing.
1. Use the Scissor icon to break the video in parts. Drag the white pin shaped object on the timeline to the location at which you want to do the split and hit the Scissor button.
2. Select any section from the timeline to see other editing options. The tools have been arranged in different sections like Transform which allows you to Resize the video, increase or decrease playback speed and rotate or flip the video.
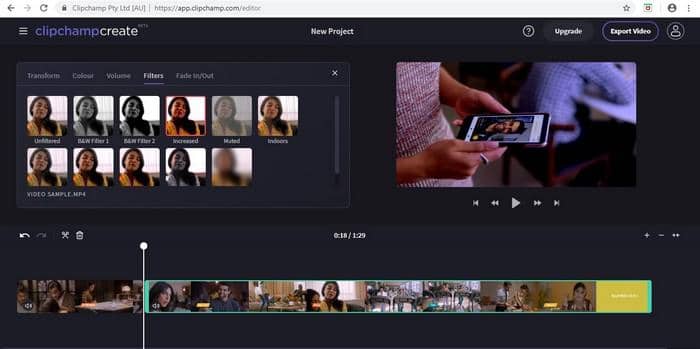
3. Use the Color section to change the Exposure, Temperature and Saturation of the video. Volume section lets you modify the audio volume, Filters to add 1 from 11 available filters and the Fade In/Out option.
And once you are done editing video online on ClipChamp, use the Export video button to download the completed work.
Part 2: The Best Tool to Convert and Edit Videos
Even while doing the research for this article, I was practically frustrated with the effort and time required to edit videos online. For someone who does this periodically, I can only imagine the amount of precious manpower wasted in a task that can be handled much better by an offline video editing tool like DVDFab Video Converter.
DVDFab Video Converter is a complete audio-video processing solution that can convert as well as edit video and audio at high speeds while maintaining the best quality possible. It supports both format based conversion and device based conversion. Not only that, you can use it to extract audio from video files and store it in any audio format like MP3, AAC, M4A, FLAC etc. You can upload files from your any locally attached storage or remotely from mobile device through the DVDFab Remote mobile app. Let’s see how to edit convert and edit videos on DVDFab Video Converter.
Conversion
Step 1. Upload the video on the main screen of the application by doing drag and drop of the video or using the +Add or +Add from Mobile button present on the application.
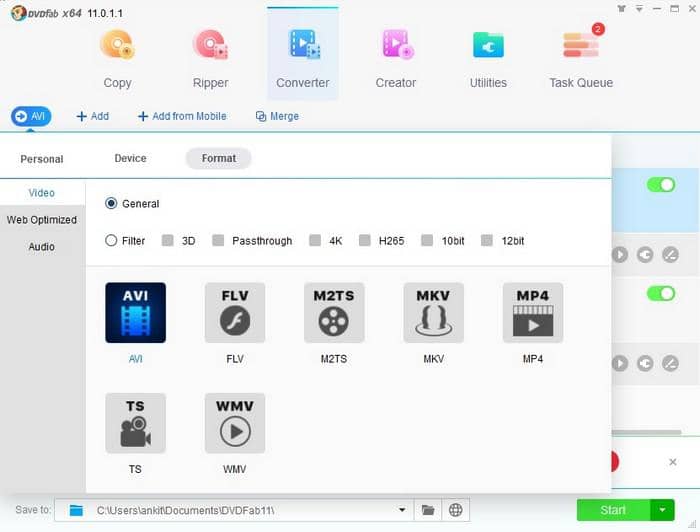
Step 2. Use the Profile Switcher button and choose the output format from a large number of supported video and audio formats. You can also choose the Device section and choose your mobile device too if you are doing the conversion to make a video compatible with your mobile device.
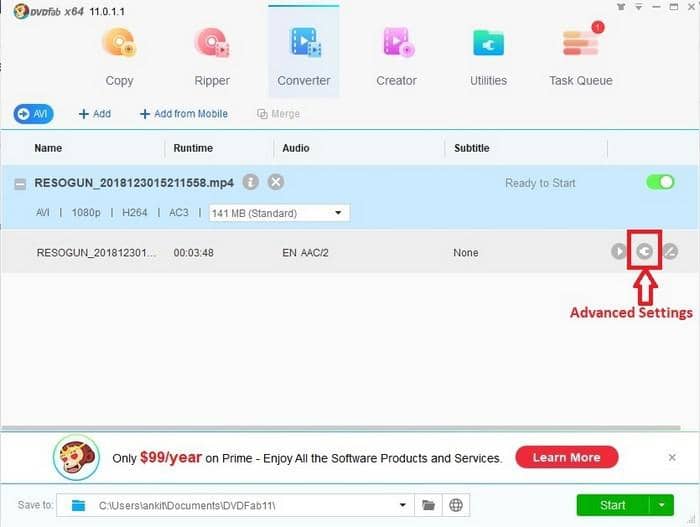
Step 3. Video and audio file types have their own properties too like the video resolution, the codec used, the frame rate of the video, the bitrate of the audio and more. With DVDFab Video Converter, you can use the Advanced Settings window to modify these Advanced Settings of your output video.
Video Editing
Just beside the button for Advanced Settings, sits the button to launch the video editor of DVDFab Video Converter. The best part about the video editor inside this application is that even if you have multiple videos to edit, you don’t have to wait for your previous video generation to complete. You do the video editing on one video and click on Start to generate the output file in background meanwhile immediately starting the editing task on another video. Or, you can also do the changes in all videos in one sitting and run all the tasks in batch at once making sure that your time is spent productively.
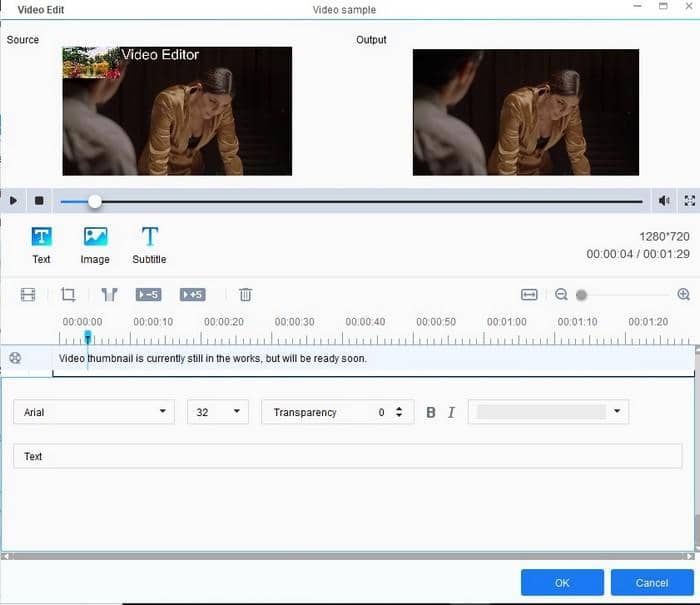
1. Insert Text or Image - Add a Text or Image that can work as your watermark. You can decide on the size and font of the text and transparency of both the text and the image.
2. Insert subtitles - Add subtitles to the video if you have prepared the subtitles separately in a subtitle file like .srt.
3. Color modification - Change the brightness, contrast and saturation of the video
4. Crop or Trim - Change the video frame size by cropping a part of the video. Remove unwanted portions from the video or split it into parts by using the Trim feature.
5. Rotate - Correct the orientation of the video if it has been shot in the incorrect one by using the Rotate feature.
Video creation required a lot of creativity, planning and effort. Make sure you get the best out of your creation by editing the video properly. Use a tool that you can rely on and works quickly enough for you. For an efficiency filled video editing session, consider DVDFab Video Converter.
This post shows you how to edit videos online on your computer but if you want to edit videos on your Android, please check how to edit videos on android.
 Can Wii Play DVDs? Best Methods to Watch DVD on Your Wii!
Can Wii play DVDs? This is probably the most frequent question asked by Nintendo Wii lovers. And you might be disappointed to find out that the answer is No. But thanks to the advancement of technology, you can play DVDs on a Wii as long as you get the right method.
 How to Solve "No Valid Sources are Available for this Video" Error
If you are facing errors like No Valid sources are available for this video android or any similar errors, this means you are having trouble loading your videos. This article will give you all the information regarding the reason behind this error and the best ways to fix it.
 Explore the Most Popular Sites for MP4 Movies Download 2025
Feeling difficult to figure out the most suitable website or tool? This article teaches you how to achieve HD MP4 movie downloads and shows the top sites designed to download MP4 movies easily. Read on to know more.
 Can Blu-ray Players Play 4K Ultra HD?
Can I play 4K movies on my Blu-ray player? If you are wondering "Can Blu-ray plays 4K" and "Will 4K Blu-ray play on a regular Blu-ray player", you are on the right page! This post offers the optimal solution to watch your 4K movies on a standard Blu-ray player when you have no 4K Blu-ray player at hand. Read on for more details.