
Best 7 AI Video Denoiser of 2025
Summary: Looking for video denoiser software? Check out our unbiased reviews of the best video noise reduction software powered by AI to denoise video to get the crisp video quality you desire.
How Does Video Denoiser Work?
Video denoisers are software tools that help remove unwanted noise or grain from videos, resulting in a cleaner and sharper image. These noises can come from various sources, including low lighting, high ISO settings, or poor camera quality.
By applying sophisticated algorithms, video denoisers analyze the video frame-by-frame to detect and reduce noise while preserving the essential details. This process enhances the overall quality, providing viewers with a clearer, more visually appealing experience.

Why Does AI Video Denoiser Matter?
AI video denoiser uses deep learning models to denoise videos and enhance video quality to the next level. Compared to traditional methods, AI denoising excels in detail retention and adaptability. Here’s why AI video denoising is important:
- Focus on your video: noisy videos can be distracting and make it challenging to focus on the content.
- For business purposes: such as marketing or training videos, having a clean and professional-looking video is crucial. A noisy video may give off the impression of unprofessionalism.
- Affect the viewing experience: If someone is watching your video with low-quality sound, it can make it difficult to understand what’s being said, leading to confusion and disengagement.
- Improve archived videos: With a denoiser, you can enhance older videos, giving them a new lease of life.
In conclusion, a video denoiser is a useful tool for anyone who wants to create professional-looking videos or improve the quality of existing ones. By removing unwanted noise or grain, you can ensure that your videos are clear, engaging, and of high quality. Then how to remove noise from video? Read on to find the best ai video denoiser that can help you.
Top AI Video Denoisers You Shall Try
A video denoiser is a handy tool that helps you remove noise and grain from your videos, making them look more professional. With numerous video denoisers available on the market, it can be challenging to choose the right one for your needs. To help you out, we have compiled a list of top-rated video denoisers that are worth trying in 2024.
UniFab Denoise AI

- Perfect and automatic noise reduction: denoise videos from any cause
- Enhance video clarity to a more realistic and vivid visual effect
- Support video editing to meet your personalized demand
- Lightning-Fast Processing with GPU acceleration
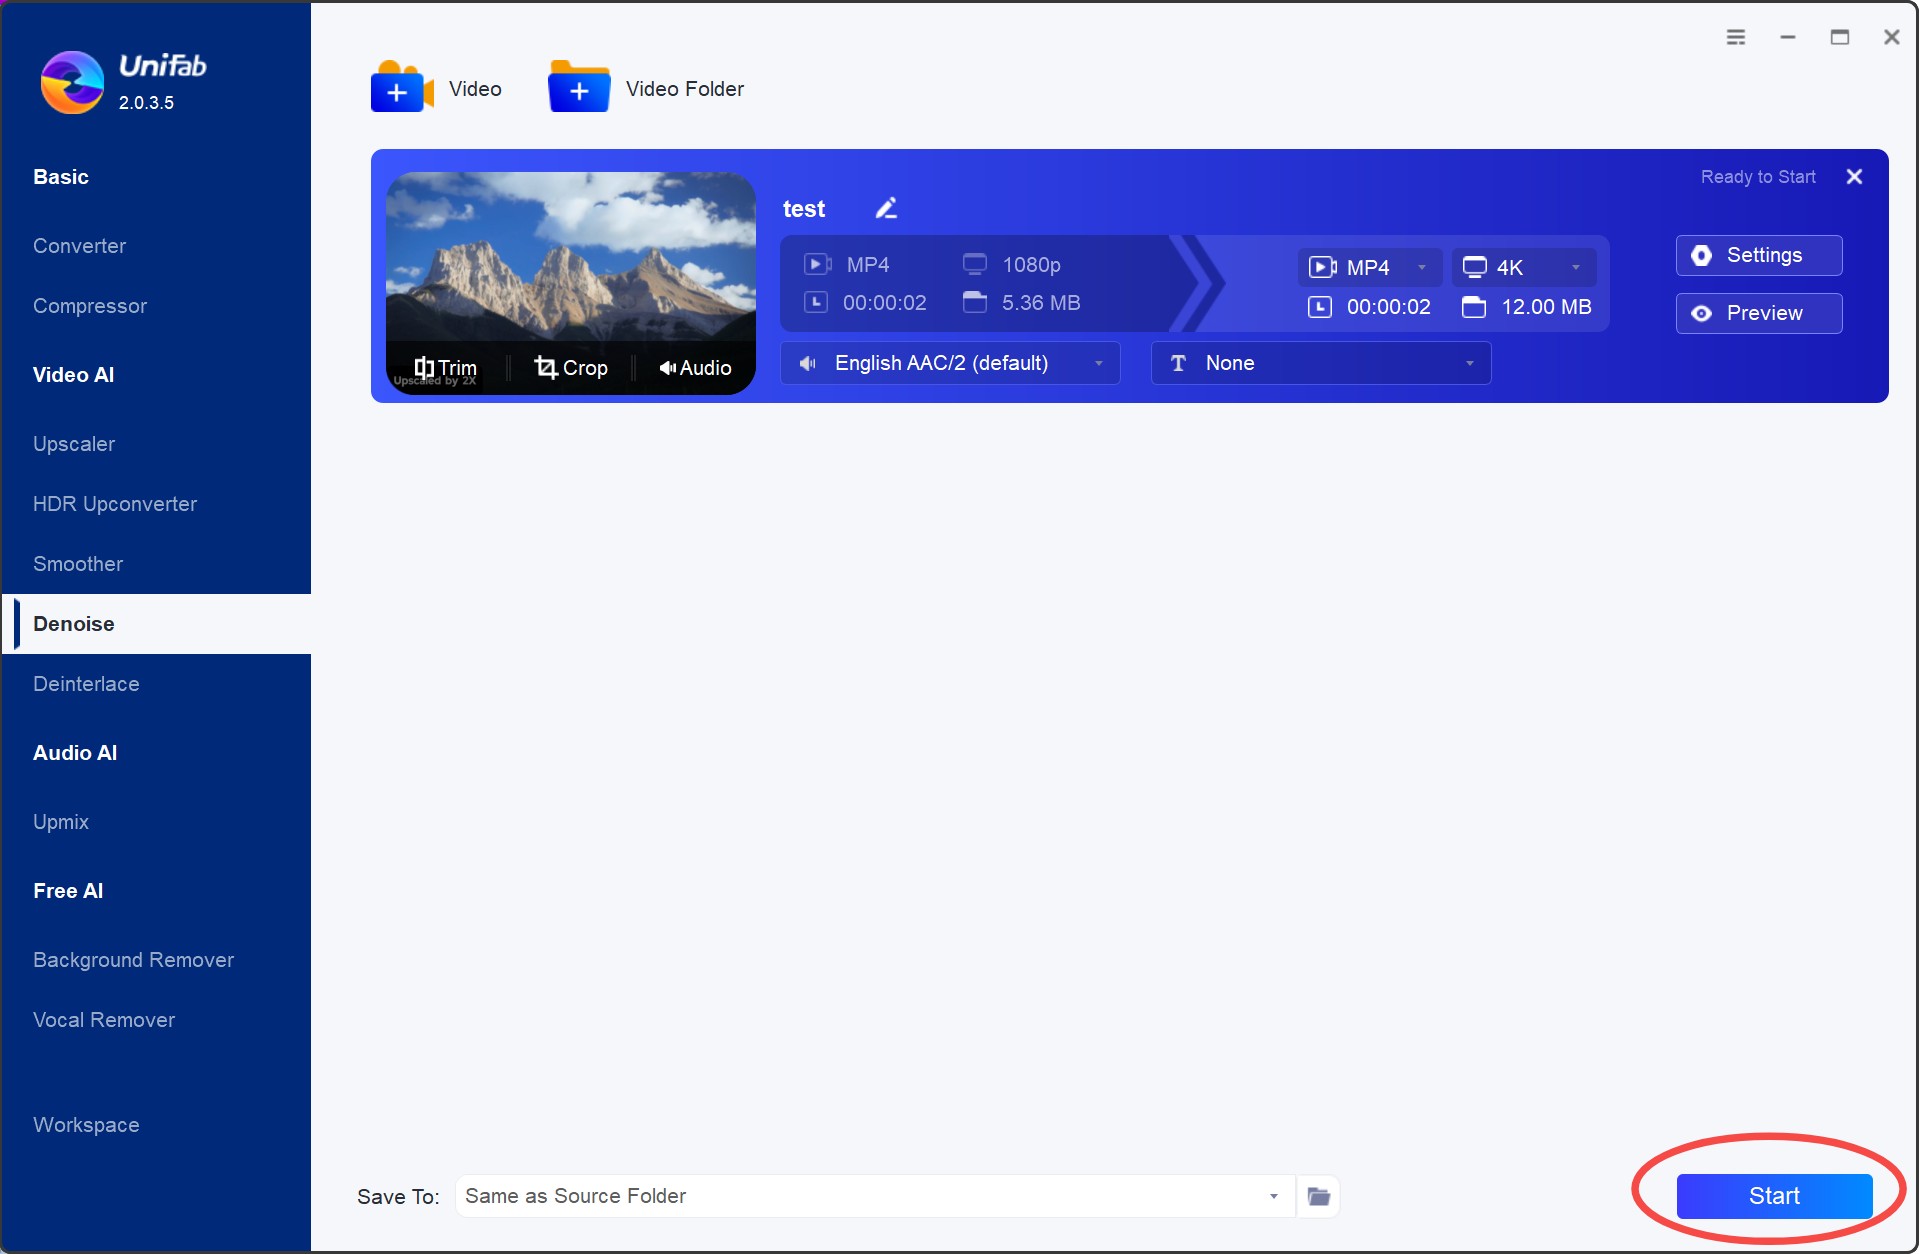
Launch UniFab and choose the 'Denoise' module.
Install the software on your device and open the interface
Load the source and edit the output video
Choose the 'Denoiser' module. Click the Add Video button to select the video you want to denoise, and then customize it.
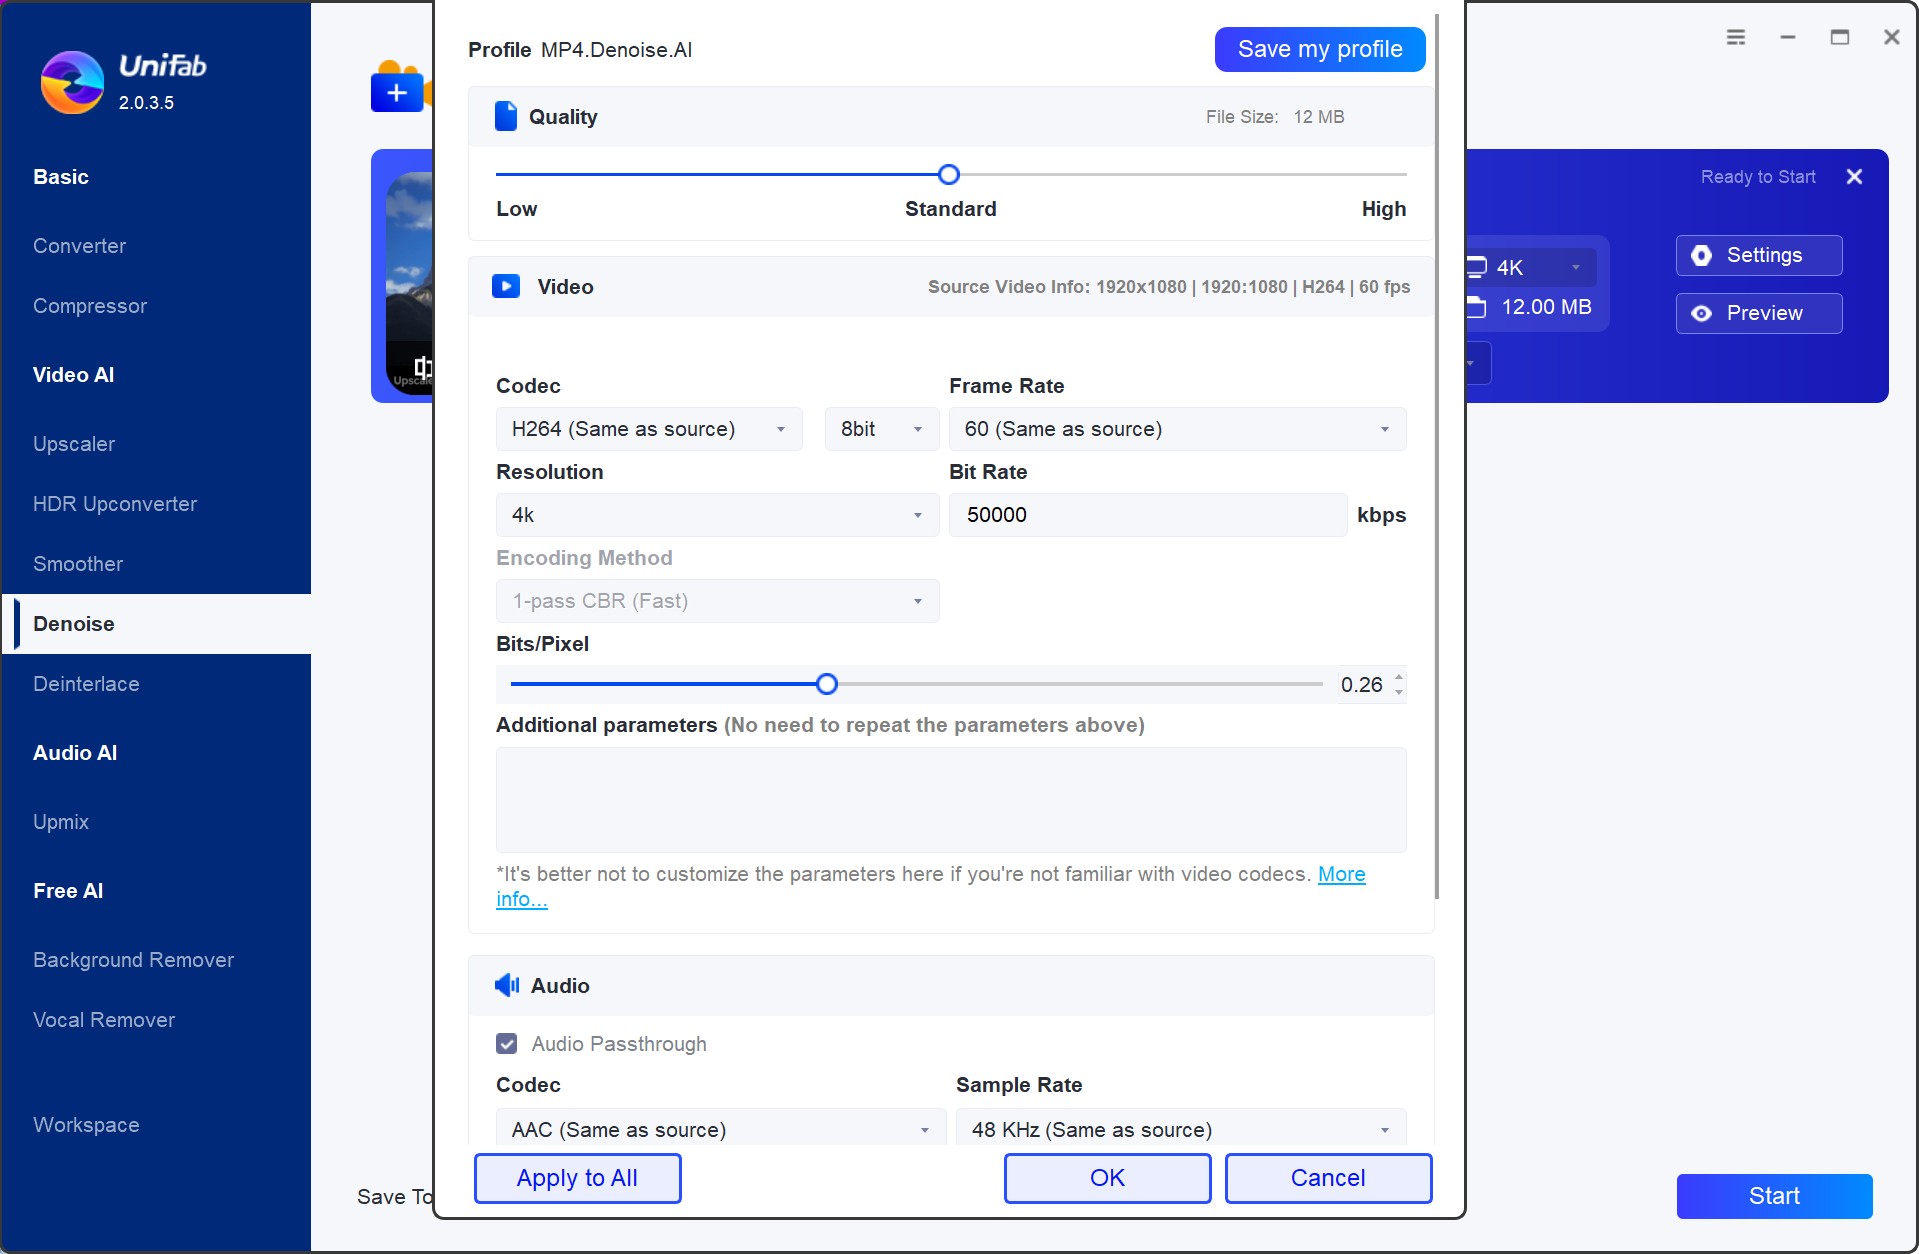
Customize the restoring video file
After customization, you can click 'Start' immediately.. UniFab will complete the video editing task at lightning speed.
Available on: Windows, macOS
Pricing
- 1-Year license: $99.99
- Lifetime: $139.99
Performance of UniFab Denoise AI
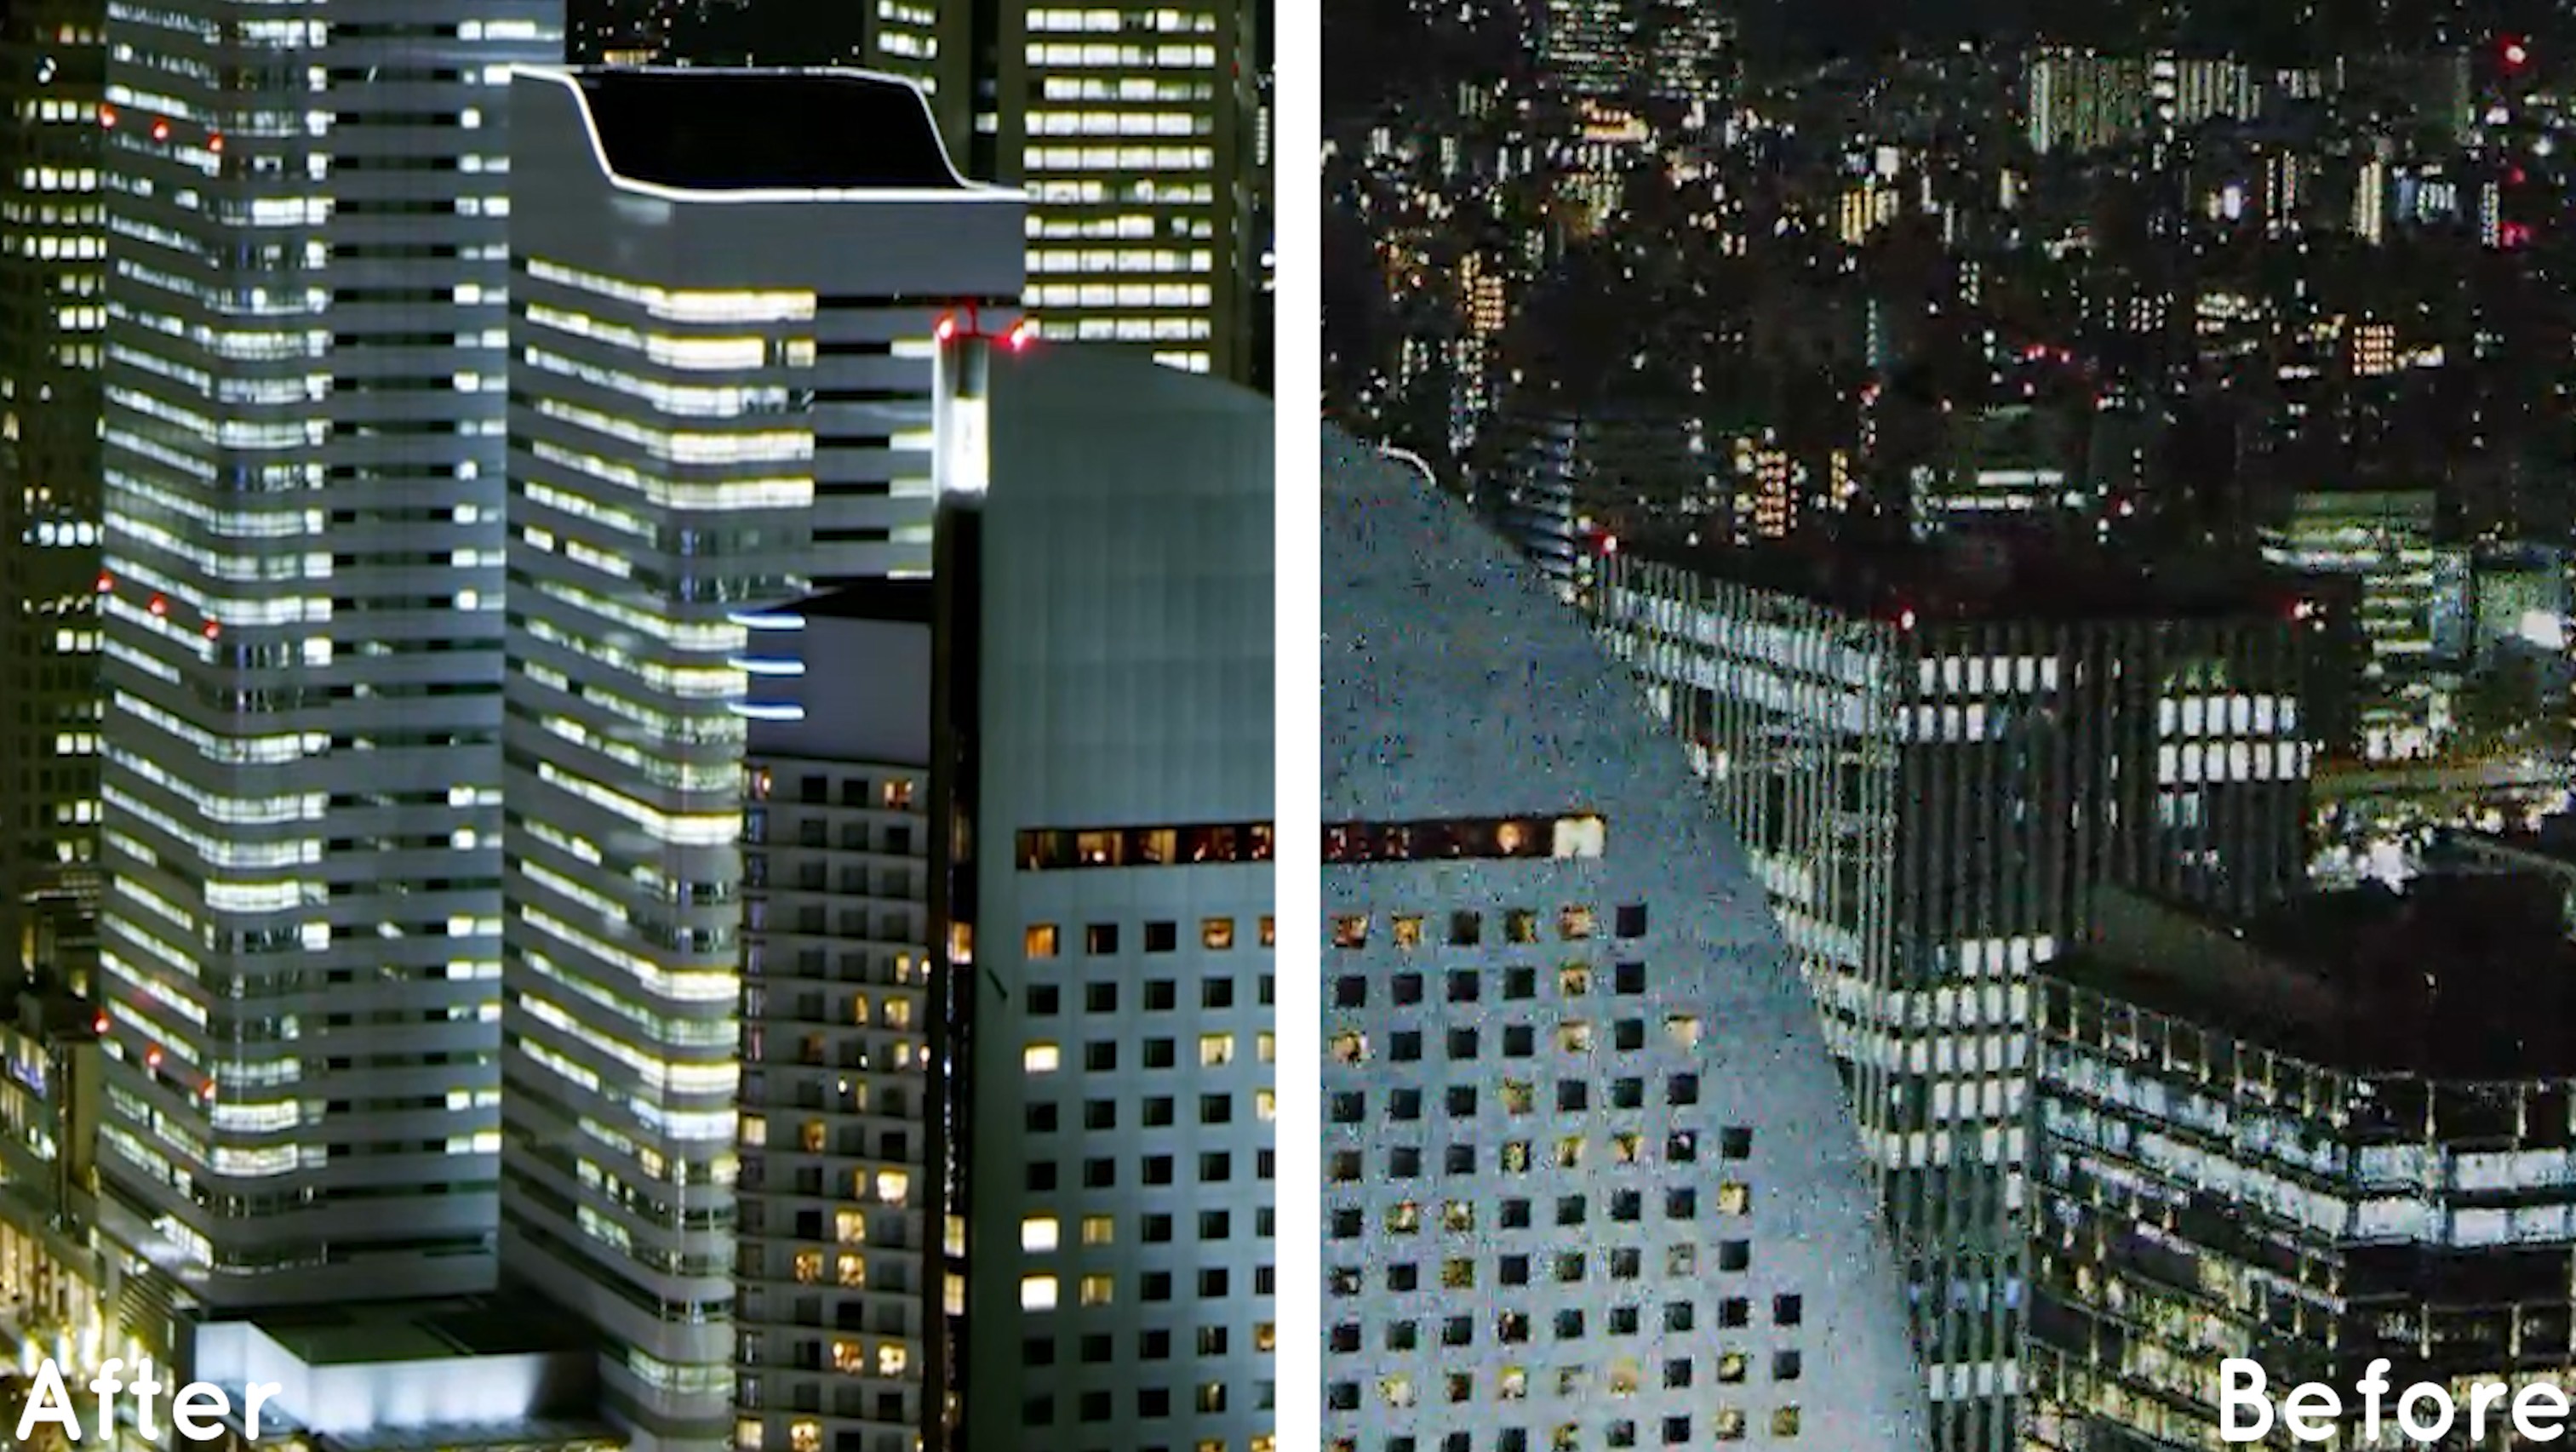
Effect
- Noise Reduction: Noise reduction is good, artefacts are eliminated.
- Clarity and Details: The video quality is enhanced and details such as floors are restored.
Neat Video
Neat Video is an advanced video denoiser that uses sophisticated algorithms to reduce noise and preserve details in your footage. It works with popular video editing software such as Adobe Premiere Pro, Final Cut Pro, and DaVinci Resolve, making it an excellent choice for professional videographers. With its intuitive interface and customizable settings, Neat Video is perfect for both beginners and experts.

Key features at a glance:
- Premium noise reduction and sharpening
- Intuitive noise profiling
- Instant visual feedback
- Comprehensive host integration
- Excellent hardware optimization
Available on: both Windows, macOS and Linux
Pricing: start from $74.9 for a perpetual license
Red Giant Magic Bullet Denoiser III
Red Giant Magic Bullet Denoiser III is a best video denoiser that offers fast and high-quality noise reduction. It works with most video editing software, including Adobe Premiere Pro and After Effects, and provides customizable controls to achieve the desired result.
Key Features
- Advanced Denoising Algorithms: Uses cutting-edge algorithms to reduce noise from footage, delivering smooth and sharp results.
- Easy-to-Use Interface: Allows analyzing footage automatically and applies optimal denoising settings.
- Real-Time Playback: Allows real-time playback during the editing process, even when applying heavy noise reduction.
- Detail Preservation:Excels at maintaining critical details in the footage, ensuring that the video doesn’t appear too "soft" after noise removal.
- Compatibility: Denoiser III works with most popular editing platforms like Adobe Premiere Pro, After Effects, and Final Cut Pro X.
Available on: both Windows and macOS
Price: $199 for a standalone license
Filmora
Filmora is a user-friendly video editing software that also comes with a built-in video denoiser. It has a simple and intuitive interface that makes it easy for beginners to use, but it also provides advanced tools for professionals. It uses AI to denoise videos, which is fast and effective, allowing you to denoise your footage quickly and easily.
Key Features
- Automatic Noise Reduction: Intelligently analyzes noise in the video and adjusts the reduction level automatically.
- Customizable Noise Reduction: Allows users to manually adjust noise reduction strength for personalized settings.
- Video Editing Features: Offers various editing tools to enhance video creation.
Available on: both Windows and macOS
Price
- Annual Plan: $49.99/year.
- Perpetual License: $79.99
- Monthly Plan: $19.99/month
DaVinci Resolve Studio
DaVinci Resolve Studio is a powerful video editing software that comes with a built-in denoiser, as one of the best video nosie reduction software. It uses advanced temporal and spatial noise reduction techniques to remove noise and improve the overall quality of your videos. With DaVinci Resolve Studio, you can denoise your footage while editing your video, saving you time and effort.
Available on: both Windows and macOS
Pricing: $299 for a perpetual license
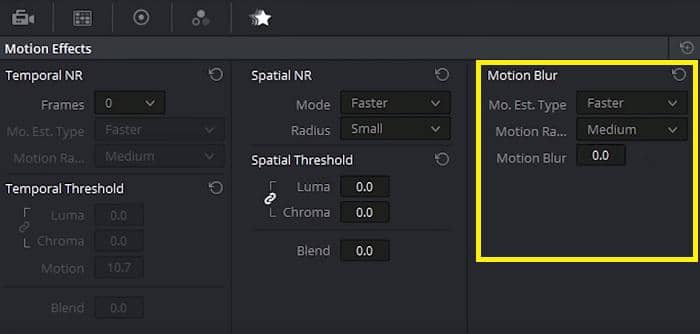
Step 1 — Open the Motion effects panel, you will see that the noise reduction is controlled by the Temporal NR and Spatial NR relevant settings.
Step 2 — Enhance the viewer mode to help create new mode, and zoom in so that you can check deep details.
Step 3 — Now start with the less destructive Temporal Noise Reduction option: select two frames for comparison, select your desired motion estimation type, make selection for motion range and then adjust the temporal threshold settings as per need. Use Command D to check the de-noise effect when necessary.
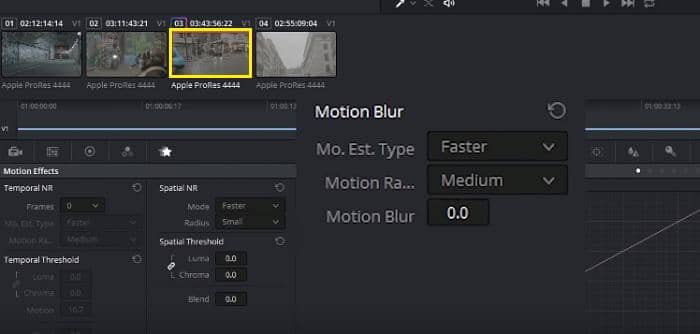
Step 4 — Then move back to Spatial NR to adjust the settings there: after done with Temporal NR, it is suggested that you make minimal adjustments here.
Step 5 — Change the mode and radius settings if needed. Make adjustments for Chroma values, Luma and blend mode from Special threshold panel.
Adobe After Effects
Among the many features offered by After Effects, it is the Remove Grain that actually does the job to remove noise from video footages. However, by smoothing out the video footages to smooth out those noise artifacts, the program is also blurring everything a tiny bit. The downside of this is that some details and sharpness can be removed from the image at the same time. So, it’s a little bit techy to make the balance.
Available on: both Windows and macOS
Pricing: $19.99/month
See the steps below how to remove noise from video with After Effects:
Step 1 — After loading the video footages that you want to remove noise from, locate the Remove Grain feature from the Effects & Presets panel and then apply the effect. A small rectangle will appear on top of your noisy footages. This rectangle is the preview region, giving you a preview of what your footages will look like with the final effect applied.
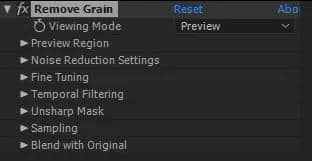
Step 2 — To see the noise removed from your entire video footages, just switch the Viewing Mode to Final Output.
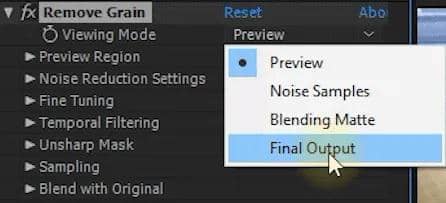
Be aware that doing this may slow down your computer as the Remove Grain effect is a computation intensive process.
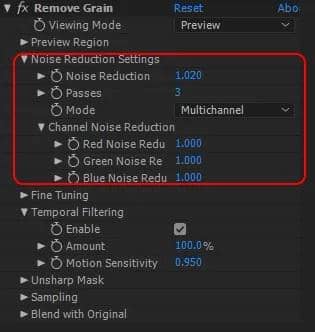
Step 3 — Apply some relevant settings to optimize your final video footages. The primary settings for the Remove Grain effect are the Noise Reduction Settings that you can try out to control how aggressively you want After Effects to reduce noise from video footages. Higher values will remove more noise, but potentially also make your video slightly blurry.
Final Cut Pro X
Starting from version 10.4.4, Apple finally decided to bring the Noise Reduction filter to its Final Cut Pro X video editing software. The newly added filter is specifically designed to quickly denoise videos.
Available on: macOS
Pricing: $299 for a perpetual license
Refer to the guides below to see how to remove noise from video using the latest Final Cut Pro X:
Step 1 — Add the noisy video footage into the Timeline.
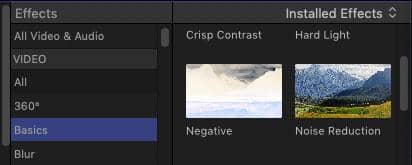
Step 2 — Go to Effects Browser > Basics and drag the Noise Reduction effect onto the video footage.
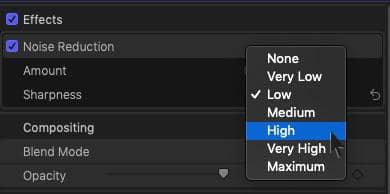
Step 3 — Adjust the Amount menu to dial out the amount of noise you want to remove. Your settings will vary based upon the amount of noise in the image and how much you want to remove.
Whether you’re a professional videographer or an amateur filmmaker, these top-rated video denoisers are worth trying in 2024. Each one offers unique features and benefits, so be sure to choose the one that best suits your needs. With these tools at your disposal, you can take your video editing skills to the next level and produce high-quality videos that stand out from the crowd.
FAQs
AI-based video denoising is a newer technology that uses advanced machine learning algorithms to intelligently analyze and remove visual noise from video footage. This technology has been adopted by UniFab Denoise AI and is becoming increasingly popular among professionals who want high-quality results without having to spend hours manually adjusting settings.
Simply put, “denoise” is noise reduction. But, when it comes to denoising, can you tell apart background noise from video and background noise from audio? Video noise generally refers to background noise, chroma noise, and luminance noise related to video images.
While audio noise usually covers hissy sound or others you want to eliminate from a video. No matter it is noise reduction from video or noise removal in audio, there are targeted denoisers able to do that.
3. What is the best free video denoiser?
Currently, there are many free AI tools available to denoise video effectively. Among them, I recommend UniFab Denoise AI, which uses advanced AI models for both video noise reduction and video quality enhancement. It offers a 30-day free trial, giving users ample time to explore its powerful features.
Conclusion
There are many ways to denoise video. But before you start it, make sure you want noise reduction from video or noise removal in audio, as different aims need different support from noise reduction software. After clearing this point, you can denoise video with UniFab automatically to get the best video, color, saturation, brightness, and more.
Or, you can denoise video featuring the audio noise with Toolkit to the largest extent. Moreover, you can replace the original audio with a new one with Video Editor, when you find a video recording especially noisy, you have to add a new sound or speech to your file. And no matter which way you choose to denoise video, such software is free and easy to use.