
Advanced Techniques for Screen Recording on Windows 10 and Windows 11
Summary: Deep dive into the vital features of Windows 10 and Windows 11 screen recorder. Learn why they’re important. Come here to begin your journey.
Introduction
How can you record your screen? If you are looking for the best flexible screen recorder for your computer or smartphone, here is everything you need to know. You may come across an exciting or informative video that you would like to save and download, but the download option is not available on the site.
Other times, you may want to tutor someone on how a particular software or mobile application works. Screen recording comes as the best option in these two cases. Screen recording captures a video of the screen of your smartphone, tablet, or computer and enables future playback.
Why You Need Screen Recorder for Windows 10/11
Apart from walkthrough tutorials on navigating through software and obtaining content without a download option, there are several instances when you need a screen recorder. They may include;
Online courses and training videos are very popular today. A screen recorder lets you record training videos that you can review later.
Webinars are useful seminars conducted over the internet. Recording these seminars and presentations to view later is very important. A screen recorder for windows 10 and 11 comes in hand for webinar and presentation recording.
If you are an enthusiastic game who has developed good gaming skills and strategies, you may want to share your skills with the world. A screen recorder windows 10/11 helps you share your skills with other gamers and the world.
TOP 7 Screen Recorder for Windows 10&11
Are you looking for a reliable and free screen recorder for your Windows 10 or 11 device? Look no further! We’ve scoured the web and tested dozens of options to bring you the top 7 screen recorders for Windows 10&11.
Get free trial of StreamFab Video Downloader to download streaming videos from popular OTT including Netflix & Amazon Prime video, which blocks you from screen recording and save videos in original premium resolution in up to 8K.
Game Bar
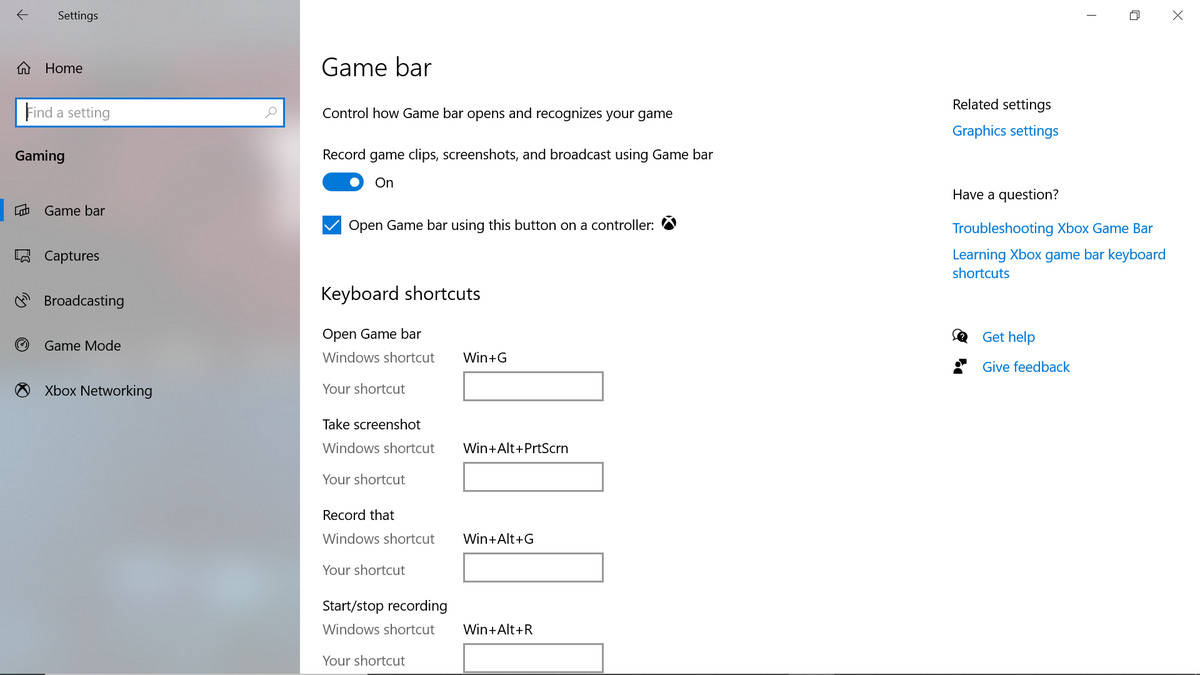
If you are using a windows device, there are a couple of solutions to your screen recording problem. Game Bar is a built-in Windows 10 and 11 screen recording extension invented to capture clips of video games but is used for all forms of screen video recording.
Here is how you use Game Bar:
Open the application window you wish to record. Press Window + G on your computer keyboard to open Game Bar.
Check the checkbox on the on-screen popup confirming "Yes, this is a game." This is the way to go regardless of the type of screen video recording you are set to indulge in.

To enable external audio streams, you can click on the microphone button. You can adjust other options before kick-starting your screen recording, such as adjusting the sounds of apps that may be open.
When relaxed and ready, click on the red Recording button to begin recording.
Game Bar, however, does not capture the entire desktop and some programs such as File Manager. However, this does not leave you without viable options.
OBS Studio Recorder
When it comes to free screen recording software for Windows 10/11, OBS Studio is a top contender. This powerful software is packed with features that allow you to record your screen, webcam feed, and audio simultaneously.
Whether you’re creating a tutorial, recording gameplay, or making a vlog, OBS Studio has everything you need to produce high-quality videos.
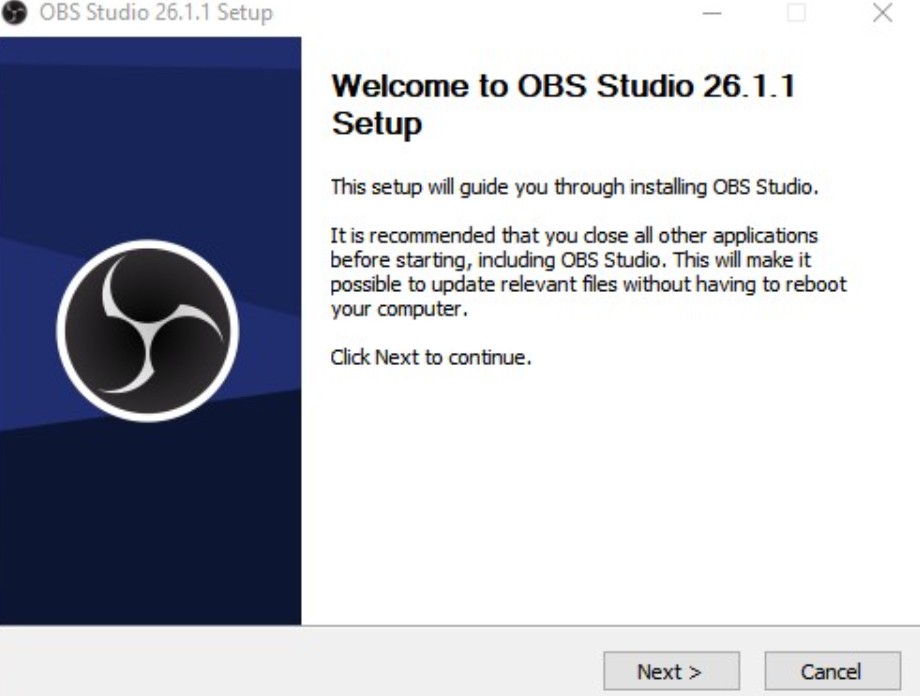
To get started with OBS Studio, follow these simple steps:
Download and install OBS Studio from the official website. The installation process is straightforward, and you should be up and running in no time.
Once installed, launch OBS Studio and navigate to the “Settings” menu. Here, you can configure your recording and streaming settings to meet your needs.
Next, click on the “Sources” tab, and add the sources you want to capture, such as your desktop, webcam, or microphone.
Once you’ve set up your sources, you can start recording by clicking the “Start Recording” button on the main OBS Studio window. You can also use hotkeys to start and stop your recordings.
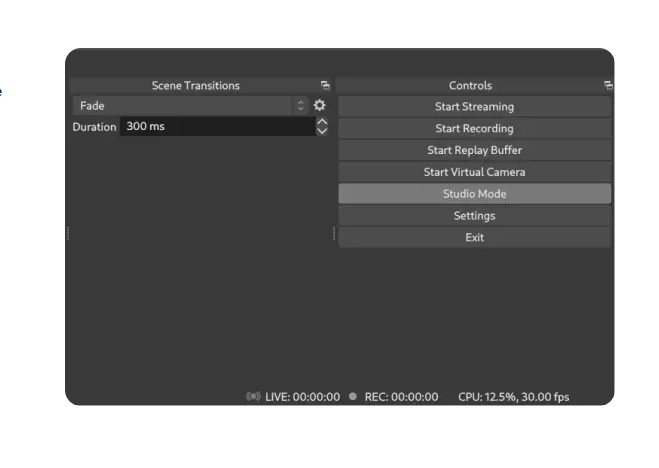
When you’re finished recording, click the “Stop Recording” button, and OBS Studio will save your video to your designated output folder.
One of the best things about OBS Studio is its versatility. You can customize your recording settings to match your specific requirements, whether you’re recording at 720p or 1080p, at 30 or 60 frames per second. Additionally, OBS Studio supports a wide range of codecs, including H.264 and VP8, giving you even more flexibility when it comes to exporting your videos.
OBS Studio is an excellent choice for anyone looking for a free, feature-packed screen recorder for Windows 10 or 11. With its intuitive interface and powerful capabilities, OBS Studio makes it easy to create professional-looking videos without breaking the bank.
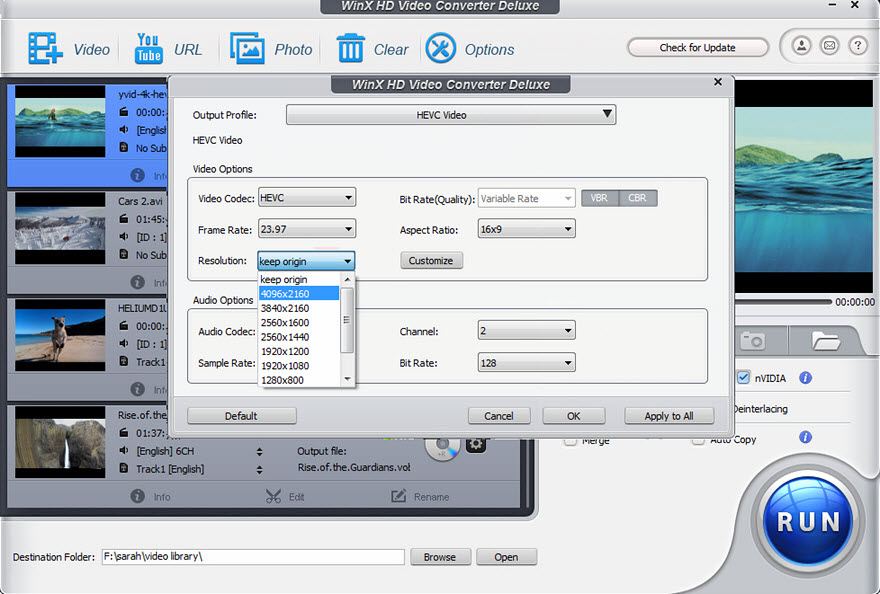
WinX HD Video Converter Deluxe
WinX HD Video Converter Deluxe is a video processing software and the best option for screen recording Windows 10 and 11 users. The video software combines screen recording, video converting, DVD ripping, video downloading, and webcam recording on one platform.
Here are the steps to follow to obtain a good screen video recording:
Launch the software and then click the "Recorder" button.
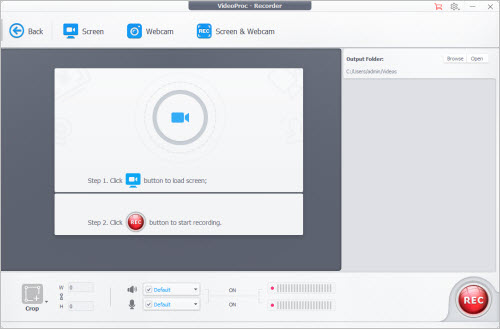
To record your PC screen, you choose the "Screen" button, but if you want to record the desktop screen and webcam at the same time, you choose the "Screen & Webcam" button
Adjust the settings to suit your preferences before commencing the screen capture. You can click "Crop" to select the focus part of your screen that you want to record and apply the change by clicking the green round button.
At the bottom right of the window, a "Rec" button will initiate screen video recording within a few seconds. You click on "Stop" or Ctrl + R to stop the recording.
CamStudio Screen Recorder
If you’re looking for a reliable and straightforward screen recorder for Windows 10 and 11, CamStudio is an excellent option. This free software allows you to record all or part of your screen with ease.
Here’s how to use CamStudio:
Download and Install CamStudio
Once you have downloaded the file, double-click on it to start the installation process and follow the on-screen instructions.
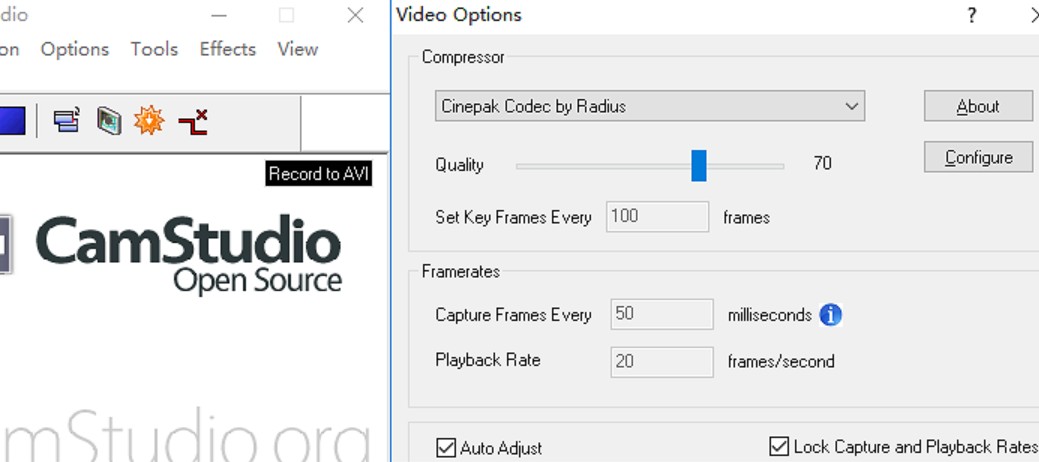
Configure Your Settings
Click on the Options menu and select Video Options. Here, you can choose your video compressor, frame rate, and color depth. You can also adjust your audio options by clicking on Audio Options.
Start Recording
Click on the Record button in CamStudio’s main window, and then select the area of your screen that you want to record. You can also choose to record your entire screen.
Stop Recording and Save Your File
Your recorded file will automatically be saved in AVI format. If you want to convert it to a different format, you can use a video converter tool.
CamStudio is a great screen recording software for Windows 10/11 users who need a simple and effective tool. With its user-friendly interface and customizable settings, you can create high-quality recordings in no time.
ShareX
ShareX is a free and open-source screen recording tool for Windows 10 and 11 that offers several advanced features. Its user-friendly interface and powerful capabilities make it one of the best screen recorders available in the market.
Here are some easy steps to follow to use ShareX for screen recording:
Download and Install ShareX
To get started with ShareX, you need to download and install it from the official website. The installation process is straightforward and takes only a few minutes.
Configure Recording Settings
Once you have installed ShareX, it’s time to configure the recording settings. You can customize the recording area, audio source, video codec, and other options as per your requirements.
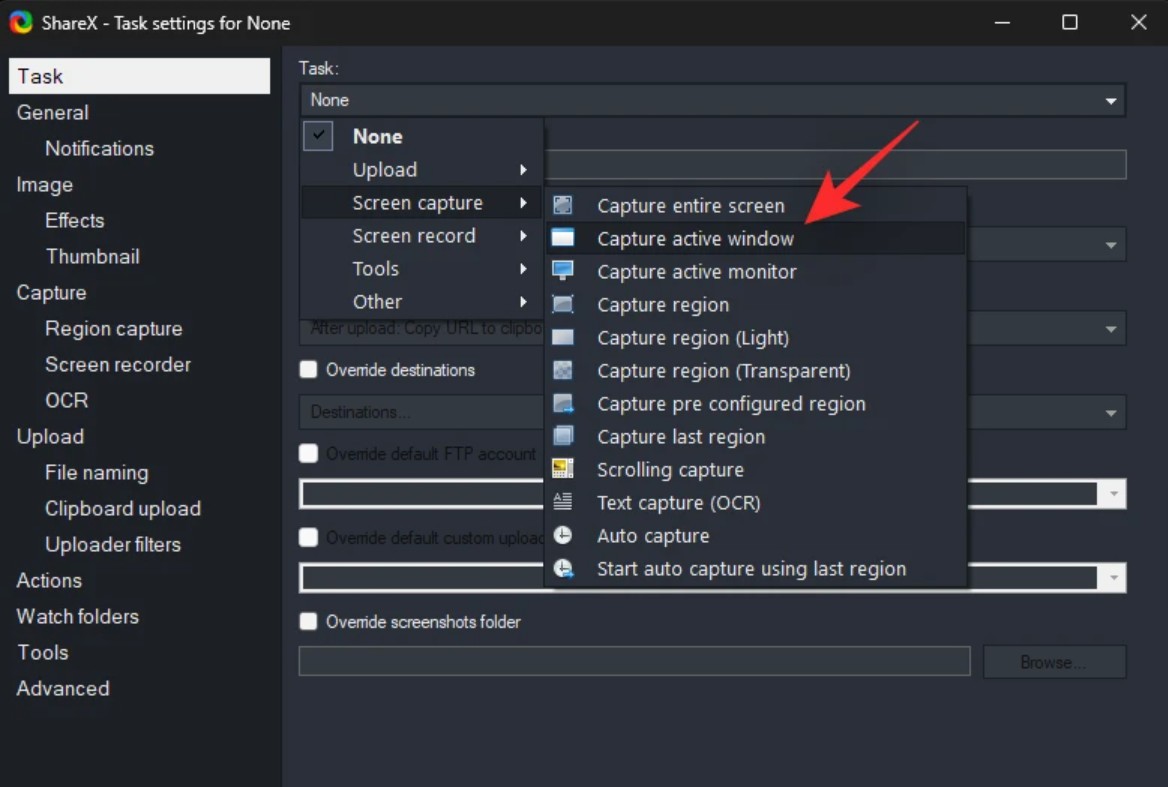
Start Recording
After configuring the settings, you can start recording by clicking on the “Record” button on the main interface. ShareX also allows you to record specific windows or regions of the screen easily.
Edit and Save
You can trim the video, add captions, or apply various effects to make it more engaging and informative. After editing, you can save the final version to your preferred format.
ShareX is an excellent choice for users who need an efficient and flexible screen recording tool. With its advanced features and customization options, you can create high-quality videos quickly and easily. Try out ShareX today and take your screen recording game to the next level!
Flashback Express
Flashback Express is a free screen recorder for Windows 10/11 that offers users an easy-to-use interface, making it perfect for beginners. With this software, you can record your screen, webcam, or both simultaneously, and save the recorded videos in various formats.
Getting started with Flashback Express is simple. Here are the steps to follow:
Download and Install
Once downloaded, double-click on the file to start the installation process. Follow the instructions provided by the installation wizard to complete the installation.
Select Recording Area
After launching the application, select the recording area. You can choose to record the full screen, a specific window, or a custom area.

Set Audio Options
Next, set the audio options for your recording. Choose whether to record system audio, microphone audio, or both. Once you have selected the recording area and audio options, click on the “Record” button to start recording.
Stop Recording and Save Video
You can then preview the recorded video and make any necessary edits. Finally, save the video in your preferred format.
Flashback Express is a great choice for anyone looking for a free screen recorder for Windows 10/11. With its simple user interface and robust features, it’s no wonder why it’s one of the top five screen recorders on our list. So why not give it a try today and see for yourself how easy it is to create high-quality recordings?
FAQs
OTT (Over The Top) platforms such as Netflix, Amazon Prime, Disney+, and others use strict digital rights management (DRM) protocols to protect their content from piracy. These DRM systems prevent users from recording or downloading content directly. It it better to use a video downloader like StreamFab.
The Game Bar in Windows 10, which includes a screen recording feature, doesn't have a built-in limit to its recording time. The length of your recording mainly depends on two factors: the available storage space on your device and the running time of your device's battery (if it is not plugged in).
No. But there are various third-party screen recording apps available that can be used with different versions of Windows.
Conclusion
After reviewing the whole passage, hope this article provides comprehensive features and easy-to-start steps for you to handle screen recording on Windows 10/11 easily even if you are totally new to screen recording.
 Can Wii Play DVDs? Best Methods to Watch DVD on Your Wii!
Can Wii play DVDs? This is probably the most frequent question asked by Nintendo Wii lovers. And you might be disappointed to find out that the answer is No. But thanks to the advancement of technology, you can play DVDs on a Wii as long as you get the right method.
 Explore the Most Popular Sites for MP4 Movies Download 2025
Feeling difficult to figure out the most suitable website or tool? This article teaches you how to achieve HD MP4 movie downloads and shows the top sites designed to download MP4 movies easily. Read on to know more.
 Download Videos from URL with the Best URL Video Downloader
There are a lot of URL video downloaders out there, but which one is the best one?
 How to Solve "No Valid Sources are Available for this Video" Error
If you are facing errors like No Valid sources are available for this video android or any similar errors, this means you are having trouble loading your videos. This article will give you all the information regarding the reason behind this error and the best ways to fix it.