How to Burn a Blu-ray Disc with High Quality on Mac & Windows?
Summary: I consistently rely on burning Blu-ray discs to preserve movies with lossless audio and crisp visuals. Mastering how to burn Blu-ray requires specific hardware setups, reliable blank media like Verbatim, and robust software selections. Based on my testing across Mac and Windows, the insights below detail the methods and tools needed to successfully burn a Blu-ray disc.
Table of Contents
As someone who regularly archives multimedia on physical discs, I see the same frustration on communities like Reddit: people spending hours burning a movie, only to find their living room Blu-ray player can't read it. They burn a basic data file instead of properly authoring a playable video disc.
While streaming offers convenience, it relies on heavy compression. If you want to preserve your movies with high-definition visuals, lossless audio, and selectable subtitles, burning physical media remains the best route. Achieving this simply requires the right hardware and a solid authoring tool. Below, I outline the exact process and test out reliable Blu-ray burning software for Mac and Windows so you can author flawless discs with working menus.
What Do You Need to Burn a Blu-ray
Before you start burning Blu-ray discs, make sure your hardware and software are prepared to handle high-definition media.
- Blank Blu-ray discs: Choose BD-R (recordable once) or BD-RE (rewritable).
- Blu-ray burner software (which you can find in this article): A reliable tool to process your video files, audio tracks, and custom menus.
- Blu-ray burner drive: An internal or external drive. If using an external drive, ensure it connects via USB 3.0 or higher for stable data transfer.
- Ample Storage Space: Ensure your computer has at least 50GB to 100GB of free hard drive space. Burning software needs this to temporarily cache large ISO files or BDMV folders before writing them to the disc
How to Burn Blu-ray Discs with Professional Authoring Software
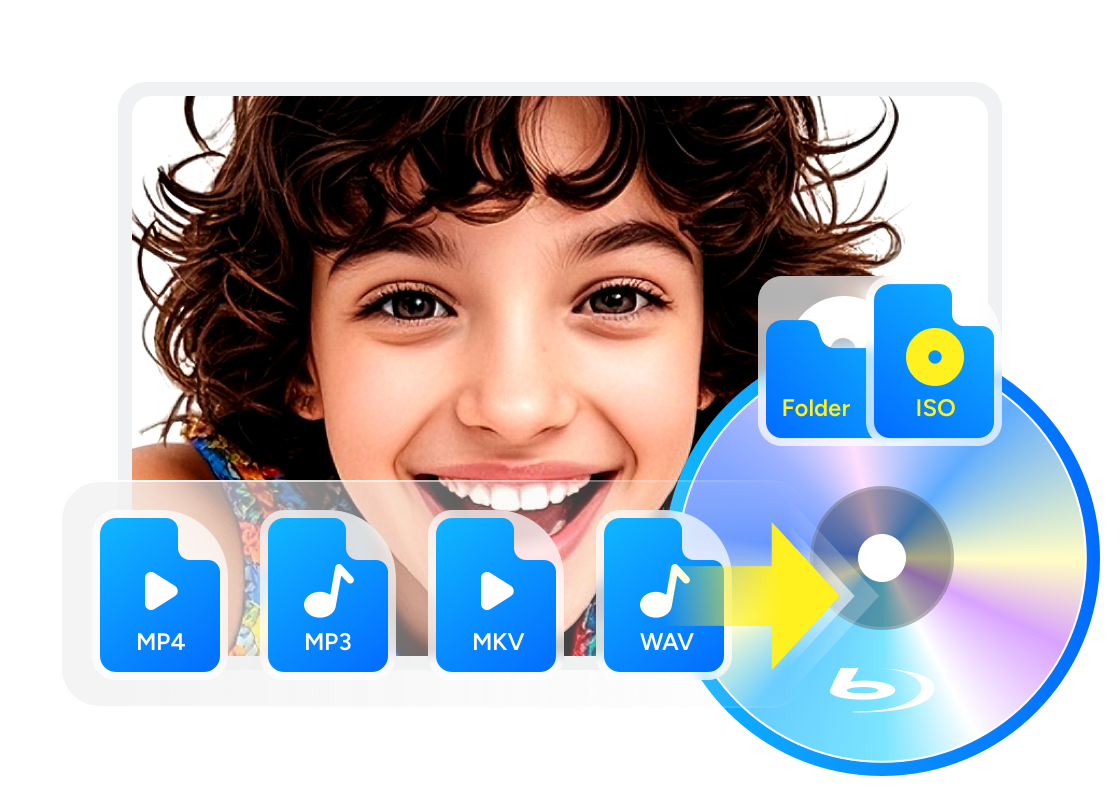
As mentioned earlier, simply dragging files onto a blank disc creates a data disc that most Blu-ray players cannot read. You need a dedicated authoring tool. Based on my continuous testing, DVDFab Blu-ray Creator is the most reliable choice for both macOS and Windows. With this powerful Blu-ray burner, you can create a Blu-ray disc, ISO image, or folder, as well as customize Blu-rays using stylish templates, built-in editor and advanced settings.
I recommend DVDFab because it solves the authoring hurdles I often see discussed on r/software. While many free tools struggle to retain multi-track audio or complex subtitles during conversion, DVDFab processes MP4, MKV, MOV, or AVI files while keeping all your original media tracks intact. It also features stylish built-in menu templates and allows you to output directly to a physical disc, an ISO image, or a BDMV folder based on your needs.
Features
- Burn 200+ video formats to high-quality Blu-ray discs, ISO files or folders.
- Choose from multiple output formats including BD-R, BD-RE, BD-50, BD-25, BD-9, BD-5.
- Synchronize the metadata information of the source videos on the Blu-ray menu.
- Boast multiple free and stylish menu templates and allow you to customize them.
- Allows you to select audio tracks and subtitles, as well as add external subtitles.
- Burn multiple videos to one Blu-ray disc and arrange their playback order.
- Enjoy faster burning speeds powered by GPU acceleration.
- Crop video, apply effects, add watermarks, and customize subtitles using edit tools.
Step 1: Launch DVDFab and Switch to Creator Module
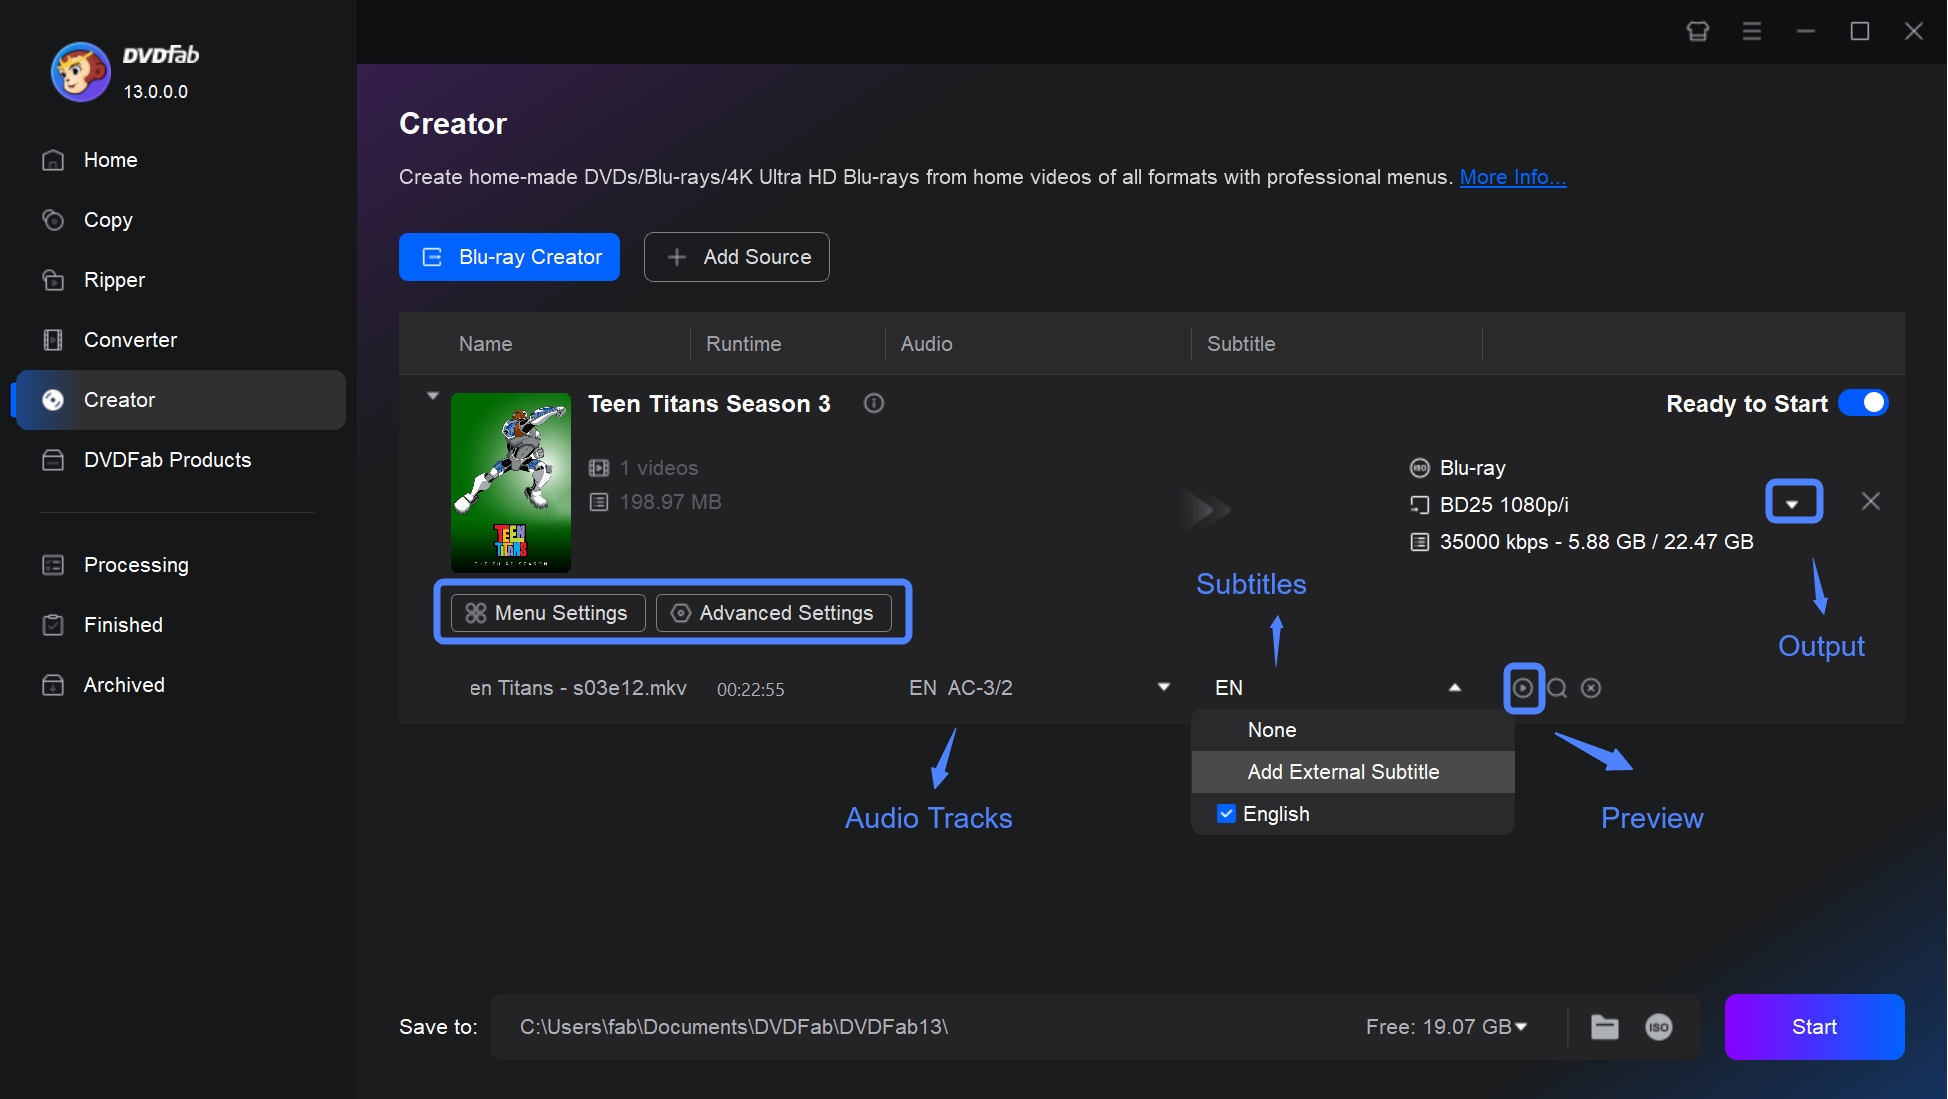
Launch the software and you will see the clean user interface with options such as Copy, Ripper, and Creator. You need to click on "Creator" and go to "Creator Mode" to choose Blu-ray Creator.
Step 2: Add Videos and Insert Your Blu-ray Disc
Click the "+" icon to load the video file, or simply drag it into this interface. You can also add multiple video files at once. After uploading, insert your blank Blu-ray disc into the optical drive so it’s ready for burning later.

Step 3: Tailor Blu-ray Output Settings
After loading the video, move on to configuring the Blu-ray disc. On the main interface, you can adjust settings, including subtitles, audio tracks, quality, menus and editing. "Menu Settings" and "Advanced Settings" offer a range of adjustable output quality options. You can also open the Subtitle drop-down and the Audio Track drop-down to select the tracks you need.
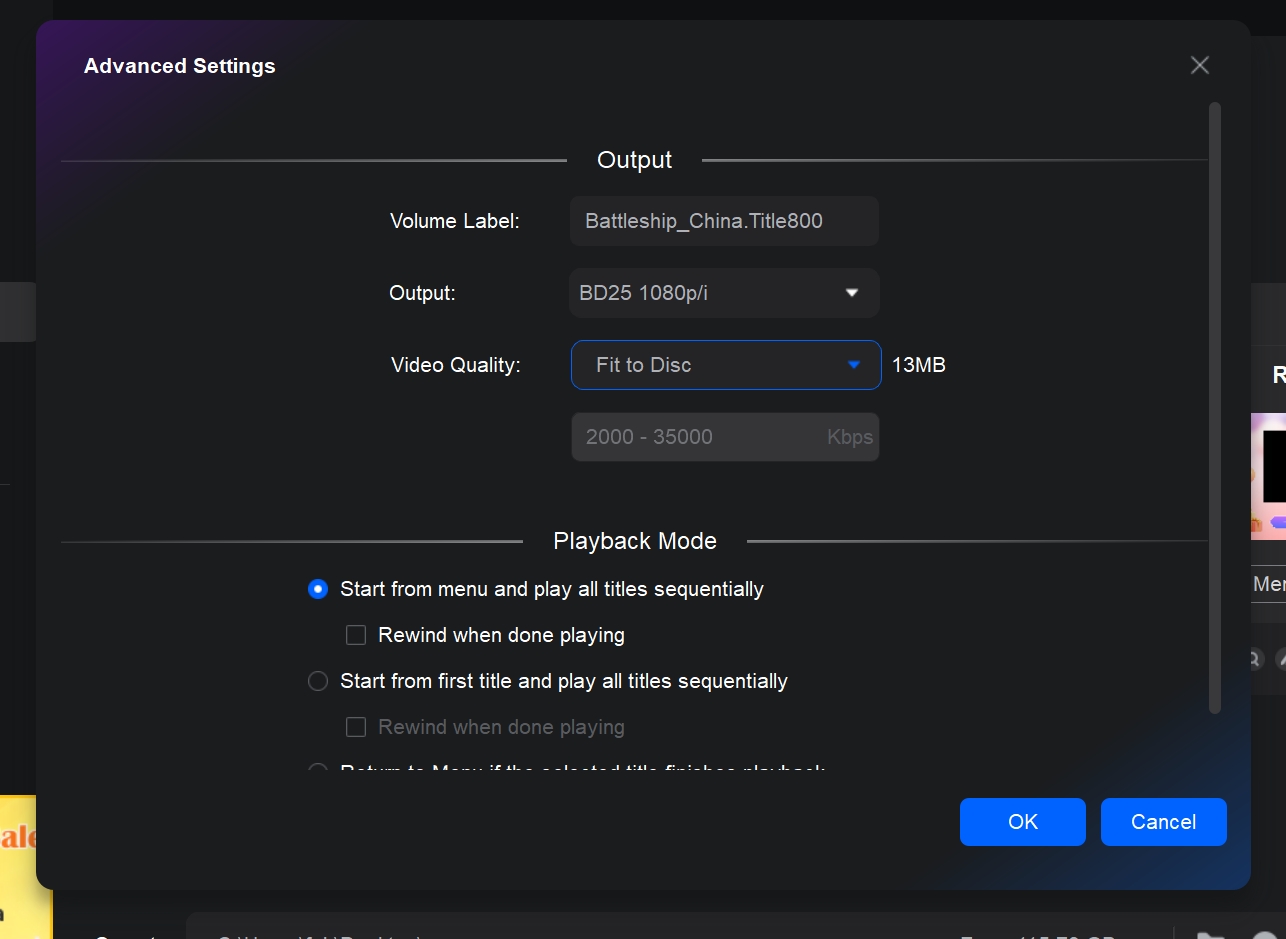
In Advanced Settings interface, fine-tune parameters to customize the output quality of your Blu-rays. You can select your desired Blu-ray type (such as BD25 1080p/i) from the Output dropdown menu, depending on disc capacity and video quality needs. For video quality, pick "Fit to Disc" to let the software automatically balance video quality and disc space, or manually enter a specific bitrate for even more control over the output quality.
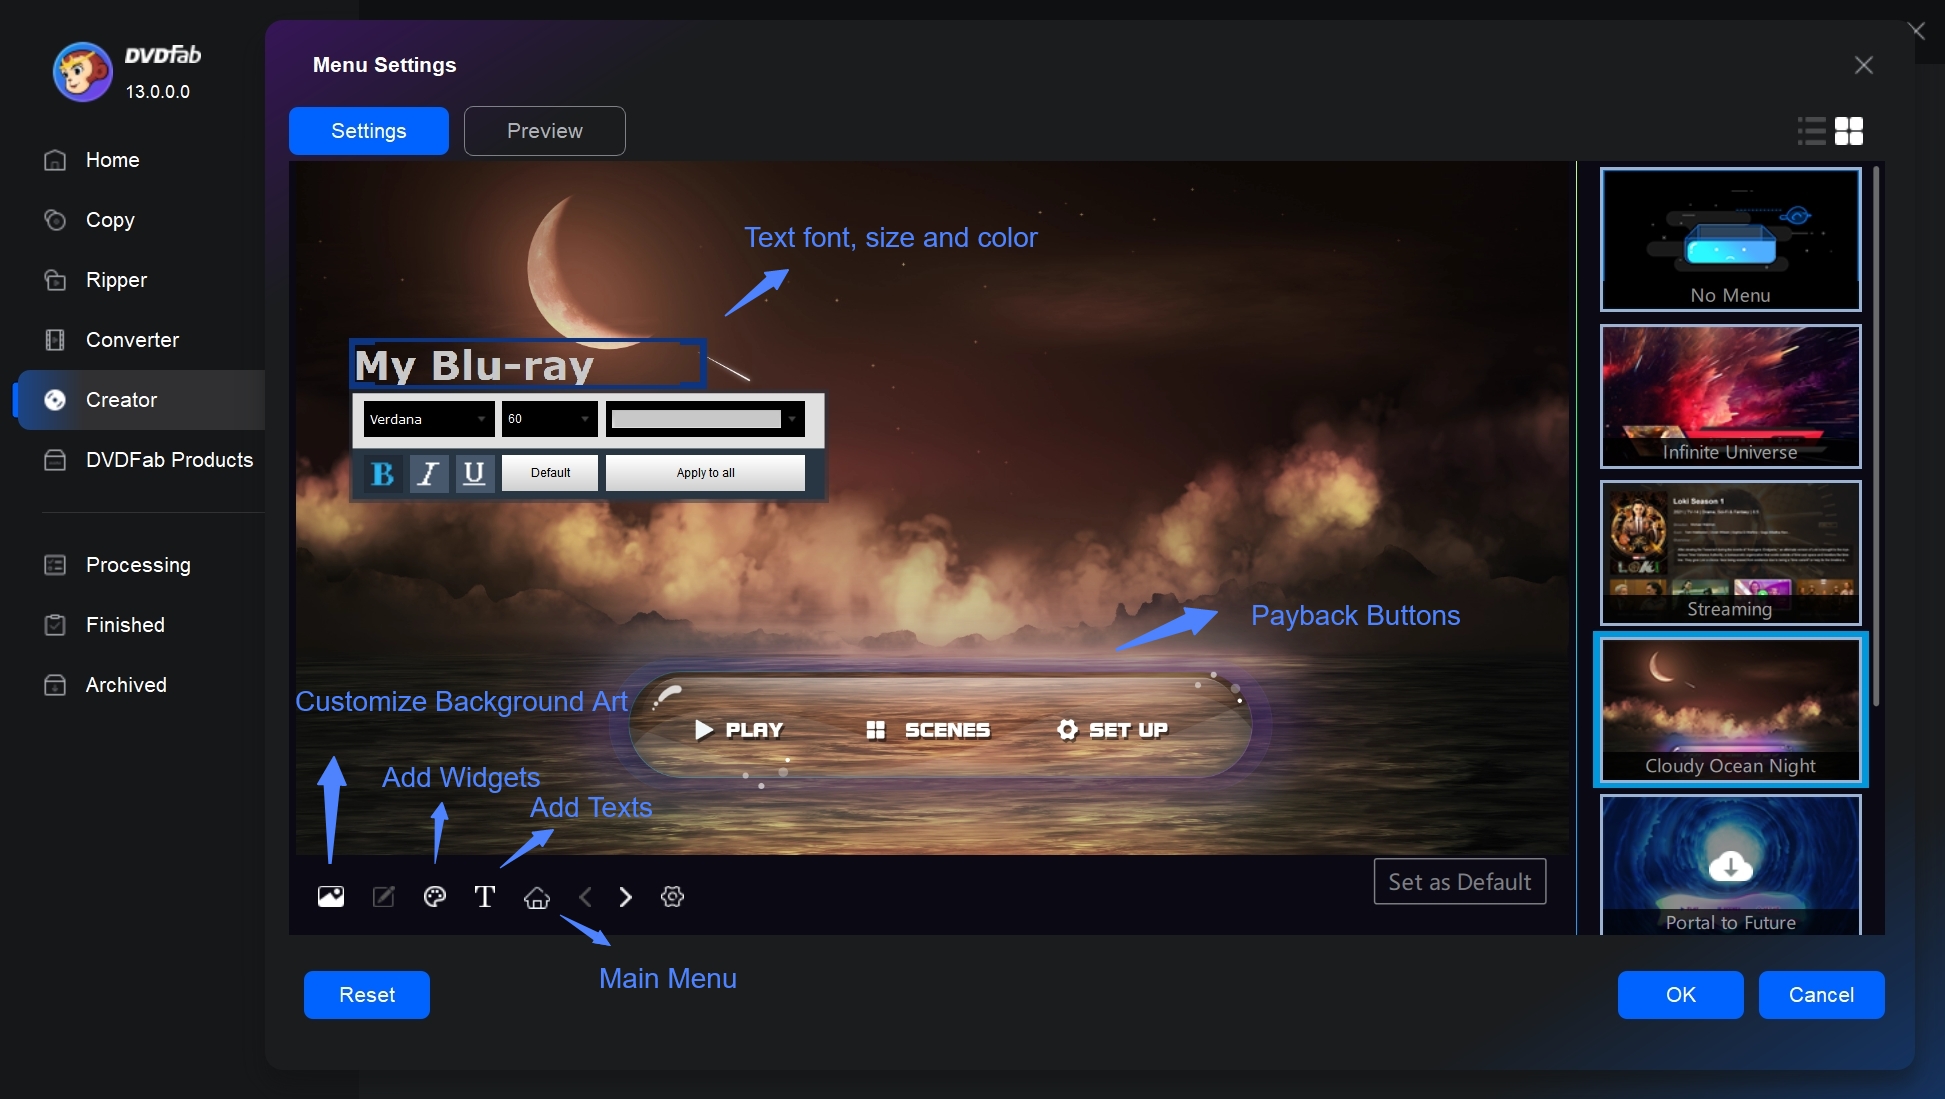
Click on Menu Settings and you can set the Blu-ray disc's menu page. Here you can personalize all the widgets, including background art and music, thumbnails, text font, color, as well as playback buttons.
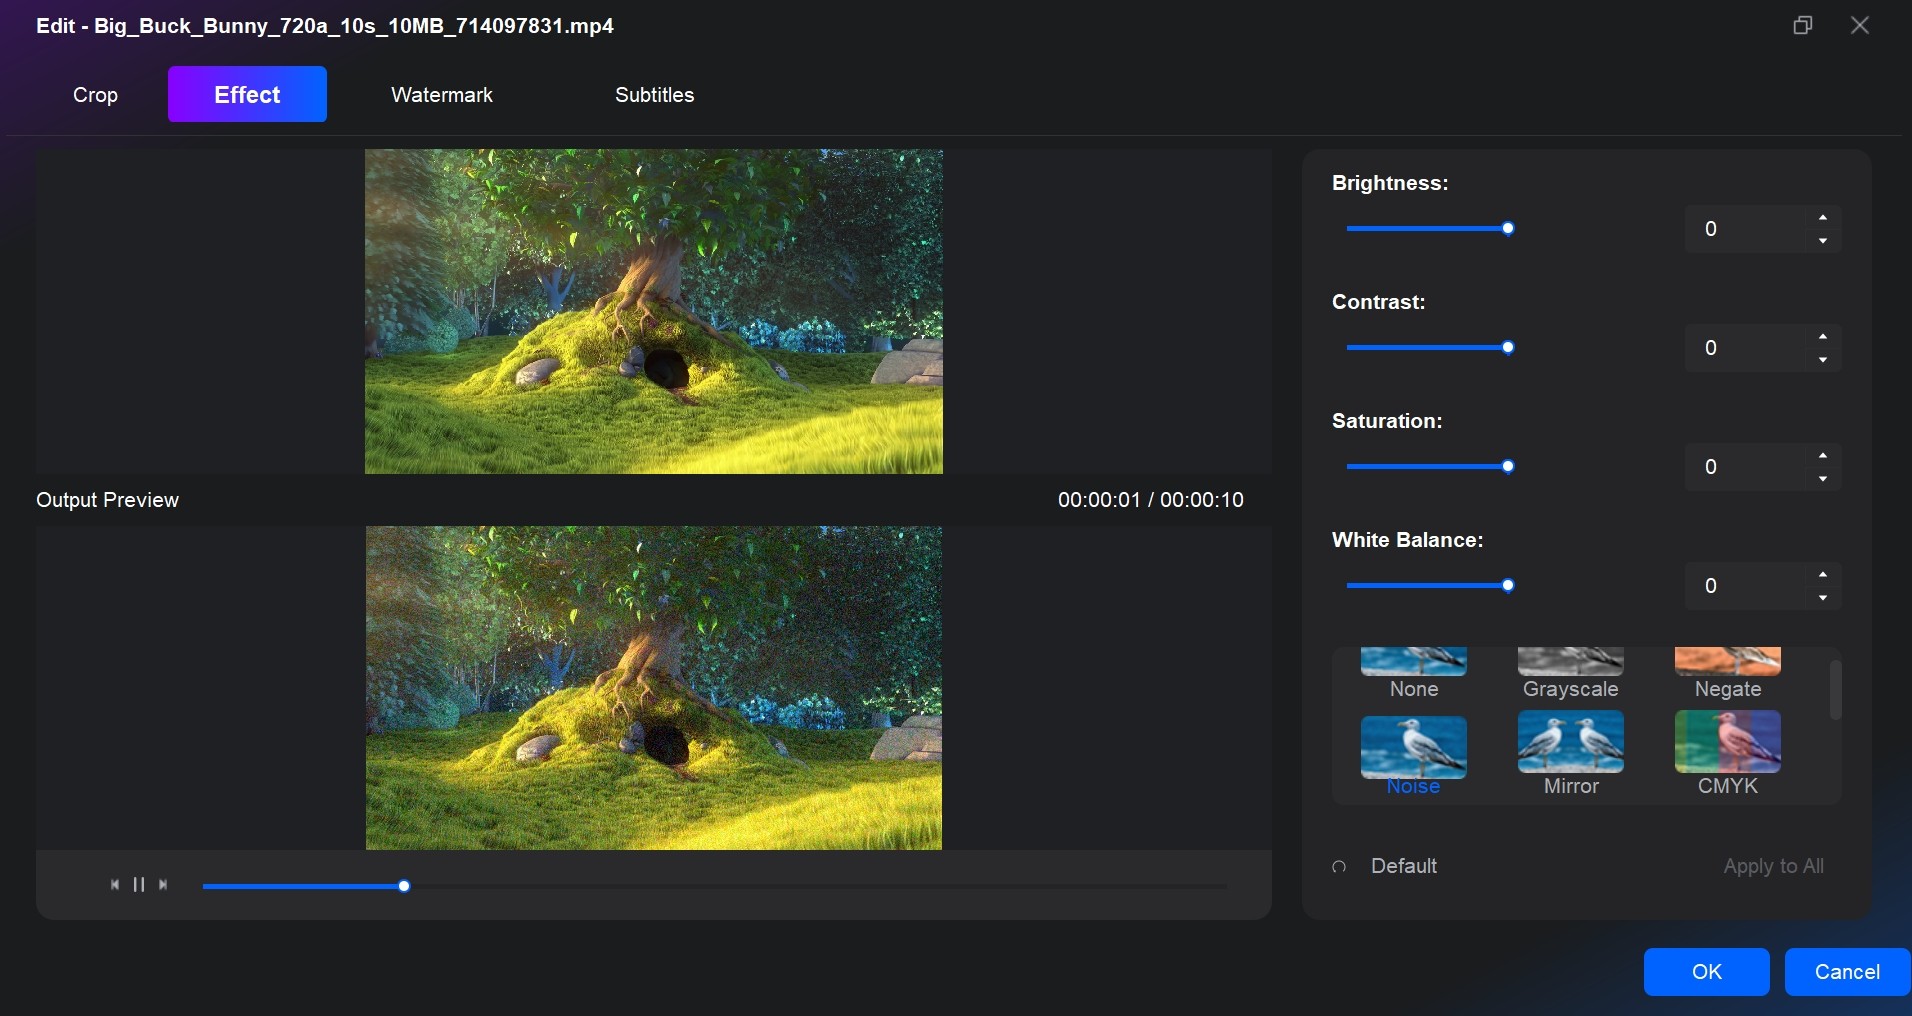
You can also edit the video before burning, such as cropping the size, adjusting the white balance and contrast, etc.
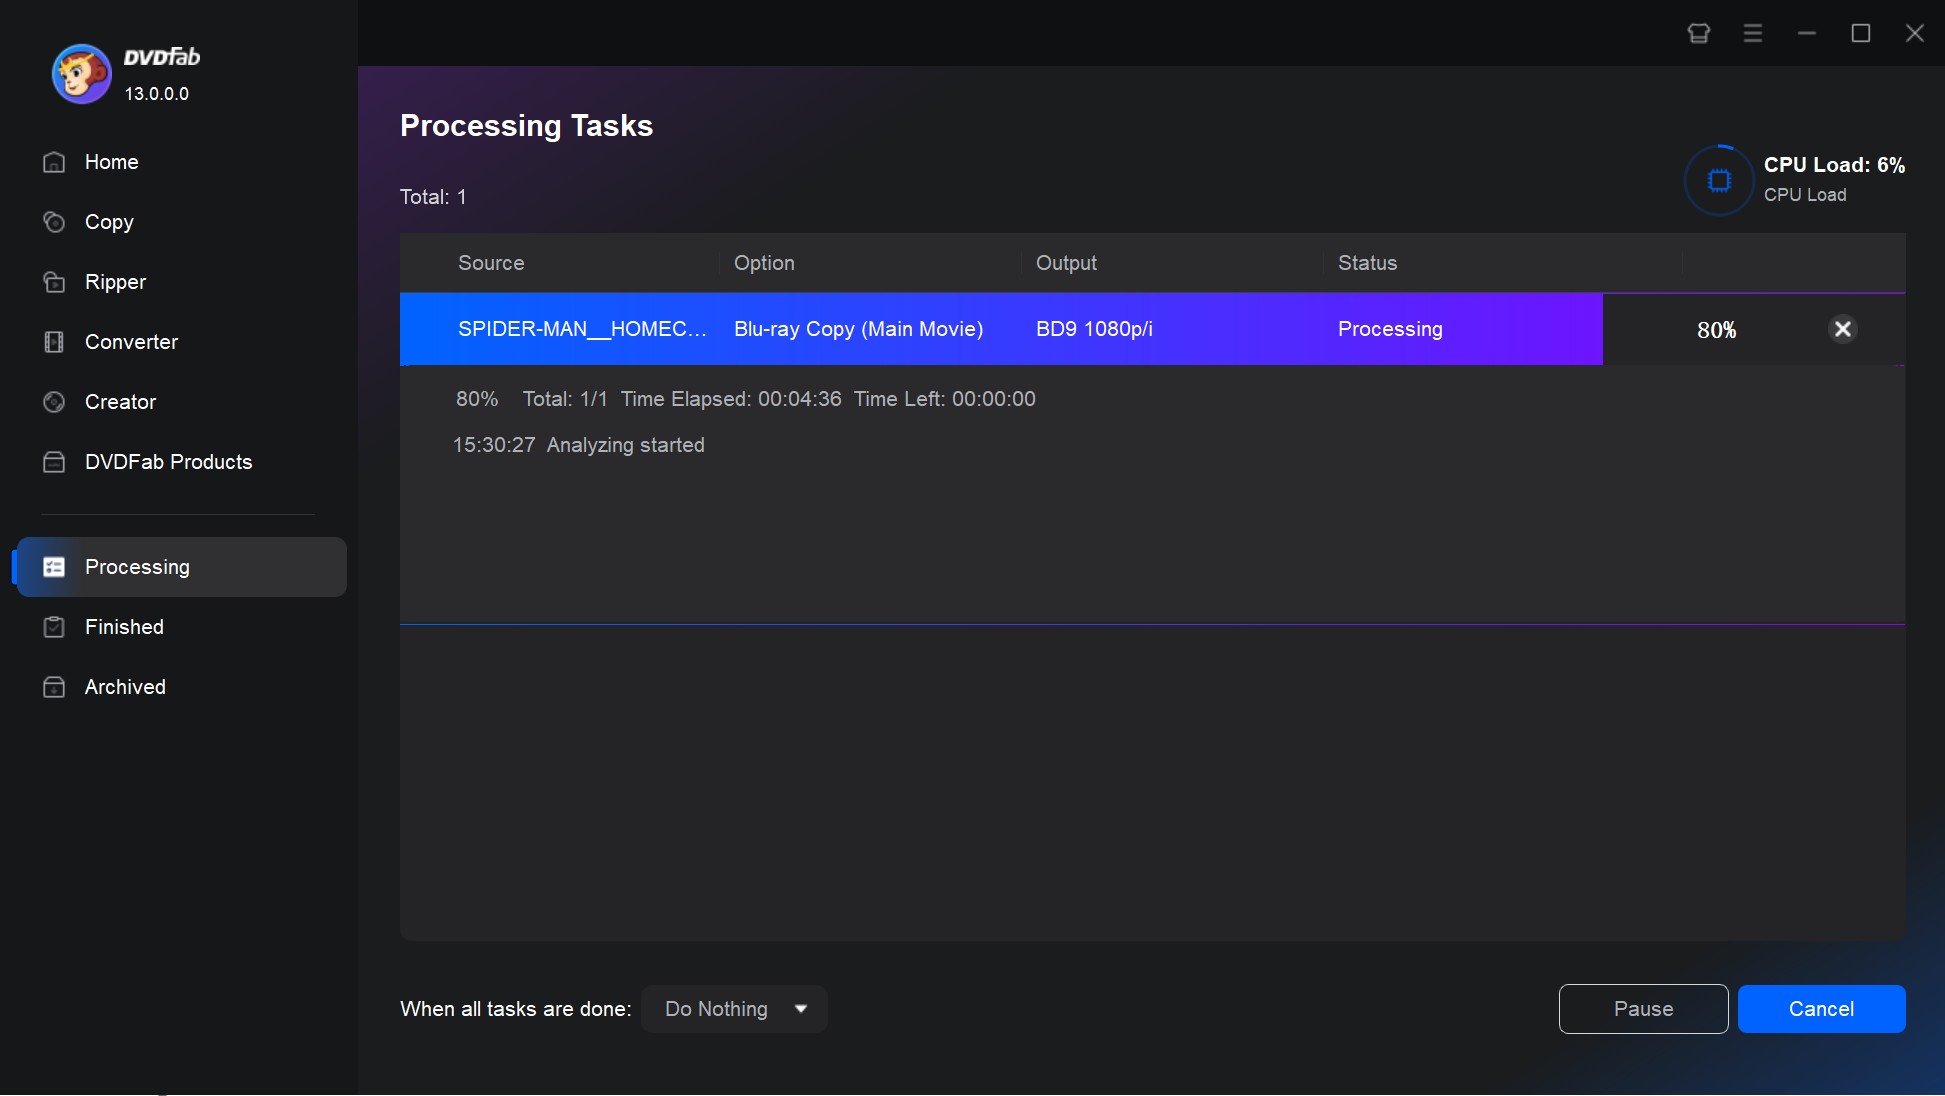
Step 4: Burn Blu-ray Disc
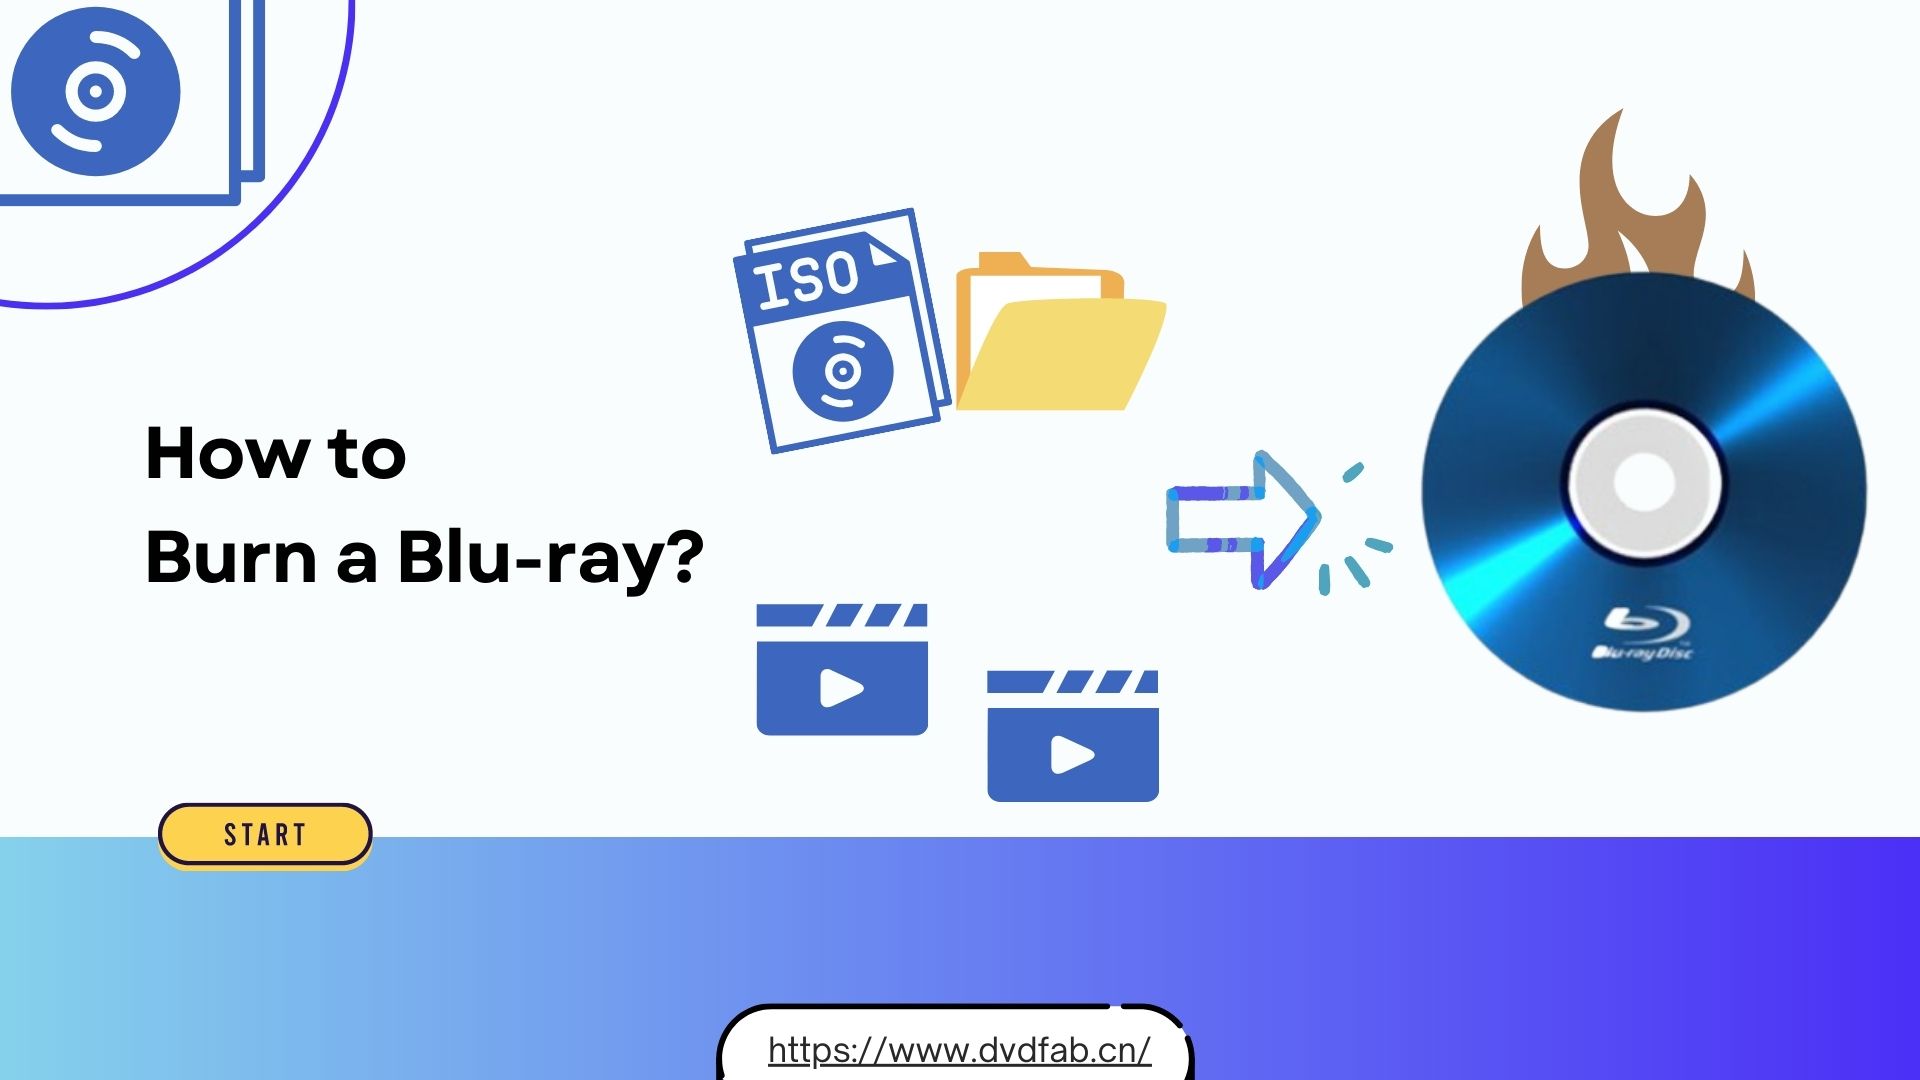
Now, select the directory for the output Blu-ray. If you want to burn your video to a blank disc, you must select your optical drive in the directory. If you want to convert the movie to a Blu-ray ISO file or folder, just choose the "ISO" icon or the "folder" icon.
Finally, click "Start" to initiate the burning process. I tried burning MKV to Blu-ray that contained a 1 hour and 33 minute movie, and the entire process finished in just 16 minutes. The disc played on my Blu-ray player without issues.
Watch Video Tutorial on How to Burn a Blu-ray Disc
If you're still unsure how to burn Blu-rays, please watch the detailed step-by-step tutorial video below for Windows and macOS.
How to Burn a Blu-ray Disc with Free Blu-ray Burner
If you only need basic burning and don't require advanced features or customization, a free Blu-ray burning software may be enough for your needs.
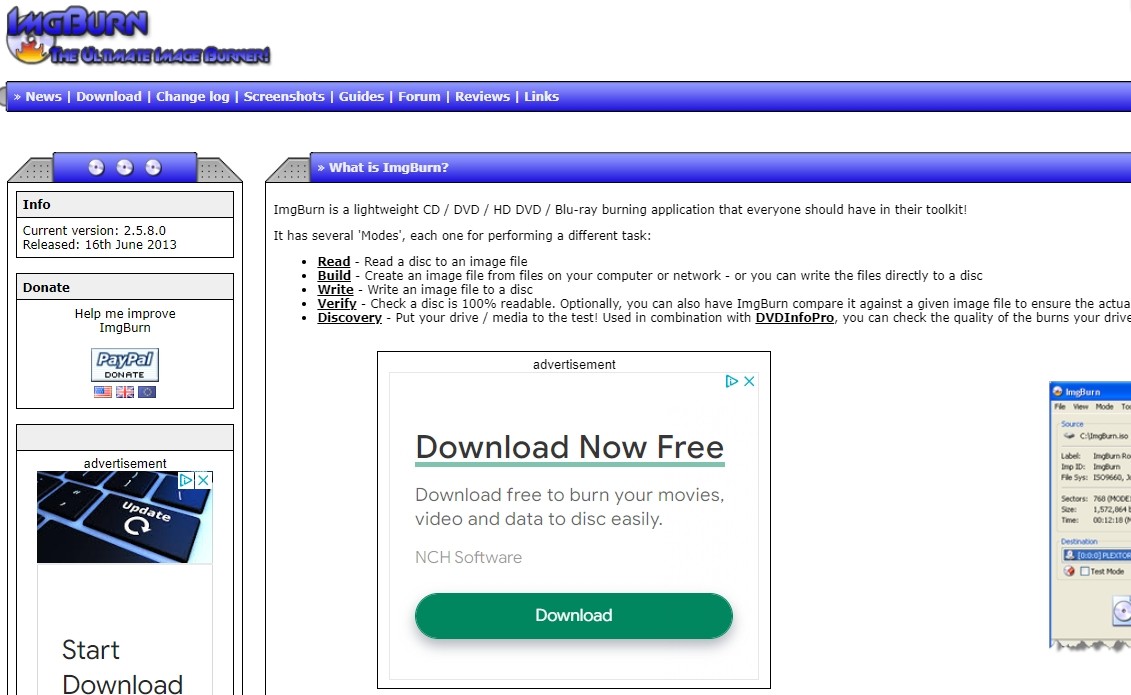
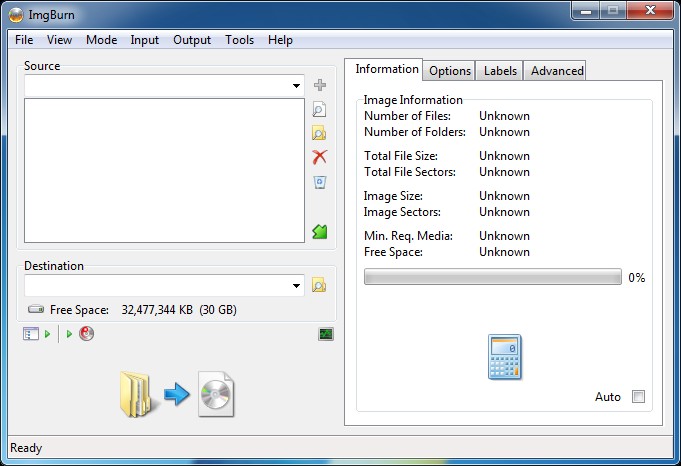
ImgBurn is a popular free software used for burning image files to discs, such as CDs, DVDs, and Blu-ray discs. This Blu-ray burner lets you create Blu-ray discs from image files such as ISO, BIN, and IMG. You can also write data directly to Blu-ray discs, or create ISO files from Blu-ray discs. ImgBurn works with many Blu-ray types, including single-layer and dual-layer media, and both BD-R and BD-RE. It also lets you adjust the burn process, such as setting the write speed, verifying the disc after burning, and creating bootable Blu-ray discs.
But unlike DVDFab Blu-ray Creator, it can't burn digital files like MP4 directly to Blu-ray; it only supports burning disc image files to a disc. If I only have an ISO or other image files like BIN, or if I'm burning a Blu-ray disc for data backup, I choose ImgBurn.
The following is the guide on how to burn a Blu-ray disc on Windows 10 with ImgBurn.
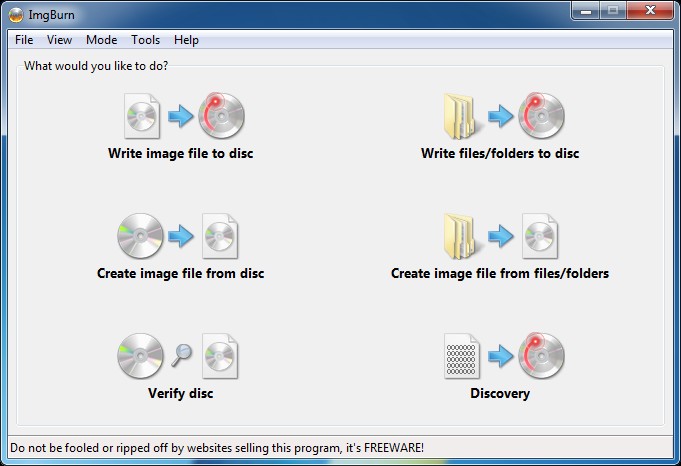
Step 1: Select Burning Mode
Download and install ImgBurn from the official website to your Windows computer. Insert a blank Blu-ray disc into your Blu-ray burner drive. Then open ImgBurn and select the "Write image file to disc" mode.
Step 2: Add the Image File
Click on the "Browse for a file" button and select the Blu-ray disc image file (.ISO or .IMG) that you want to burn to the disc.
Step 3: Set Speed and Start Burning Blu-ray
Set the burning speed and verify that the Blu-ray burner drive is selected as the destination. Click on the "Write" button to start burning the Blu-ray disc.
How to Burn an ISO, Folder, or Blu-ray to a Blank Disc
As discussed, a recommended workflow from the data-hoarding community is to create an ISO file first to test your menus and audio before committing to a physical burn. When you are ready to write that ISO to a blank disc, or if you need to duplicate an existing movie, you need a cloning tool.
DVDFab Blu-ray Copy specializes in exact 1:1 duplication. This software burns existing Blu-ray discs, ISO files, or folders to blank media, guaranteeing that every original menu animation and Dolby Vision enhancement is preserved. It empowers you to losslessly back up or compress encrypted 2D and 3D Blu-rays to a physical disc. Featuring five distinct copy modes, it is my top pick for creating reliable physical backups.
Features
- Remove any copy protection from old or latest Blu-rays to enable backup.
- Copy any Blu-ray to blank disc or save it as ISO file or folder for playback.
- Losslessly backs up a disc to BD-50 or compress it to common BD-25.
- Clone and burn your Blu-ray in a 1:1 ratio with no quality loss.
- Copy any 3D Blu-ray disc and better preserve the 3D effects.
- Get faster Blu-ray copying speed with GPU-accelerated technology.
- Work with Blu-ray Cinavia Removal to process Blu-rays with watermark.
Here is a tutorial on how to burn a Blu-ray to blank disc with DVDFab Blu-ray Copy.
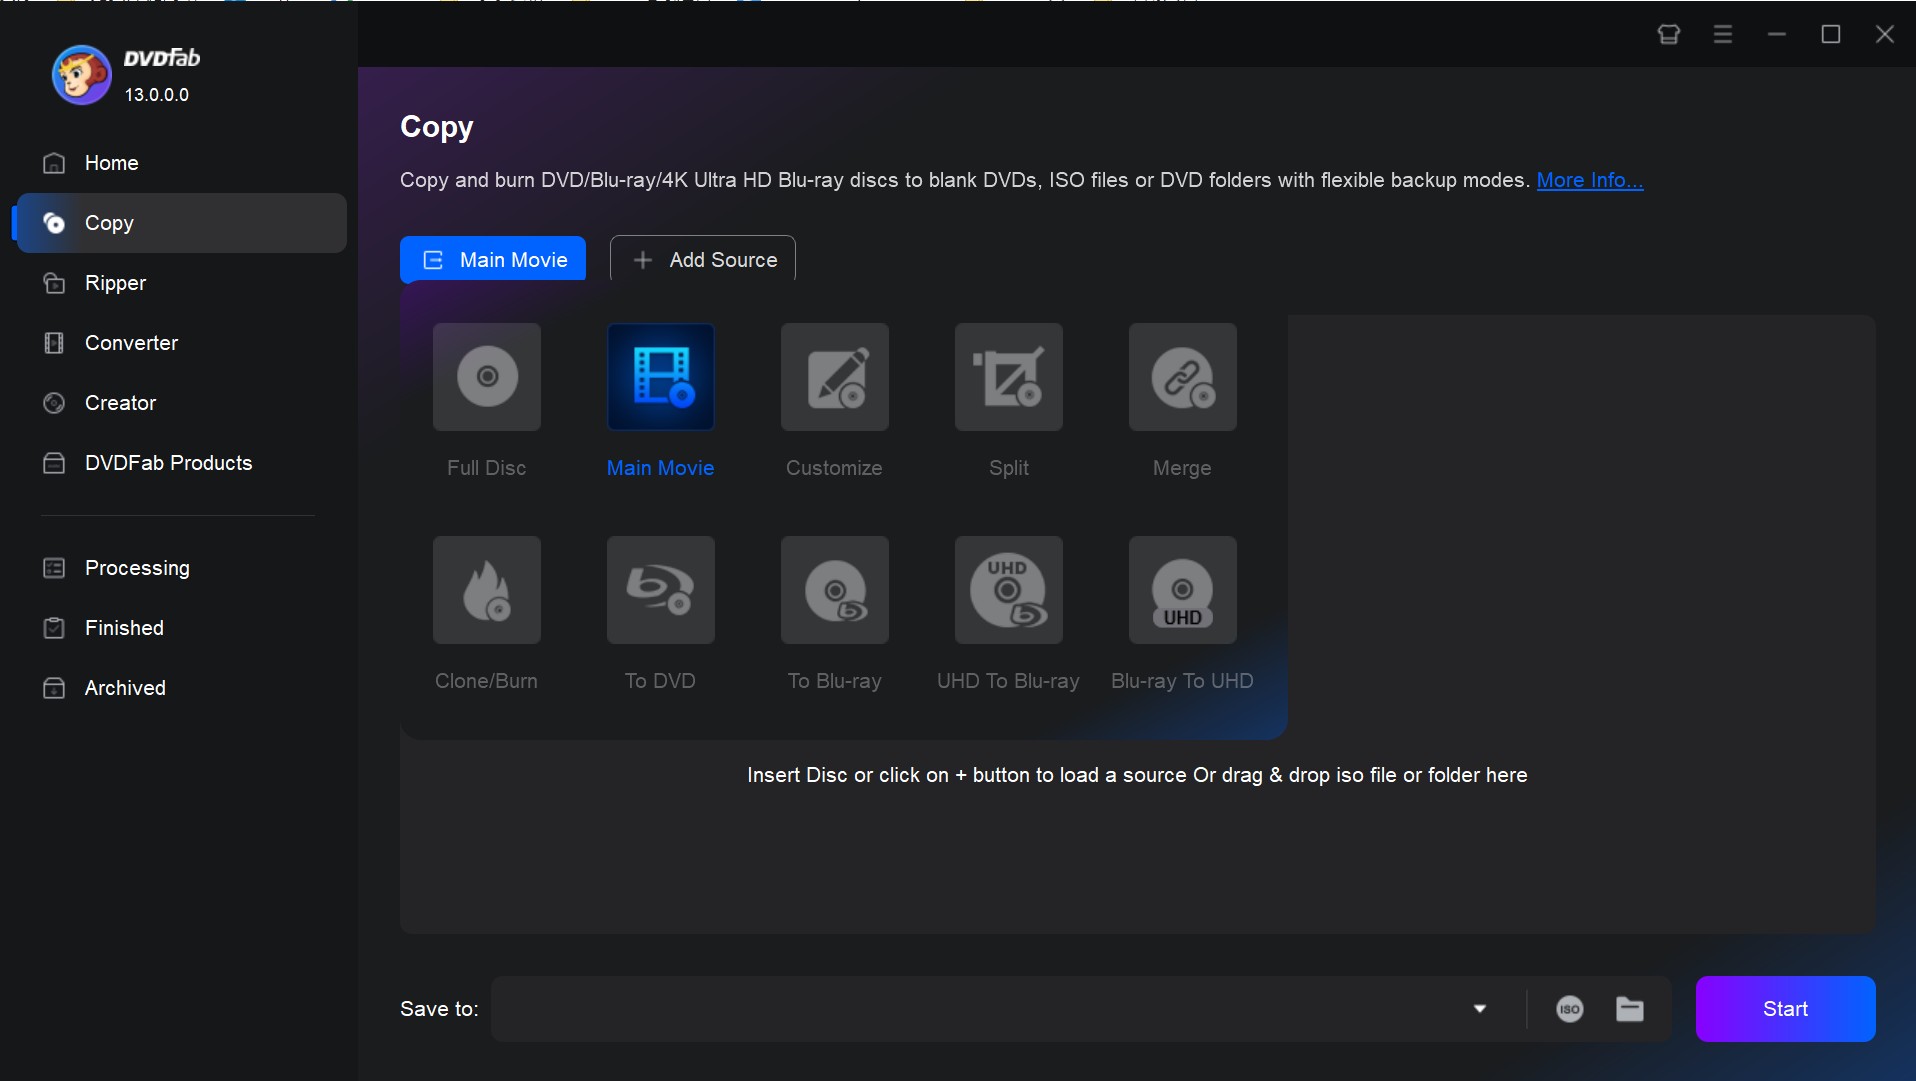
Step 1: Launch DVDFab and Select Copy Mode
Note: Both DVDFab Blu-ray Creator and Blu-ray Copy are installed in one package, DVDFab 13. Download once, and you can freely explore all the function modules of DVDFab.
Launch the software and you will see its clear user interface. Click on the "Copy" option and then choose the "Clone/Burn" copy mode. Next, click the "+" icon and locate the Blu-ray disc. If it is an ISO file or folder, just drag it to the UI to load it.
Step 2: Adjust Advanced Settings and Preview the Blu-ray
After the source is loaded, you can go to Advanced Settings to set the volume label and choose to keep protection or not. You can also click the Play button to preview your Blu-ray video.
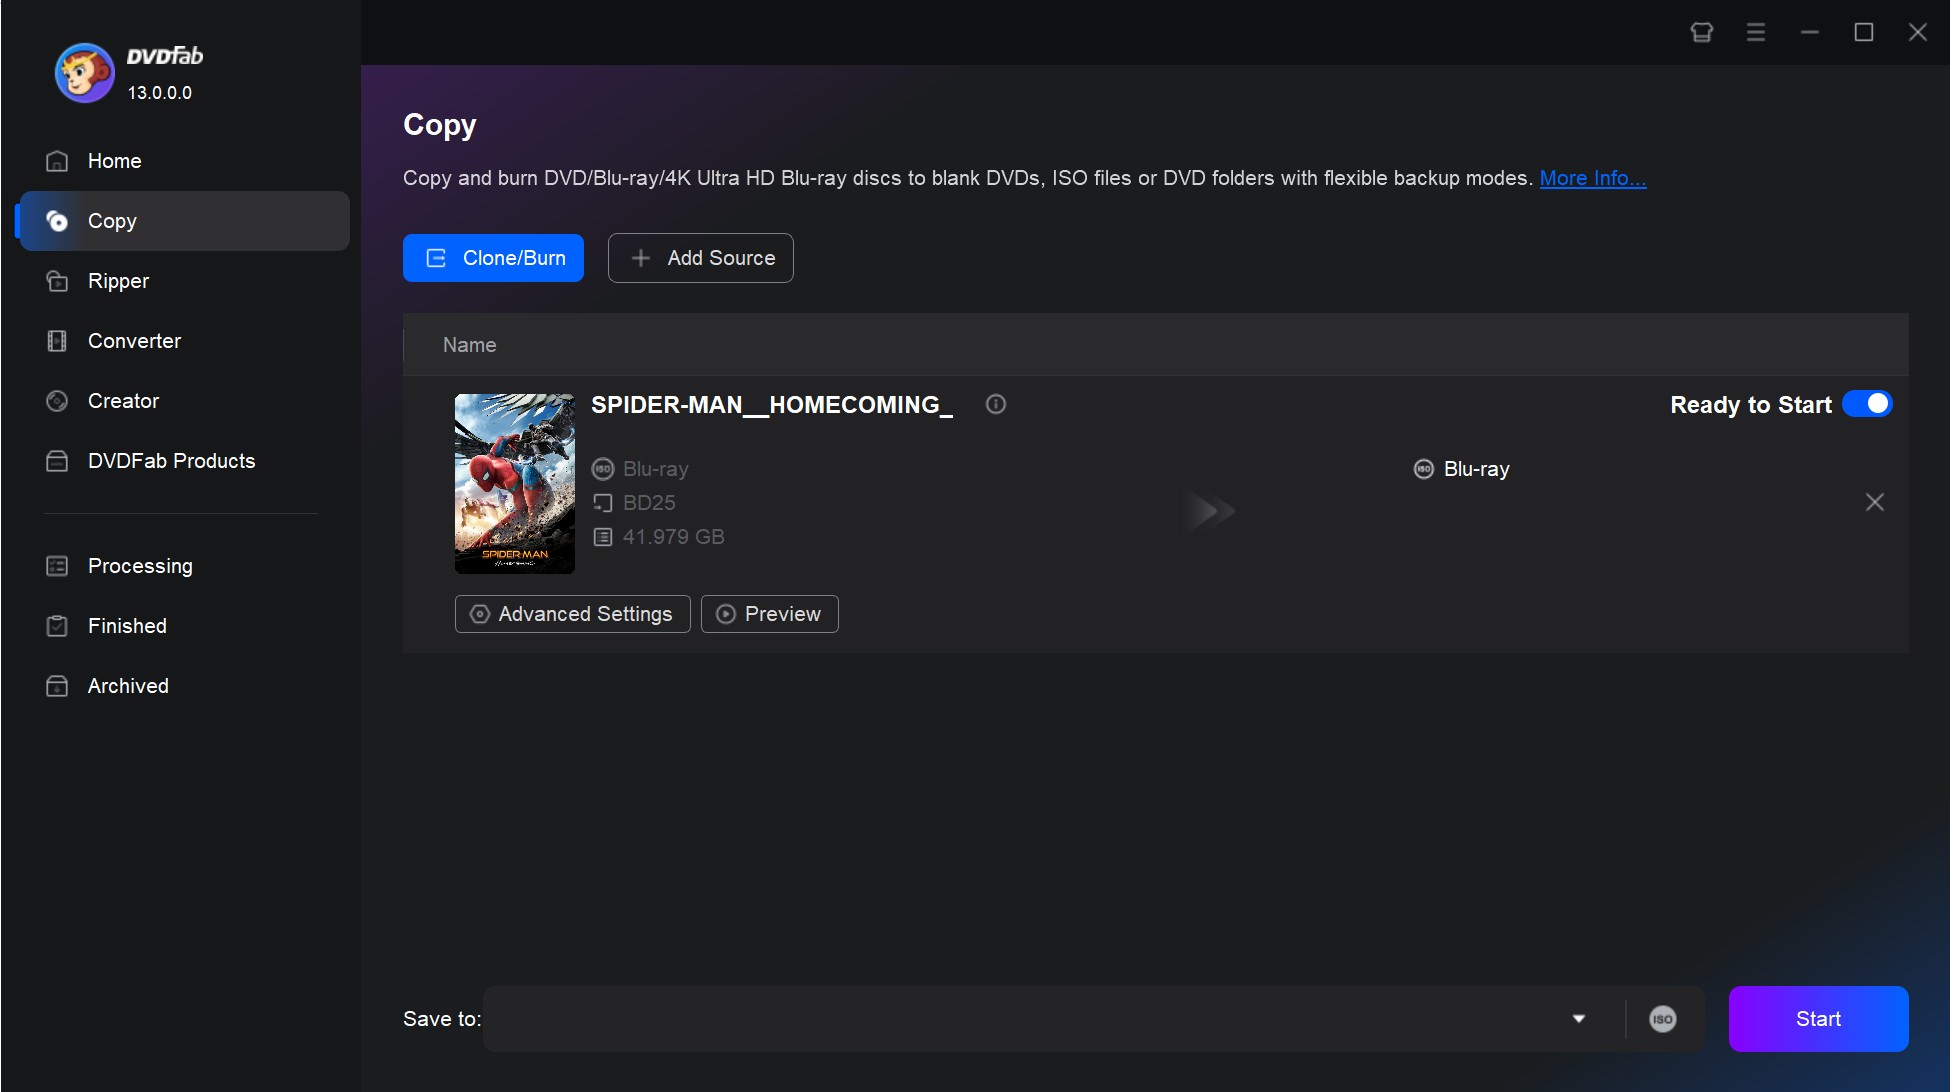
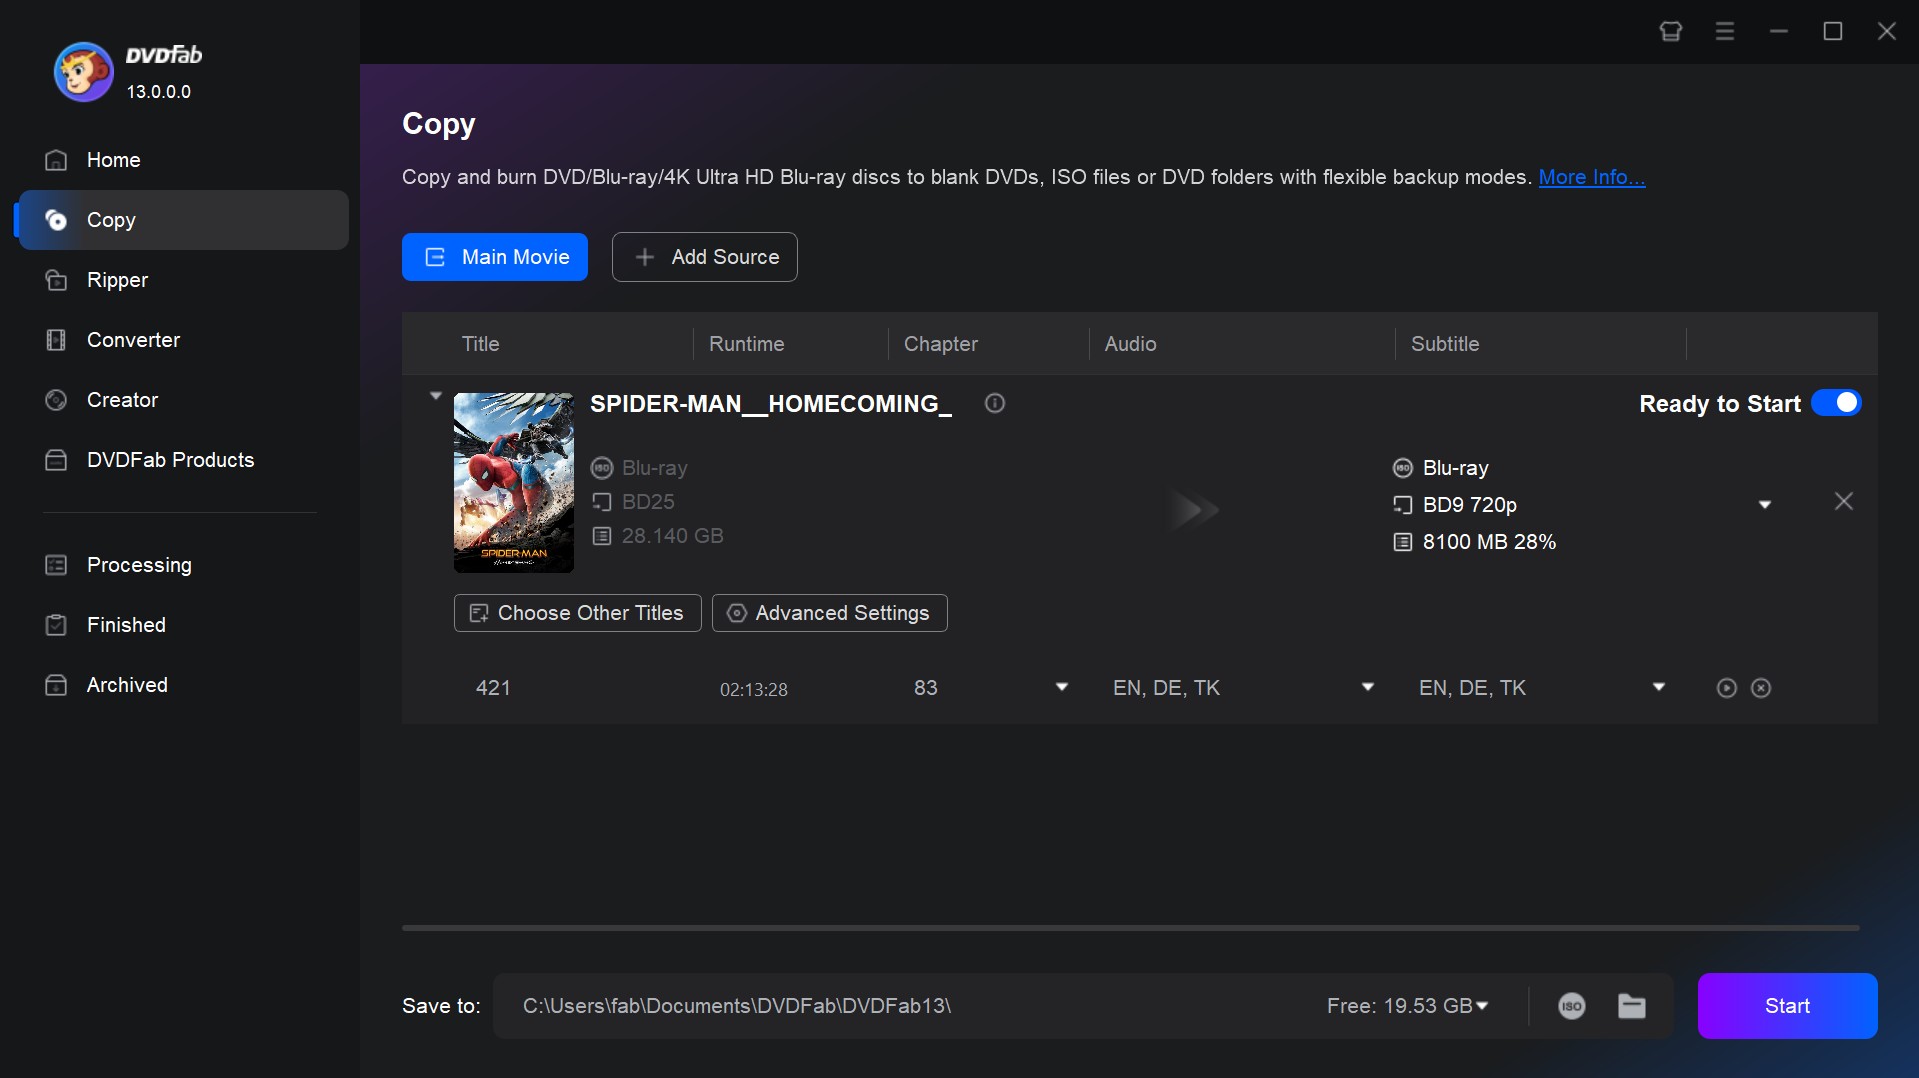
Note: Under the Clone/Burn copy mode, your Blu-ray disc will be burned in a 1:1 ratio, so there are no customized options. If you want to copy Blu-ray disc with more customized settings, just choose the Main Movie mode. As the following main interface shows, you can choose the titles, chapters, audio tracks, and subtitles you want to burn. You can also add external subtitles.
Step 3: Burn Blu-ray disc
Finally, select your optical drive as the output location and click "Start" to begin the burning process. You will see the progress window, and in some time the Blu-ray will be copied. Once the process is done, you can go ahead, and check out the copied Blu-ray at the output location, and you will find that it's done successfully.
Disclaimer: Copying Blu-ray discs may be restricted by law in your country. This article does not encourage or authorize burning copyrighted videos for commercial use. Make backups only of discs you own, for personal use, and check your local laws before proceeding.
FAQs
Which Blu-ray disc should I choose for burning?
When choosing a Blu-ray discWIKI for burning, you have a few options:
- BD-R (Blu-ray Disc Recordable): a one-time-use disc. You can write data to it, but you cannot erase or rewrite it.
- BD-RE (Blu-ray Disc Rewritable): you can write data, erase it, and rewrite it.
- BD-XL: These discs come in two types: BD-R XL (recordable) and BD-RE XL (rewritable). They offer capacities of 100 GB and 128 GB, larger than the standard 25 GB (single-layer) or 50 GB (dual-layer).
Is it possible to burn 3D Blu-ray movies?
Yes. First, choose software that supports your 3D format (e.g., side-by-side or top-and-bottom), such as DVDFab. Also prepare a Blu-ray recorder and a blank Blu-ray disc that supports 3D effect.
Remember to test your 3D Blu-ray movie on a compatible 3D Blu-ray player and TV to make sure the 3D format plays as expected.
Is it legal to burn a Blu-ray?
Generally, yes, as long as it is strictly for personal use. Creating a physical backup of a movie you legally own is widely considered an acceptable practice. However, distributing, selling, or sharing those burned Blu-rays is entirely illegal because it directly violates the copyright owner's exclusive distribution rights. Since copyright regulations vary, always double-check your local laws before proceeding.
Can I burn Blu-ray movies on macOS without extra software?
No. While macOS includes built-in disc burning features, these tools can only create basic data Blu-rays, not playable video discs. If you try to burn a movie file using the native Mac tools, a standard Blu-ray player will not be able to read it. To author a proper movie disc with functional menus, you must use dedicated Mac-compatible software like DVDFab Blu-ray Creator or Roxio Toast.
Conclusion
Burning Blu-rays from videos makes movie playback more stable and immersive. Picture and sound are more reliable, and you can organize the chapters and menus the way you like with advanced tools like DVDFab Blu-rat Creator. Once you learn how to burn Blu-ray, you can enjoy a home theater experience that many streaming options don't match.
 6 Best Blu-ray Authoring Software for Windows & Mac (2026 Review)By Diana Smith - Apr 30, 2026
![10 Best Blu-ray Burning Software for Windows & Mac [2026 Update]](https://r4.dvdfab.cn/upload/resource/top-blu-ray-burning-software-bCV5.jpeg) 10 Best Blu-ray Burning Software for Windows & Mac [2026 Update]By Wenny Yan - Feb 27, 2026
10 Best Blu-ray Burning Software for Windows & Mac [2026 Update]By Wenny Yan - Feb 27, 2026![5 Best Software to Burn MKV to Blu-ray on Mac and Windows [2026]](https://r3.dvdfab.cn/upload/resource/en/burn-mkv-to-blu-ray-kptz.jpg) 5 Best Software to Burn MKV to Blu-ray on Mac and Windows [2026]By Diana Smith - Nov 20, 2025
5 Best Software to Burn MKV to Blu-ray on Mac and Windows [2026]By Diana Smith - Nov 20, 2025