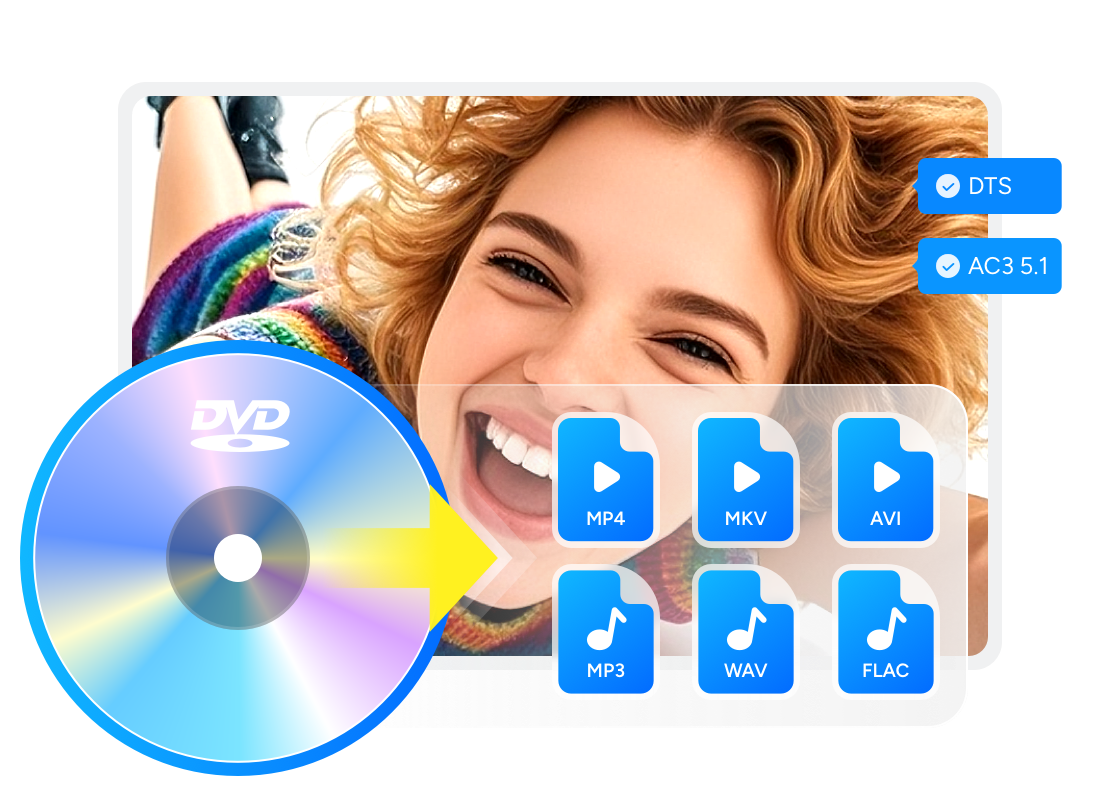
How to Rip DVD with HandBrake on Windows & Mac [Encrypted DVDs]
Summary: HandBrake is a capable free DVD ripper, but most commercial discs will not rip without adding libdvdcss first. I walk through the complete workflow on both Windows and Mac, with preset settings based on real test data. For titles using advanced schemes like ARccOS or X-Project DRM, the guide also covers when HandBrake falls short and a dedicated tool is the more practical option.
Table of Contents
HandBrake is free and capable, but one limitation trips up most users early: it cannot bypass the copy protection on commercially pressed DVDs without help. I tested it on Windows 11 and macOS Sonoma across both unprotected home recordings and commercial titles to map out the full picture. For discs with basic CSS protection, adding the libdvdcss library resolves the issue in most cases. Discs using more aggressive schemes such as Sony ARccOS or Disney X-Project DRM require a dedicated decryption tool, and this guide covers those scenarios as well. Below are complete step-by-step instructions for both Windows and Mac, along with fixes for the most common failures. For a broader comparison, the best free DVD rippers guide covers HandBrake alongside other options.
Before Ripping DVDs with HandBrake: What Should You Do?
HandBrake works reliably for homemade and unprotected DVDs. Commercial discs require extra preparation: the majority of store-bought titles use Content Scramble System protection, which HandBrake cannot decrypt on its own.
The library that addresses this is libdvdcss, released by the VideoLAN project. It allows compatible software to read and decrypt CSS-protected discs. Once placed in the correct location alongside HandBrake, it enables ripping of most CSS titles without additional configuration. The installation method differs between Windows and macOS, with specific steps for each platform covered below.
Discs using more advanced protection, such as Sony ARccOS or Disney X-Project DRM, are outside what libdvdcss handles. Those schemes require a dedicated DVD decryption tool before any ripper can access the content.
Download HandBrake DVD Ripper
Open the HandBrake DVD Ripper download page to find the latest stable release, available for Windows 10 and later, macOS 10.13 (High Sierra) or later, and Linux. Click the button that matches your operating system to begin the download.
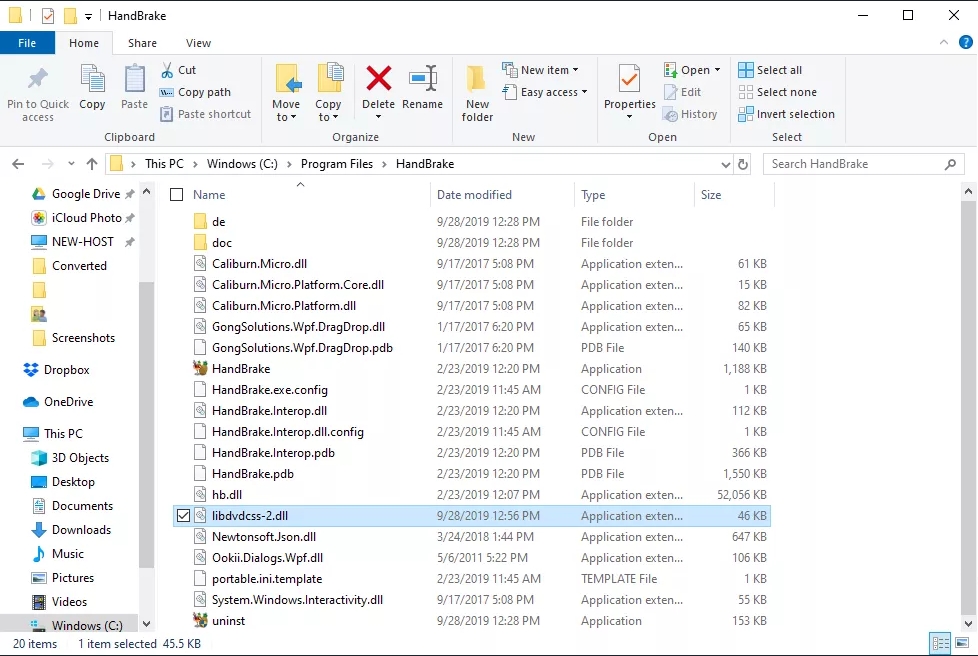
Install Libdvdcss for HandBrake on Windows
Installing libdvdcss on Windows requires placing the library file directly into HandBrake's installation folder. Here is how to do it:
- Step 1: Go to the official VideoLAN page to download the correct version of libdvdcss for your system. For most users on modern hardware, the 64-bit version is the right choice.
- Step 2: Rename the downloaded file to libdvdcss.dll.
- Step 3: Move the renamed file to HandBrake's installation directory. The default path for 64-bit Windows is C:\Program Files\HandBrake\.
- Step 4: Close and restart HandBrake if it is already running. It will detect the library on the next launch.
💡Detailed Tutorial on How to Download Libdvdcss HandBrake
Install Libdvdcss to HandBrake on Mac
macOS security policies prevent installing libdvdcss by dropping a file into a folder, as you would on Windows. Instead, install it through Terminal using the Homebrew package manager:
- Step 1: Open Terminal and paste the following command to install Homebrew.
/bin/bash -c "$(curl -fsSL https://raw.githubusercontent.com/Homebrew/install/HEAD/install.sh)"
- Step 2: When prompted, press Return and enter your administrator password to confirm.
- Step 3: The process will also install portions of Apple's Xcode developer tools. Approve the permission prompt when it appears.
- Step 4: Once the Homebrew installation is complete and you see the standard Terminal prompt again, enter the following command and press Return: brew install libdvdcss
- Step 5: Close Terminal when the installation finishes. HandBrake will now be able to read CSS-protected DVDs.
How to Rip DVD with HandBrake on Windows
In this section, I will use Windows 11 to demonstrate how to rip a DVD using HandBrake.
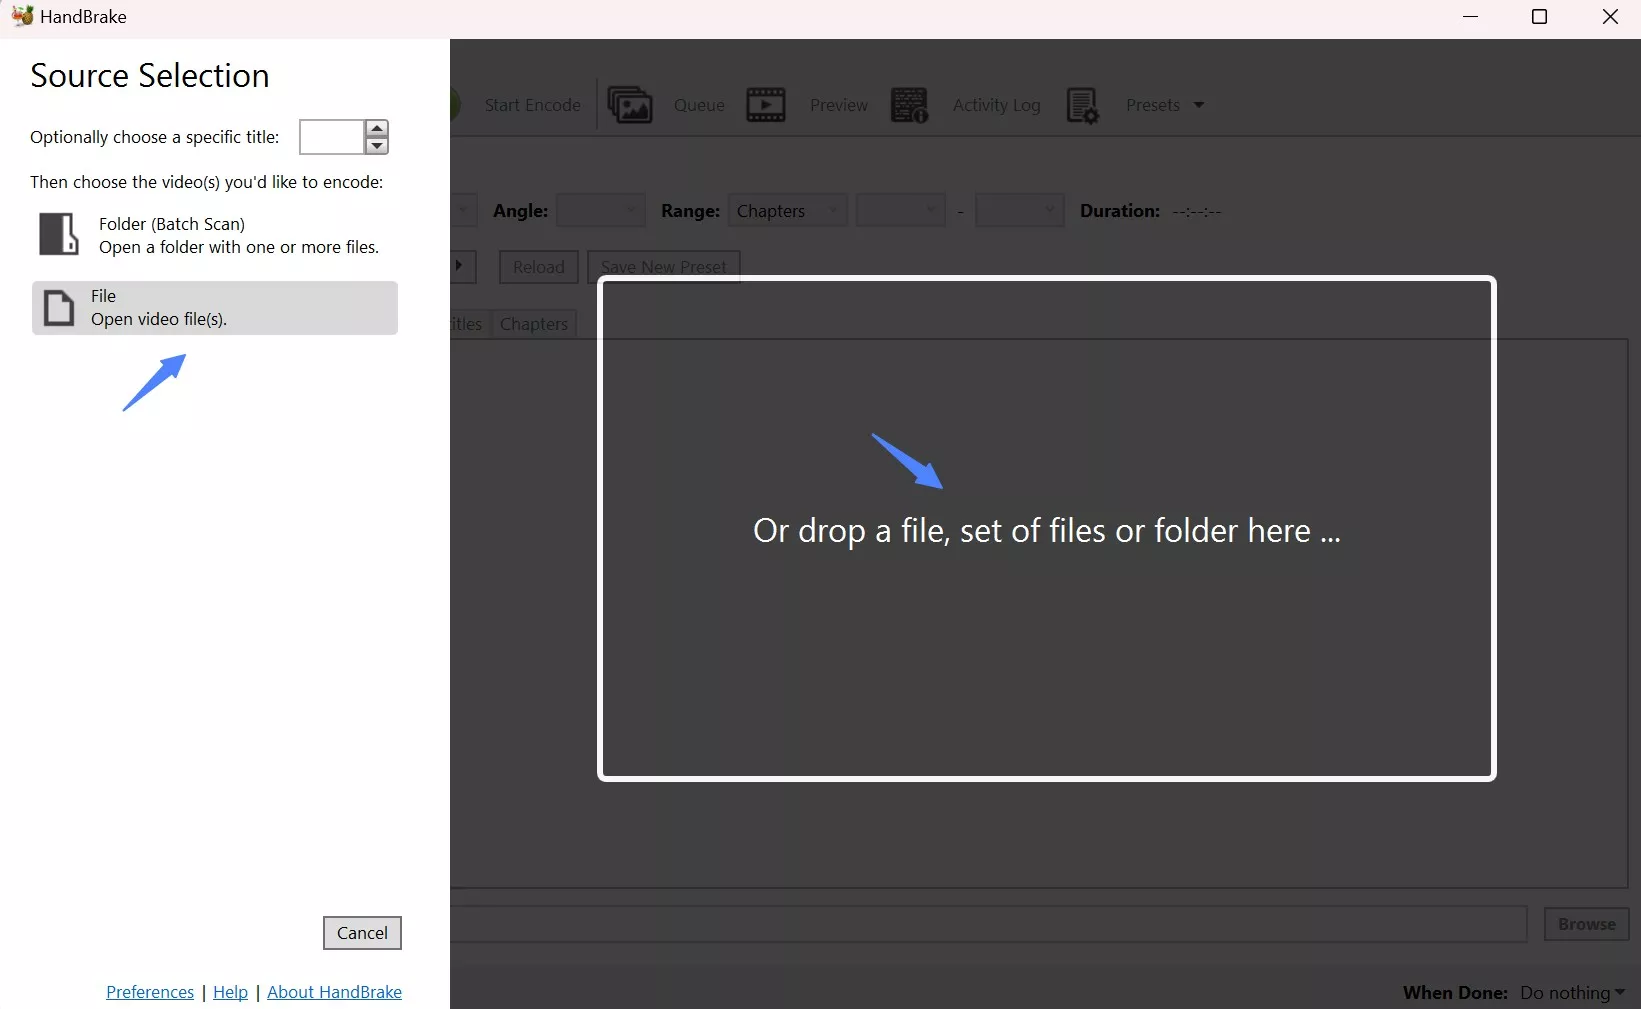
Step 1: Load the DVD you want to rip
Insert the DVD into your computer's DVD drive and launch HandBrake. Click Open Source in the top left corner and select the DVD drive. HandBrake will scan the disc contents, which can take several minutes depending on the disc.
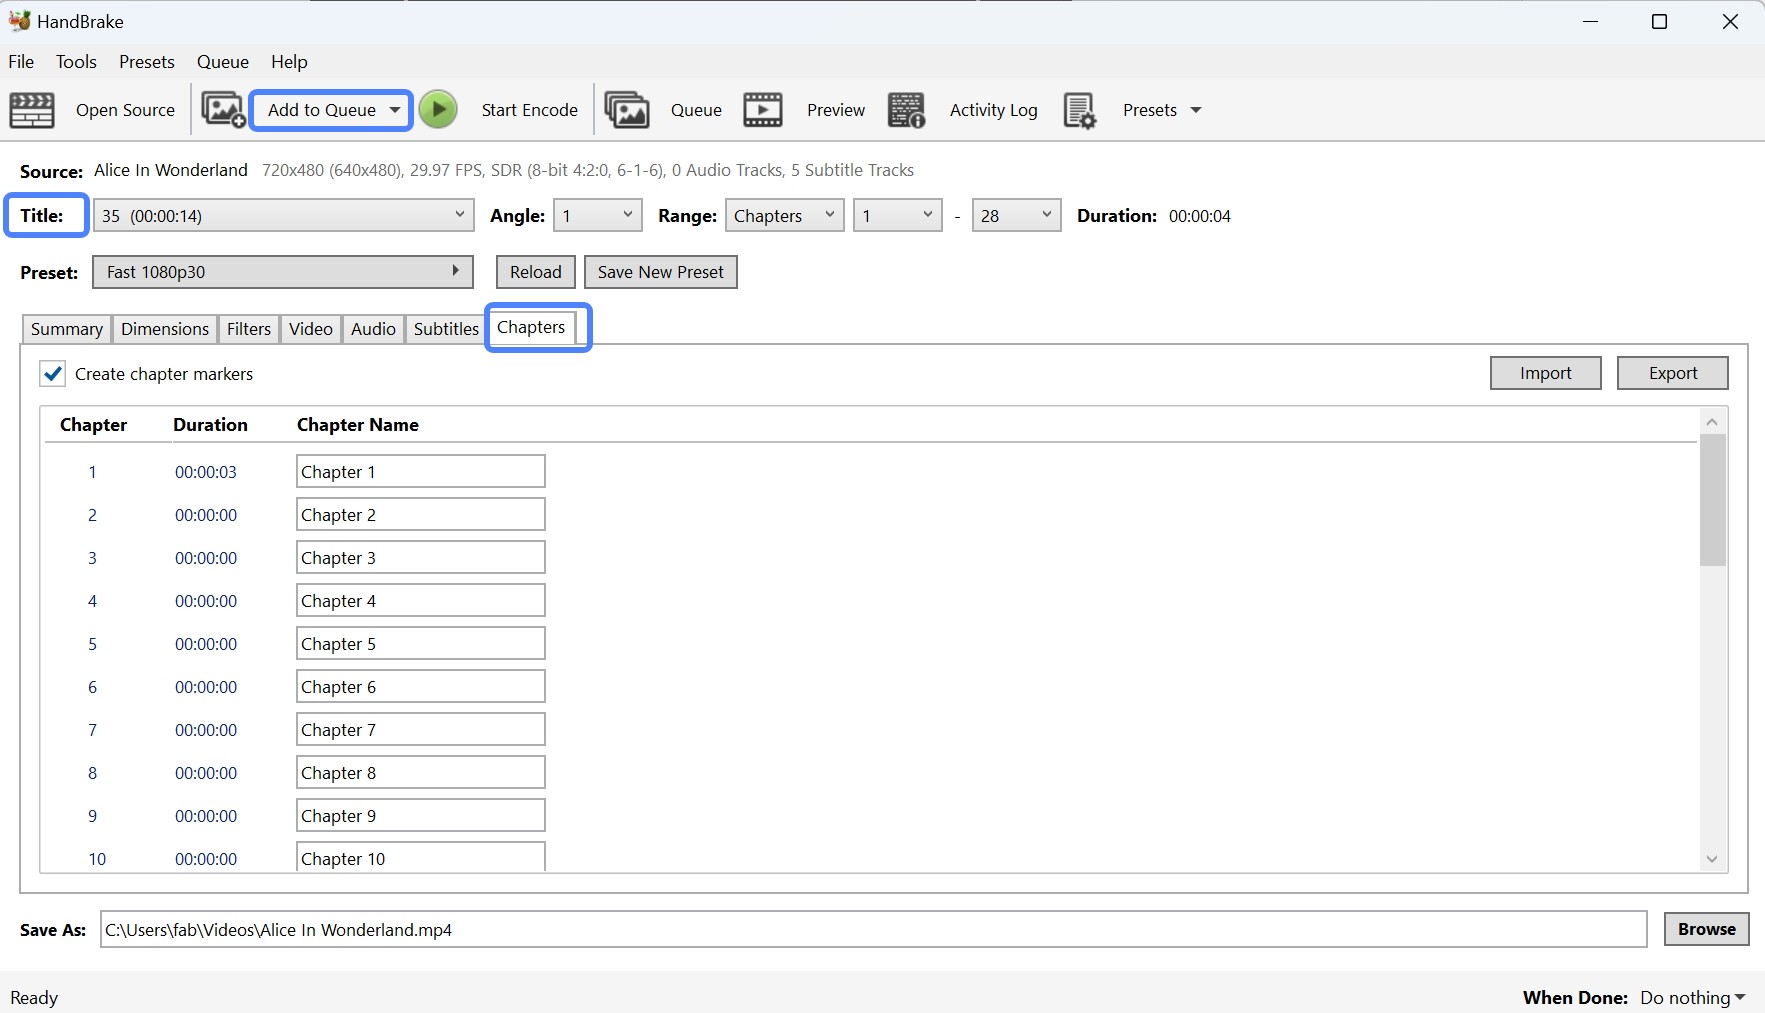
Step 2: Select the DVD title and chapter
HandBrake generally auto-selects the main movie, which is typically the longest title on the disc. You can verify this by checking the duration listed for each title. If you need to rip a specific title separately, select it from the Title menu and click Add to Queue. To rip only a portion of a title, enter the chapter range in the Chapters field.
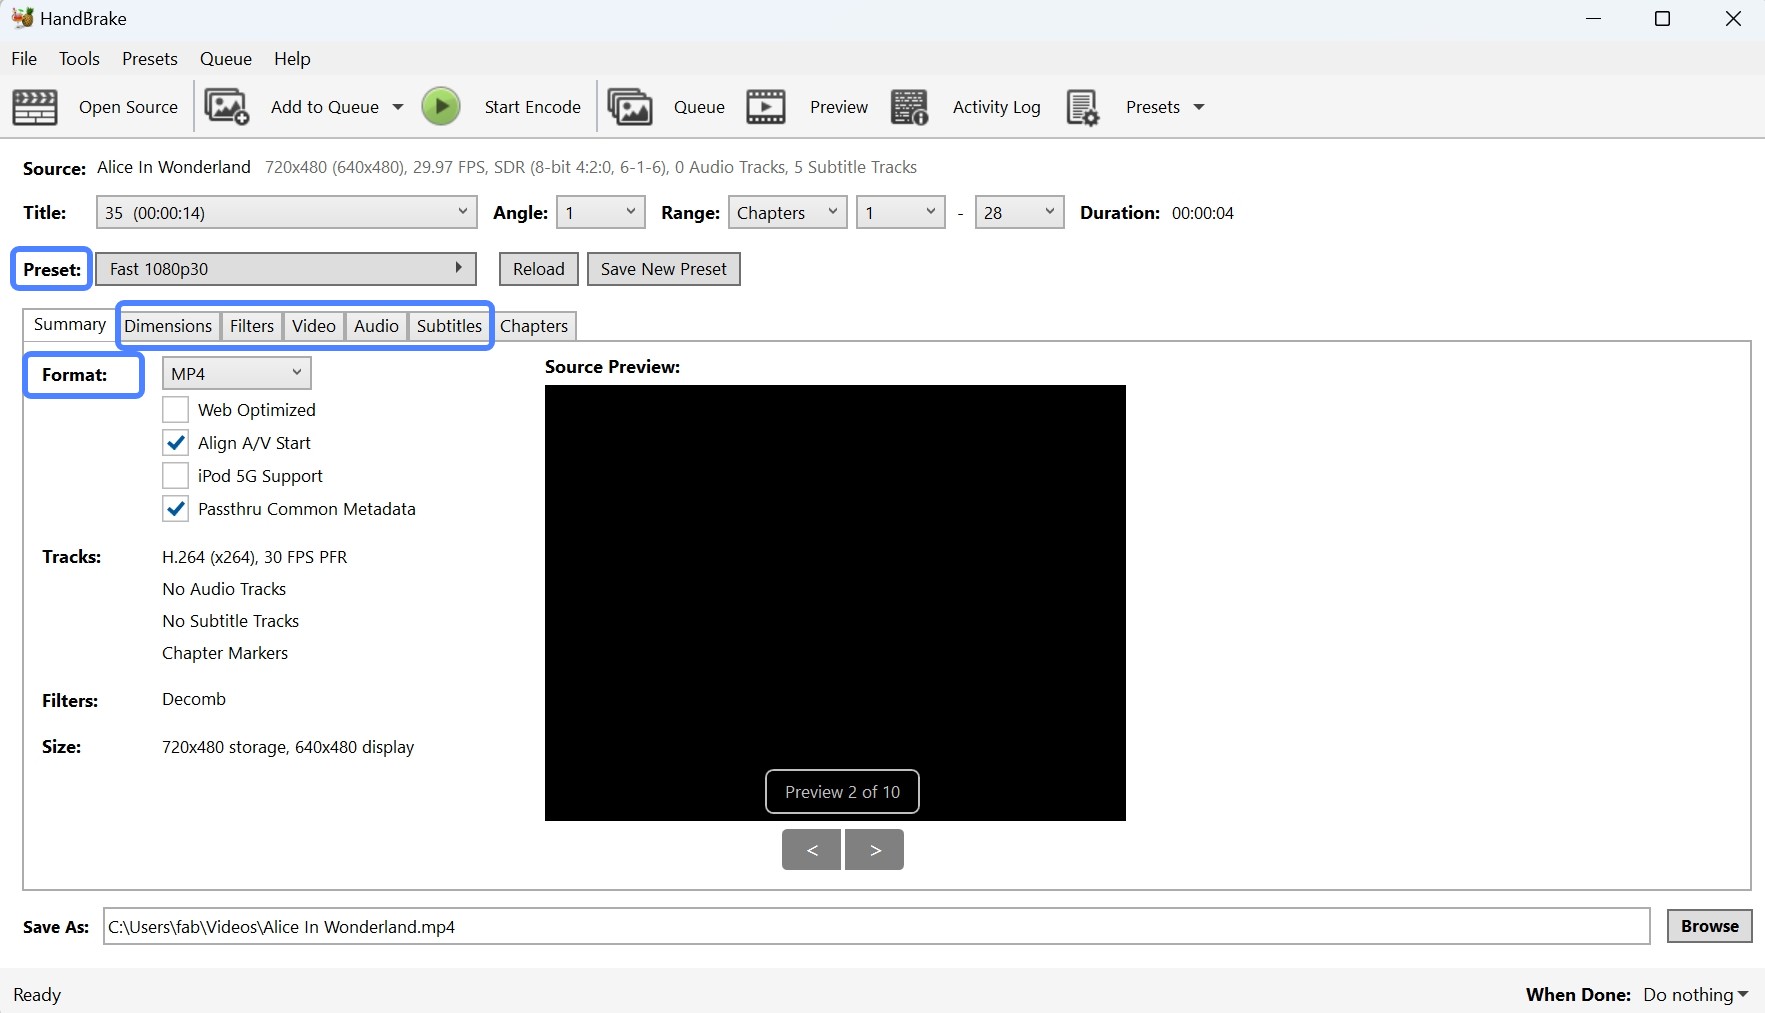
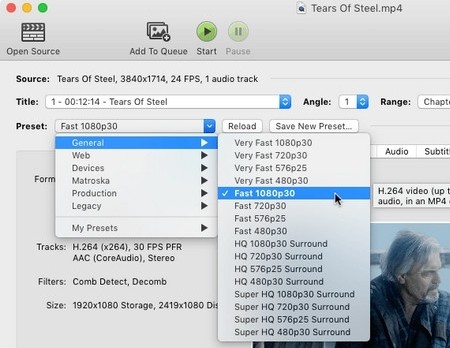
Step 3: Choose an output format
Choose a preset encoding option and your desired output format. HandBrake converts DVDs to MP4, MKV, and WebM, with a range of output presets available for common use cases.
You can also select subtitles and audio tracks, adjust video settings such as codec, frame rate, and quality, and apply additional editing options.
- OS: Windows 11
- CPU: AMD Ryzen 7 5700G with Radeon Graphics
- GPU: AMD Radeon 7900XT
| Preset | Video Codec | Audio Codec | Avg. Speed | Output Size | Time Taken |
| Very Fast 480p30 | H.265 | AAC | 305 FPS | 0.99 GB | 13 mins |
| Fast 480p30 | H.265 | AAC | 113 FPS | 790 MB | 30 mins |
| HQ 480p30 Surround | H.265 | AAC | 106 FPS | 1.67 GB | 46 mins |
Analysis:
- The Very Fast preset offers the highest speed and produces acceptable quality for quick rips. In testing, it finished about three times faster than Fast and nearly four times faster than HQ, though the output file is somewhat larger than the Fast preset.
- The Fast preset provides a practical balance between file size and encoding speed and works well for most situations.
- The HQ preset produces the largest file (more than double the size of Fast) and delivers the best video detail and surround audio. It works well for home theater setups but requires more time and storage space.
Step 4: Set the destination to save the ripped DVD
In the Save As section, enter the desired file name and select where to save the output file on your computer or external storage.
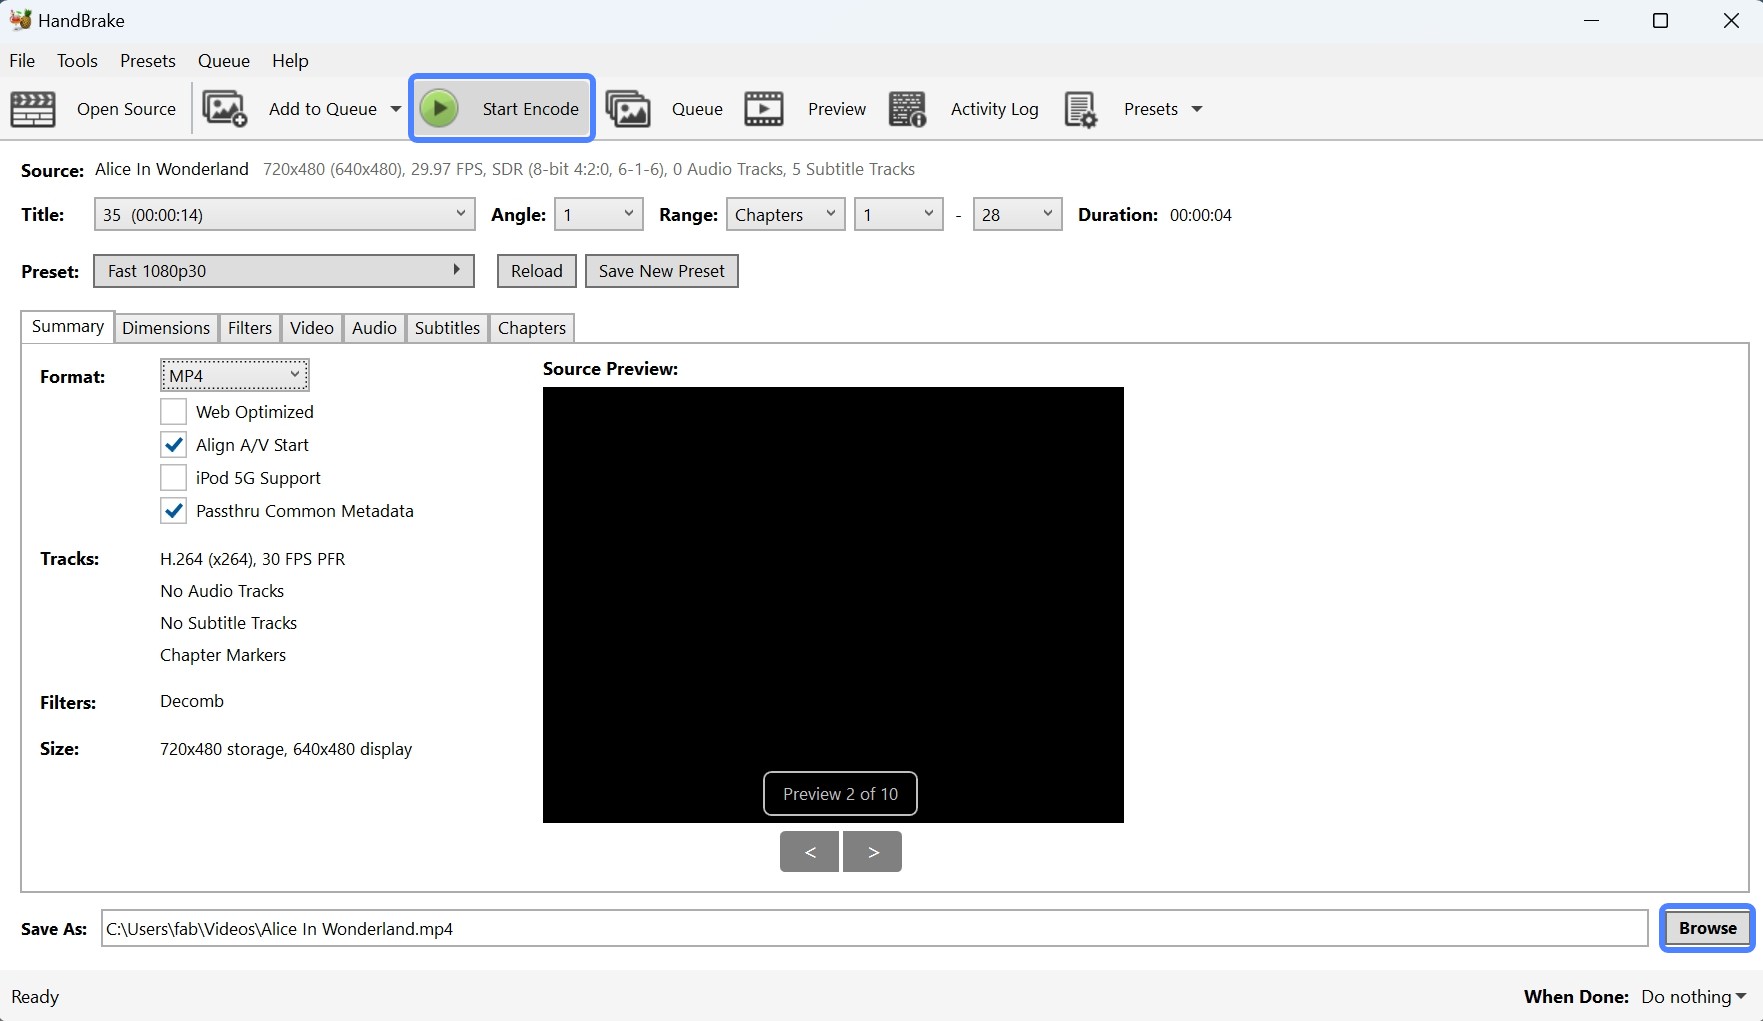
Step 5: Start to rip DVD with HandBrake
Click the Start Encode button at the top of the interface to begin ripping. The process time depends on the length of the content and your computer's performance. When it finishes, the ripped video will be saved in the folder you selected.
How to Rip DVD with HandBrake on Mac
Although HandBrake on macOS follows the same overall logic as the Windows version, the UI layout and a few options differ. Below is a Mac-specific walkthrough for ripping DVDs with HandBrake. Before starting, make sure you have already installed libdvdcss via Homebrew as described above, so HandBrake can read CSS-protected discs.
Step 1: Load the DVD source
Insert the DVD into your Mac's built-in drive or an external DVD drive, then launch HandBrake. In many cases, HandBrake will detect the disc automatically. If it does not, click Open Source, select your DVD drive manually, then click Open.
HandBrake will scan the disc and list available Titles. For a movie disc, scanning typically takes a minute or two. For TV box sets, it can take longer.
Step 2: Choose the correct title and chapters
Click the Title drop-down at the top. HandBrake usually auto-selects the longest title, which is often the main movie. For extras such as behind-the-scenes clips, select the specific title manually. For episodic DVDs, you will typically select each episode title one at a time.
To rip only part of a title, adjust the Range settings. You can set a chapter range in Chapters, or switch the range type to Seconds for more precise trimming.
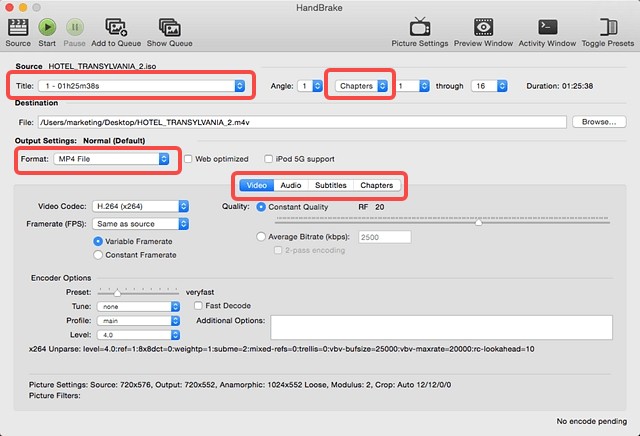
Step 3: Pick an output preset
Click Presets on the main window. HandBrake provides built-in presets for common scenarios. For 480p DVD ripping, a typical choice is General > Fast 480p30 or HQ 480p30 Surround. If you plan to watch on Apple TV or iPad, the matching Apple device preset under Devices will automatically optimize compatibility settings for those platforms.
Step 4: Fine-tune settings
In the middle panel tabs, you can customize the following details:
Output Settings: Choose the container format, typically MP4 or MKV.
Video:
- Video Encoder: Choose H.264 or H.265.
- Hardware acceleration: Selecting H.264 (VideoToolbox) or H.265 (VideoToolbox) uses hardware encoding and noticeably speeds up the process. On Apple Silicon Macs (M1, M2, or M3), VideoToolbox is available by default and typically reduces encoding time by more than half compared to software-only encoding.
- Framerate: Set to Same as source for most DVDs.
Audio: Keep the original 5.1 audio track if you want surround sound, or downmix to Stereo to save storage space.
Subtitles:
- Click Tracks > Add New Track.
- Choose Burned In if you want subtitles permanently embedded, or keep them as soft subtitles (a selectable track inside the container) if you want the option to toggle them during playback.
Step 5: Set the save location and start ripping
At the bottom, enter a file name in Save As. Click Browse to choose the destination folder for the output video.
If you are ripping one title, click Start to begin immediately. For multiple titles (common with TV disc sets), click Add to Queue to queue each job, then start the queue to process them in sequence.
Why HandBrake Won't Rip DVD? How to Fix It?
Common HandBrake DVD Ripping Errors and Solutions
Even though HandBrake is a capable free DVD ripper, it has known limitations. Below are the most common issues and how to address them.
HandBrake won't rip encrypted DVDs: If HandBrake fails to scan or rip commercial DVDs, the most common cause is that it cannot decrypt CSS or other protections on its own. Installing the libdvdcss library allows HandBrake to read CSS-protected discs in most cases.
💡 Tips: If the disc still cannot be ripped or the output is unplayable after installing libdvdcss, the disc likely uses a more advanced protection scheme. A dedicated DVD ripper designed for commercial discs will handle those cases.
Best Solution When HandBrake Won't Rip DVD
When HandBrake consistently fails on a particular disc after trying the options above, the issue is usually a protection type that libdvdcss does not cover. DVDFab DVD Ripper handles a broader range of DVD protection schemes, including ARccOS, X-Project DRM, and region-locked imports, and keeps its decryption database updated as new disc protections appear.
HandBrake with libdvdcss handles basic CSS protection well but does not address newer or more complex schemes. DVDFab DVD Ripper is designed specifically for those cases and handles them without additional configuration.
- Removes DVD copy protection including CSS, APS, RC, Sony DADC, ARccOS, and X-Project DRM
- Updated regularly to support newly released DVDs
- Rips DVDs to MP4, MP3, MKV, and 1,000+ other audio and video formats
- Supports both CPU and GPU acceleration for faster processing
- Includes a video editor and advanced settings for output customization
- Converts DVD video to 4K HDR10 content with NVIDIA AI Enhancer
How to Use DVDFab DVD Ripper to Rip Protected DVDs?
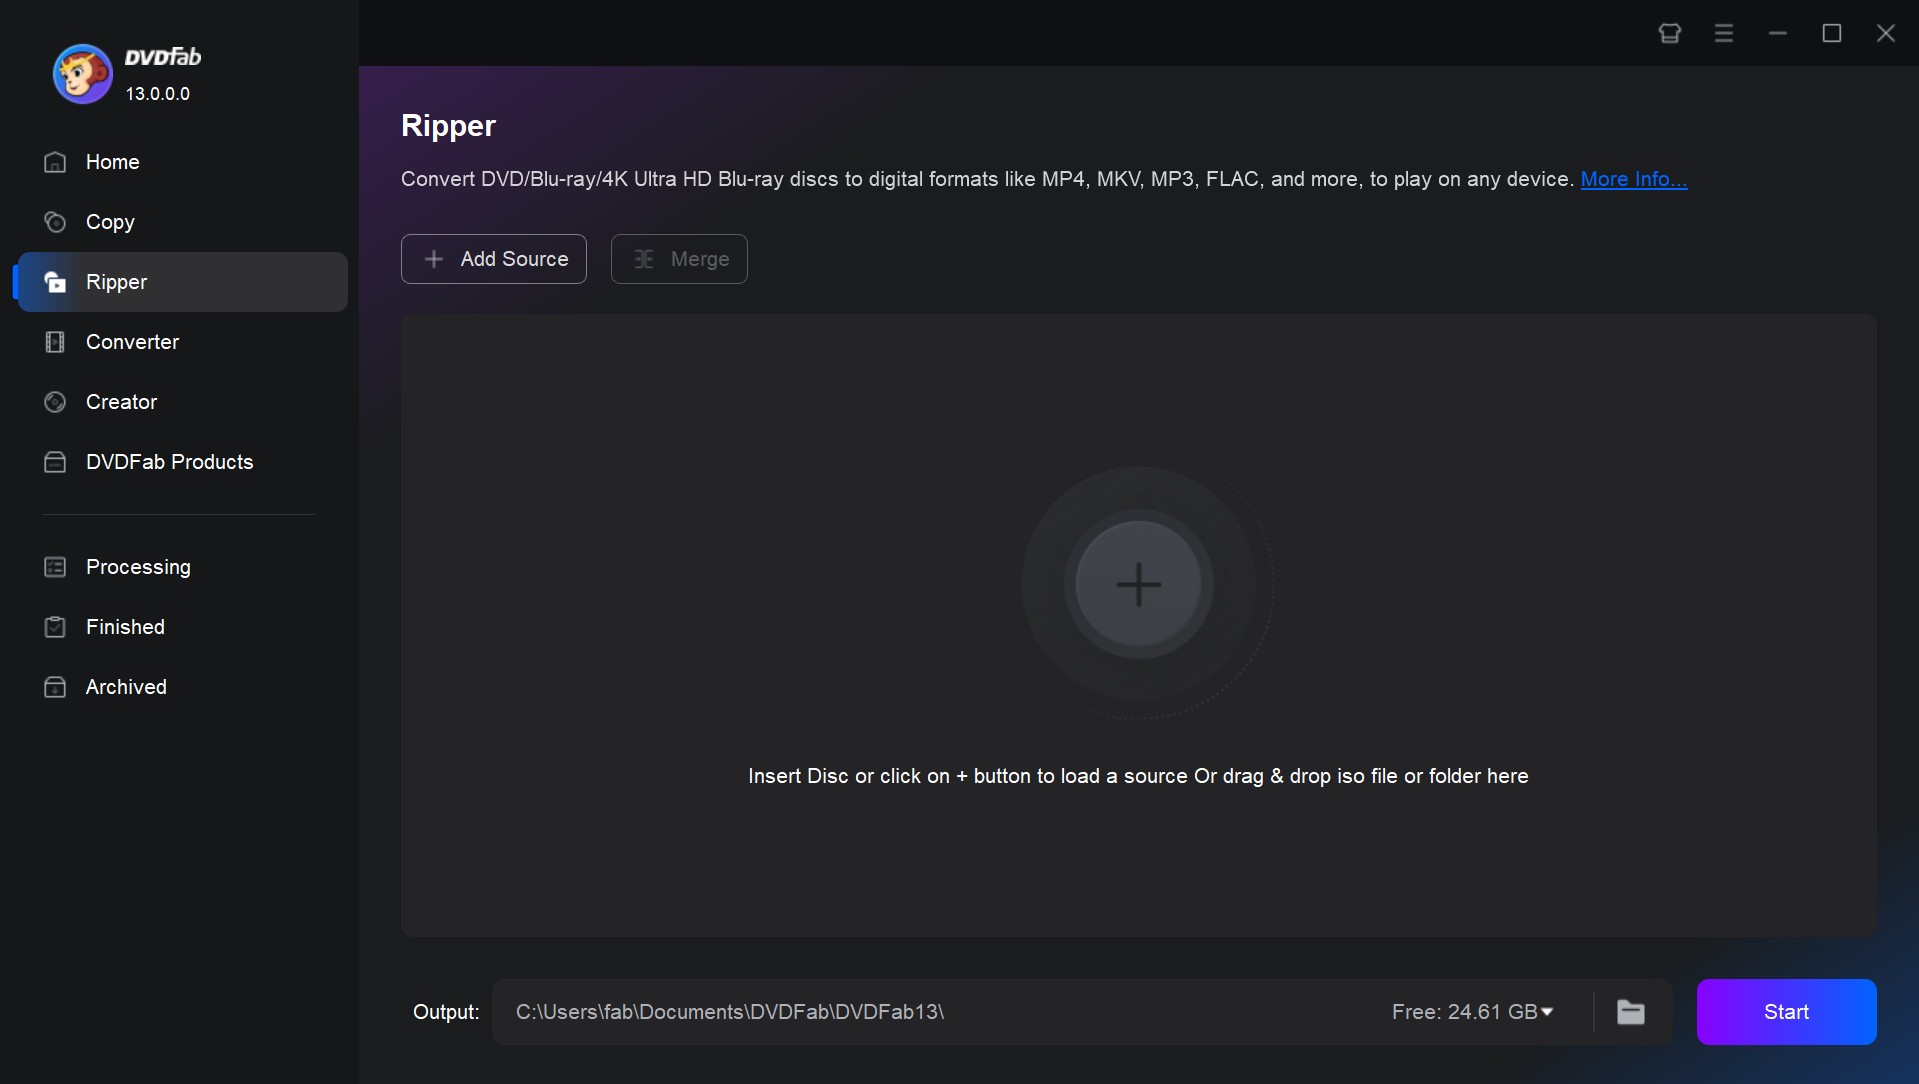
Step 1: Download the latest version of DVDFab and install it on your macOS or Windows system.
Step 2: Run the software and choose the Ripper option. Insert the DVD into the drive or use the Add button if it is already inserted. ISO files and folders can be dragged and dropped directly onto the main interface.
Step 3: Click Choose Other Profile to select the output video format. Available options include DVD to MP4, MKV, AVI, and others.
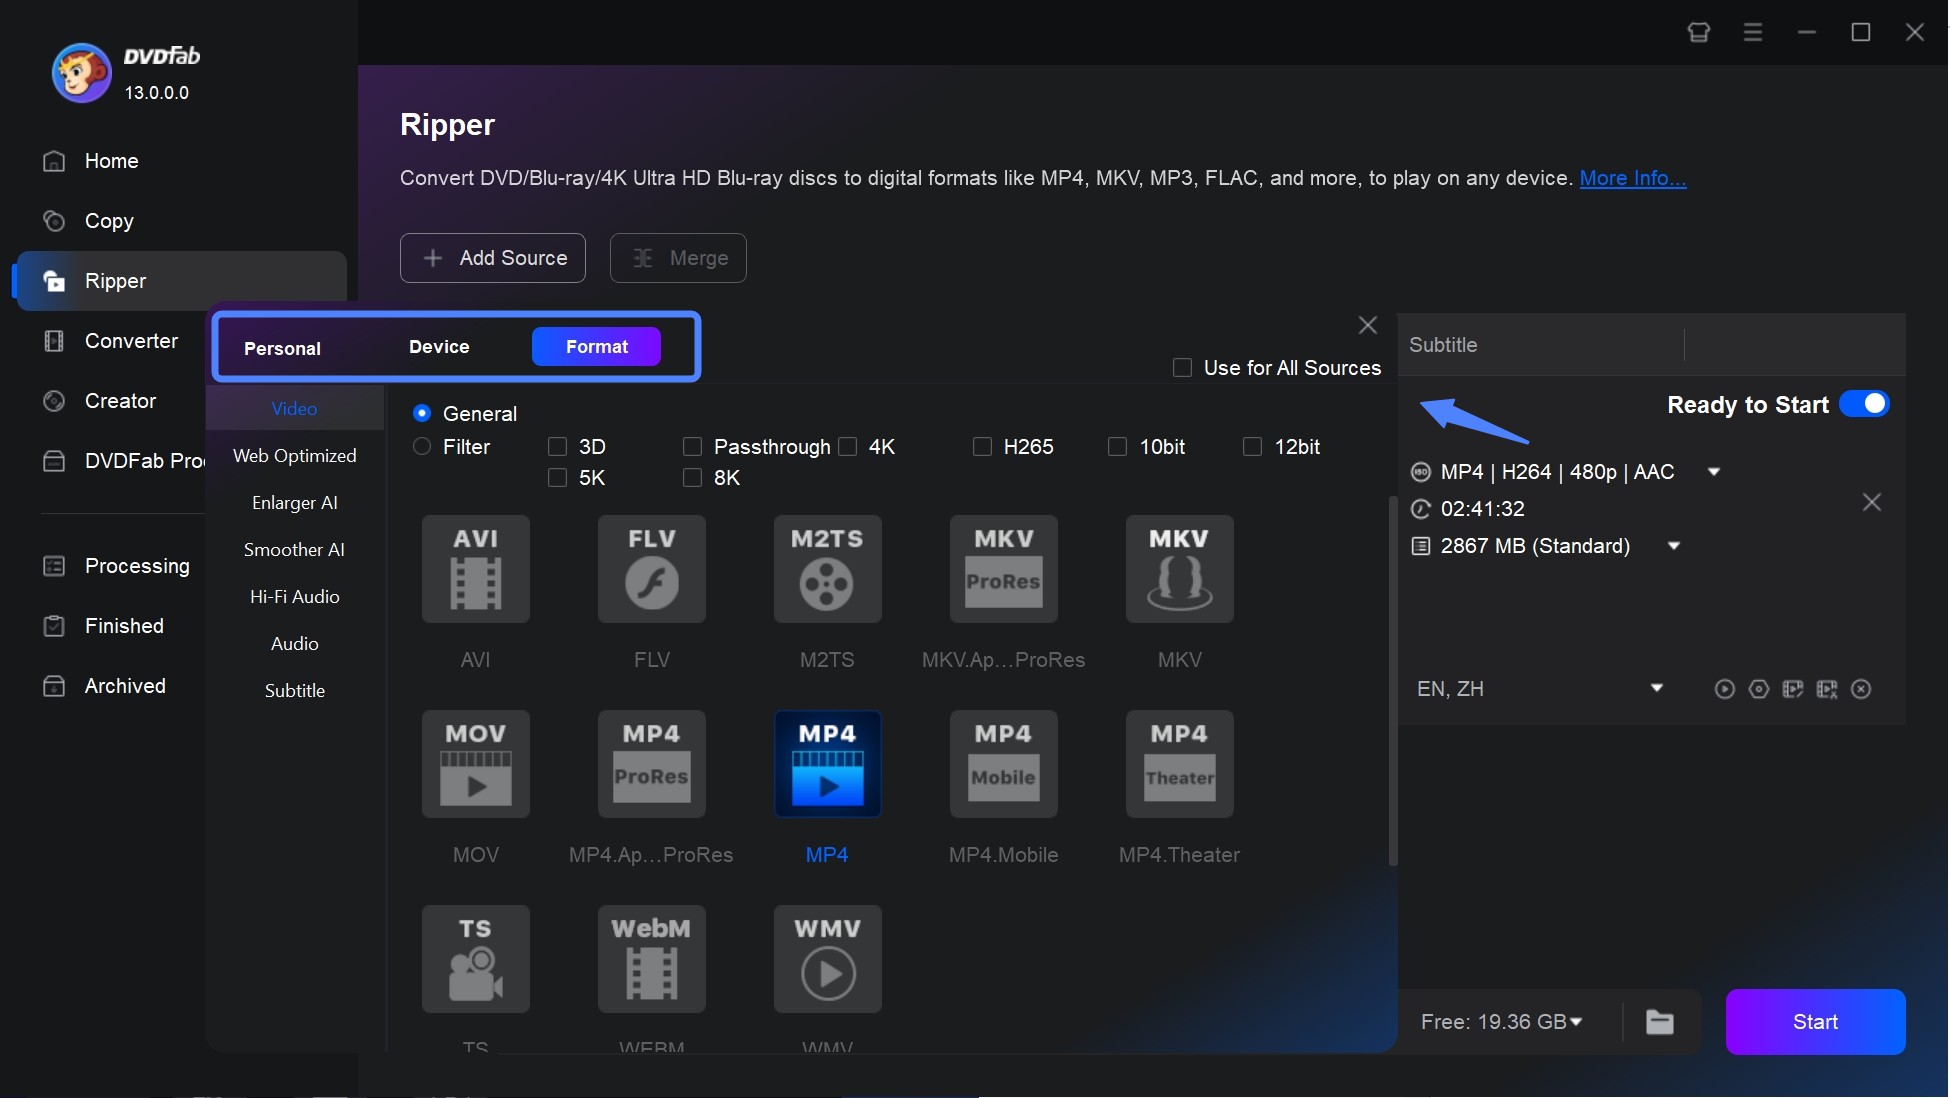
Additional options are available to select audio tracks and language, extract subtitles from DVD to SRT format, or add external subtitles. You can also adjust video and audio parameters using Advanced Settings and Video Edit.
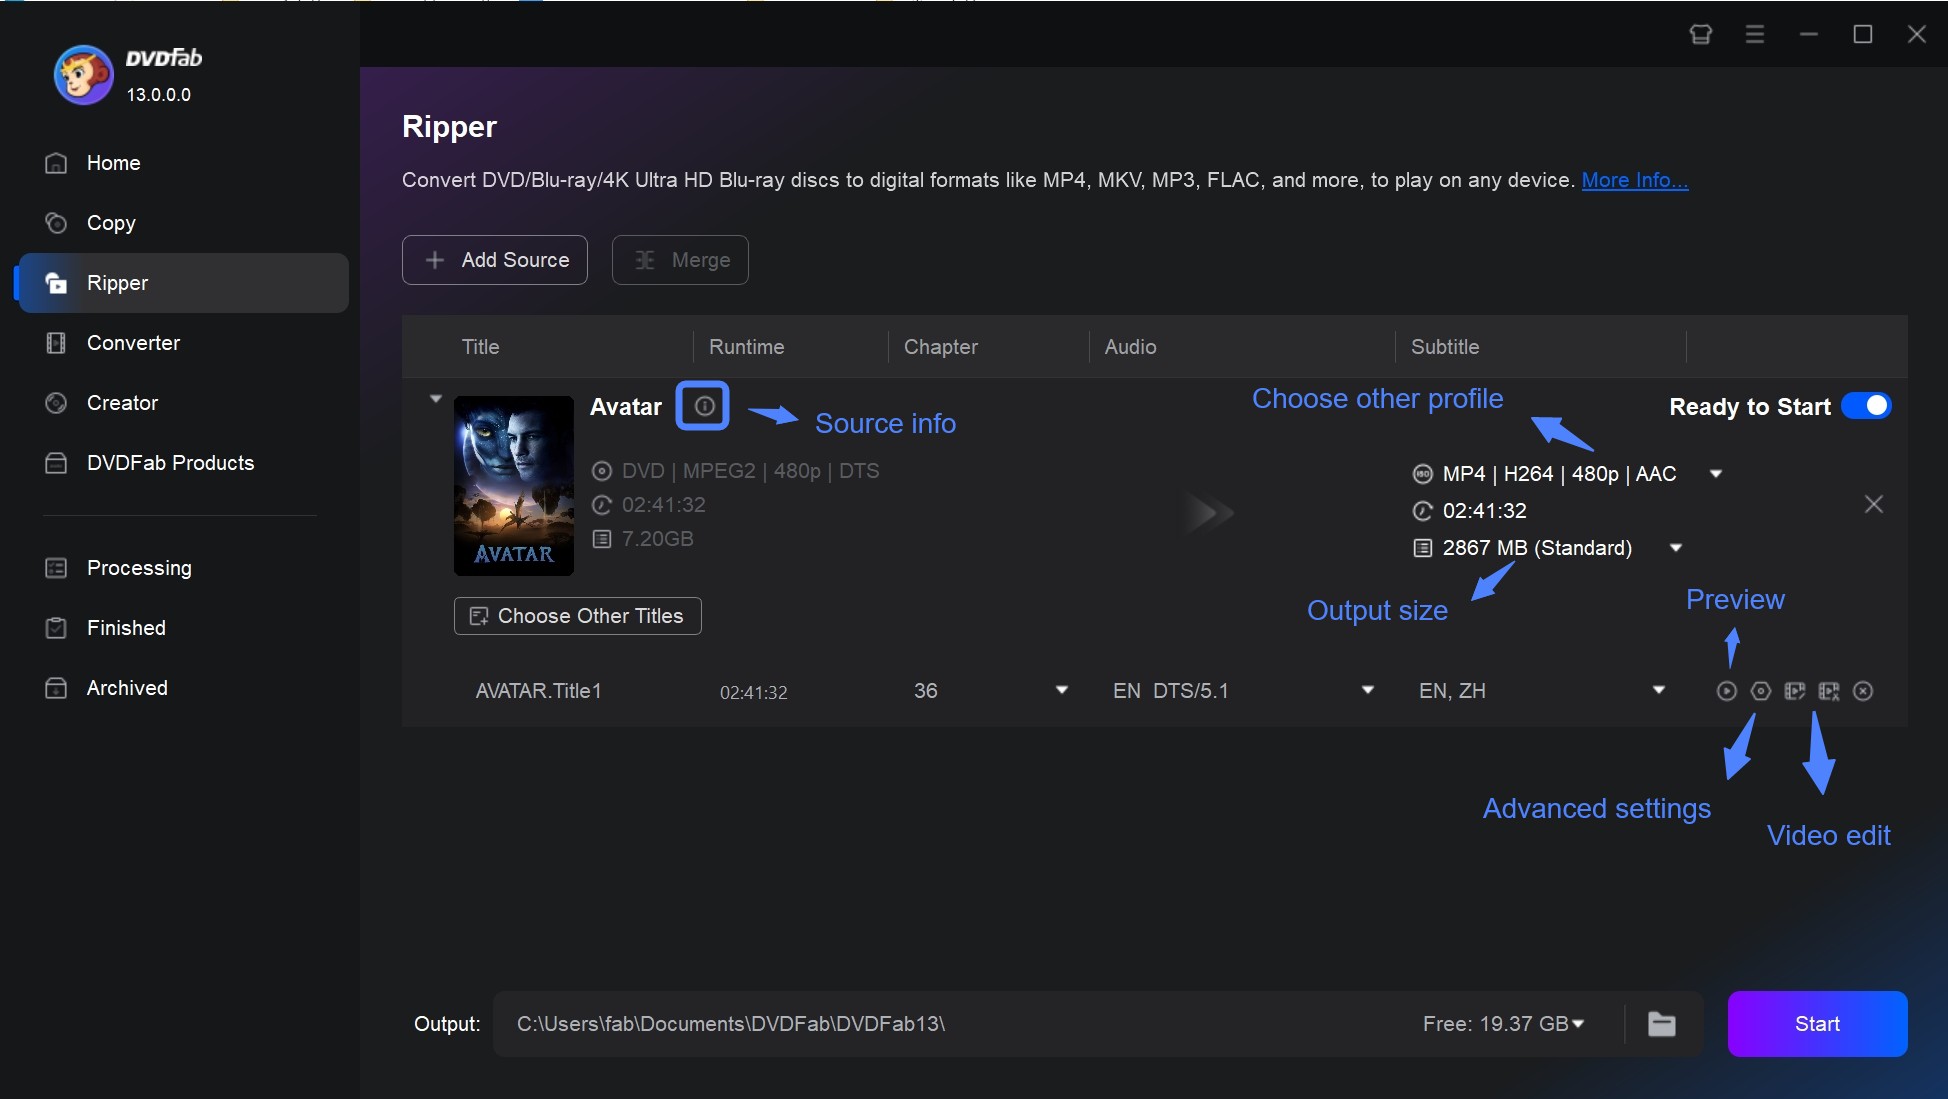
Step 4: Select the output folder and click Start to begin the conversion.
How to Choose a DVD Ripper for Your Situation
The right DVD ripping tool depends on what type of discs you are working with. The table below maps common scenarios to the most suitable option.
| Use DVDFab DVD Ripper when | Use HandBrake when |
|---|---|
| Ripping copy-protected DVDs or Blu-rays | Ripping homemade or unprotected DVDs |
| You need broader format support or video editing options | Doing basic video conversion on any platform |
| Working with discs that use advanced DRM like ARccOS or X-Project | Ripping on macOS or Linux with libdvdcss installed |
| You want a straightforward workflow without manual library setup | You are comfortable installing libdvdcss for CSS-protected discs |
| Batch processing multiple discs with varied protection types | / |
FAQs
Not on its own. HandBrake does not include built-in decryption. To rip CSS-protected commercial discs, you need to install the libdvdcss library separately. Once installed, HandBrake can process most CSS titles. Discs with more advanced protection, such as Sony ARccOS or Disney X-Project DRM, require a dedicated decryption tool even with libdvdcss in place.
Ripping time depends on the disc length, the preset you select, and whether you are ripping the full disc or specific titles. In our testing on a mid-range desktop, a standard DVD episode took 13 to 46 minutes depending on the preset. A full movie typically falls in the 30-minute to 2-hour range. Enabling GPU hardware acceleration (VideoToolbox on Mac, NVENC on Nvidia GPUs) can cut that time significantly.
Yes. In the Subtitles tab, you can select one or more subtitle tracks from the disc. HandBrake gives you the option to burn subtitles permanently into the video (burned in) or keep them as a separate selectable track inside the container (soft subtitles). The soft subtitle option requires MKV format and is useful if you want to toggle subtitles on or off during playback.
When HandBrake rips directly from a disc using libdvdcss, it handles decryption and video transcoding at the same time in a single pass. This combined workload is significantly slower than transcoding an already-ripped file. A common workaround in disc-ripping communities is to use MakeMKV first to create a lossless copy of the disc, then run that file through HandBrake separately. This two-step approach is often faster overall and leaves you with a lossless backup you can re-encode from if you change format preferences later.
Yes. For Plex and Jellyfin, MKV or MP4 with H.264 video and AAC or AC3 audio is broadly compatible across devices. HandBrake's Fast 480p30 or HQ 480p30 Surround preset covers most DVD ripping scenarios for home server use. If you want Plex to direct-play the file rather than transcode it, choose MKV as the container and keep the original audio track. This preserves 5.1 surround audio, which Plex can pass through to compatible receivers.
Conclusion
HandBrake works well for unprotected DVDs and for CSS-protected commercial discs when libdvdcss is installed. It is free, cross-platform, and produces reliable output with the right preset settings, as the test data in this guide demonstrates.
The limitation becomes clear with discs that use newer protection schemes. A dedicated decryption tool like DVDFab DVD Ripper provides broader protection coverage without requiring additional manual setup.
The comparison table above maps out which tool fits which scenario. If your collection is a mix, starting with HandBrake for simpler discs and using a dedicated tool for the ones that fail is a practical approach that keeps costs low while still handling the full range.
 How to Convert ISO to MKV: Lossless Remux vs H.265 Re-encodeBy Wenny Yan - Jun 3, 2026
 How to Compress ISO Files: 4 Methods for Storage, Playback, and ArchivesBy Diana Smith - Jun 2, 2026
![How to Convert DVD to AVI Free and Easily [2026 Updated]](https://r6.dvdfab.cn/upload/resource/en/dvd-to-avi-QL6y.jpg) How to Convert DVD to AVI Free and Easily [2026 Updated]By Diana Smith - Jun 2, 2026
How to Convert DVD to AVI Free and Easily [2026 Updated]By Diana Smith - Jun 2, 2026![Top 12 DVD to MP4 Converter Software for Win & Mac [2026 Tested]](https://r3.dvdfab.cn/upload/resource/convert-dvd-to-mp4-p2X3.jpeg) Top 12 DVD to MP4 Converter Software for Win & Mac [2026 Tested]By Diana Smith - May 22, 2026
Top 12 DVD to MP4 Converter Software for Win & Mac [2026 Tested]By Diana Smith - May 22, 2026