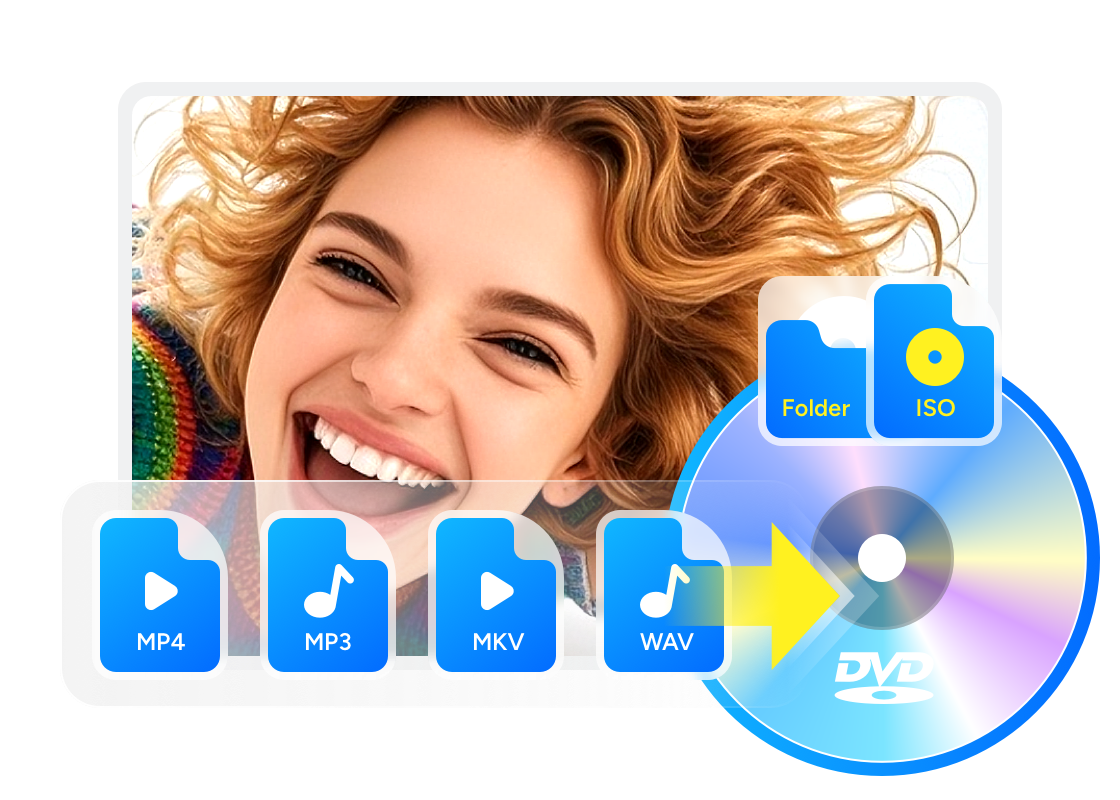
How to Burn DVD with VLC Media Player (Plus 3 Easier Alternatives)
Summary: VLC converts video to DVD-compatible MPEG-2 but cannot build a DVD-Video structure or burn a disc on its own. This guide covers the workflow that pairs VLC with DVD Flick and ImgBurn to finish the disc, VLCs real pros and cons, and three all-in-one alternatives with their platform support clarified for Mac, Windows, and Linux users, plus an expanded FAQ covering hardware playback compatibility.
VLC can convert a video to the DVD-compatible MPEG-2 format, but it cannot build a DVD-Video structure or write that file to a blank disc. That is the short answer to whether VLC burns DVDs: it handles one part of the job and stops there, which surprises anyone who expects a single Convert / Save click to end with a finished disc.
I tested the full workflow, from VLC's conversion settings through to a playable DVD, and mapped out exactly which extra tools close the gap. Below, I walk through that process step by step, flag where the community-recommended freeware has aged, and cover three alternative programs that handle conversion and burning in one pass. If your goal is only to watch the video on a computer rather than hand someone a physical disc, there is also a shortcut: skip the burn entirely and just play the converted file or VIDEO_TS folder directly in VLC.
How to burn DVD with VLC media player
Convert Video to DVD-Compatible MPEG-2 with VLC
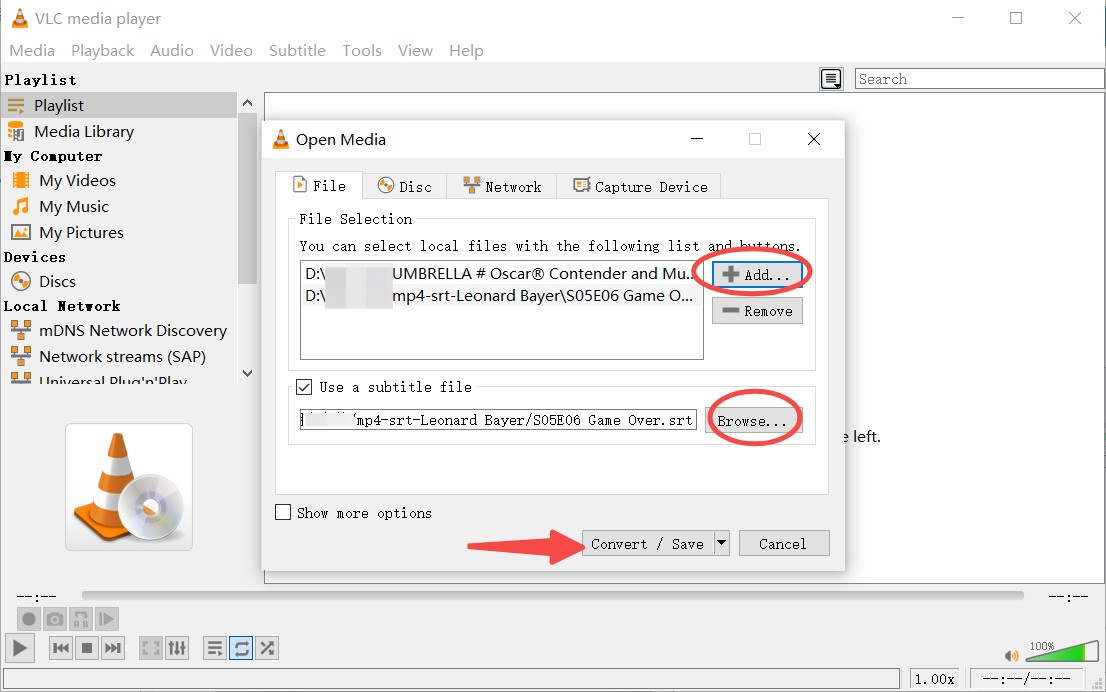
Step 1: Open VLC and open the "Media" menu, selecting "Convert / Save".
Step 2: In the Open Media window, add the video files you want to include for the DVD.
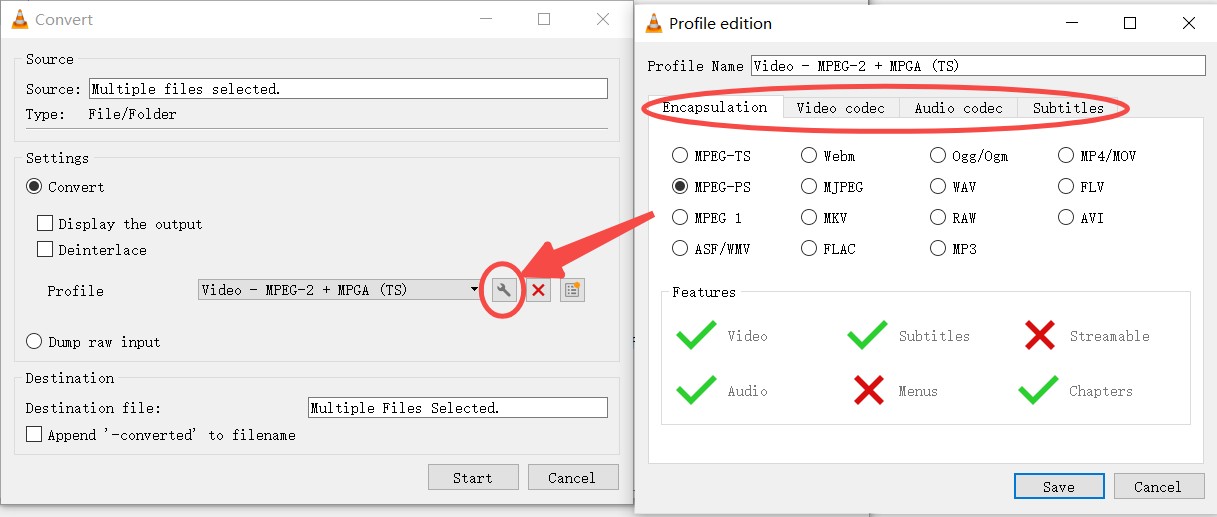
Step 3: Click "Convert / Save" again, then open the Profile edition window, and choose MPEG-PS as "Encapsulation". Adjust the video codec and audio codec if needed.
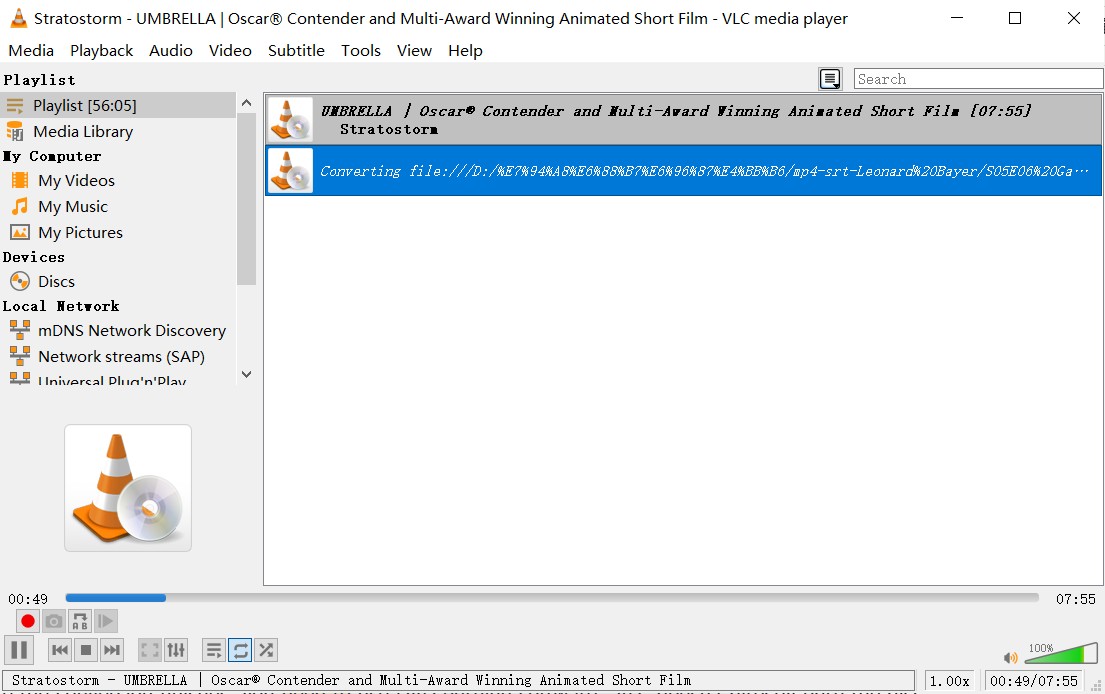
Step 4: Save the settings, go back to the previous window, and click Start. Then wait for VLC to complete the process.
Use Additional Tools to Burn the MPEG File to a DVD
VLC cannot build a DVD-Video structure or burn a blank disc, so a second program has to take the converted MPEG-2 file the rest of the way. DVD Flick is the tool most how-to guides point to for this step: it turns the file into a proper DVD layout and hands the project to ImgBurn to finish writing the disc. The official DVD Flick site is still online and the download still works, but the project has not shipped a new release in years, and its copyright notice has not moved past 2021. That does not stop it from working on most current systems, though it is worth testing your output on the DVD player you actually plan to use before you rely on it for anything important.
Step 1: Download DVD Flick from the official site, install it, and open the program. Make sure you also install ImgBurn when prompted.
Step 2: Click "Add title" and select the MPEG-2 file created by VLC. DVD Flick accepts other formats as well, but using an already converted MPEG-2 file reduces the amount of re-encoding needed. You can rearrange titles if you plan to include more than one video on the disc.
Step 3: Open "Project Settings" then "Video" and confirm that the format matches your region. You can also choose:
- Target size (4.7GB for single-layer DVDs)
- Encoder priority (faster vs. higher quality)
- Bitrate settings if you need to fit longer videos
These options help prevent issues like oversized projects or playback problems on older DVD players.
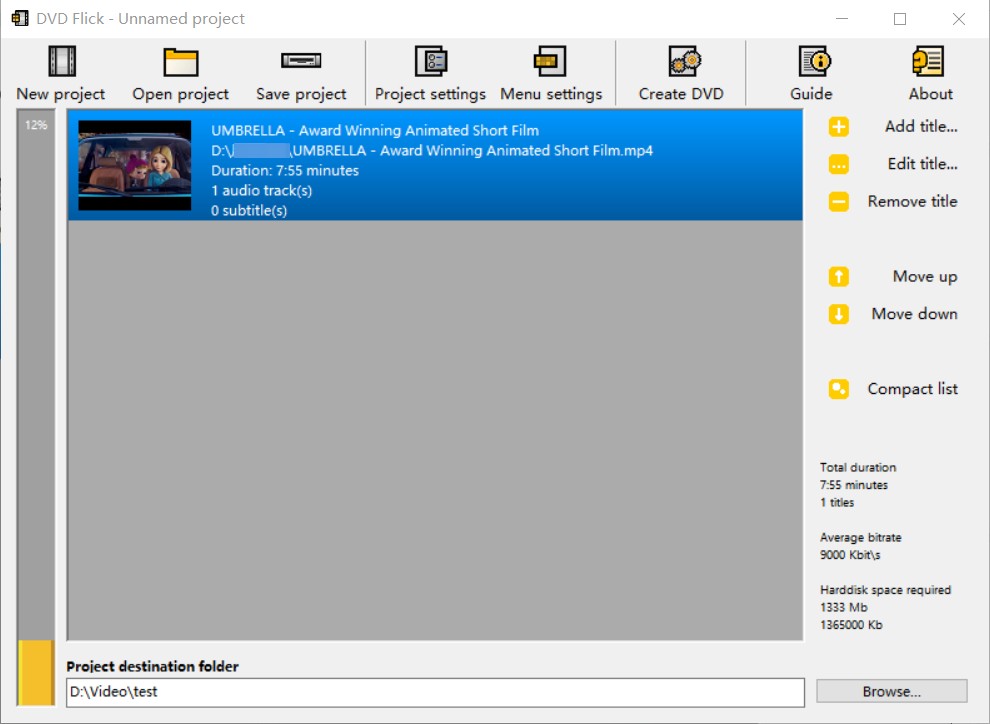
Optional: DVD Flick supports basic templates. Go to Menu Settings, enable a menu, and choose a style. While not mandatory, menus make navigation easier if you include multiple videos.
Step 4: Click "Browse" next to Project destination folder and pick a location with enough space. DVD Flick will create a full VIDEO_TS folder here, including IFO, BUP, and VOB files required by DVD-Video. Press "Create DVD".
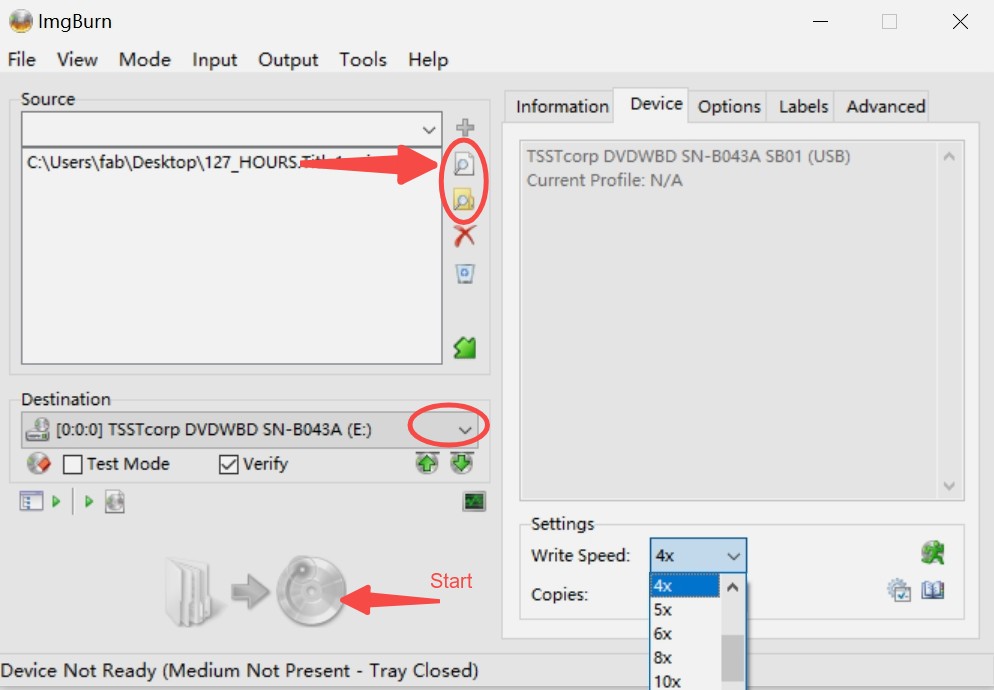
Step 5: ImgBurn will open with the VIDEO_TS folder already loaded. Before burning:
- Select your DVD burner in Destination
- Insert a blank DVD-R
- Set Write Speed to 2x or 4x for fewer burning errors
Finally, click Write to burn the disc.
Pros and Cons of Using VLC DVD Burner
VLC is easy to access and works well as a video player, but its role in DVD creation is limited. Before relying on it for disc projects, it helps to know where it performs well and where it falls short.
- Supports many input and output formats, including conversion to MPEG-2 for DVD use.
- Lets you embed external subtitle files before conversion.
- Free, open source, and compatible with multiple platforms.
- No editing or DVD authoring tools such as chapters, menus, or layout control.
- Cannot build a DVD-Video structure or burn a disc without extra software.
- When converting to MPEG-2, VLC may repeatedly prompt you to overwrite existing files.
One gap worth flagging before you burn anything: a disc that plays fine through VLC or another software player is not proof it will play on a standalone DVD player. A user account shared on Reddit described a homemade disc that opened without issue in VLC but would not read at all in an older library DVD player, an incompatibility that only showed up once the disc reached actual hardware. If the disc needs to work in a set-top player or a car stereo, test it there before you assume the conversion and burn were successful.
Best Alternative to VLC for Burning DVDs
Burning a DVD through VLC requires several extra steps, so many users prefer a tool that can handle conversion and burning in a single pass. Platform support varies across the three options below: DVDFab DVD Creator runs on Windows and macOS, DVDStyler covers Windows and Linux, and CDBurnerXP is Windows only. If you're on a Mac, DVDFab DVD Creator is the only one of the three built for you.
1. DVDFab DVD Creator (Windows and macOS)
DVDFab DVD Creator is the only one of the three alternatives covered here built for both Windows and macOS. Rather than treating conversion and disc authoring as two separate steps the way the VLC workflow does, it handles both inside one program, from adding source files through to burning the finished disc. That single-program approach is the main reason people switch to it instead of stringing together separate free tools.
- • Disc Compatibility: Supports standard DVD-5 and DVD-9 discs.
- • Wide Format Support: Accepts more than 200 video formats for input.
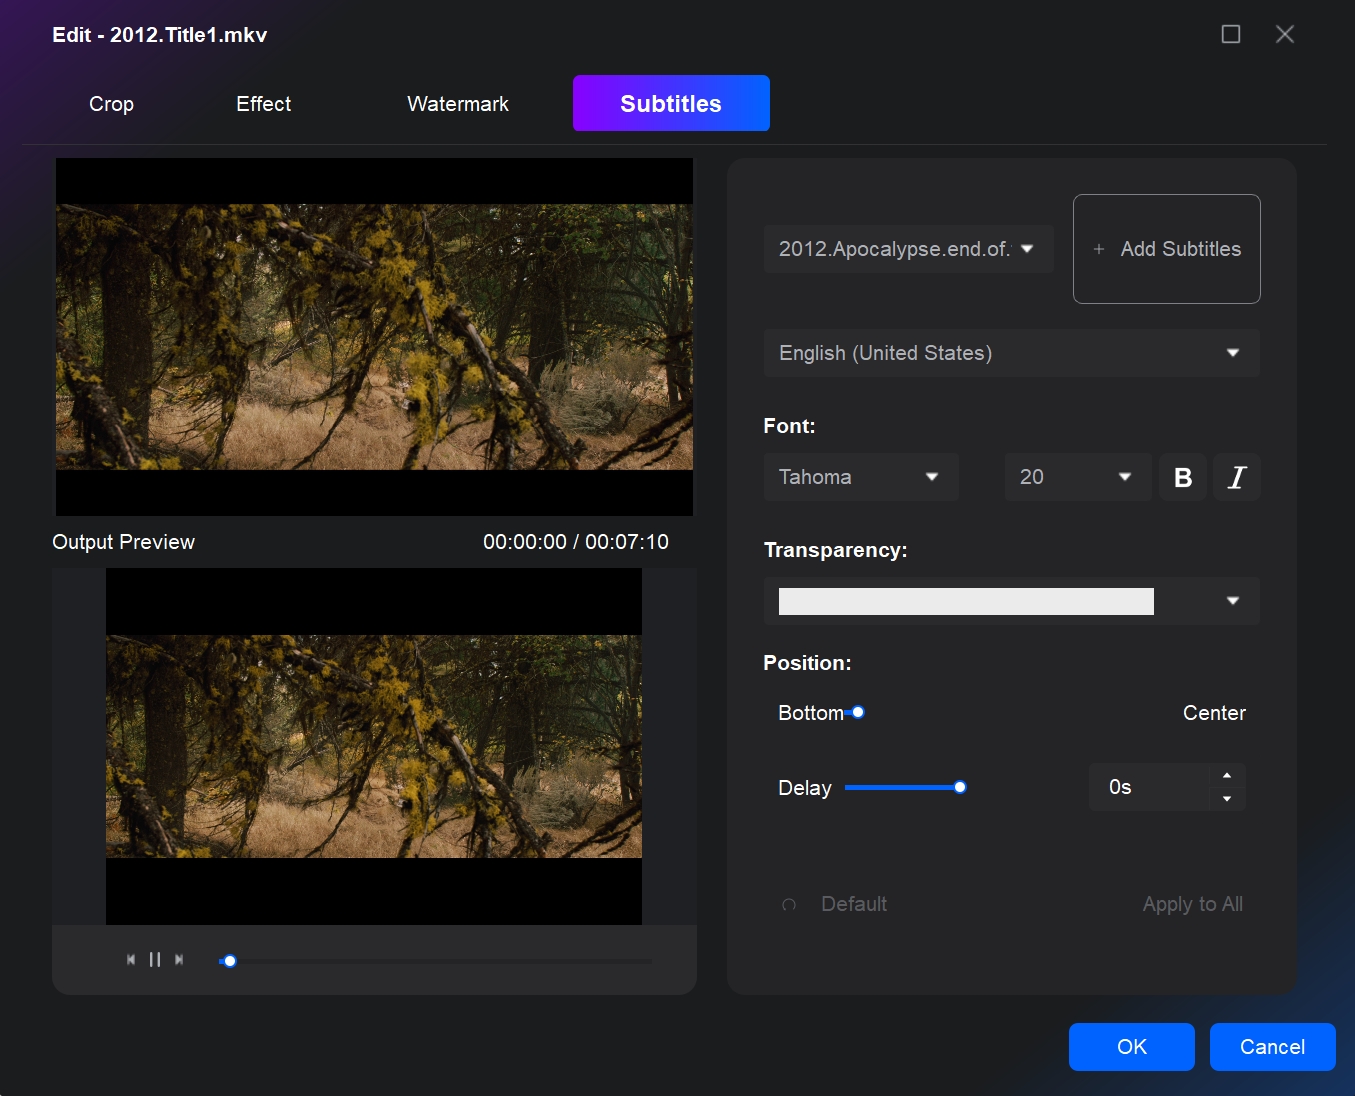
- • Allows adding external subtitles in formats such as *.srt *.smi *.ass *.ssa.
- • Menu Templates: Includes preset menus with adjustable backgrounds and button layouts.
- • Basic Editing Tools: Offers trimming, cropping, and other simple edits before burning.
How to burn a DVD with DVDFab DVD Creator
Step 1: Install DVDFab (the current version is DVDFab 13, which has picked up AI-based quality enhancements and support for newer Pioneer Blu-ray drives through its 2026 updates) on your computer.
Step 2: Open the program and switch to the Creator module. The default mode should be DVD Creator.
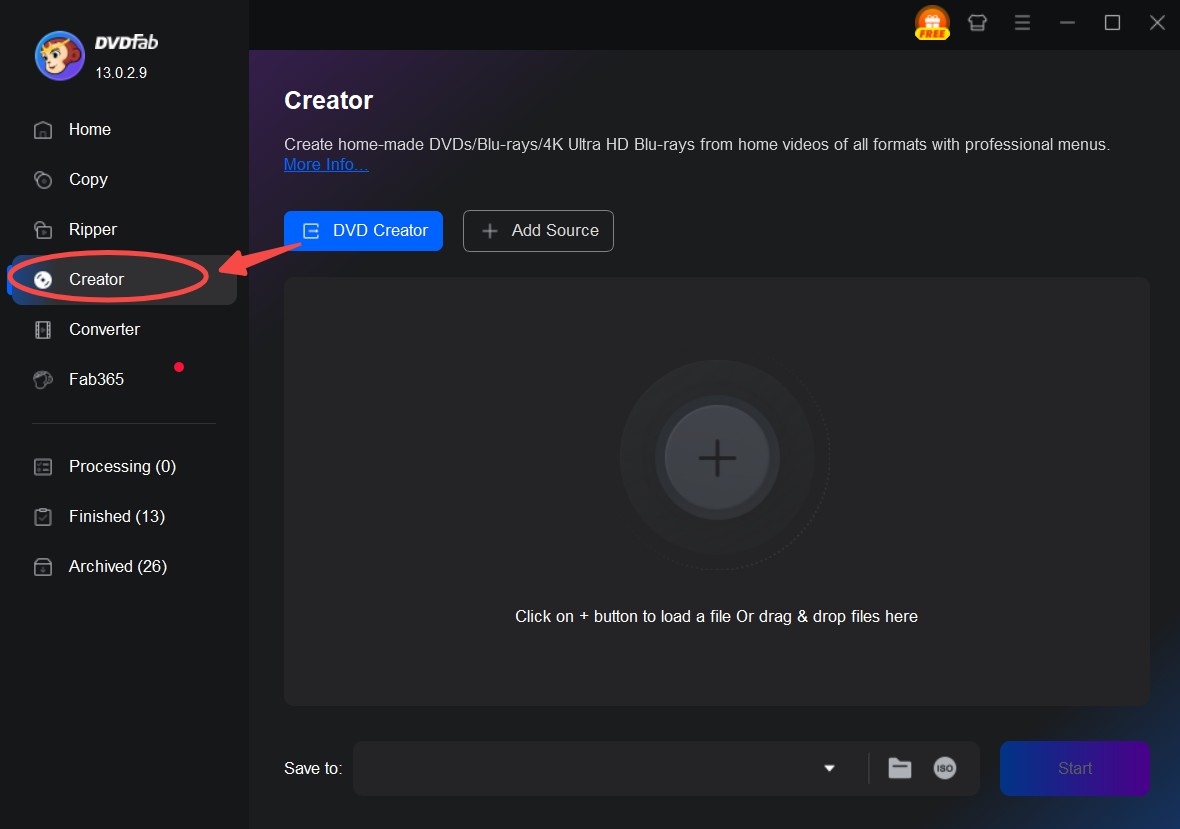
Step 3: Use the Add Source button to add video files, or drag and drop those videos you want to create a DVD. Add external subtitles to the video if needed.
Step 4: Open the Advanced Settings panel to set video quality. You can customize the size or choose "Fit to Disc" and set the output to DVD-5 or DVD-9.

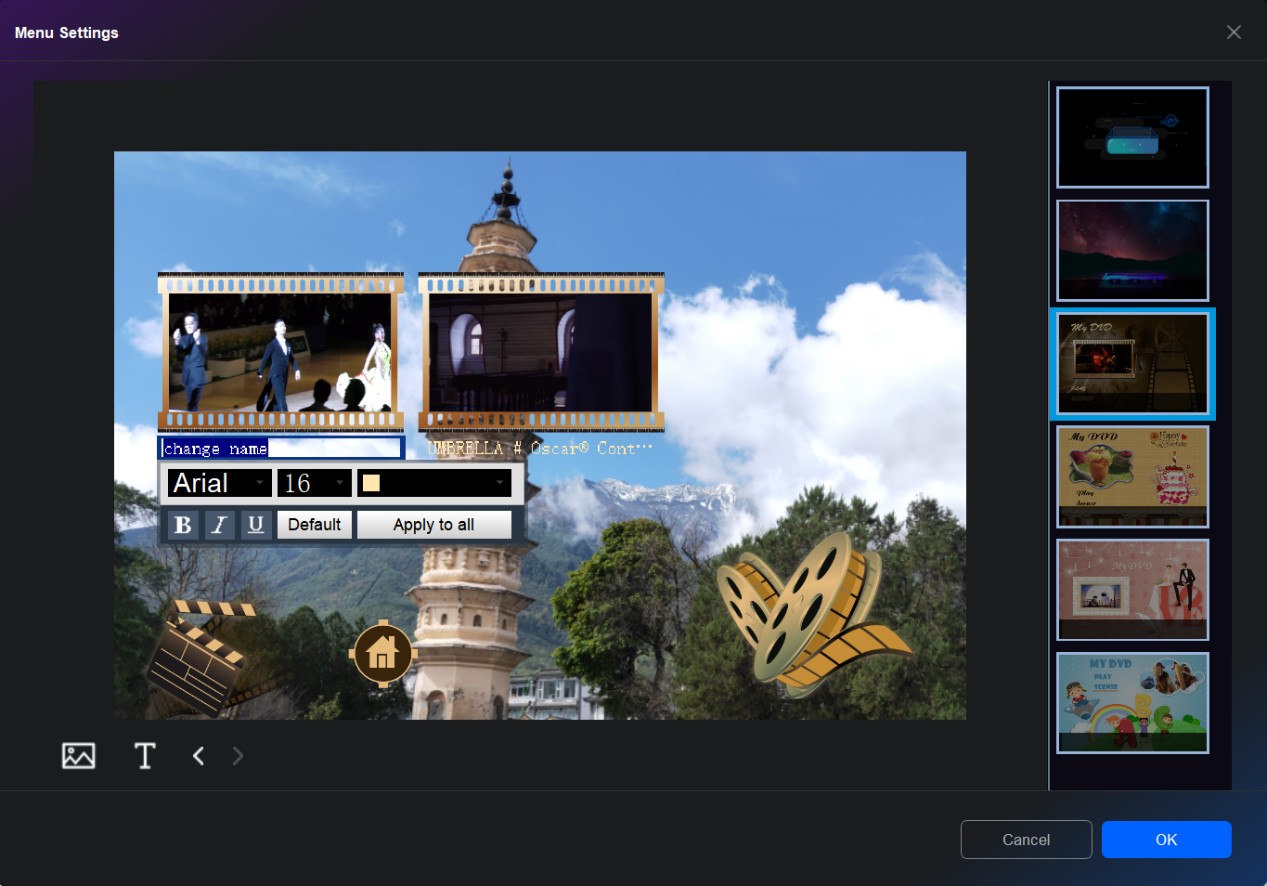
Step 5: In the Menu Settings panel, you can change the title name, add text, or change the background.
Step 6: In the Video Edit and Trim module, you can crop, rotate and trim your footage, adjust color effect and adding watermarks to your DVD.
Step 7: Choose your burner in the target field in the lower area. Besides burning to blank DVDs, you can also save the DVD as a folder or ISO image file on your hard drive. If you meant to burn to the blank, be sure to insert a suitable DVD to start the process. Either DVD5 or DVD 9, depending on the output you selected in the previous step.
Step 8: Wait till the process is completed. You will get a DVD Video disc that is compatible with various DVD players.
Worth noting: full disc burning through the Creator module is a paid feature once the 30-day trial ends, so factor that in if you plan to use it beyond a first test run.
2. DVDStyler (Windows)
DVDStyler is a free, open source DVD burner built specifically for menu-driven DVD-Video discs, which puts it in a different category than VLC's bolt-on conversion feature. Where VLC treats DVD creation as an extra step after converting a file, DVDStyler's entire interface is organized around building a disc project from the start, menus included. That focus is why some longtime users still reach for it over newer tools when a project needs custom menu artwork rather than a quick single-video burn.
- Free and open source, with no license fee for personal or repeated use.
- Menu templates plus manual design tools for backgrounds, buttons, and text.
- Direct support for PAL and NTSC output to match your player's region.
- No official macOS build; available for Windows and Linux only, so Mac users need DVDFab DVD Creator or another tool instead.
- Interface and menu-editing tools look dated compared to newer authoring software.
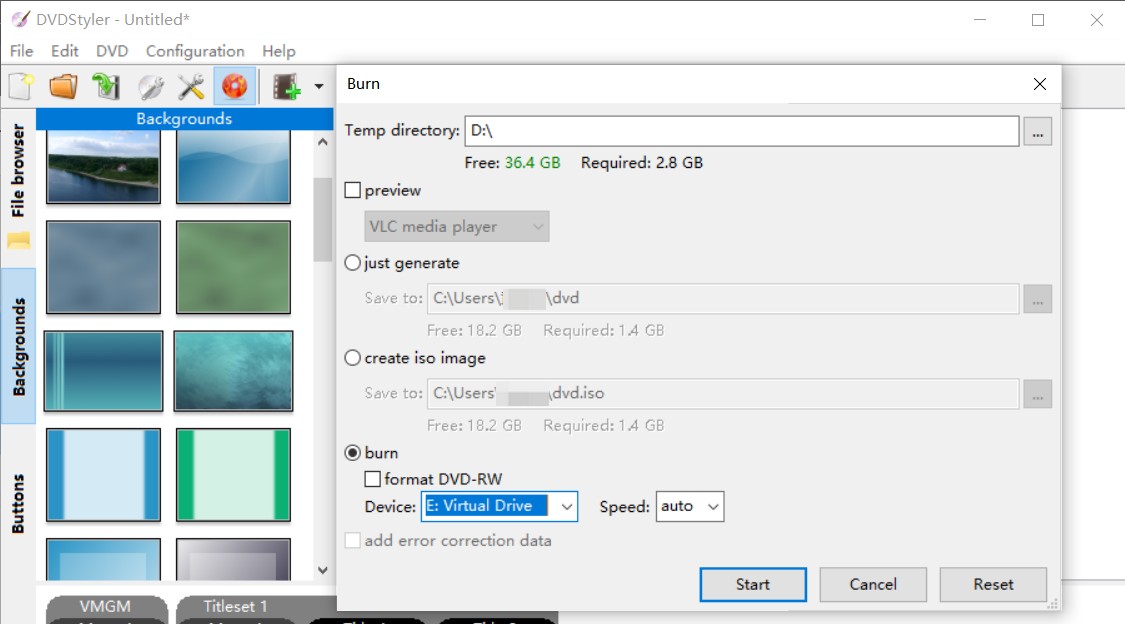
Here is how to burn DVD using this DVDStyler:
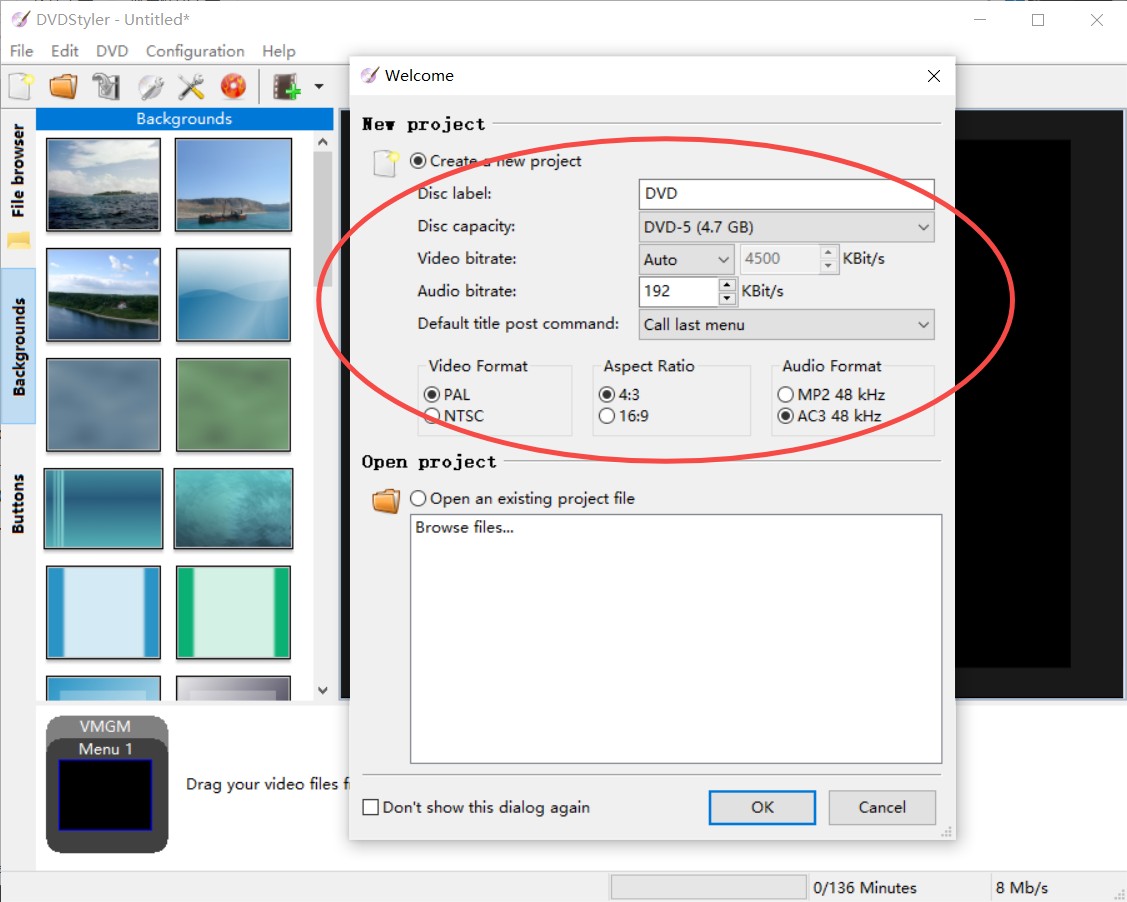
Step 1: Install and launch DVDStyler on your Windows PC.
Step 2: On the "New project" window, set the disc capacity, video format (PAL/NTSC), aspect ratio (4:3/16:9), and audio format (MP2/AC3). If you don't want to set this part, ignore it; you can later adjust related settings after importing videos.
Step 3: Use the "+" button at the top menu to import the videos you wish to create a DVD.
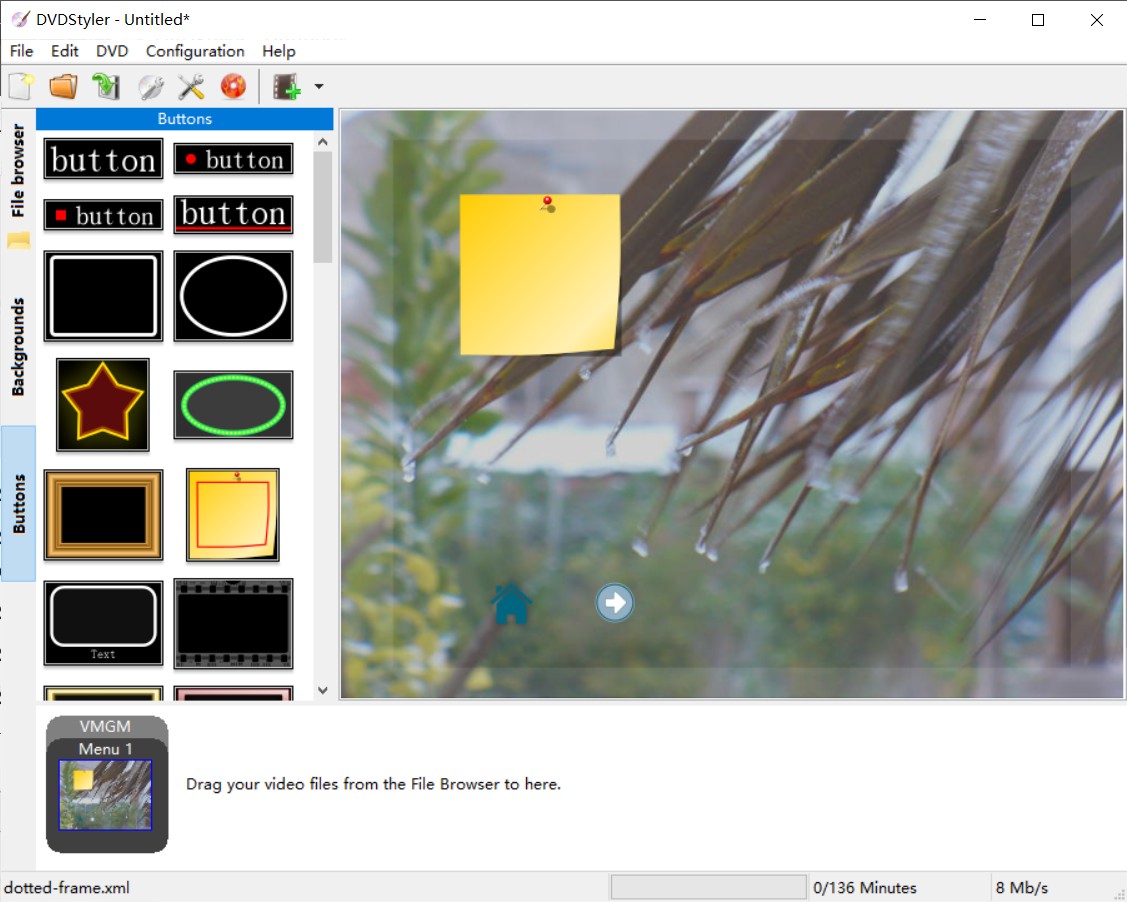
Step 4: Adjust the menu, change the menu's background, and choose a button option to your liking.
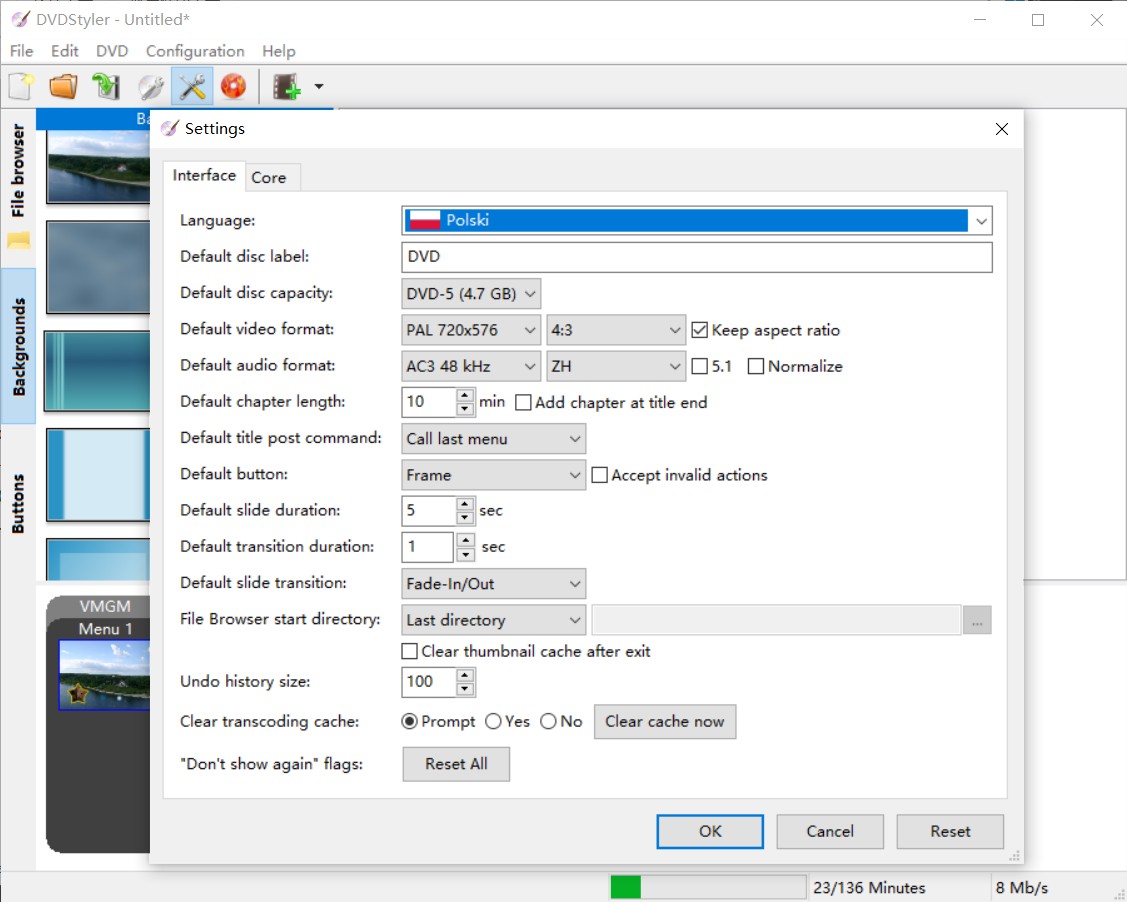
Step 5: Open the Settings panel to set the disc label, video format, audio format, chapter length, etc.
Step 6: On the top menu bar, click "Save" to save the DVD video to your hard drive or click the "Burn" button to burn it to a blank DVD.
3. CDBurnerXP (Windows)
CDBurnerXP is a free, Windows-based DVD authoring software that can write DVD-Video discs alongside data discs, audio discs, and ISO images from one interface. The program is still available directly from its official site and installs normally on current Windows systems, but its most recent build matches the version released in November 2019, so it has gone without a new release for roughly seven years. That gap has not broken basic DVD burning in testing, though it is a reasonable prompt to verify your specific use case still works as expected before relying on it for anything time-sensitive.
- Free with no bundled trial limits or nag screens during burning.
- Handles video, data, and audio discs plus ISO burning in one program.
- Straightforward four-step flow from source folder to finished disc.
- Built specifically for Windows, with no Linux or macOS version at all, a narrower reach than DVDStyler's Windows-and-Linux coverage.
- No new stable release since November 2019, so it has not been tested by its developer against recent Windows updates.
How to burn a DVD with CDBurnerXP for playback on a DVD player
Step 1: Choose the needed setup version and then download CDBurnerXP and install it on your PC.
Step 2: Run CDBurnerXP and choose Video DVD.
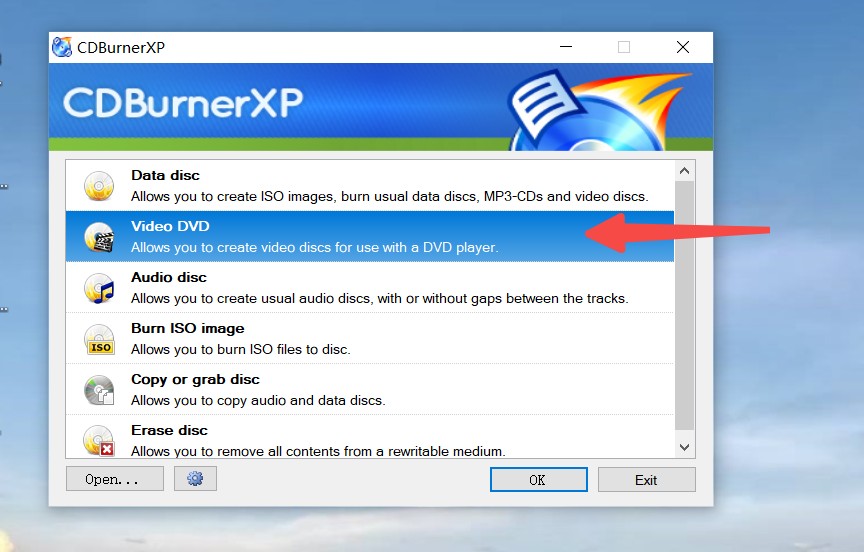
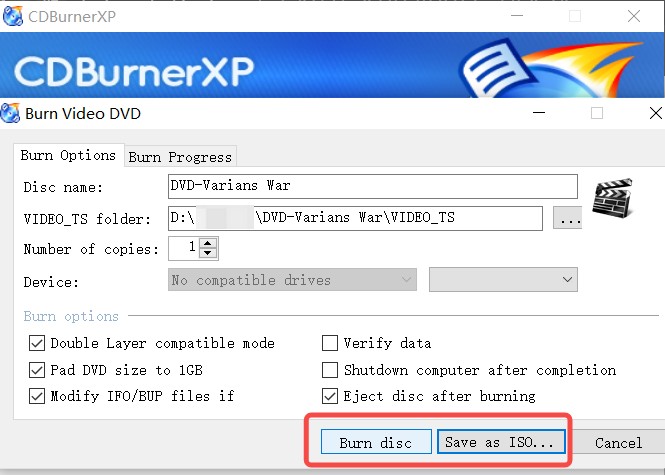
Step 3: Select the Video_TS folder (valid files include .vob, .ifo, .bup) as the source.

Step 4: Set the number of copies and then choose Burn disc or Save as ISO per your need.
FAQs
How to burn a DVD that plays on DVD players (PAL/NTSC)?
To make a DVD-Video disc from files like MOV, MP4, or AVI, first convert the video to MPEG-2 using VLC or another converter, then author and burn it with a tool such as DVD Flick, DVDStyler, or CDBurnerXP. Along the way, choose the video standard that matches your player: PAL (720x576) is used across most of Europe, Australia, and parts of Asia, while NTSC (720x480) is standard in North America and Japan. Picking the wrong one for your region is a common reason a finished disc plays back with color or timing issues, or does not play at all.
What's the difference between a data DVD and a video DVD?
A data DVD stores files the same way a USB drive does. It can hold videos, documents, or any other file type, but most standalone DVD players cannot read these files directly. A video DVD uses the standard DVD-Video structure, with VIDEO_TS files, menus, and disc-compliant encoding, which lets it play automatically when you insert it into a regular DVD player.
Do I have to burn a physical DVD, or can I just play the converted file?
If you only need to watch the video yourself or share it with someone who has a computer, you can skip the burn entirely. Once VLC finishes converting the file to MPEG-2, you can open it directly in VLC or another player, no disc required. Burning only becomes necessary when the video needs to play in a standalone DVD player, a car stereo, or another device that expects an actual disc rather than a video file.
Why does a disc that plays fine on my computer fail in a standalone DVD player?
Software players such as VLC are more forgiving than dedicated hardware and will often play discs with formatting quirks that a standalone player rejects outright. Common causes include burning at too high a write speed, using DVD+R when the player only reads DVD-R (or the reverse), or a PAL/NTSC mismatch with the player's region. If a disc works on your computer but not your DVD player, try reburning at a slower speed and confirm the disc type and format your specific player supports.
Conclusion
VLC can prepare a DVD-ready file, but finishing the disc means combining it with at least one more program, and the free tools that traditionally filled that role, DVD Flick and CDBurnerXP, have not been updated in years even though they still run. That is really the core trade-off: stick with the free, multi-step VLC workflow if you don't mind the extra software and occasional compatibility surprises, or move to an all-in-one tool such as DVDFab DVD Creator if you'd rather convert and burn in one program with an active update cycle.
For a wider look at other options, see this comparison of DVD burning software. Whichever route you pick, burn a short test disc and check it in the DVD player you actually plan to use before committing a full project to disc.
 How to Burn Video_TS to DVD on Windows and Mac: 4 Methods That WorkBy Diana Smith - Jul 1, 2026
 Top 9 Free DVD Burners for Mac in 2026: Tested & ReviewedBy Diana Smith - Jun 23, 2026
![How to Convert MKV to DVD with Stylish Menu? [2026 Updated]](https://r3.dvdfab.cn/upload/resource/mkv-to-dvd-yO3k.jpeg) How to Convert MKV to DVD with Stylish Menu? [2026 Updated]By Wenny Yan - Jun 17, 2026
How to Convert MKV to DVD with Stylish Menu? [2026 Updated]By Wenny Yan - Jun 17, 2026 Convert Video to DVD: 8 Best and Free Video to DVD Converters in 2026By Diana Smith - Jun 15, 2026