How to Burn a DVD on Mac: 5 Methods That Work on macOS Sequoia
Summary: This guide covers 5 ways to burn DVD on Mac: DVDFab DVD Creator for playable video DVDs, Finder for data disc backup, Disk Utility for disk images, a Photos/iMovie slideshow workflow, and the Music app for audio CDs. Updated for macOS Sequoia 15, with external drive setup and blank disc guidance.
Table of Contents
Burning DVD on a Mac takes more setup than most people expect. Every Mac shipped since 2012 has no built-in optical drive, so an external USB DVD burner is the first thing you need before any software comes into play. Once the hardware is in place, the right approach depends on your goal: a video disc that plays on a standalone DVD player, a data archive, a bootable disk image, or an audio CD.
I worked through all five workflows on a Mac running macOS Sequoia 15 to map out what still works in 2026, what has changed since older guides were written (iTunes was replaced by the Music app in macOS Catalina, and some previously popular free tools no longer run on modern macOS), and when the free built-in tools are enough. Each section below covers one specific scenario.
What You Need to Burn a DVD on Mac
Before choosing software, make sure you have the right hardware and media in place. Skipping this step is the most common reason a DVD burn fails before it even starts.
External DVD Drive
Apple stopped shipping Macs with built-in optical drives in 2012. The company's own USB SuperDrive was officially discontinued in 2024. Third-party USB DVD drives from brands like LG, Verbatim, and ASUS are available for $20 to $40 and work with macOS out of the box, with no extra drivers required. If your Mac has only USB-C ports, look for a drive that includes a USB-C cable, or pick up a USB-A to USB-C adapter.
If you plan to burn Blu-ray discs rather than standard DVDs, verify that the drive explicitly supports Blu-ray writing. Most drives under $40 handle DVD only.
Blank Disc Types
- DVD-R: Write-once, broadly compatible with standalone DVD players. This is the standard choice for video DVDs you plan to distribute or archive.
- DVD+R: Also write-once, with slightly better error correction at the format level. Either DVD-R or DVD+R works on most modern players; compatibility differences are minimal.
- DVD-RW / DVD+RW: Rewritable discs you can erase and reuse. Useful for test burns before committing to single-use media, though some older standalone players do not read them reliably.
- Disc capacity: Standard DVD-5 holds 4.7 GB (single layer). DVD-9 holds 8.5 GB (dual layer) and requires a dual-layer-capable burner.
For home video projects, a spindle of DVD-R discs rated at 4x write speed is a reliable starting point. Avoid no-brand budget media: burn failures are more common with low-quality discs than with the drive or software.
Types of DVDs You Can Burn on Mac
DVD burning needs vary by use case. There are five distinct scenarios, each calling for a different tool and workflow.
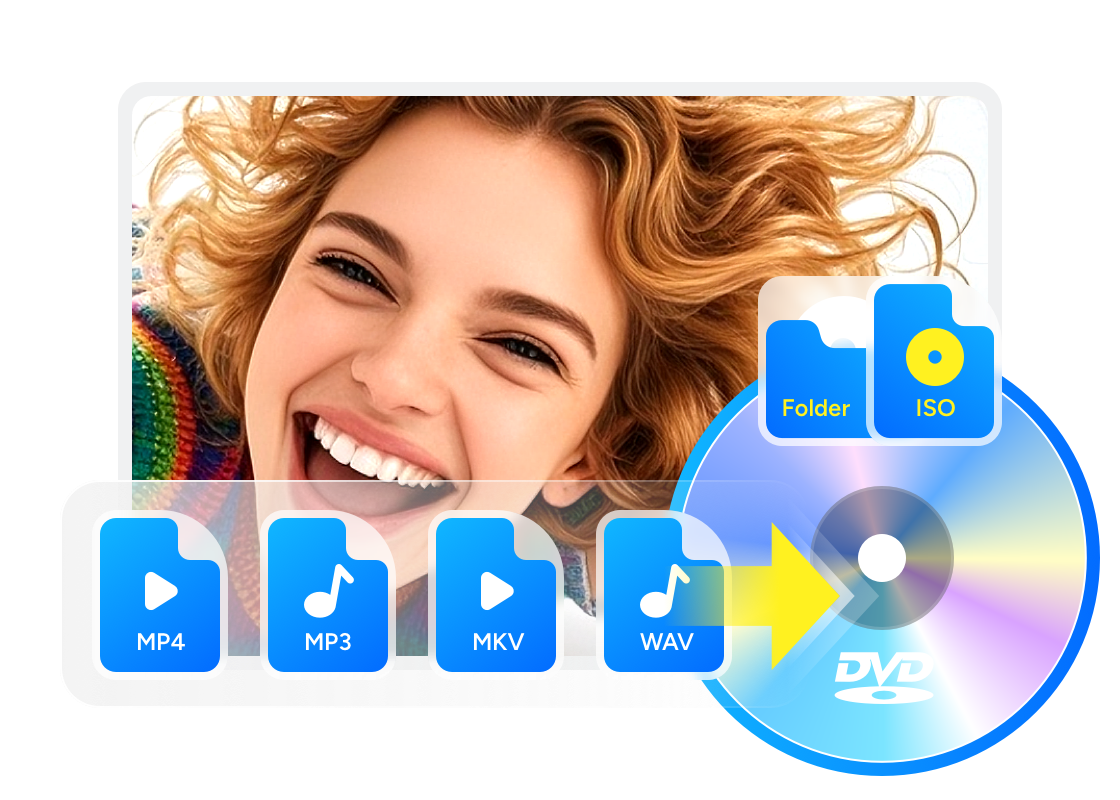
| Burn Playable DVD | Converts video files (.mp4, .mov, etc.) into standard DVD-Video format for playback on home DVD players or computer optical drives. The most common use case for sharing and archiving personal video. |
| Burn Data DVD | Stores files (documents, photos, project backups) on a DVD as raw data, similar to using a high-capacity USB drive. Suited for file backup and transfer; not playable on standard DVD players. |
| Burn Disk Image to DVD | Writes a complete disk image (.dmg or .iso) onto a DVD, typically for creating bootable installation discs or full software backups. |
| Burn Slideshow to DVD | Combines photos and music into a video slideshow and burns it as a video DVD playable on standard DVD players. |
| Burn Music to Disc | Writes audio files to a CD-R in standard audio CD format for playback on CD/DVD players, or stores MP3/AAC files on a data disc for digital playback. |
How to Burn a Playable DVD on Mac
When I want to burn a family movie or an event recording to DVD with a custom menu that plays reliably on a standalone player, I use DVDFab DVD Creator. It's the same workflow I follow when archiving iPhone videos to DVD: import, customize the menu, burn.

- Burn DVDs from MOV, MP4, MKV, AVI, and 200+ video formats without manual codec setup
- Built-in DVD menu templates with full customization: text, backgrounds, buttons, and music
- Supports DVD-5 (4.7 GB) and DVD-9 (8.5 GB) output formats
- GPU-accelerated encoding for faster burn times without quality trade-offs
- Output plays on standard DVD players and media playback software
- Runs natively on both Intel and Apple Silicon Macs with no Rosetta required
- Save output as ISO image for easy duplication later without re-encoding
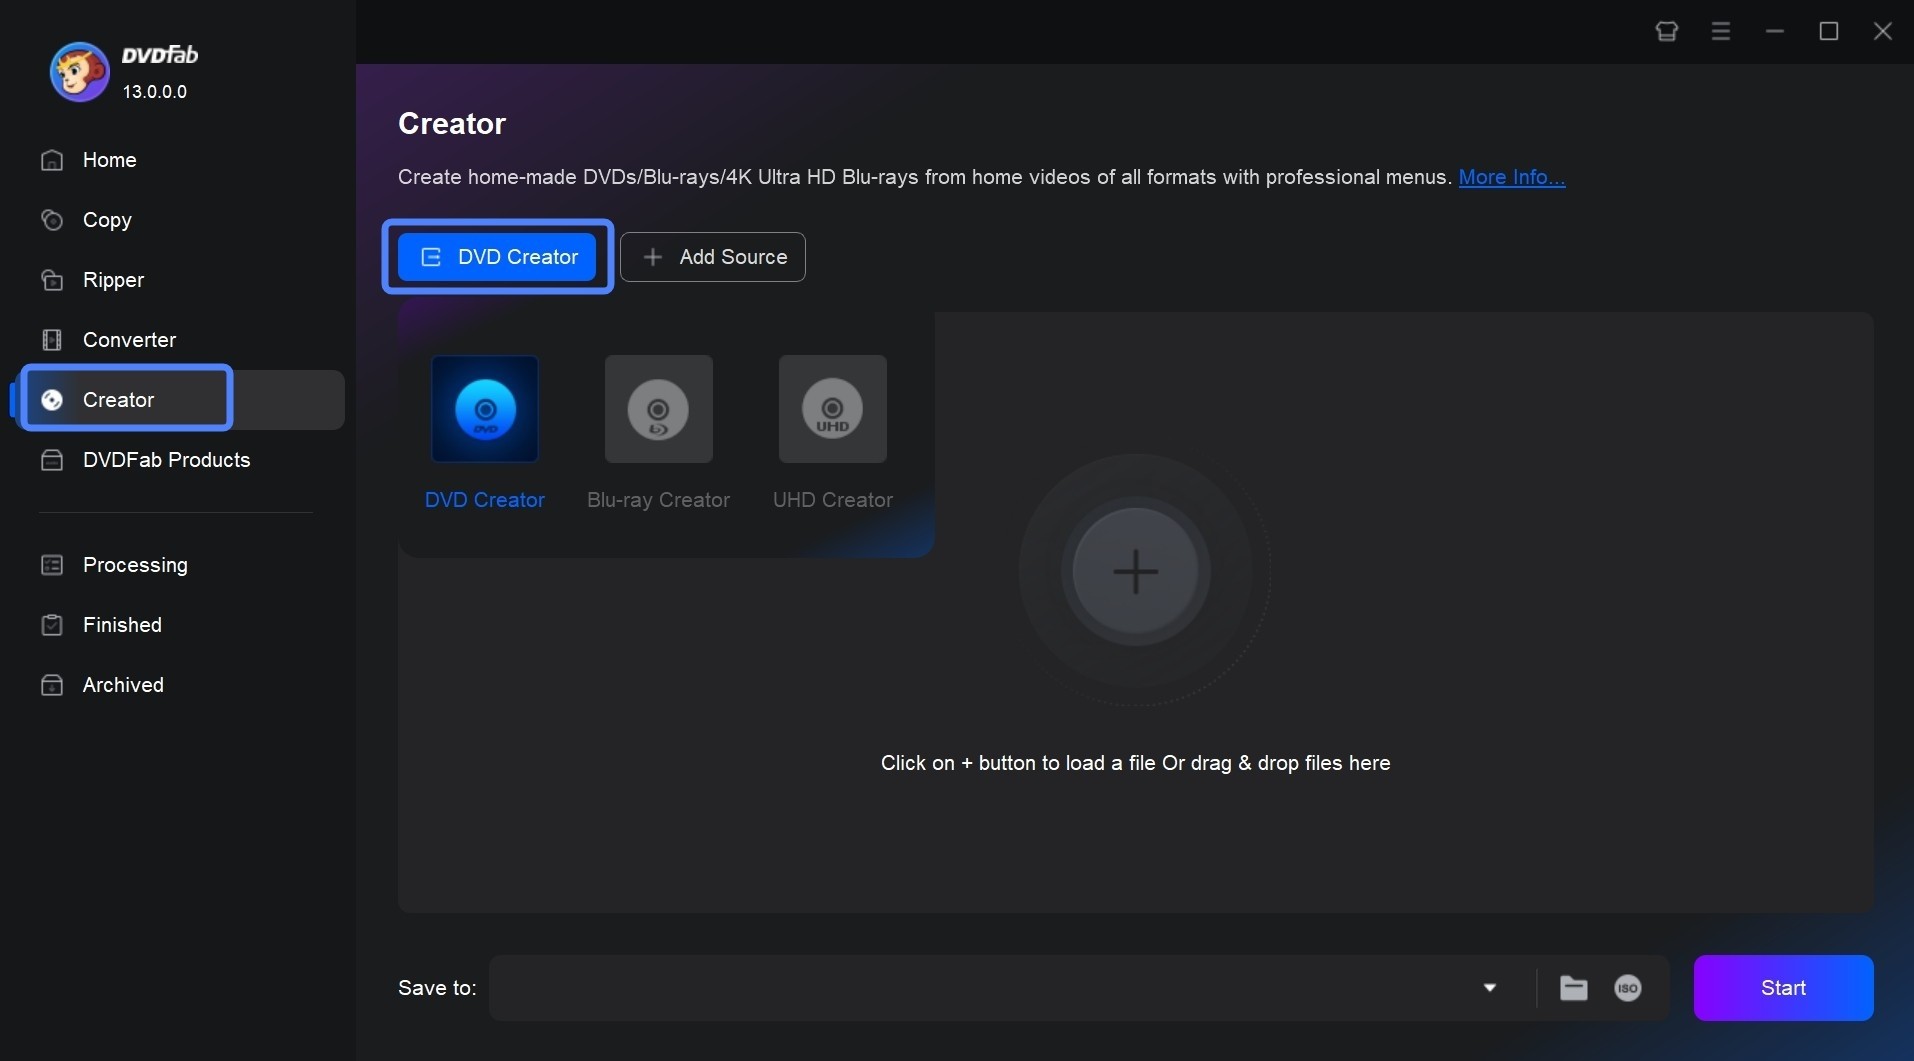
Step 1: Launch DVDFab and Load Video Source
After installing DVDFab DVD Creator on my Mac, I switched to Creator Mode and dragged my video files directly into the workspace. The program handled all my MP4 and MOV files without any manual configuration, including footage from an iPhone and a GoPro in the same project.
Step 2: Customize DVD Settings and Menu
The settings panel is clearly organized. I selected DVD-5 for standard blank discs, set the aspect ratio to match my source footage, and chose NTSC for compatibility with US players. If you're burning for PAL regions (UK, Europe, Australia), switch this to PAL before proceeding.
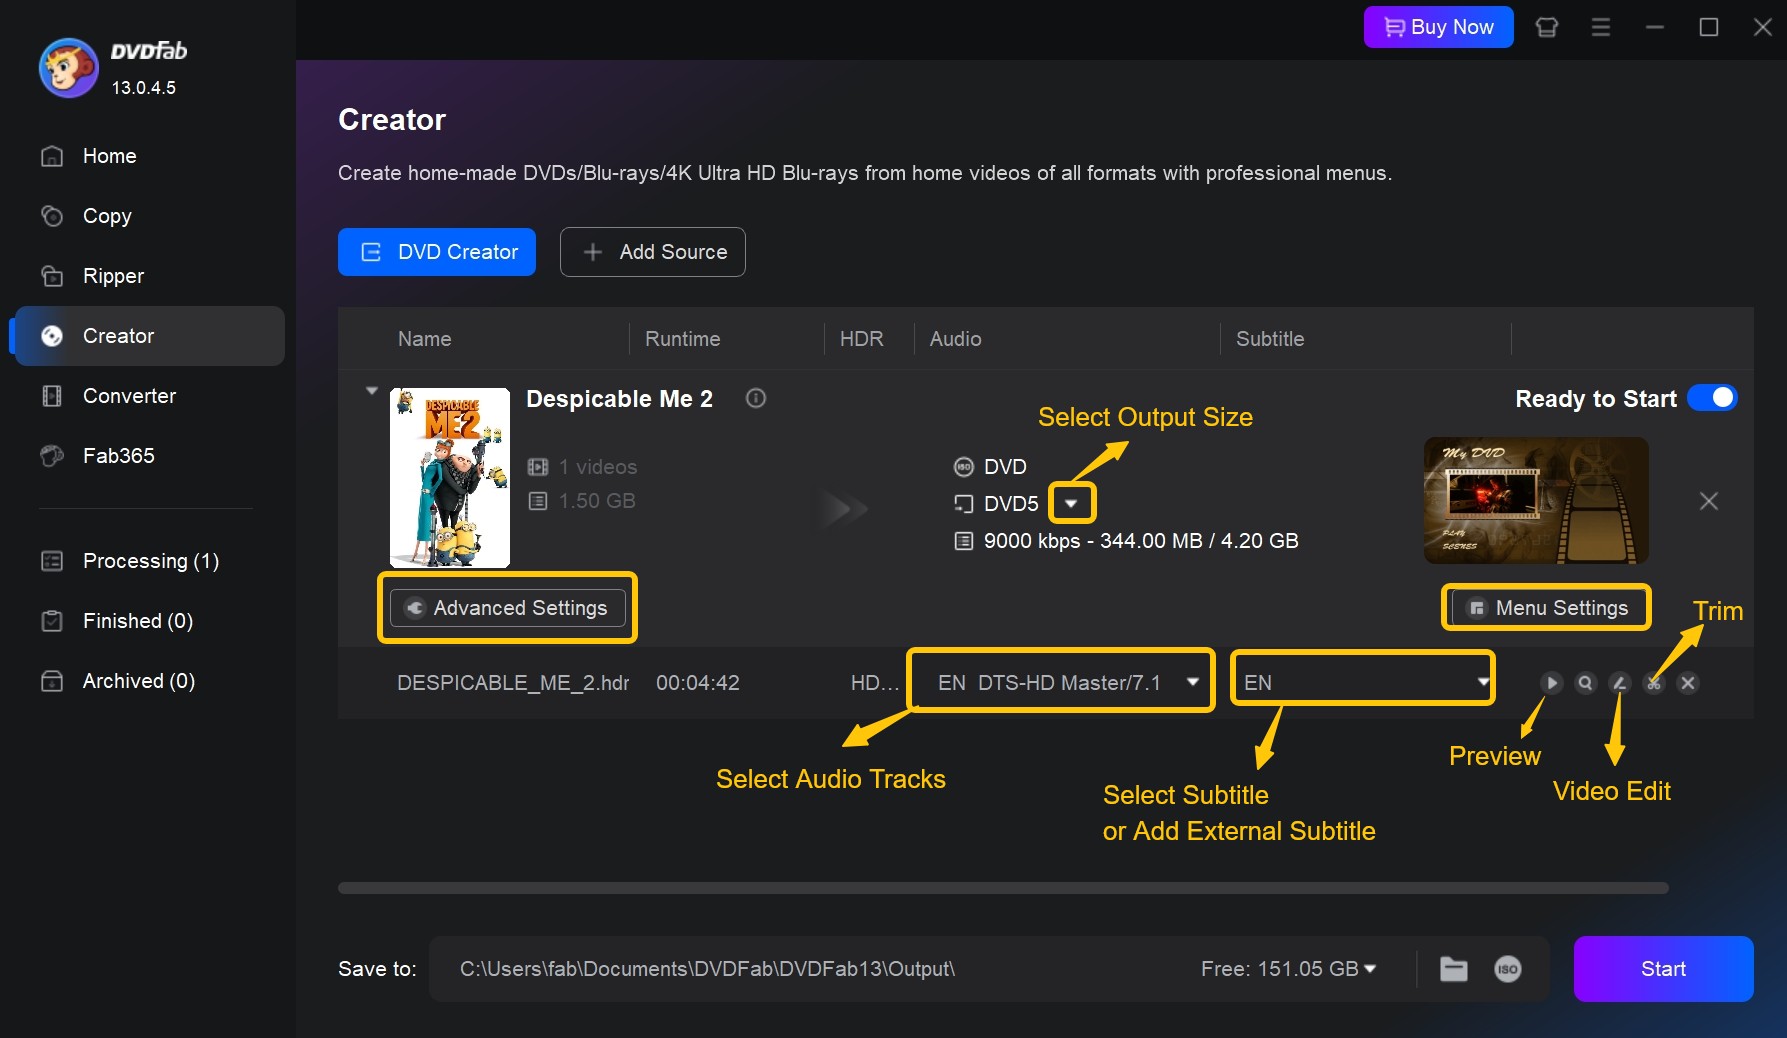
The menu editor stood out during my testing. I selected a template, uploaded a background image, and adjusted the title text in about five minutes. Adding synced external subtitles was straightforward as well, which came in useful for travel footage I wanted to share with family.
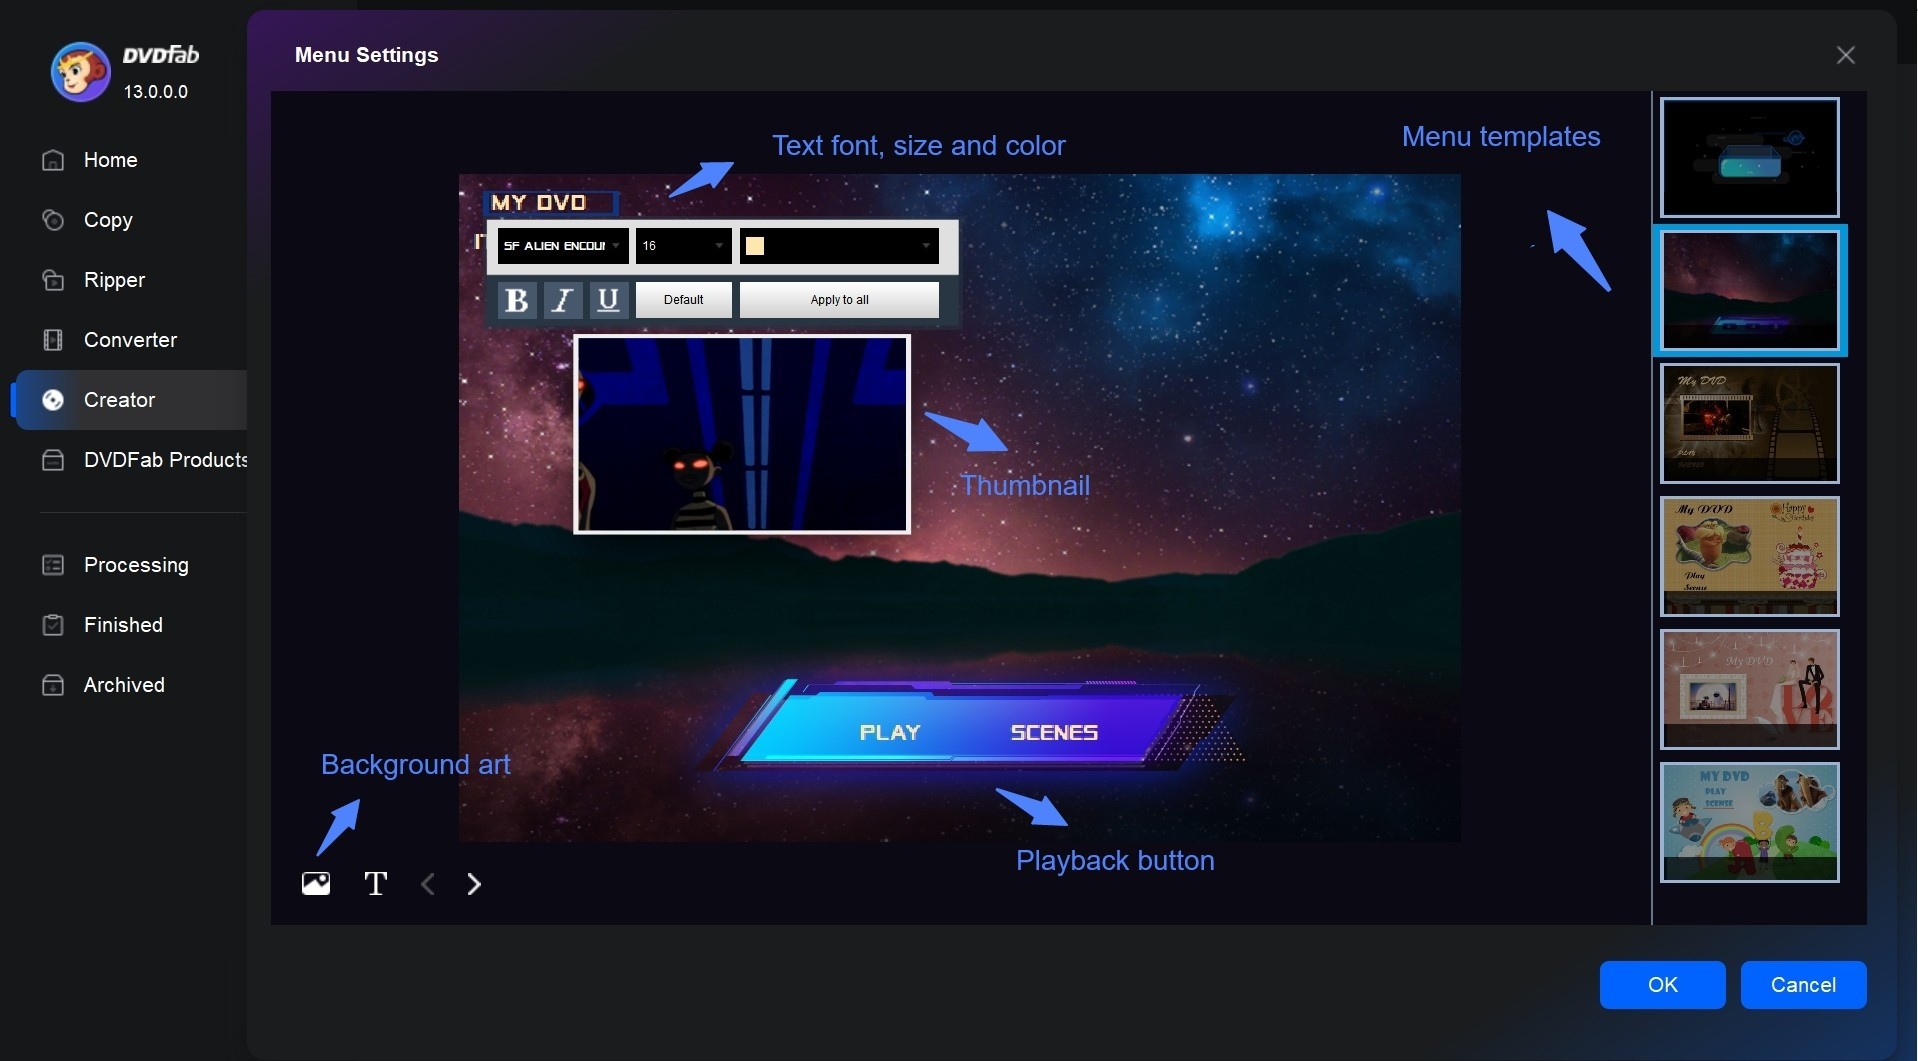
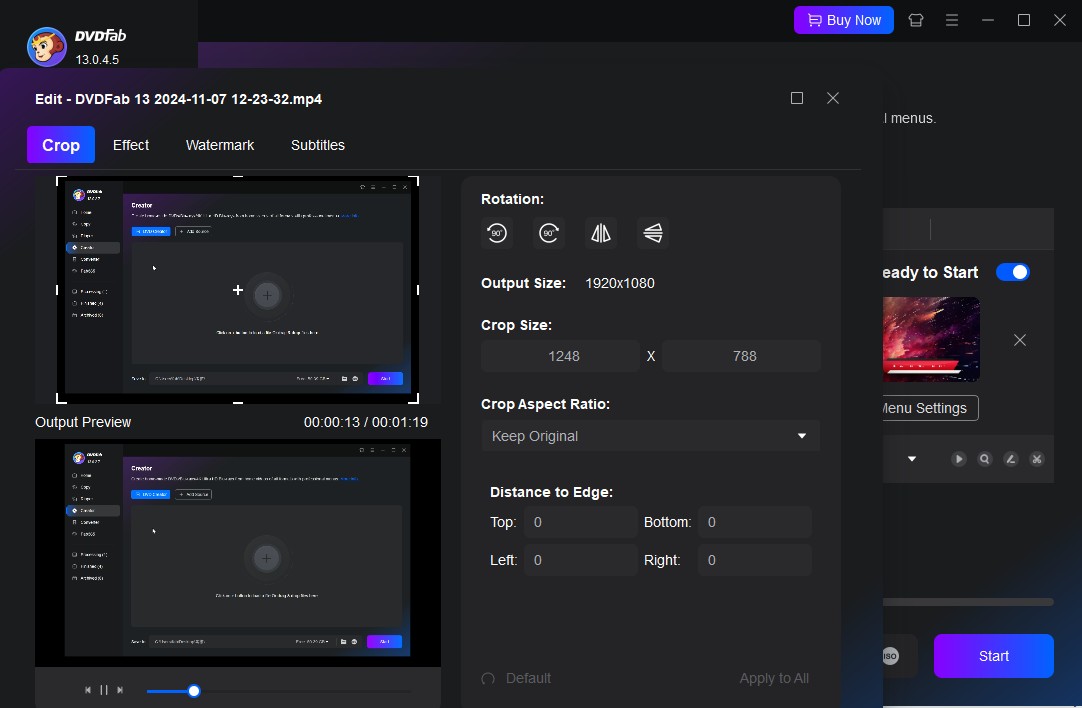
DVDFab includes built-in editing tools for trimming, color correction, watermarks, and subtitle timing, covering most pre-burn adjustments without switching to a separate application.
Step 3: Start Burning DVD on Mac
After reviewing the menu preview and making a few last adjustments, I inserted a blank DVD-R and clicked Start. GPU-accelerated encoding kept the total time noticeably shorter than software-only encoding I've used on other tools. A live progress bar tracks each phase. One option I found useful: saving to ISO simultaneously, so you can press additional copies later without re-encoding the source.
How to Burn Data DVD on Mac For Free
For quick file backups or sharing documents and photos with a colleague on disc, macOS Finder handles data burning without any additional software. DVDs burned this way are data discs: they work for storage and file transfer, but they won't play on a standard DVD player.
Step 1: Insert a blank DVD and choose how to handle it
Insert a blank DVD into your external optical drive. macOS will display an Untitled DVD icon on the desktop and the same disc in the Finder sidebar under Locations. If a dialog appears asking what to do with the blank disc, choose Open in Finder.
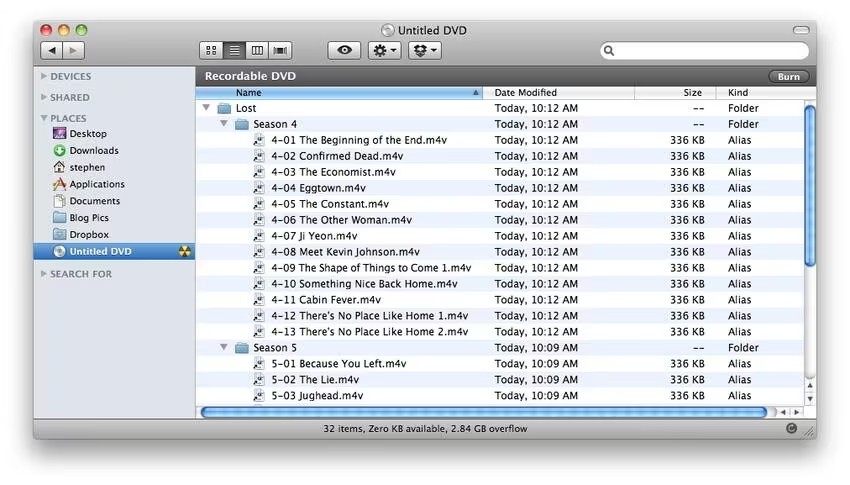
Step 2: Add data files to the disc
Open a Finder window and locate Untitled DVD in the sidebar. In a second Finder window or tab, navigate to the files and folders you want to back up. Drag the items into the Untitled DVD window.
Step 3: Burn the data to DVD in Finder
With the disc window open, click the Burn button in the upper-right corner, or use the menu bar: File > Burn "Untitled DVD" to Disc. In the dialog, enter a disc name, set the write speed, and click Burn. Finder shows a progress bar while it writes the files. The disc ejects automatically when finished.
How to Burn a DVD on Mac from a Disk Image
When I need a bootable installation disc or a complete software backup, I start from a .dmg image file and write it to DVD using macOS's built-in Disk Utility. The same steps apply to .iso files.
Steps to Burn a .dmg to DVD with Disk Utility
Step 1: Open Disk Utility
Go to Applications > Utilities and open Disk Utility, or use Spotlight to search for it by name.
Step 2: Load the .dmg file in Disk Utility
From the menu bar, choose File > Open Disk Image…, locate the .dmg file you want to burn, and open it. The image will appear in the left sidebar under Images.
Step 3: Insert a blank DVD
Insert a blank DVD into your external optical drive and wait for macOS to recognize it. The disc will appear in the Disk Utility sidebar.
Step 4: Select the .dmg image to burn
In the left sidebar, click the .dmg image entry (the top-level image entry, not the mounted volume that appears beneath it).
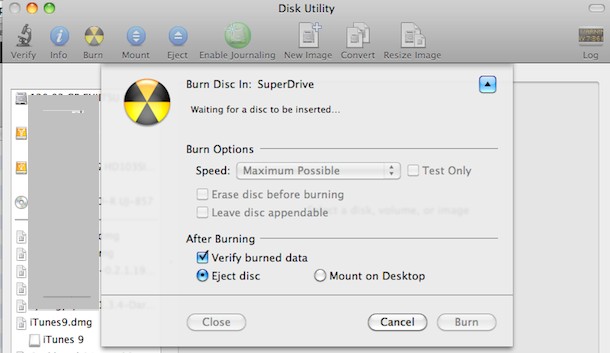
Step 5: Start burning the DVD on macOS
Click the Burn button in the Disk Utility toolbar. In the settings window, confirm the target device is your external DVD burner.
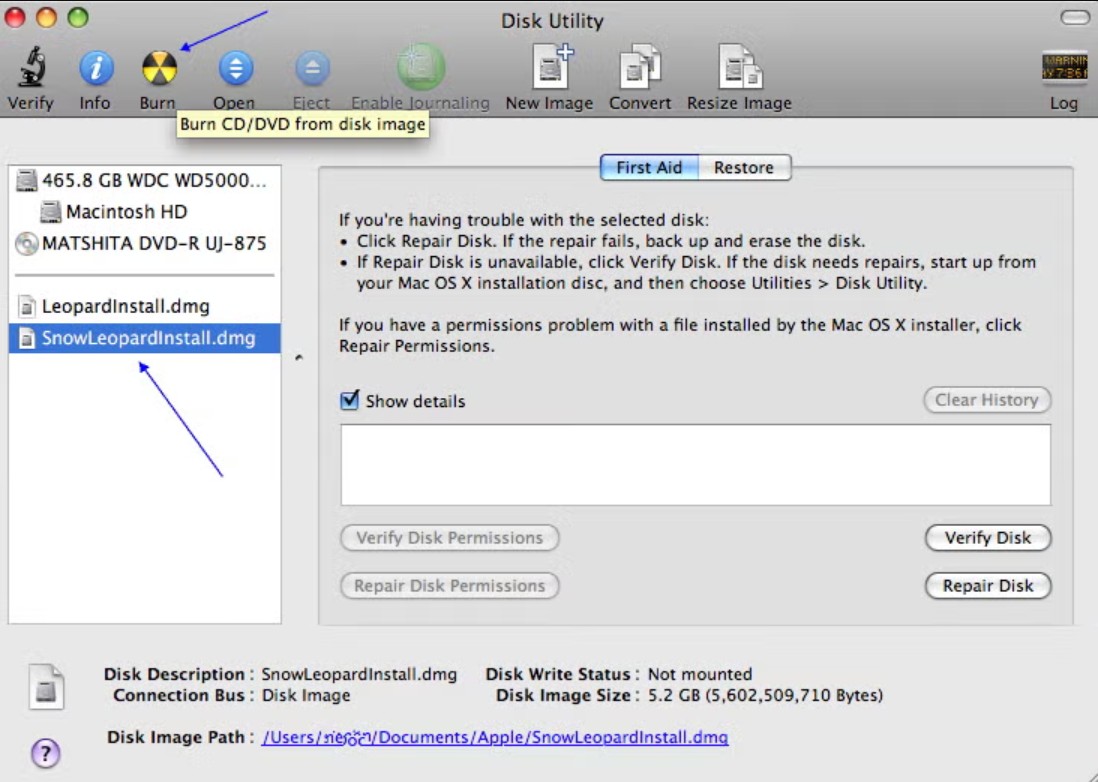
Click Burn and wait for the progress bar to complete. The disc ejects automatically or appears on your desktop when the process finishes.
Note: Burning .iso files in Disk Utility follows the same steps as .dmg images. ISO is a cross-platform format commonly used for DVD-Video discs and system installation media that needs to work across Windows, Linux, and macOS.
How to Create a Slideshow DVD on Mac
The landscape of free slideshow-to-DVD tools on macOS has changed significantly. Apple discontinued iDVD with macOS Mojave, and SimplyBurns, a longtime free option, has not received updates since 2012. It fails to install on macOS Ventura, Sonoma, and Sequoia because Gatekeeper blocks unsigned applications from unverified developers.
The practical approach on modern macOS is a two-step process: use a free built-in app to export your photos as a video file, then burn the video to a playable DVD.
Step 1: Export Your Slideshow as a Video Using Photos or iMovie
Both apps come with macOS at no cost.
Using Photos: Open the Photos app, select the images you want, and go to File > Create > Slideshow. Set your theme, add background music, adjust the slide duration, then click the export button to save the slideshow as a .mov or .mp4 file.
Using iMovie: Create a new movie project, import your photos, add transitions and a music track, then export via File > Share > File. Choose 1080p resolution and MP4 format for broadest compatibility with DVD authoring software.
Step 2: Burn the Exported Video to a Playable DVD
Once you have a video file, use DVDFab DVD Creator to convert it into DVD-Video format and burn it to disc. The process is the same as in the playable DVD section above: import the exported video, choose a menu template, insert a blank DVD-R, and burn. The finished disc plays on any standard DVD player.
If you only need to store the slideshow video on disc for computer playback rather than on a standalone DVD player, Finder's data disc method handles that for free with no additional software.
How to Burn Music to DVD on Mac (For Audio CDs)
When I want to burn a playlist as a standard audio CD for car rides or to share with someone, I use the Music app. On macOS Catalina and all later versions (Big Sur, Monterey, Ventura, Sonoma, Sequoia), iTunes no longer exists as a standalone application. Apple replaced it with three separate apps in 2019: Music, TV, and Podcasts. The Music app is the one that handles CD burning.
Disc note: Audio CDs use CD-R discs (700 MB, about 80 minutes of audio), not DVD discs. Make sure you have blank CD-R media before starting.
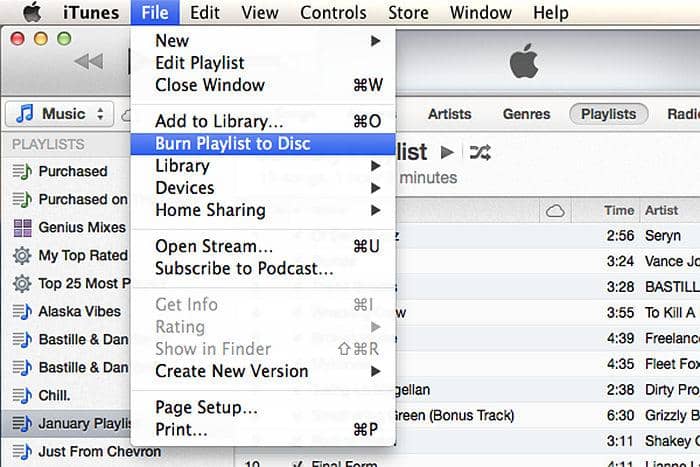
Steps to Burn Music to CD on macOS via the Music App
Playlist length: A standard CD-R holds about 80 minutes of audio in Audio CD format. If your playlist exceeds that, the Music app will prompt you to split it across multiple discs. For longer collections, switching to MP3 CD format stores more tracks per disc, though not all car stereos or standalone players support MP3 CDs.
FAQs
Do I need an external DVD drive to burn a DVD on Mac?
Yes. Apple has not included a built-in optical drive in any Mac since 2012, and the company's USB SuperDrive was discontinued in 2024. Any standard USB external DVD drive works with macOS without additional drivers. Third-party options from LG, Verbatim, and ASUS typically run $20 to $40. If your Mac has USB-C ports only, use a USB-A to USB-C adapter or a drive that includes a USB-C cable.
Does DVD burning work on Apple Silicon Macs?
Yes. External USB optical drives work with Apple Silicon Macs (M1, M2, M3, M4) without any compatibility issues. macOS-native tools including Finder, Disk Utility, and the Music app run natively on Apple Silicon. DVDFab DVD Creator has a native Apple Silicon build, so no Rosetta emulation is needed for any part of the burning workflow.
Can you burn a DVD on a Mac from iMovie?
iMovie does not have a built-in DVD burn option. To burn an iMovie project to DVD, first export the finished video: go to File > Share > File and save as MP4 or MOV. Then use DVDFab DVD Creator to convert the exported video into DVD-Video format and burn it to disc. iMovie handles the editing; the DVD authoring step requires dedicated burning software.
Why won't my Mac recognize the blank DVD?
A few things can cause this. First, check disc compatibility: some drives handle DVD-R only and won't recognize DVD+R. Second, try a disc from a different brand, since burn failures trace more often to low-quality blank media than to the drive itself. Third, open Disk Utility and confirm the external drive is listed. If the drive appears but the disc does not, the disc is likely the issue. A quick test burn on a DVD-RW can help isolate whether it is the drive or the media.
Can I burn CDs and DVDs on both Mac and Windows?
Yes, though the built-in tools differ. On Windows, File Explorer handles data discs and Windows Media Player creates audio CDs. On Mac, Finder burns data discs, Disk Utility handles disk images, and the Music app (macOS Catalina and later) creates audio CDs. For video DVDs playable on standalone players, both platforms require dedicated software such as DVDFab DVD Creator. You can also burn CDs on Windows 10 using the same built-in tools.
How to ensure the best quality when burning a DVD on Mac?
Three settings make the most difference when burning with DVDFab: match the disc type to your source file size (DVD-5 for content under 4.7 GB, DVD-9 for larger projects); use name-brand blank media rated at 4x to 8x write speed rather than the fastest available setting (slower burns produce more reliable results); and preview the DVD menu before burning to catch any timing or subtitle issues before the disc is finalized.
Final Thoughts
Which method fits your project depends on what the finished disc needs to do. For a video DVD with a menu that plays on any standalone player, DVDFab DVD Creator handles the full authoring and burning workflow from source file to disc. For file archiving or backing up disk images, Finder and Disk Utility cover both scenarios at no cost. For audio CDs, the Music app is already on your Mac.
Two things worth doing before any burn project: confirm your external drive is recognized in Disk Utility, and run a test burn on a DVD-RW disc before committing to a full spindle of DVD-R media. Both steps take under five minutes and save you from discovering a media or drive issue partway through a long encode.
 How to Burn Video_TS to DVD on Windows and Mac: 4 Methods That WorkBy Diana Smith - Jul 1, 2026
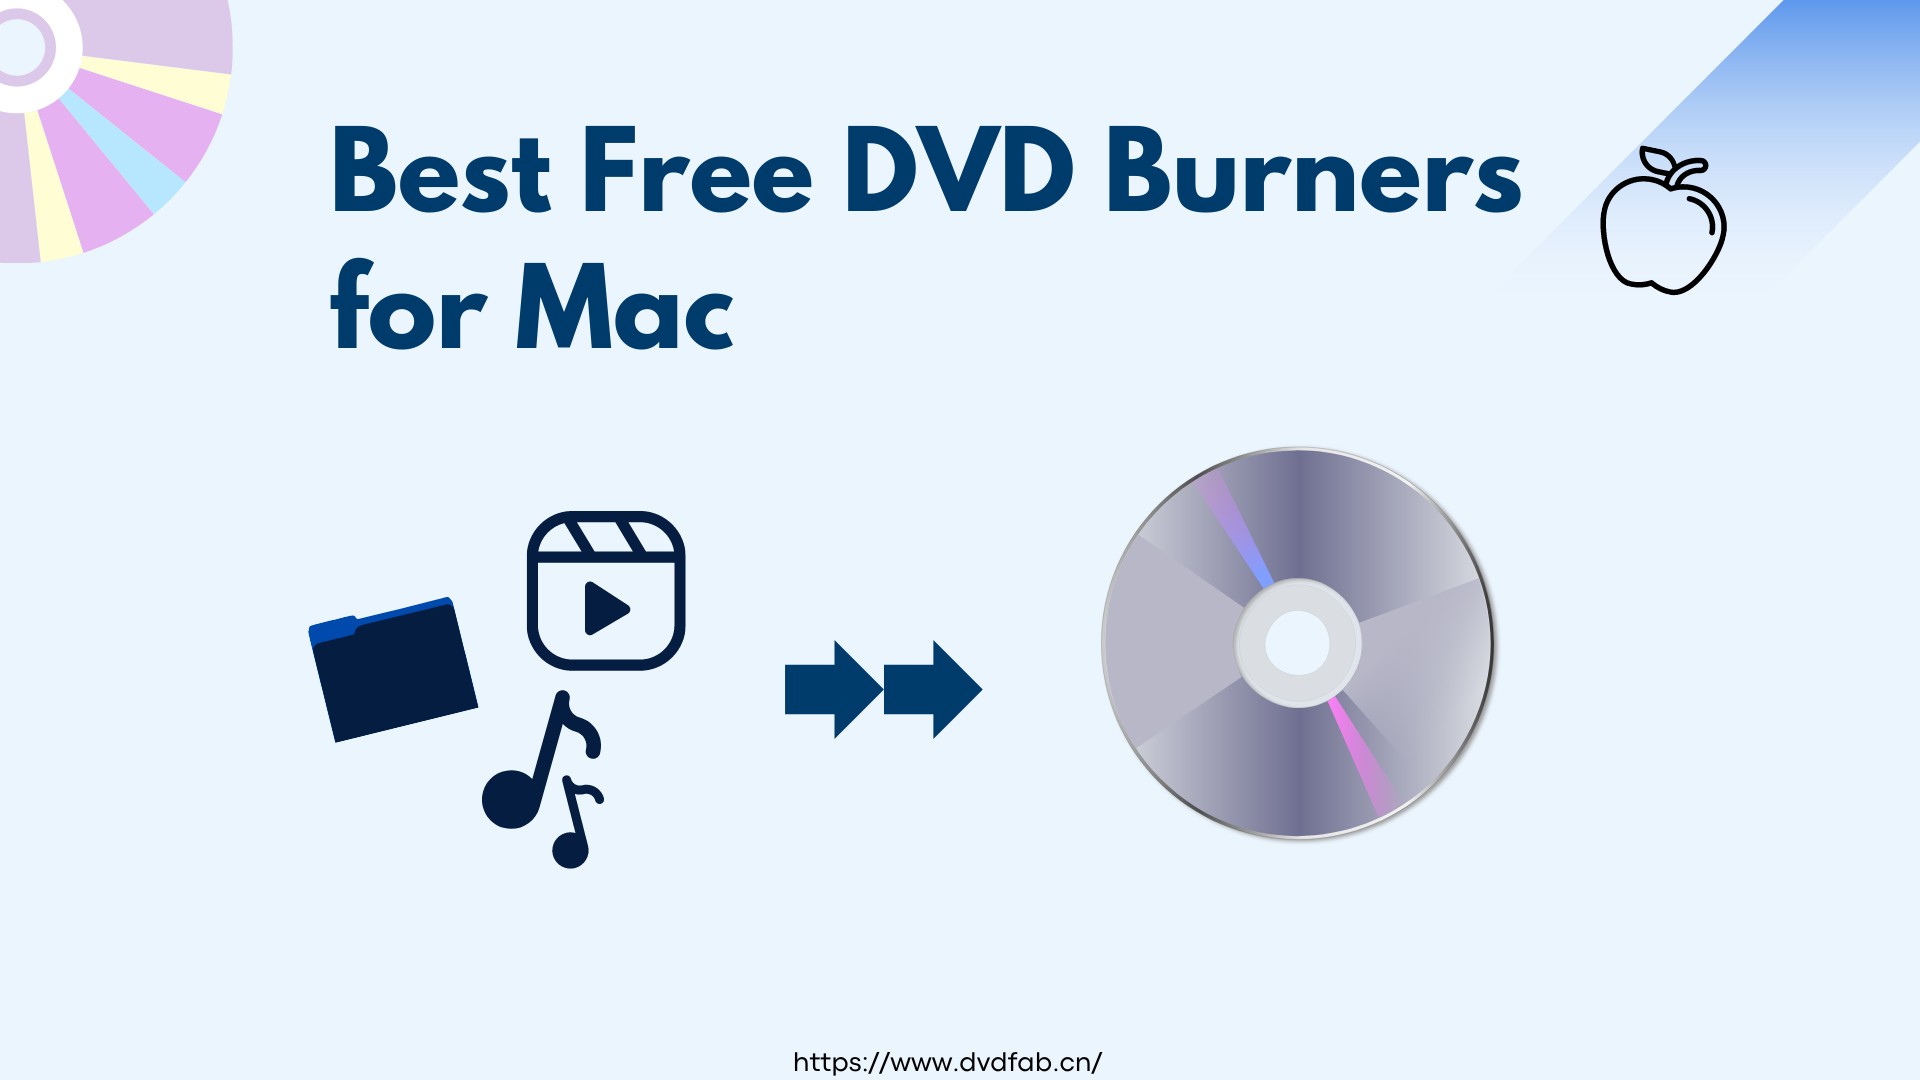 Top 9 Free DVD Burners for Mac in 2026: Tested & ReviewedBy Diana Smith - Jun 23, 2026
![How to Convert MKV to DVD with Stylish Menu? [2026 Updated]](https://r3.dvdfab.cn/upload/resource/mkv-to-dvd-yO3k.jpeg) How to Convert MKV to DVD with Stylish Menu? [2026 Updated]By Wenny Yan - Jun 17, 2026
How to Convert MKV to DVD with Stylish Menu? [2026 Updated]By Wenny Yan - Jun 17, 2026 Convert Video to DVD: 8 Best and Free Video to DVD Converters in 2026By Diana Smith - Jun 15, 2026