How to Burn Video to DVD on Windows & Mac: Playable Disc with Menus
Summary: Burning video to DVD is useful when I need a physical copy for family videos, school projects, event recordings, or work presentations. If I want a playable DVD for a regular DVD player, I use DVDFab DVD Creator because it can convert video files into a DVD-Video disc with menus and chapters. If I only want to back up or transfer video files, I burn a data DVD instead with Windows Media Player on Windows or Finder on Mac. The key difference is simple: a playable DVD is made for watching on a DVD player, while a data DVD is mainly for storing files.
Table of Contents
I usually see one problem when people try to burn videos to DVDs: the disc is burned successfully, but it does not play on a regular DVD player. This often happens because the video was saved to the disc as a normal file, not authored as a DVD-Video disc.
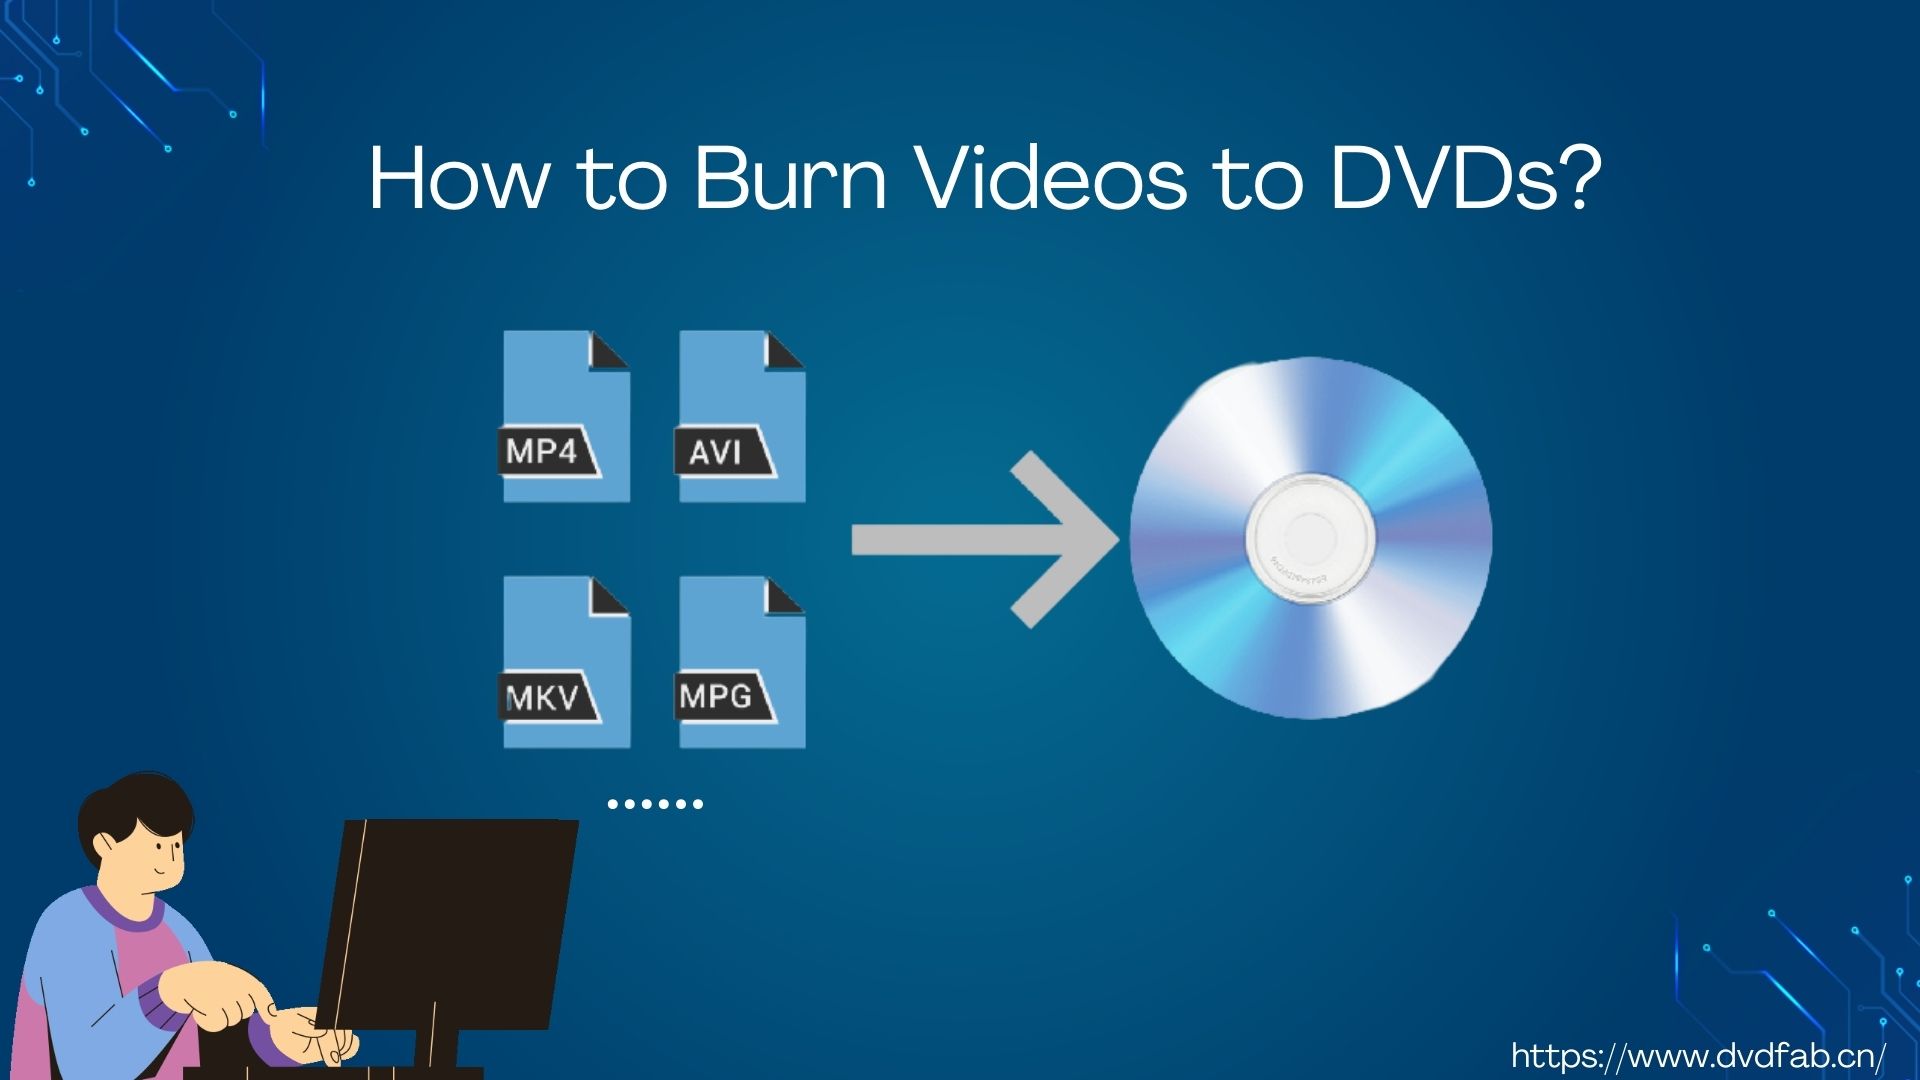
That difference matters. If I only want to move MP4, MKV, MOV, or AVI files to another computer, a data DVD is enough. If I want the disc to open on a living room DVD player, show a menu, and play like a movie disc, I need DVD authoring software that can convert the video into a proper DVD structure. In this guide, I will show how to burn video to DVD with several tools on Windows and Mac.
What to Prepare to Burn Video to DVD
Before I start burning a video, like MKV to DVD, I check three things first: a writable DVD drive, a blank disc, and the right kind of burning software.
My Top Picks
When I choose a tool, I do not only look at whether it can burn a disc. I look at whether it can create a playable DVD, whether it supports menus, and whether the workflow is simple enough for the project.
📀 Best for making a playable DVD with menus: DVDFab DVD Creator
I use DVDFab DVD Creator when I want to turn videos into a DVD-Video disc with a menu, chapters, subtitles, and a clear playback order. It is a better fit for home movies, event videos, and projects that need to play on a standard DVD player.
📀 Best for editing before burning: MAGIX Video deluxe
MAGIX Video deluxe makes more sense when I need to edit the footage first. It gives me a timeline, titles, transitions, and DVD menu options in the same workspace. The tradeoff is that the interface may feel heavier if I only want a quick burn.
📀 Best for conversion and basic DVD burning on Windows: AVS Video Converter
AVS Video Converter is useful when the main task is converting video formats and then burning the result to disc. I would choose it when my video is in a format that needs conversion before I can make a basic DVD on Windows.
📀 Best for backup only: Windows Media Player or Finder
If I only need a data DVD, built-in tools are enough. Windows Media Player can burn data DVDs, and Finder can burn files to a disc on Mac when a writable drive is available. I would not use either one when the goal is a menu-based playable DVD.
How to Burn Video to DVD with DVDFab DVD Creator
- Available on: Win 11/10/8.1/8/7 & macOS 10.13 - 15.x
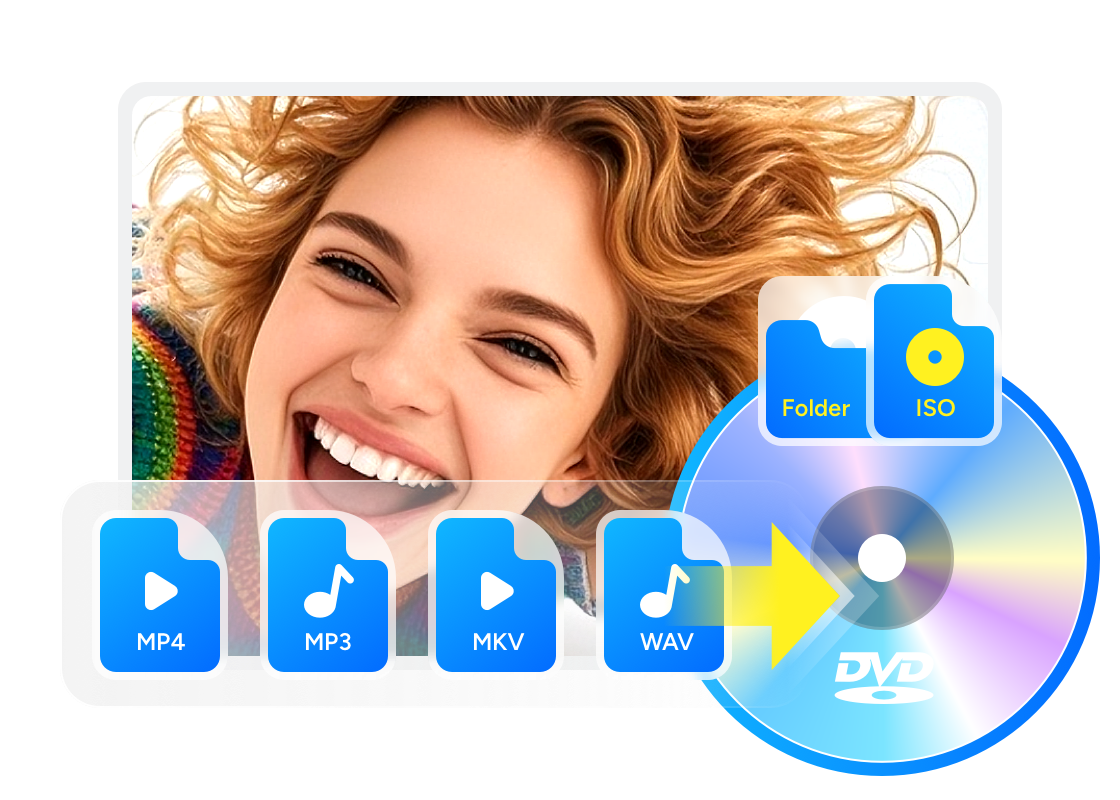
DVDFab DVD Creator is a professional video to DVD converter that enables you to create a playable DVD, ISO file, or DVD folder from any video format with remarkable speed and high-quality output. The program produces discs compatible with all major DVD standards, including DVD+R/RW, DVD-R/RW, and dual-layer discs.
I also tested DVDFab DVD Creator 13.0.6.0 on my Windows computer with a 1080p MP4 video that was about 2 hours long. In my test, the whole DVD burning process took about 14 minutes, which felt quite fast for a project of this length. For a standard DVD output, the picture looked clear, and the colors stayed very close to the original video. I also liked the menu and chapter editing features because they made the final disc easier to browse instead of turning it into one long video file.
Features:
- Burn videos to DVD, ISO, or folder from popular formats
- Edit source videos with the integrated video editor
- Merge multiple clips onto one disc and set playback order freely
- Create and customize menus using stylish templates and background music
- Convert MP4 to DVD at faster speed utilizing hardware acceleration
- Automatically retain metadata from original videos for organized playback
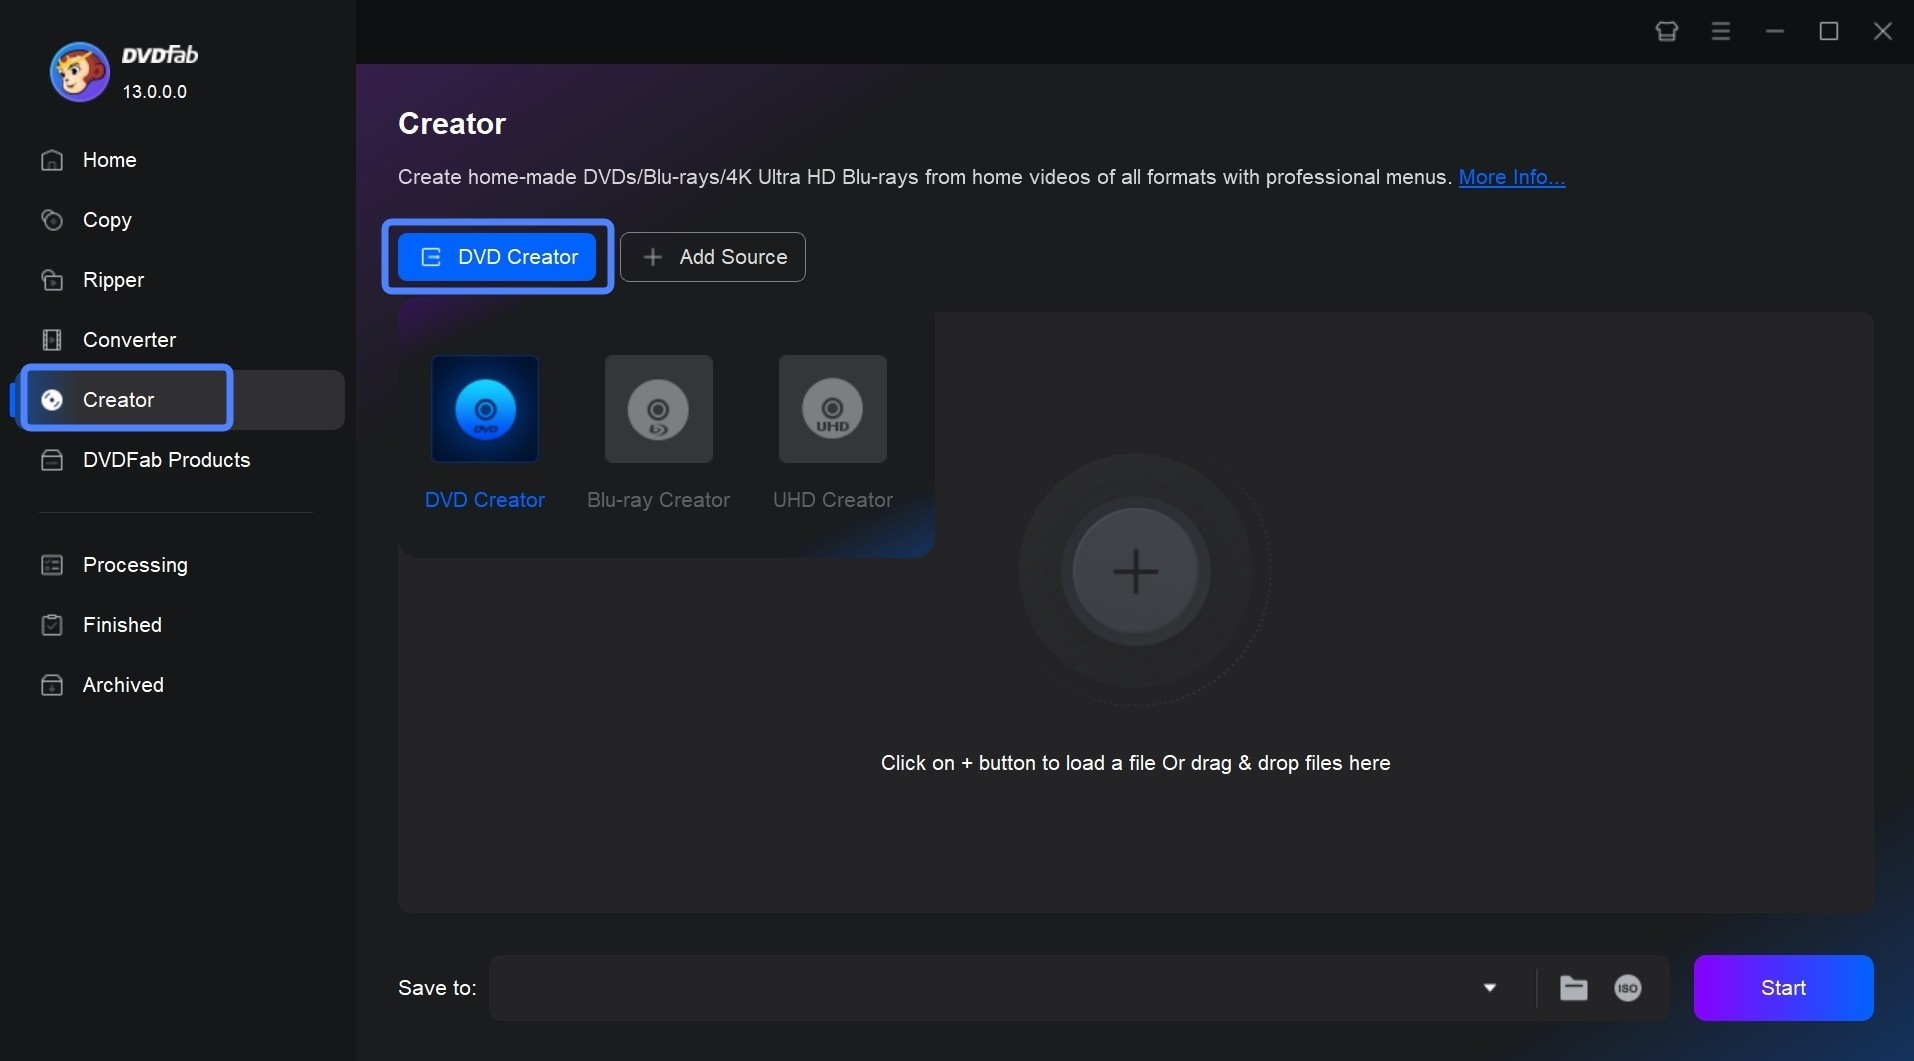
Step 1: Launch DVDFab and Load Video Source
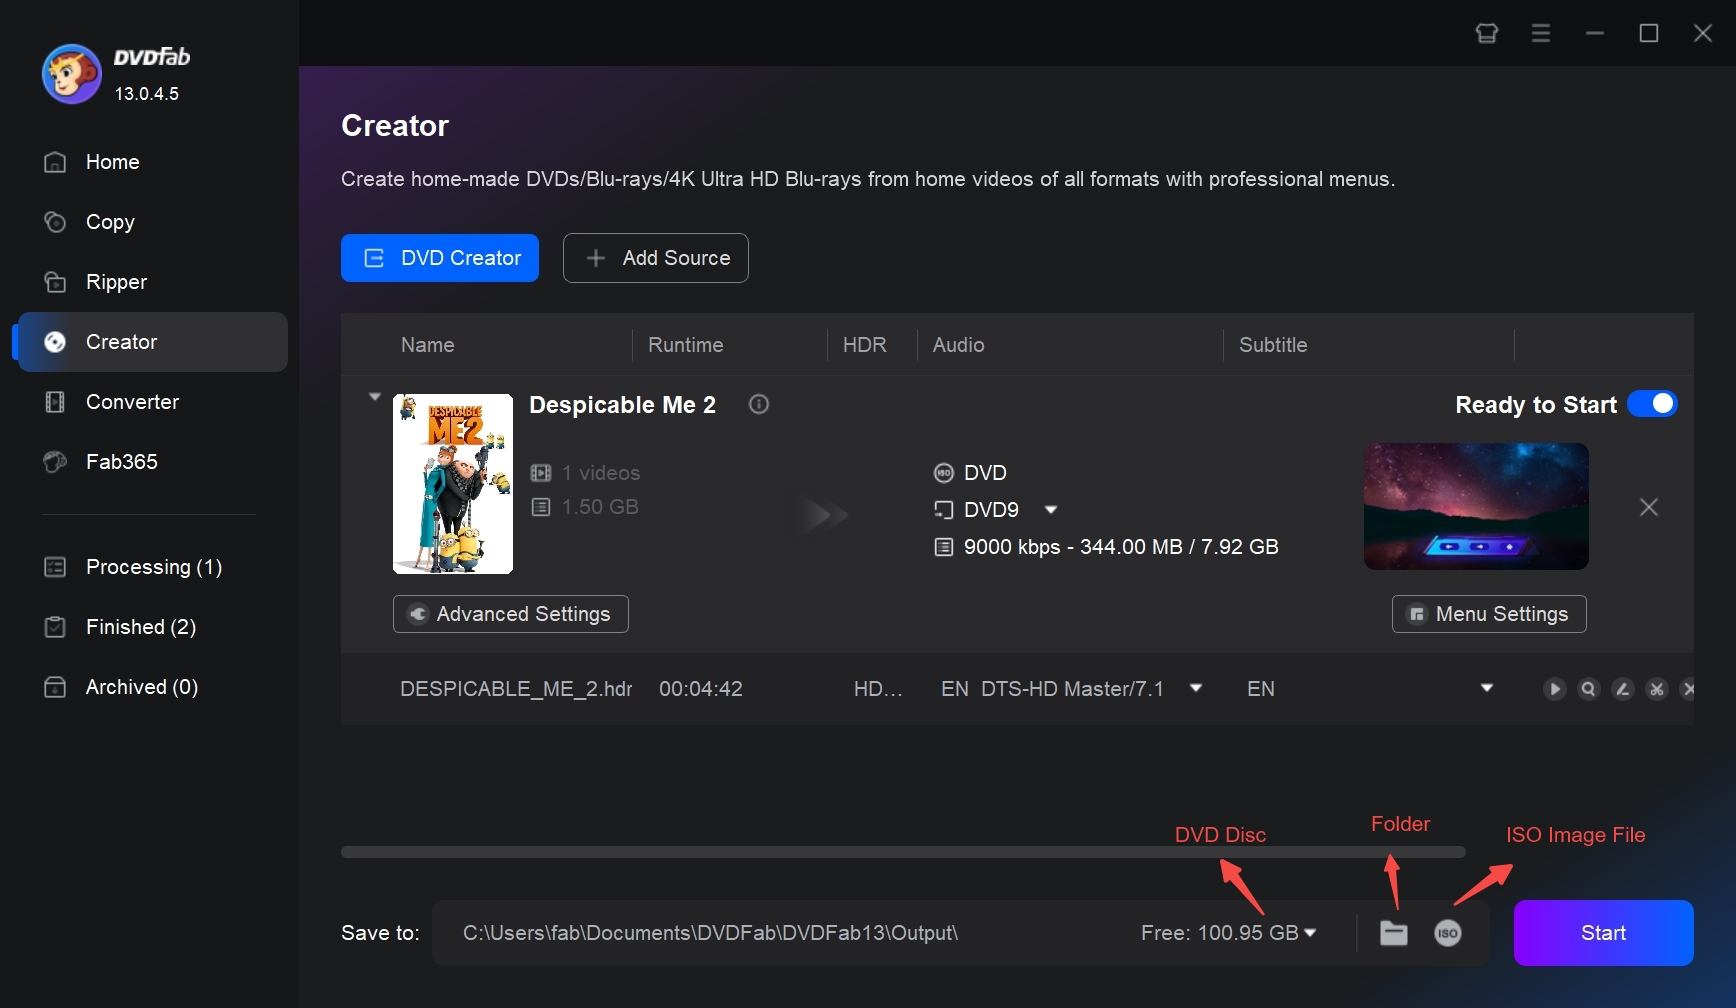
Open DVDFab and choose DVD Creator from the start-up module list. Drag and drop your video files into the main interface, or click Add to import them from your computer. Once the files are displayed, they are ready for authoring.
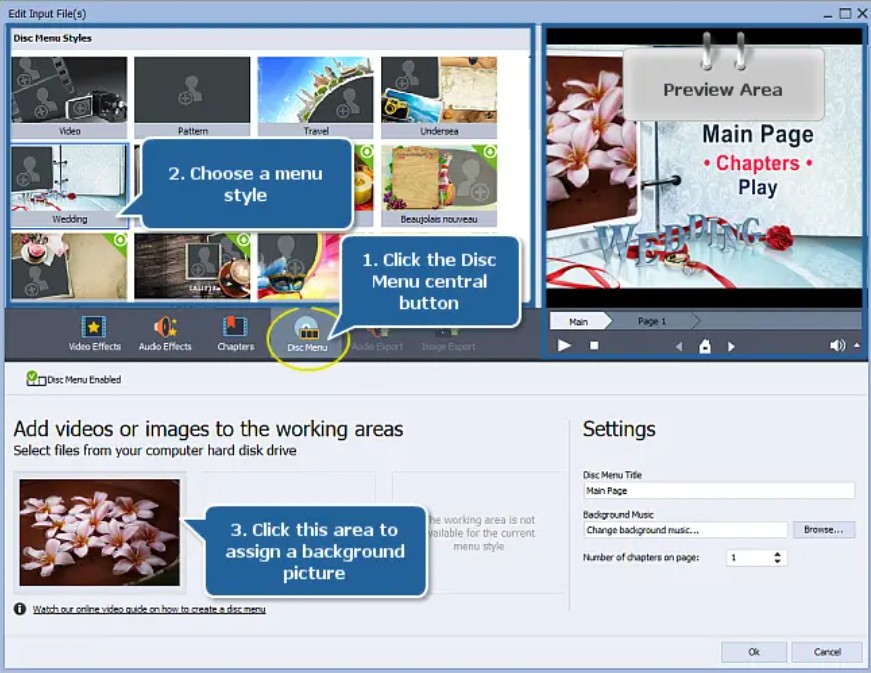
Step 2: Adjust Output Settings and Customize the DVD Menu
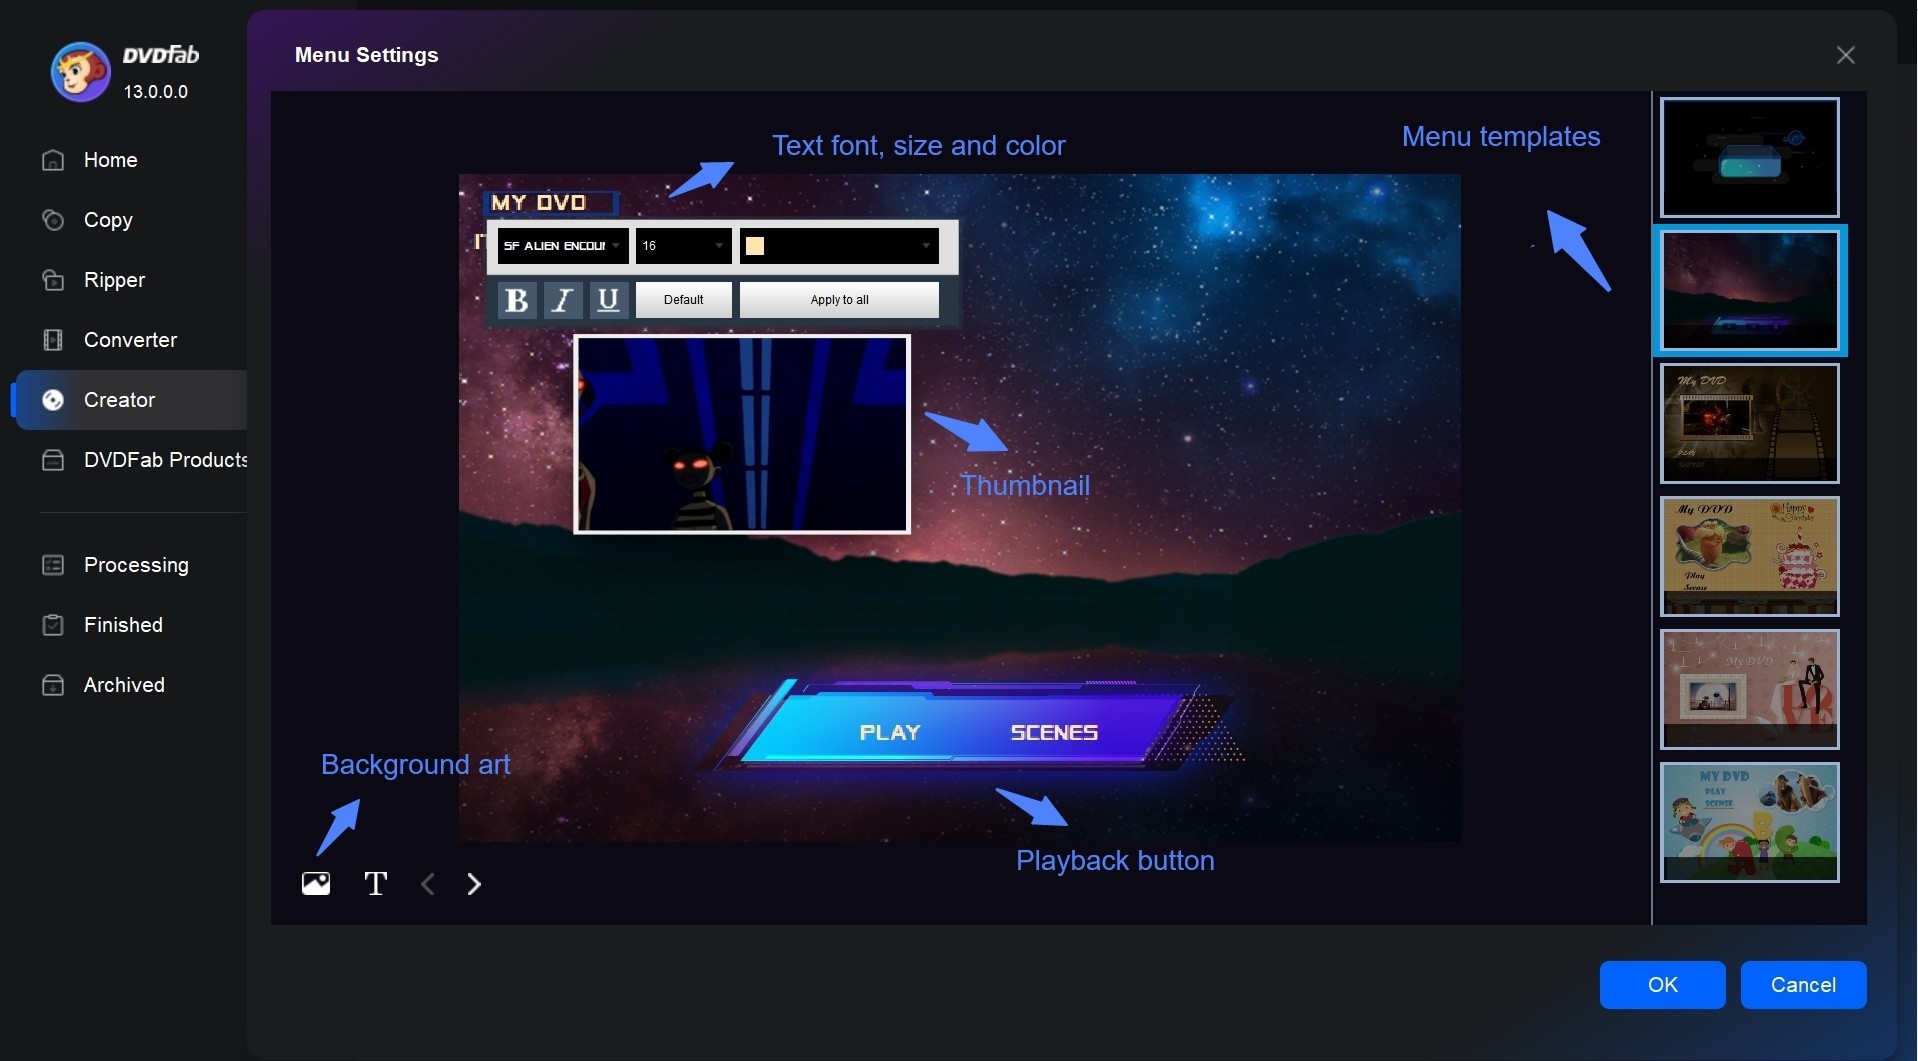
Open Advanced Settings to define your disc specifications. Select the DVD size (DVD-9 or DVD-5), choose the TV standard (NTSC or PAL), and set the aspect ratio (16:9 or 4:3). You can also adjust playback behavior to start from the menu or play all titles sequentially.
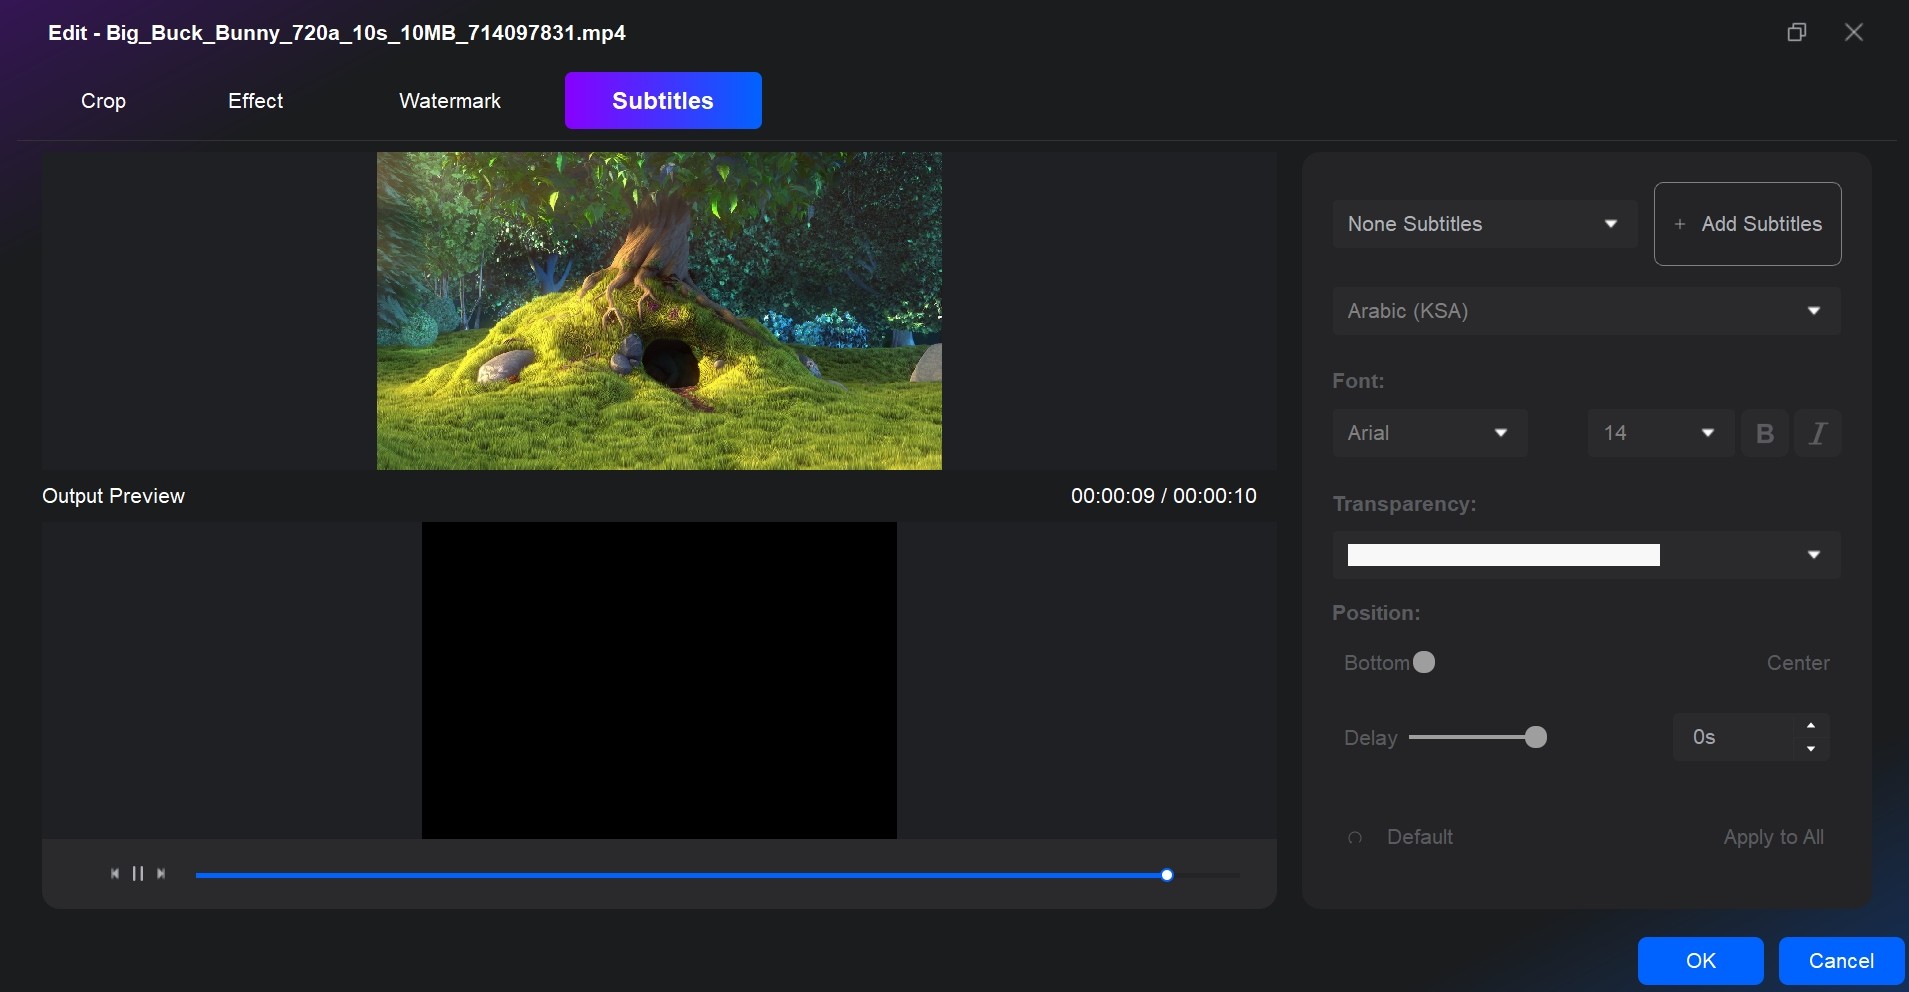
Optional: Add external subtitles or switch audio tracks for individual videos.
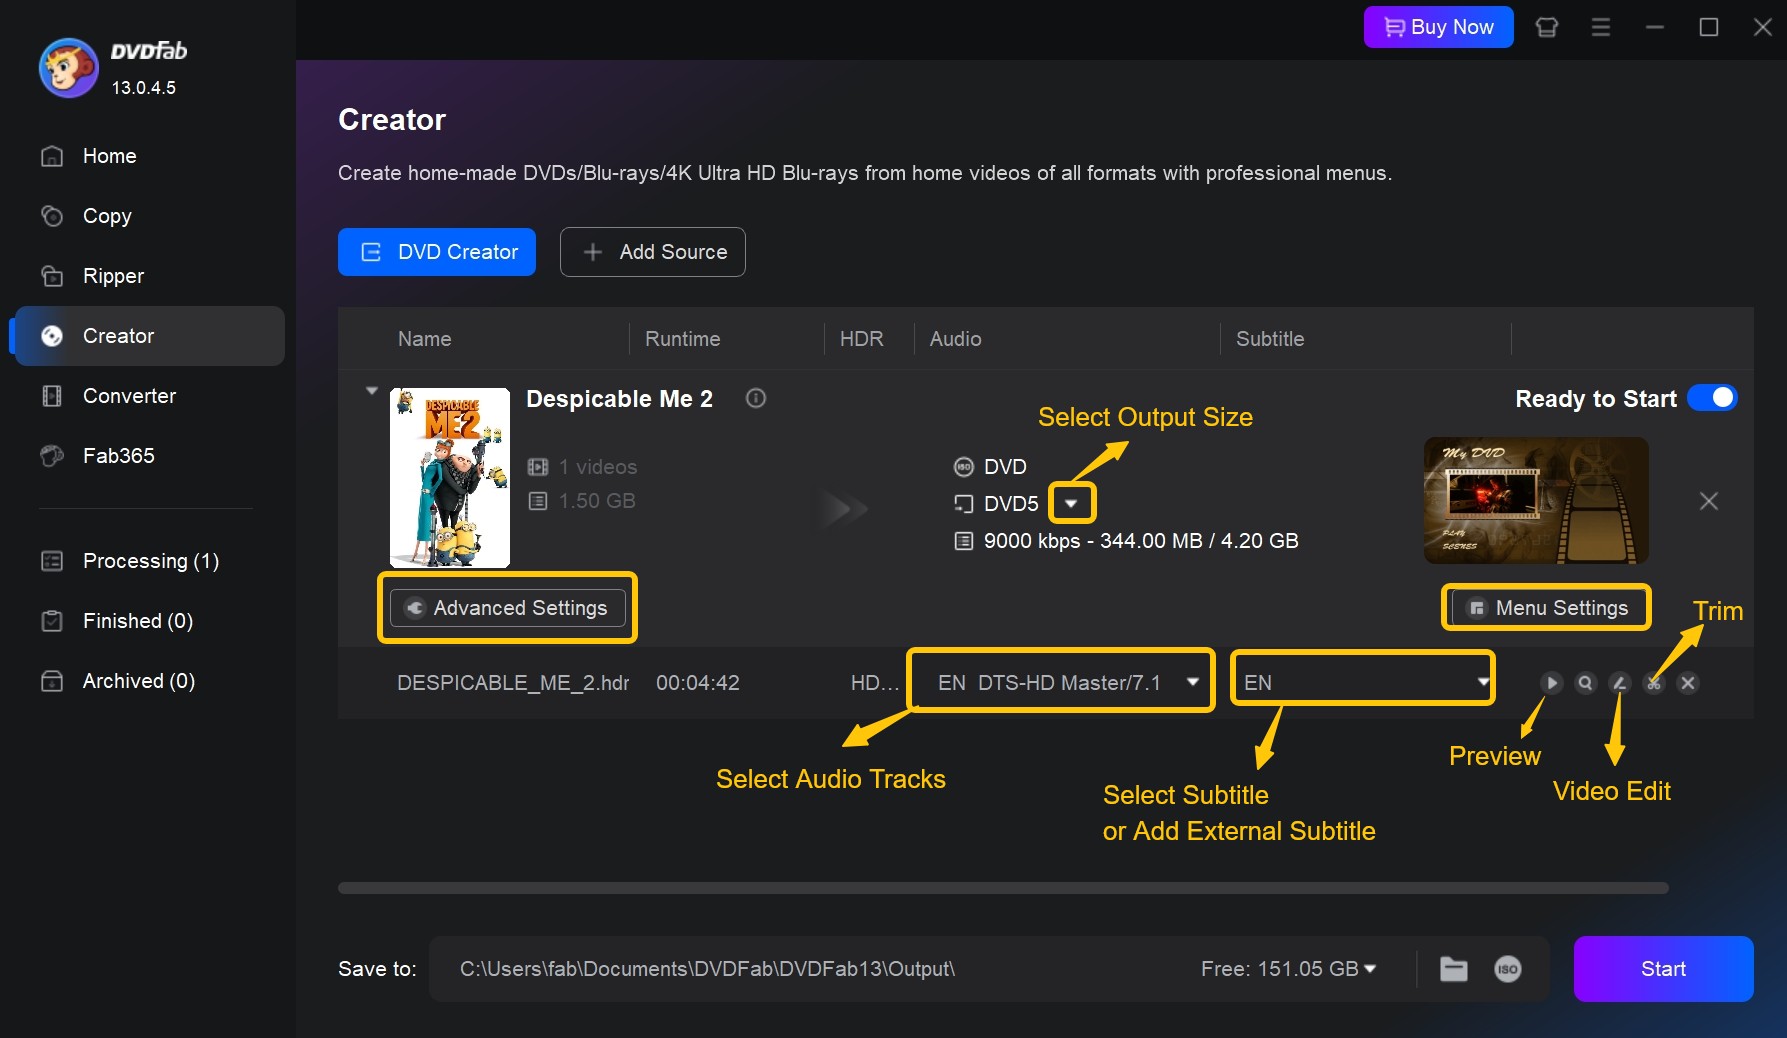
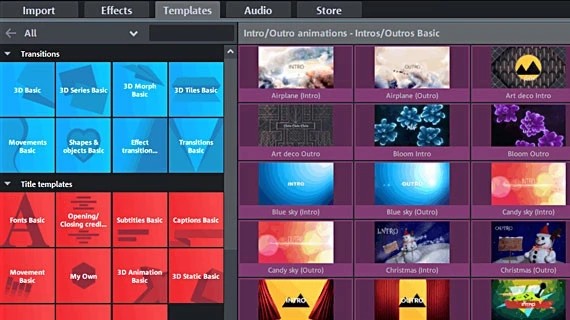
Then open Menu Settings to create DVD menu for better playback control. You can select a menu template, replace the background image, edit titles, adjust button style, or add background music. All main and chapter menus can be customized to match your preferred design.
Optional: Edit Video to DVD Before Burning
Use the Video Editor module to enhance your videos. For example, trim unwanted segments, crop the frame, rotate footage, adjust brightness and contrast, or add subtitles and watermarks. All edits will be reflected in the preview window before burning.
Step 3: Start to Burn Video to DVD
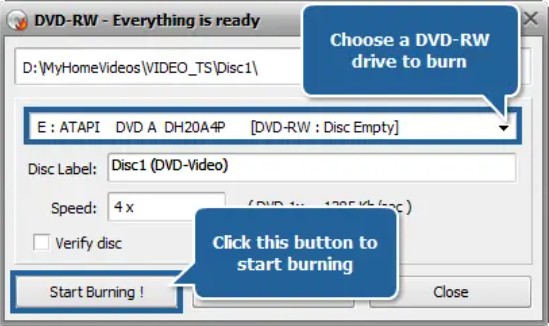
Insert a blank DVD into the optical drive of your computer. If you plan to create a digital backup, set the output destination as an ISO file or DVD folder. Once done, hit the Start button to burn DVD on Windows 10 or Mac.
How to Burn Video to DVD with MAGIX Video deluxe
- Available on: Windows 10/11
MAGIX Video deluxe provides an all-in-one workspace for creating professional DVDs from video on Windows. It integrates video editing, menu design, and DVD authoring tools within a single interface. Users can import clips from a wide range of formats, refine footage with precise timeline controls, and compile complete movie collections ready. The software also supports GPU-accelerated rendering to maintain smooth performance when working with long projects. Although its feature set is extensive, beginners may find the layered workspace slightly complex at first.
Features:
- Import and edit videos in major formats, including MP4, MOV, AVI, MPEG-2, and HEVC
- Design custom DVD menus using built-in templates, and background music
- Combine multiple clips or movies into a single DVD with structured chapter menus
- Apply transitions, text overlays, and color-correction before burning
Step 1: Import and Arrange Your Videos
Launch MAGIX Video deluxe and create a new project. In the Media Pool, locate your video files and drag them onto the timeline. Reorder clips as needed so the playback sequence matches your plan.
Optional: To include several films on one disc, right-click the title tab above Track 1, choose New movie, and import additional footage into the new timeline.
Step 2: Edit and Refine Your Footage
Open the timeline editor to polish your content before burning. Split or merge clips, and use ripple editing to keep transitions smooth. Adjust brightness, and color balance to correct exposure or style the look. Insert titles, rolling credits, and animated transitions to enhance flow, then add subtitles or overlays for narration. The preview window updates instantly, letting you evaluate changes in real time.
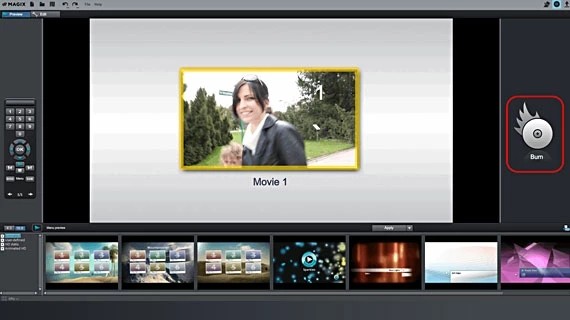
Step 3: Create a Professional DVD Menu
Switch to the Burn tab and select DVD as the disc type. Choose a menu template that suits your theme, then personalize backgrounds, button text, and navigation structure. Add background music or motion thumbnails for a more cinematic interface.
Step 4: Burn or Export the Project
Insert a blank DVD into the drive. In the Burn interface, confirm Burn to Disc to author directly or Create ISO Image to save a digital copy. Verify your settings and click Start Burning. MAGIX Video deluxe will encode, render, and finalize a playable video-to-DVD disc or ISO file compatible with standard DVD players.
How to Burn a Video to a DVD with AVS Video Converter
- Available on: Windows 11, 10, 8.1, 8, 7, Vista, XP
AVS Video Converter is a Windows-based suite that combines video conversion, basic editing, and video to DVD burning in a single application. It supports burning MP4, MOV, and WMV to DVD with custom menus and chapter navigation. Also, the ready-made presets simplify format and quality choices. Despite its versatility, the burning process can be slower, and occasional audio-video sync issues have been reported. Its single-computer license policy also limits flexibility for users who frequently upgrade hardware.
Features:
- Convert videos between 150 + formats, including HD, Full HD, and 4K (UHD/DCI 4K)
- Burn converted videos to DVD or Blu-ray with customizable menus
- Use hardware acceleration for faster encoding and preview
- Edit footage before conversion: trim, merge, split, or adjust aspect ratio
- Export videos optimized for YouTube, Facebook, mobile devices, and consoles
Step 1: Import Your Video Files
Launch AVS Video Converter and click Browse to select the video files you want to burn. Load multiple videos if you plan to create a compilation, then arrange their order in the file list before proceeding.
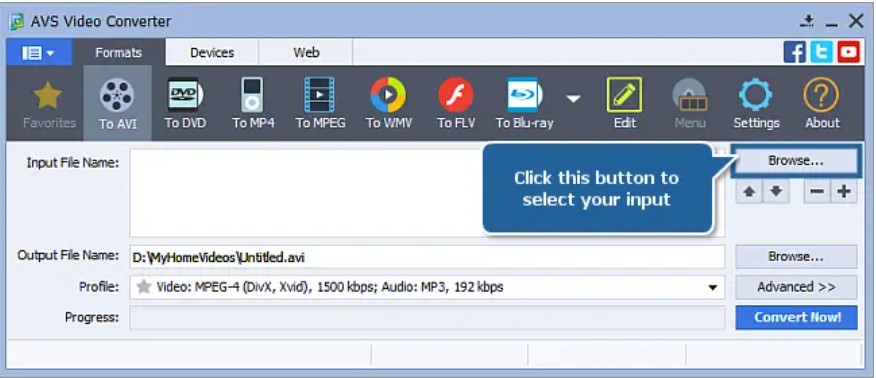
Step 2: Set Output to DVD and Choose a Profile
Open the Formats tab and select To DVD as the output option. Pick a preset profile that matches your desired quality or region standard (NTSC or PAL). If needed, add or remove files and define the target folder for the converted project on your local drive.
Step 3: Edit and Design Your DVD Menu
Before conversion, open the editing panel to refine your footage. Trim unwanted parts, merge clips, adjust color levels, and add titles or effects. Then enable Menu Creation to design the DVD layout, such as setting chapter points, selecting video loops, adding music, and editing menu titles for navigation.
Step 4: Burn Your Video to DVD
Click Convert Now! to start encoding your video project. After conversion, select Burn to Disc, insert a blank DVD, and click Start Burning. The program will author a playable disc with menus and chapters, or you can save the result as an ISO file.
How to Burn Video to a Data DVD (Backup Only)
Burn Video to Data DVD with Windows Media Player
- Available on: Windows 10/8/8.1/7/Vista/XP
Windows Media Player is a built-in Video to Data DVD software operated by Microsoft. It provides functionality for playing audio, video, and viewing images on computers running the Windows operating system. In addition, this versatile software allows you to burn your desired songs, pictures, or videos onto a CD or DVD, turning them into data discs for playback on appropriate systems. However, you cannot use Windows Media Player to create video DVDs that you could play on a regular DVD player.
Step 1: Open Windows Media Player and insert a blank DVD
Launch the program either from the shortcut on your desktop or from the programs list in the Start menu. Then place a blank DVD in your DVD writer drive. Ensure that the drive is either a DVD-R or DVD+R as these are typically the formats that are compatible with Windows Media Player.
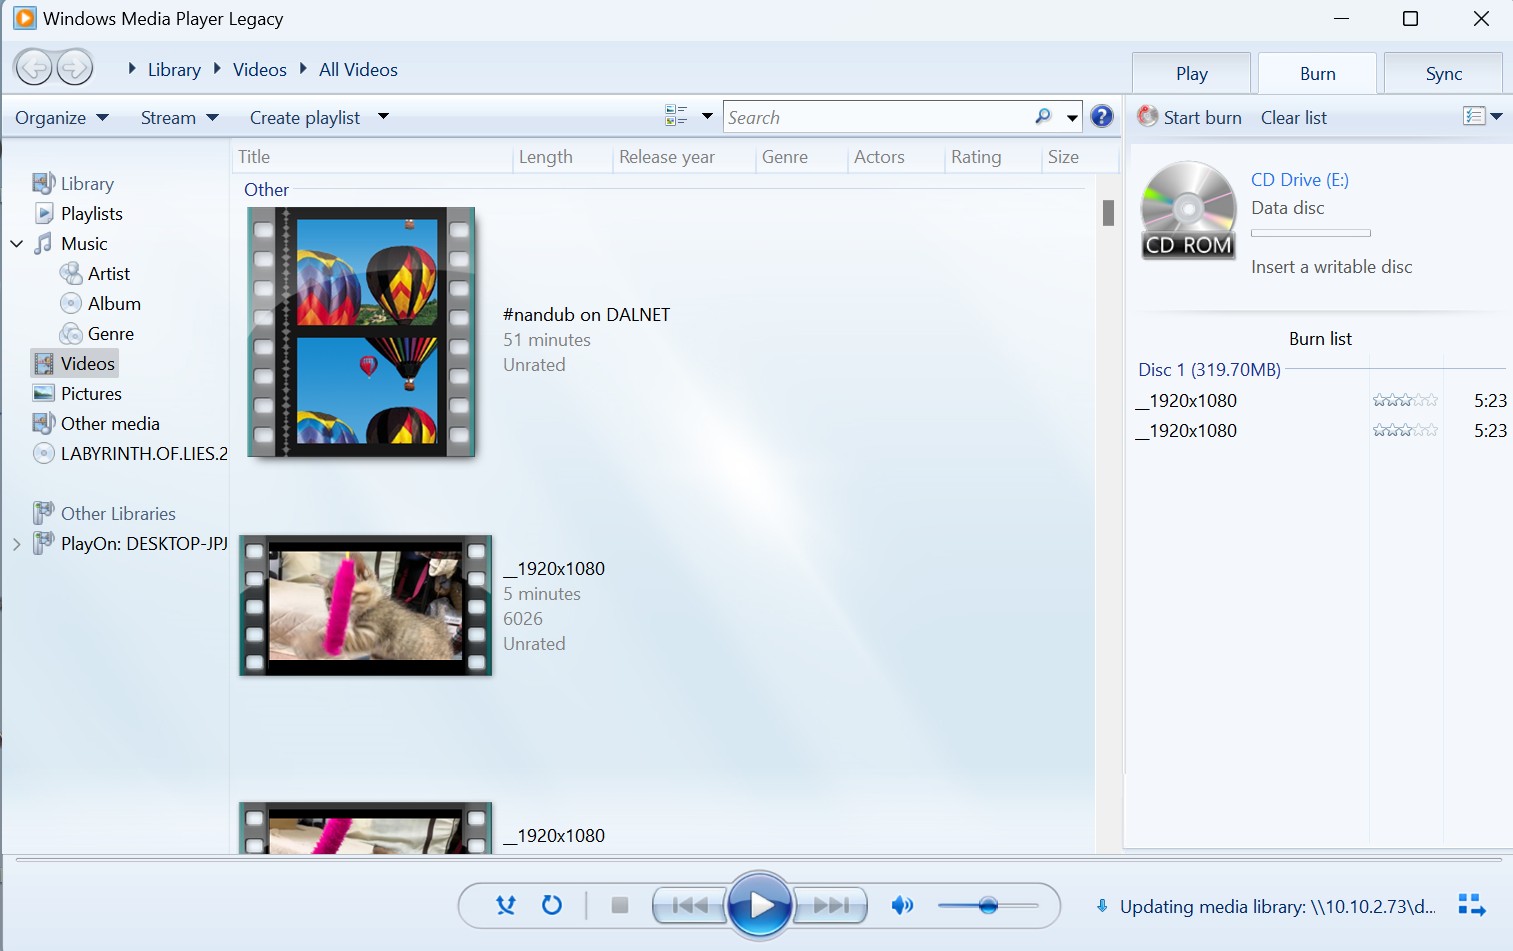
Step 2: Switch to burn list and add files
At the top right of the player, switch from the 'Play' tab to the 'Burn' tab. Navigate through your folders and find the video files you want to burn. Drag them to the burn list in the right pane of the Windows Media Player.
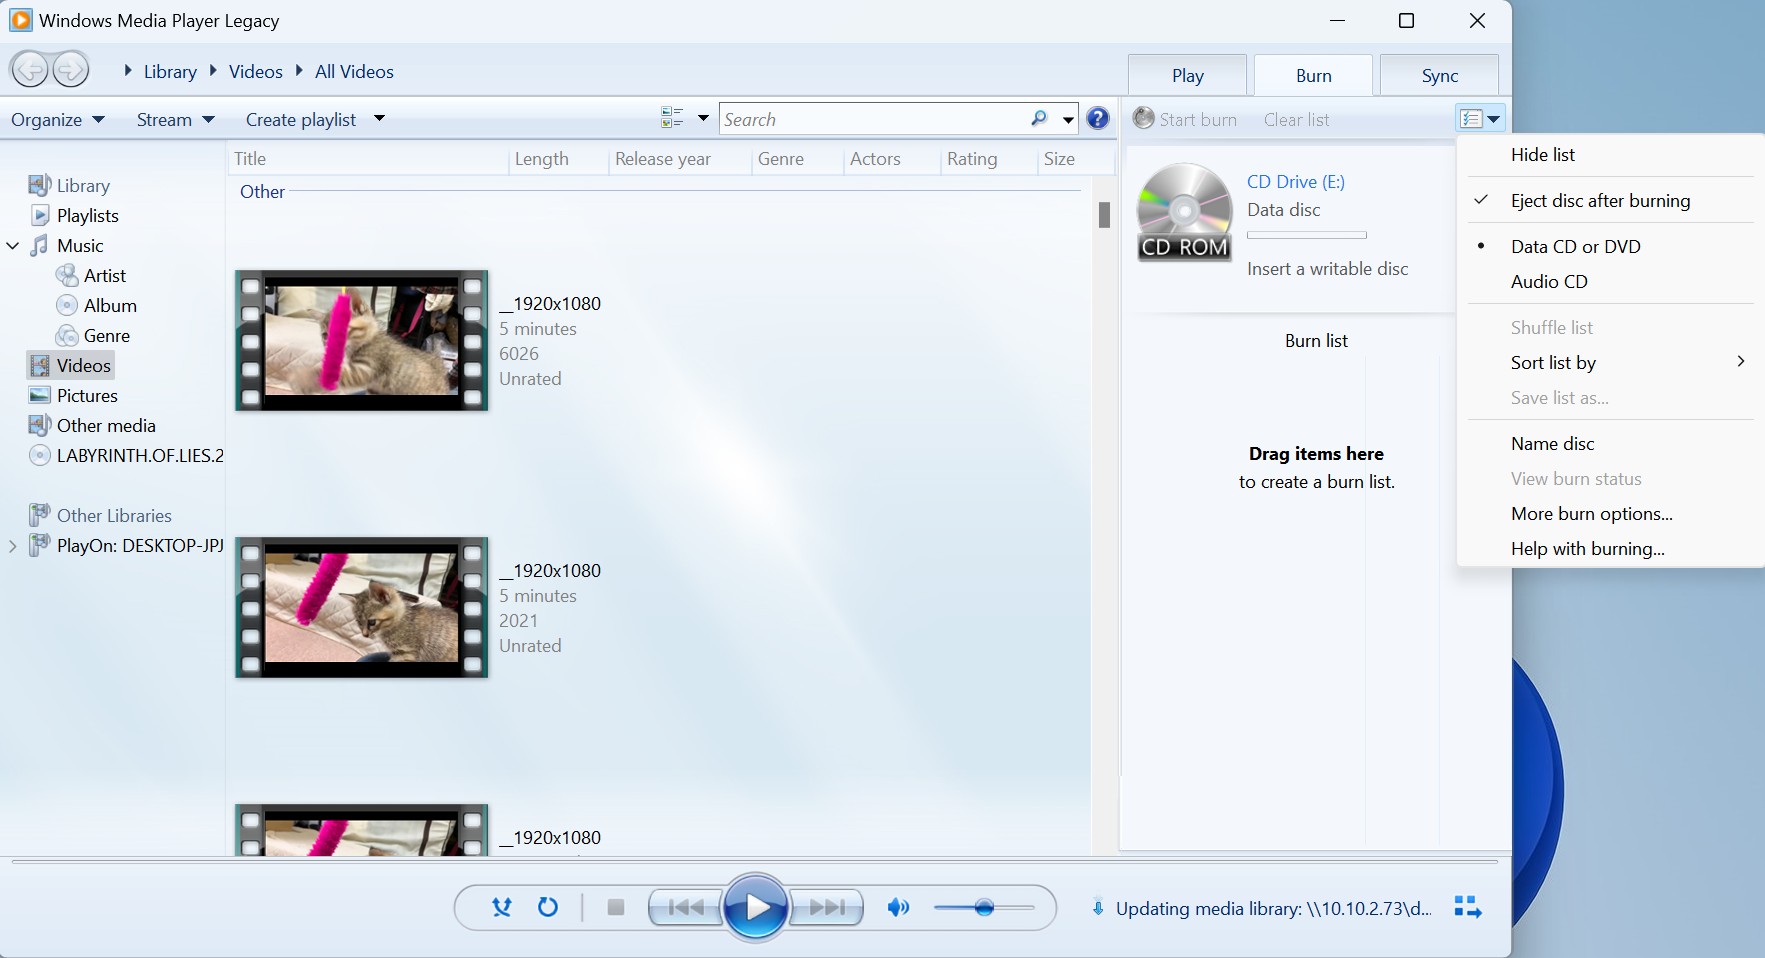
Step 3: Choose the right burning option and start burning video to data DVD
Click on the 'Burn options' drop-down menu and choose 'Data DVD'. Once you're satisfied with your burn list, click on 'Start Burn'. This feature allows Windows Media Player to start writing the video files onto your DVD.
How to Burn a Video to a Data DVD with Finder
- Available on: All macOS versions
Finder is the default file manager and graphical user interface shell used on all Macintosh operating systems. Described in layman's terms, Finder facilitates your interaction with your Mac's operating system and files; it helps you organize and access almost everything on your Mac. You can also use Finder to burn your video files to a data DVD, although it does not have features to create a DVD menu or burn a playable video DVD. For example, if you want to burn an iMovie to DVD on your Mac, the built-in Finder won't work. You'll still need a safe and clean third-party tool like DVDFab DVD Creator to burn video to DVD on Mac.
Step 1: Insert a blank or rewritable disc into your Mac's DVD drive and wait for it to appear on your desktop. Double-click on the DVD, and when it opens, go to Finder.
Step 2: Locate the video files that you wish to burn onto the DVD. You can do this by using Finder's search bar or manually searching through your files. Drag the selected files into the open DVD folder.
Step 3: Once you've relocated all the files, click on "File" in the menu bar at the top of the screen.
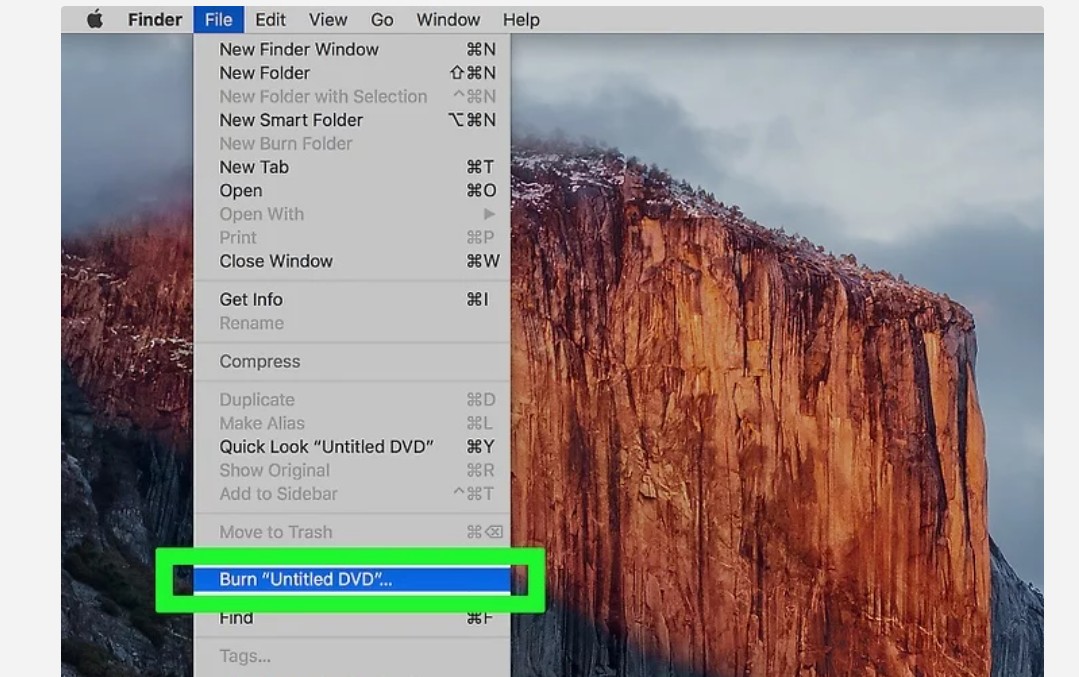
Step 4: Choose the 'Burn [disc]' option to start the burning process. A pop-up window will appear asking you to confirm the action. Click 'Burn'.
FAQs
What type of DVD is best for burning videos?
For most home projects, DVD+R and DVD-R discs work best because they are compatible with the majority of DVD players and computers. Each holds about 4.7 GB of data—roughly one standard movie.
If you need more space, use dual-layer discs such as DVD+R DL or DVD-R DL, which can store up to 8.5 GB. Rewritable discs like DVD-RW are fine for testing, but they may not play reliably on all standalone players.
Can I burn HD videos to DVD?
Yes, you can burn HD videos to DVD, but the final DVD-Video disc will not stay in full HD or 4K. The video has to be converted to a DVD-compatible format for standard DVD playback.
If you want a disc for a regular DVD player, this conversion is part of the process. If you want to keep the original HD quality, you can store the video file as a data file instead.
Can I use a mail-in service to burn video to DVD?
Yes. Some companies, such as Burn Video App, offer mail-in DVD creation services. You upload your videos through their app or website, and they handle the entire burn video to DVD process for you. A physical disc is then produced and shipped to your address.
This approach is convenient for users who prefer a ready-made disc without using local software, but it requires sharing your files with a third party and waiting for delivery.
How to Burn a YouTube Video to DVD Legally?
You can burn YouTube videos to DVD only if the content is copyright-free, in the public domain, or created by you.
- Copy the URL of the video you legally own or that is publicly available for download.
- Download the video using a reputable, authorized downloader or YouTube's own "Download" feature if provided.
- Open your DVD authoring software (for example, DVDFab DVD Creator). Import the downloaded file. Then customize your DVD menu if desired.
- Insert a blank DVD and click the Start button to create a playable video DVD.
Legal Tip: Always verify that YouTube videos are permitted for redistribution or offline use. Many educational channels offer content that can be legally downloaded and burned.
How to Burn Netflix Movies to DVD?
Netflix content is protected by Digital Rights Management and cannot be burned. However, if you have legally obtained the video files and want to create a DVD, please follow these steps:
Step 1: Import the video files you own or into the DVD burning software
Step 2: Select the output DVD size as DVD-9 or DVD-5 and set the menu properties as NTSC or PAL.
Step 3: Click "Menu Settings" to create and customize your DVD menu.
Step 4: Start to burn your Netflix movies to DVD at fast speed.
Conclusion
Burning videos to DVD remains a practical way to preserve and share digital content. The choice of software depends on your workflow and level of control. DVDFab DVD Creator focuses on stable performance and menu customization, MAGIX Video deluxe integrates full editing and authoring features, and AVS Video Converter combines conversion flexibility with direct disc burning on Windows. Whichever tool you use, the essential steps of importing, editing, authoring, and burning stay the same.
 Top 9 Free DVD Burners for Mac in 2026: Tested & ReviewedBy Diana Smith - Jun 23, 2026
![How to Convert MKV to DVD with Stylish Menu? [2026 Updated]](https://r3.dvdfab.cn/upload/resource/mkv-to-dvd-yO3k.jpeg) How to Convert MKV to DVD with Stylish Menu? [2026 Updated]By Wenny Yan - Jun 17, 2026
How to Convert MKV to DVD with Stylish Menu? [2026 Updated]By Wenny Yan - Jun 17, 2026 Convert Video to DVD: 8 Best and Free Video to DVD Converters in 2026By Diana Smith - Jun 15, 2026
 How to Transfer and Burn iPhone Videos to DVD on Windows & MacBy Diana Smith - Jun 11, 2026