How to Transfer and Burn iPhone Videos to DVD on Windows & Mac
Summary: This guide explains how to transfer iPhone videos to a Windows PC or Mac and burn them to DVD using DVDFab DVD Creator or Windows Media Player. It covers iPhone's HEVC video format compatibility, three retail mail-in services, and answers common questions on playback compatibility, burn time, and free DVD tools.
Table of Contents
I've lost count of how many times my iPhone popped up "storage almost full" right when I was filming something important. The videos pile up in Photos and iCloud, but my family still prefers watching them on the living-room TV, not on a small phone screen.
That's why I started to transfer iPhone video to DVD: it frees up space on the phone, creates a physical copy that plays on any home DVD player, and gives you something to hand to relatives who are not on iCloud. I worked through the full process on both Windows and Mac, including how to handle iPhone's default HEVC video format, which some software does not read cleanly before you convert. This guide covers two at-home methods and three mail-in service options for burning iPhone videos to DVD.
Step 1: Transfer iPhone Videos to Your Computer
Before burning iPhone videos to DVD, you must first transfer them to a computer. Here are methods for both Windows and Mac PCs:
How to Transfer iPhone Videos to Windows PC
Transferring videos from an iPhone to a Windows PC can be done quite simply through Microsoft's Photos app or via Apple's iCloud platform.
Using Windows Photos App:
- Connect your iPhone to your Windows PC with a USB cable and unlock your phone. If a prompt appears on the iPhone asking whether to trust this computer, tap Trust.
- Launch the Photos App on your Windows PC.
- In the top-right corner, click Import, then choose From a USB Device.
- Wait a moment while Windows detects your iPhone, then select your iPhone and choose the videos you want to bring over. Click Import to start copying.
- When the import finishes, the selected iPhone videos are saved on your PC (usually in the Pictures / Imported from iPhone folder), so you can use them later to burn iPhone videos to DVD.
Using iCloud:
- On your iPhone, open Settings, tap your name at the top, go to iCloud, then tap Photos. Confirm that iCloud Photos is turned on.
- Your videos upload to iCloud automatically over Wi-Fi.
- On your Windows PC, open a browser and sign in to www.icloud.com with your Apple ID.
- Open Photos and locate the videos you want to download.
- Select the videos and click the download button at the top of the screen. Files save to your default Downloads folder.
How to Transfer iPhone Videos to Mac
Since macOS Catalina (10.15), Apple moved iPhone media transfers out of iTunes. The Photos app and Image Capture now handle Camera Roll imports; Finder manages backups and file access separately. Here are three options:
Using the Photos App
- Connect your iPhone to your Mac with a USB cable. If the iPhone prompts you to trust this computer, tap Trust This Computer.
- The Photos app opens automatically. If it does not, launch it from your Applications folder.
- Click your iPhone's name in the left sidebar under Devices.
- Select the videos you want and click Import Selected, or click Import All New Items to copy everything at once.
- Imported videos are saved to your Photos library and ready for the DVD burning steps below.
Using Airdrop
- Switch on Wi-Fi and Bluetooth on your iPhone and Mac.
- Open the control center on your iPhone, tap on Airdrop and choose 'Everyone'.
- On your Mac, go to Finder then go to 'Go' > 'AirDrop' and set the option allow to be 'discovered by Everyone'.
- Choose the video you want to transfer and click the share button on your iPhone.
- Tap on 'AirDrop' and select your Mac.
- The video will be transferred to your Mac and can be found in the 'Downloads' folder.
Using iCloud
Mac users can also use iCloud Photos to sync and download videos, following the same setup described in the Windows section above. On a Mac with iCloud Photos enabled, your videos sync automatically and are accessible in the Photos app.
Step 2. Burn iPhone Videos to DVD
With your iPhone videos now transferred to your computer, you're ready to burn DVD on Windows 10 or Mac. I'll show you two methods: creating a universally playable video DVD for seamless viewing on home entertainment systems,and generating a data DVD for secure long-term storage.
Burn iPhone Videos to DVD with DVDFab DVD Creator (Video DVD)
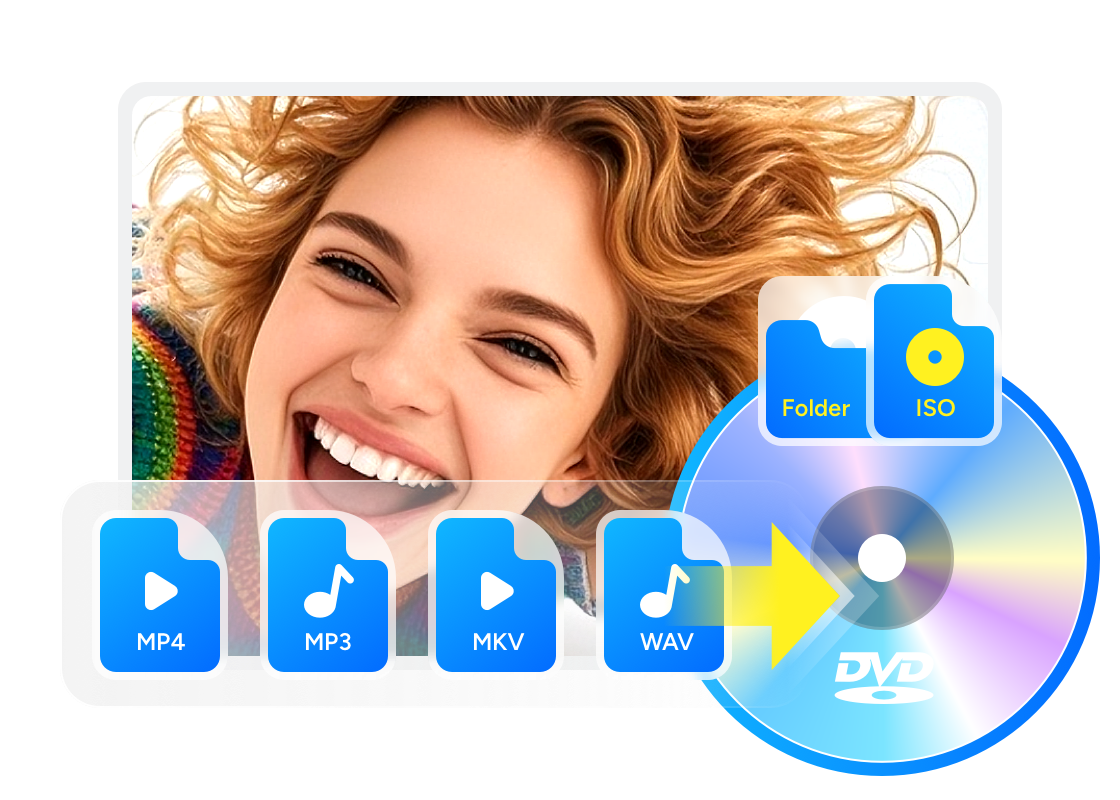
DVDFab DVD Creator is a professional DVD burning solution that converts iPhone videos in formats like MP4, MKV, AVI, MOV, and more, to DVD discs, ISO files, or DVD folders. It features a built-in menu library for designing elegant navigation interfaces, and also video editing tools to DIY your iPhone videos. You can further customize DVD setting including playback sequence, subtitles, and audio tracks.
Available on:
Features:
- Make DVDs, ISO files or Folders from 200+ formats, including MKV to DVD and HEVC .mov files from iPhone
- Output high-quality DVD-5/9, DVD+R/RW, DVD-R/RW, DVD-R DL, DVD+R DL
- Provide customized DVD menu templates and video editor
- Auto synchronize the source meta info, such as the movie title, cast, and cover
- Supports GPU-accelerated batch burning for faster processing of multiple clips
- Lets you preview any clip in the queue during the burning process
How to Use DVDFab DVD Creator to Burn iPhone Videos to DVD
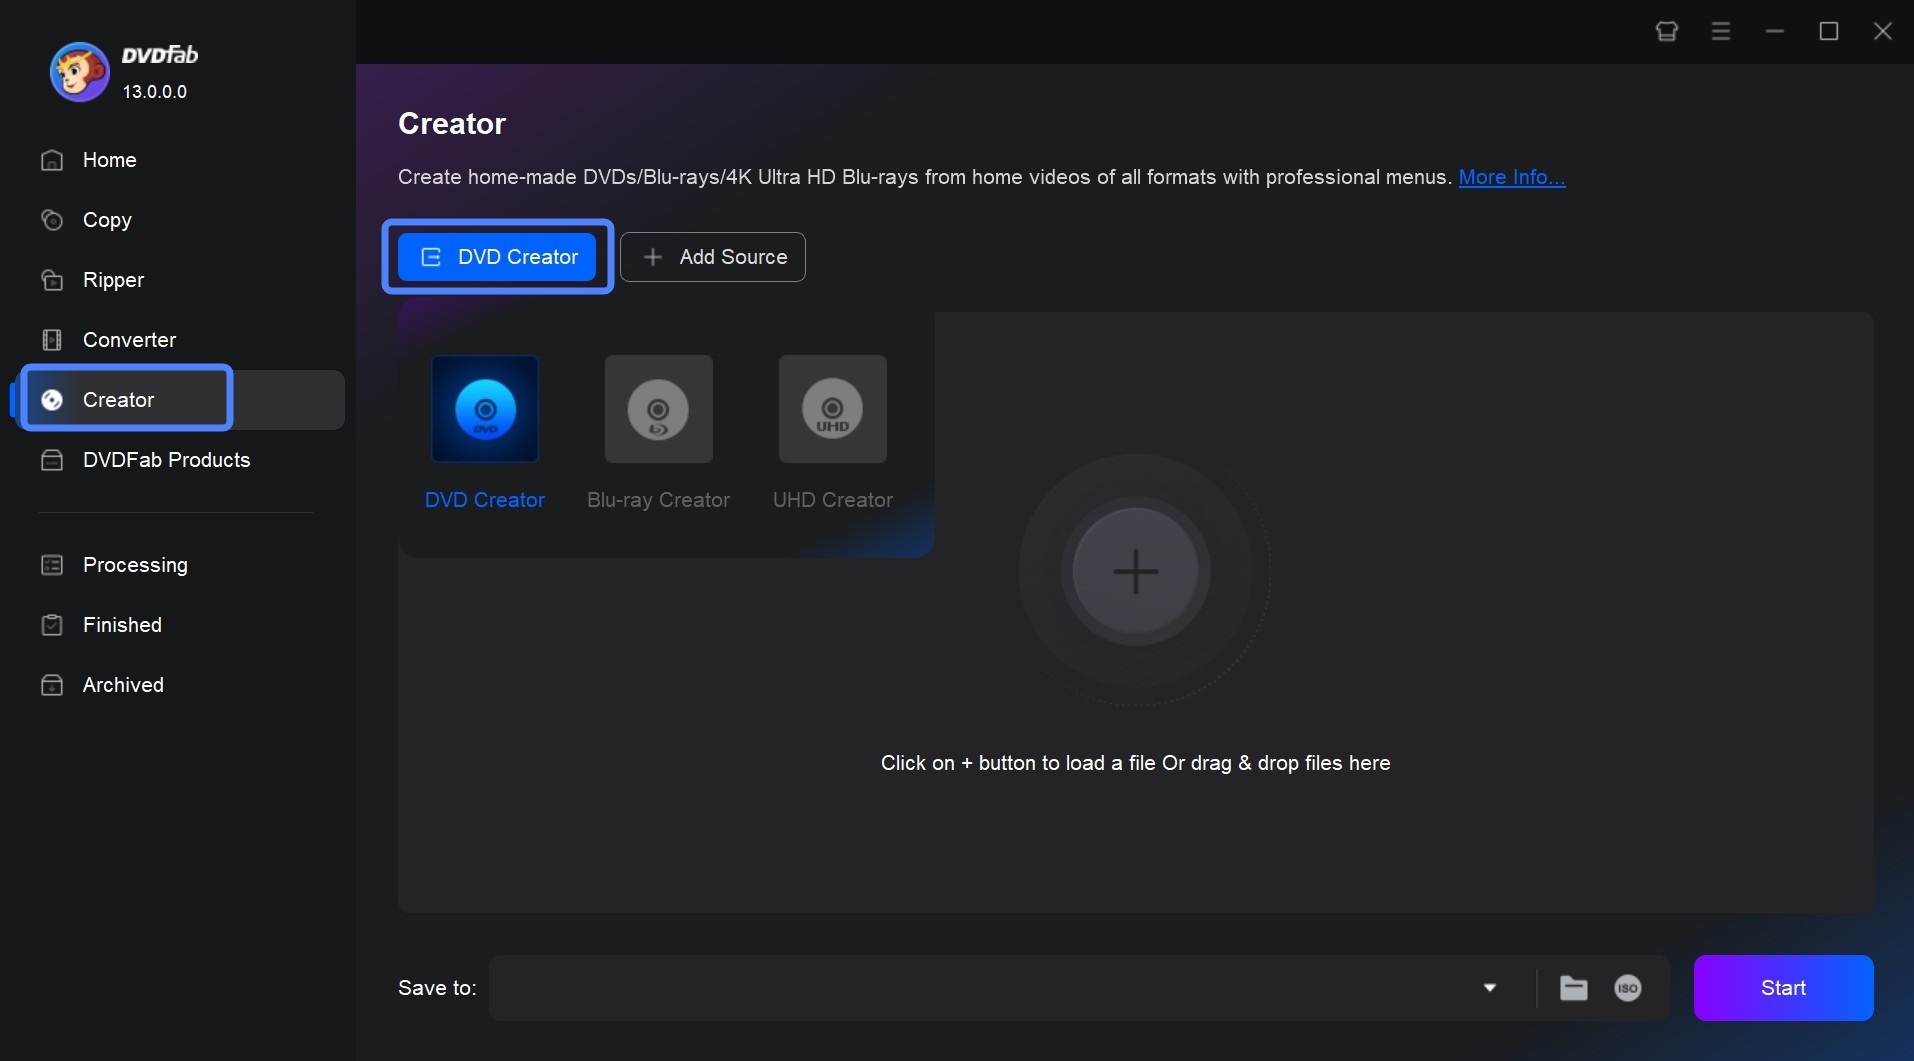
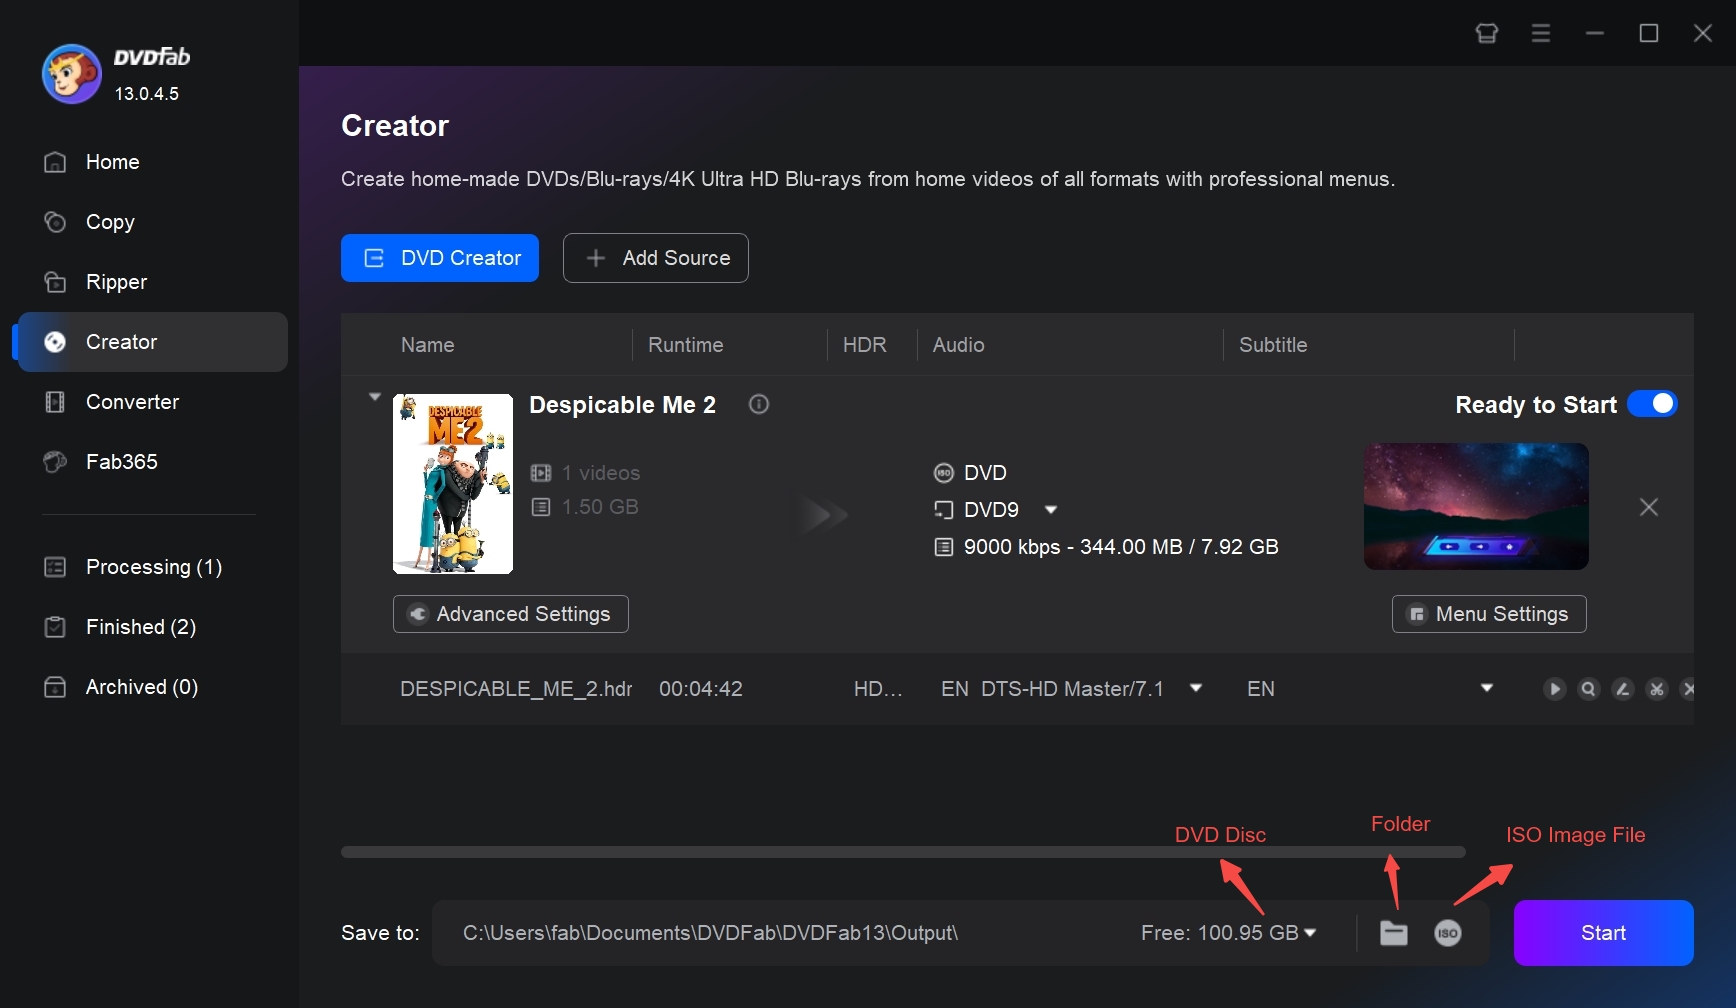
Step 1: Launch DVDFab 13 and click on the "Creator" module. Click on the Mode Switcher and choose DVD Creator". Then, tap on "+" button or drag and drop your iPhone video files directly into the main interface.
Step 2: Customize your videos before burning. Click "Advanced Settings" to name the disc and choose the output size (DVD-5 or DVD-9). Set the TV standard (NTSC for US playback, PAL for European players) and the aspect ratio. You can also choose whether the disc starts from a menu or plays directly from the first title.
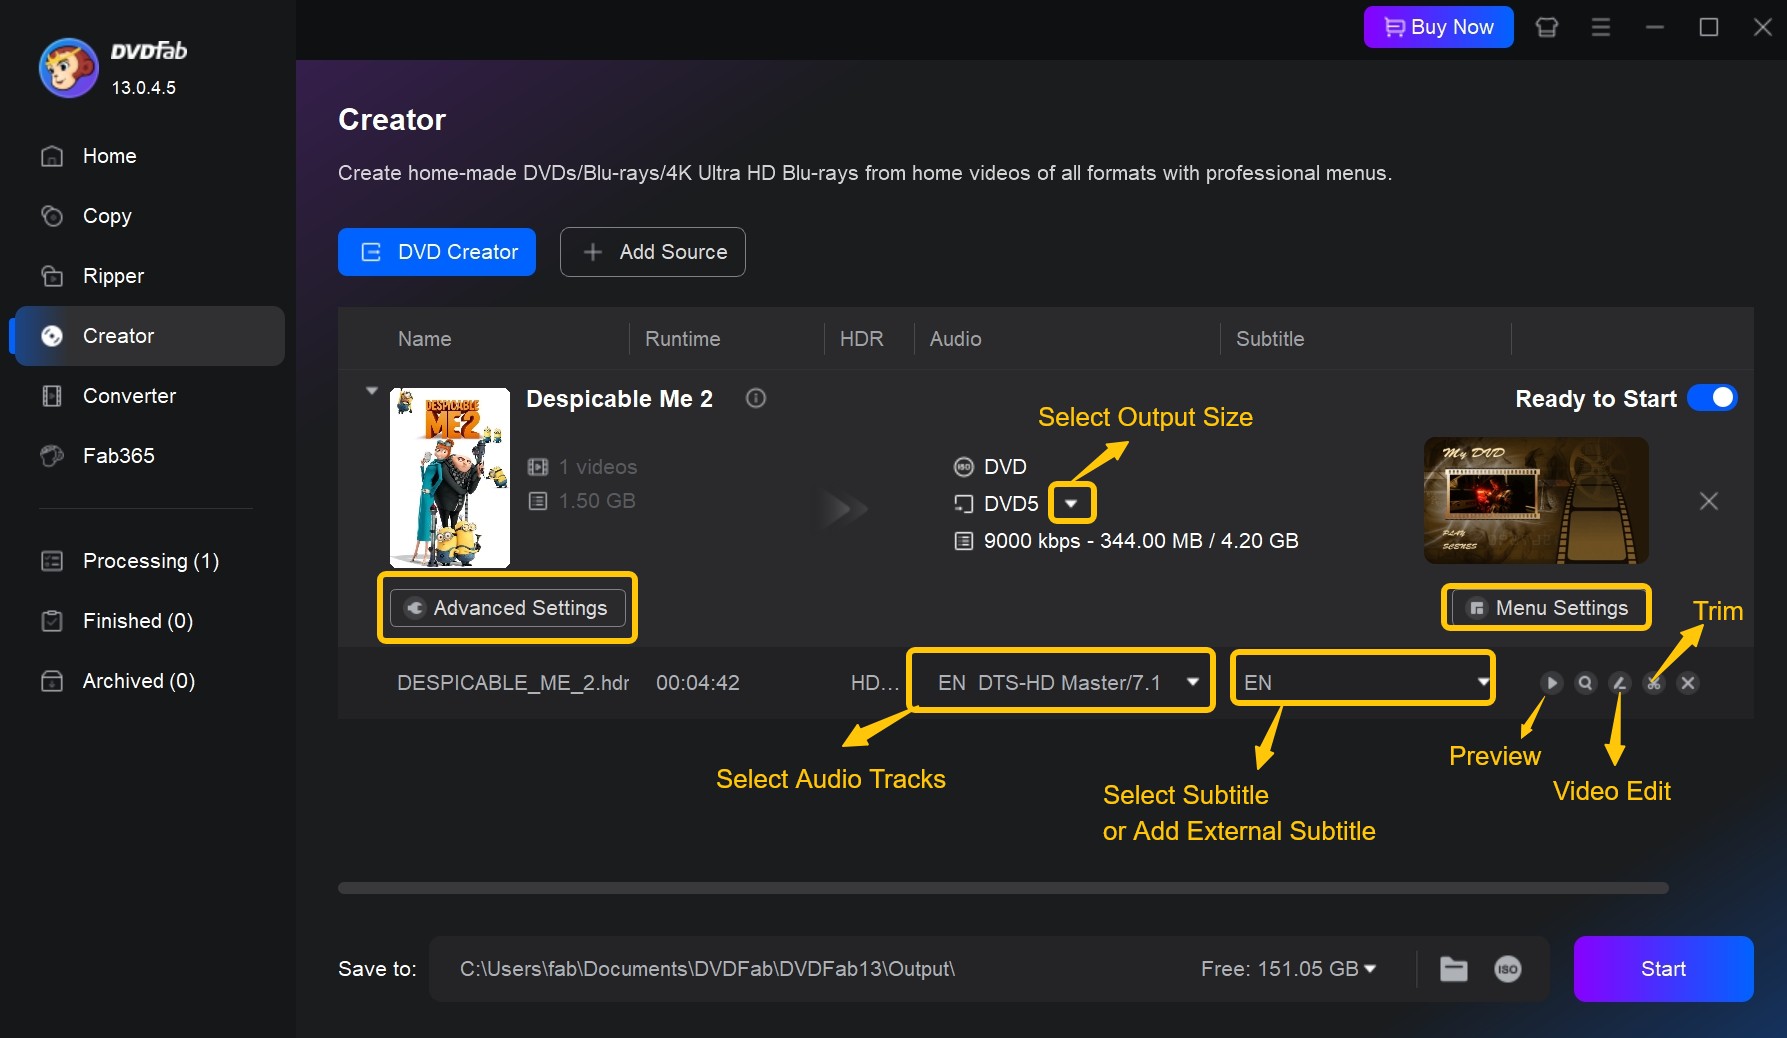
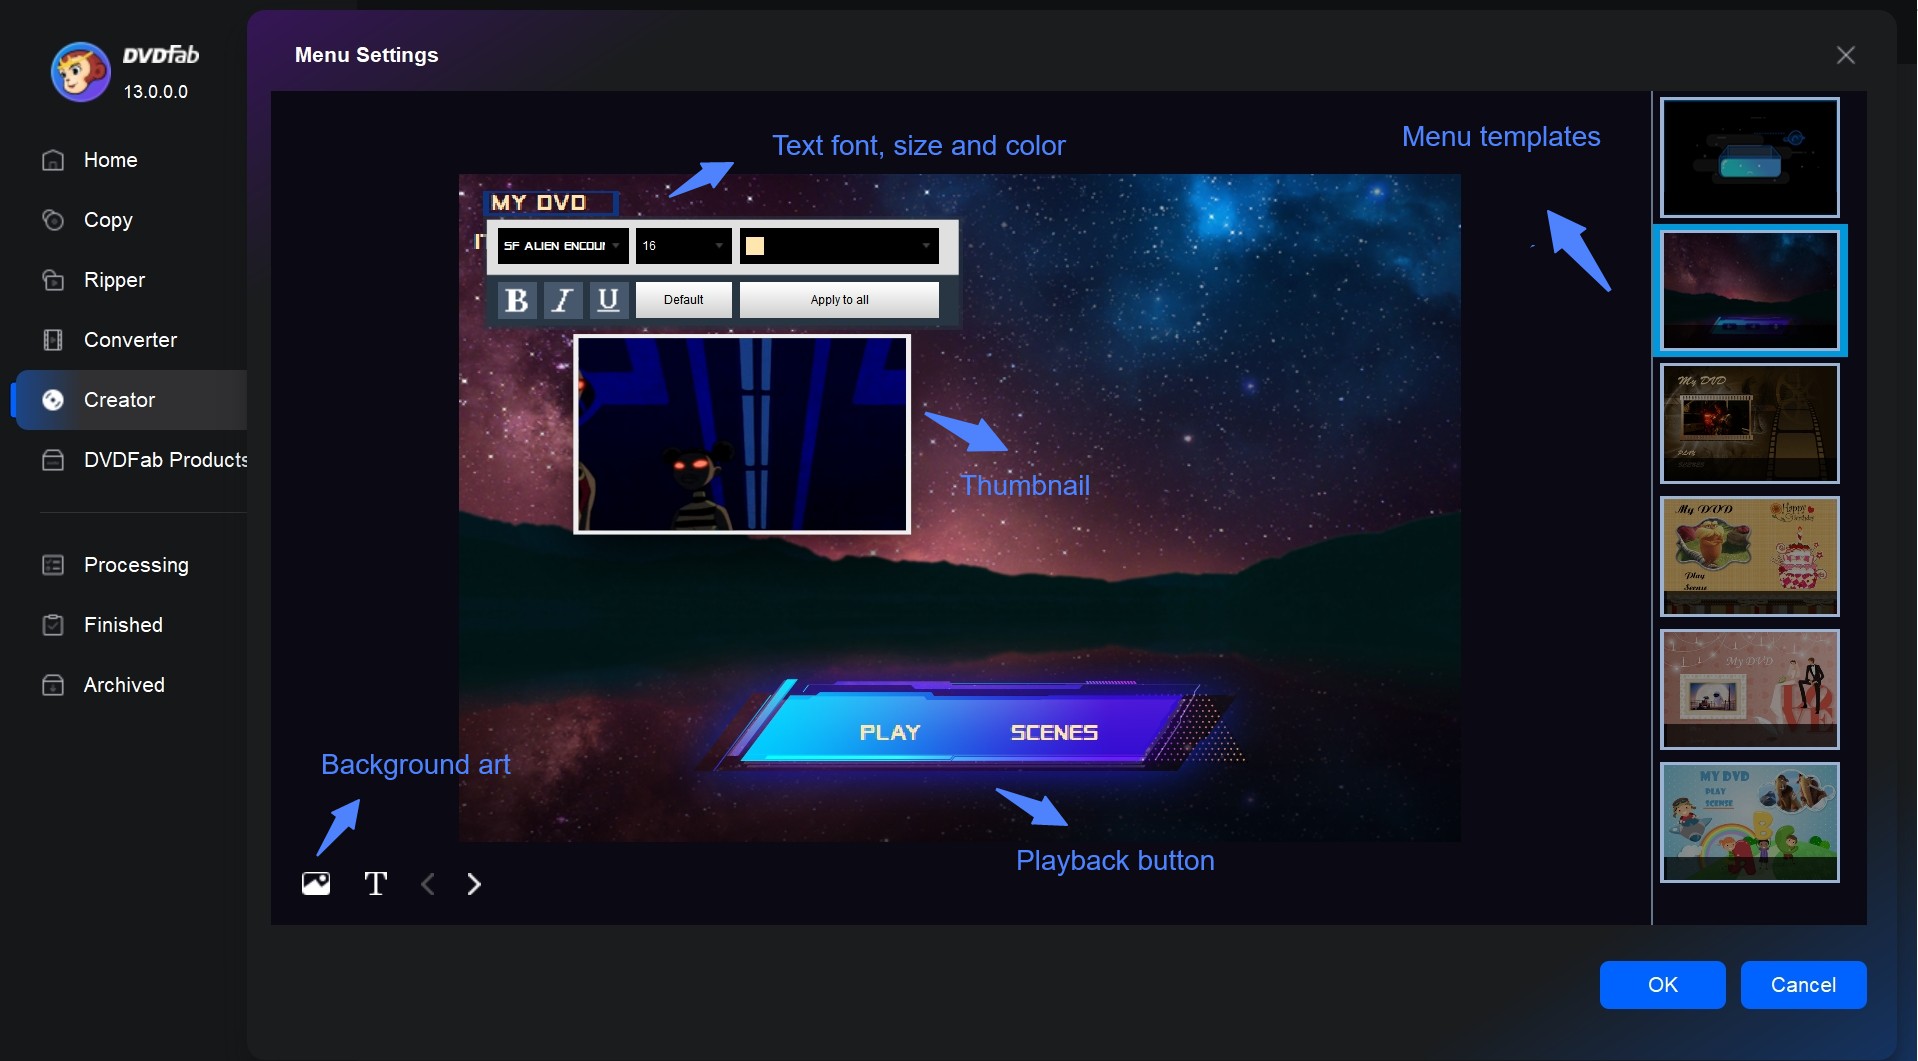
In "Menu Settings," choose a built-in template and personalize it by changing the background image or adding title text.
"Video Editor" module allows you to crop and rotate your iPhone videos, fine-tune saturation and other color settings, and add subtitles. This built-in editor gives you complete creative control to enhance and personalize your DVDs.

Step 3: Once you've made all desired settings, click the "Start" button to make a DVD from iPhone video. The software will display the progress details including the remaining time and the percent completion.
Burn iPhone Videos to DVD with Windows Media Player (Data DVD)
If you want to burn iPhone video to a data DVD for storage only, Windows Media Player is a free option. This tool is suitable for those who prefer to use default apps provided by the system and do not need DVD menu navigation. However, please noted that a data DVD will not be able to be read by a standard DVD player.
How to Burn iPhone Videos to Data DVD with Windows Media Player
Step 1: Open Windows Media Player on your PC. You can usually find it by typing its name into the Start menu search box.
Step 2: Once it's open, look at the upper-right area of the window and click the Burn tab. This switches the right-hand panel into the burn list.
Step 3: Insert a blank DVD into your computer's DVD drive. Wait a few seconds for Windows to recognize it.
Step 4: In the Windows Media Player library, browse to the folder where you saved your iPhone videos. Drag the videos you want to put on the disc into the Burn list on the right side. You can change the order by dragging items up or down in the list.
Step 5: When you've added all the clips you need, click Start burn. Windows Media Player will begin writing a data DVD with your iPhone video files.

Best iPhone Videos to DVD Services: Offline Solutions
Besides using a DVD maker software, you can also commission a professional offline service to convert your iPhone videos into DVDs if you're short on time or do not want to do it by yourself. Here are some recommended companies:
Walmart
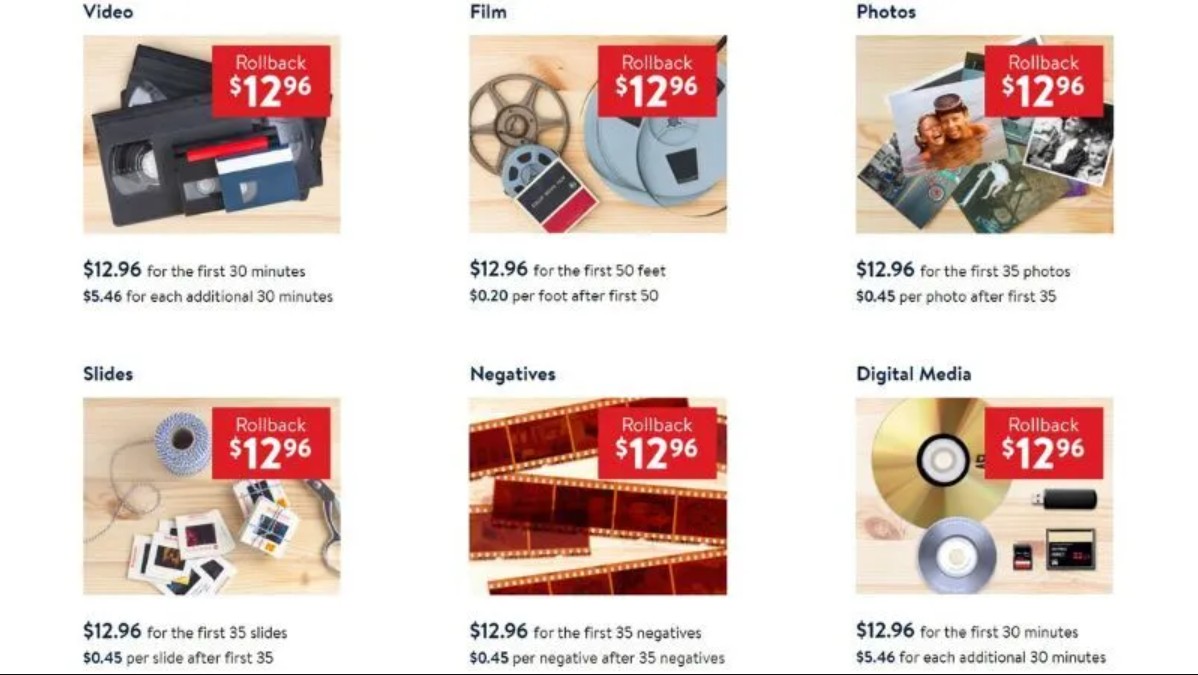
Walmart's transfer service, operated by Capture (powered by YesVideo), converts video files to DVD, USB drive, or digital download. You can drop your media off at a Walmart Photo counter or mail it in using a prepaid UPS label. Finished orders typically return within three to four weeks. Accepted formats include MPEG1, MPEG2, WMV, AVI, and MOV. For current pricing, check dvdwalmart.com or the Walmart Photo section of walmart.com, as rates are updated periodically.
Walgreens
Walgreens offers video transfer services through a partnership with iMemories. Supported formats include MP4, M4V, MTS, 3GP, MOV, AVI, DV, MPEG, and WMV. Orders are processed off-site; typical turnaround is three to five weeks. Pricing varies by order size and format. Check current rates at photo.walgreens.com before placing an order, as pricing is updated regularly.
CVS
CVS has offered video-to-DVD conversion in the past, but availability varies by location. Call your local CVS store directly to confirm whether the service is currently active before planning an order.
All three services require you to submit your video files in a compatible format. If your iPhone clips are in HEVC format, you may need to export them as MP4/H.264 first. For users with more than a few clips to convert or who want to avoid multi-week wait times, the DVDFab DVD Creator method covered earlier is the more practical option for regular use.
FAQs
Will iPhone's HEVC video format work with DVD burning software?
Most current DVD authoring tools support HEVC (H.265) input natively, and DVDFab DVD Creator reads iPhone .mov files in this format without requiring a separate conversion step. If you use another tool that rejects the files on import, convert them to MP4/H.264 first using a free conversion utility. The conversion does not cause noticeable quality loss at the resolution DVD supports (480p).
Can the finished DVD play on any standard DVD player?
A video DVD created with full authoring software, such as DVDFab, plays on most home DVD and Blu-ray players without compatibility issues. A data DVD, which stores the original video files rather than converting them to DVD-Video format, only works on computers. Windows Media Player burns data DVDs, not video DVDs, so discs created with it will not play in a living-room player.
How long does burning iPhone videos to DVD take?
Burn time depends on the total video length, file size, and whether your computer supports GPU hardware acceleration. A 30-minute batch of iPhone clips typically takes 15 to 40 minutes on a mid-range PC with GPU acceleration enabled. Without hardware acceleration, the same job can run an hour or longer. DVDFab DVD Creator shows a progress estimate as soon as the burn starts.
Conclusion
There are two primary methods for transferring and burning iPhone videos to a DVD. The first requires you to manually transfer the videos to a PC, and burn them on a DVD using DVD authoring software like DVDFab DVD Creator. This gives you full autonomy and allows for customization. Alternatively, you could use an offline iPhone videos to& DVD service, which might be costlier. Both can help you secure your cherished memories on durable physical media.
 How to Convert AVI to DVD on Windows and Mac in 2026: 6 Best ToolsBy Diana Smith - Jun 10, 2026
 How to Burn a DVD on Mac: 5 Methods That Work on macOS SequoiaBy Diana Smith - Jun 3, 2026
 How to Convert WMV to DVD Free and Easily: Windows / Mac / OnlineBy Wenny Yan - May 27, 2026
 How to Burn DVD with Subtitles: Add SRT, ASS, and Selectable CaptionsBy Diana Smith - May 26, 2026