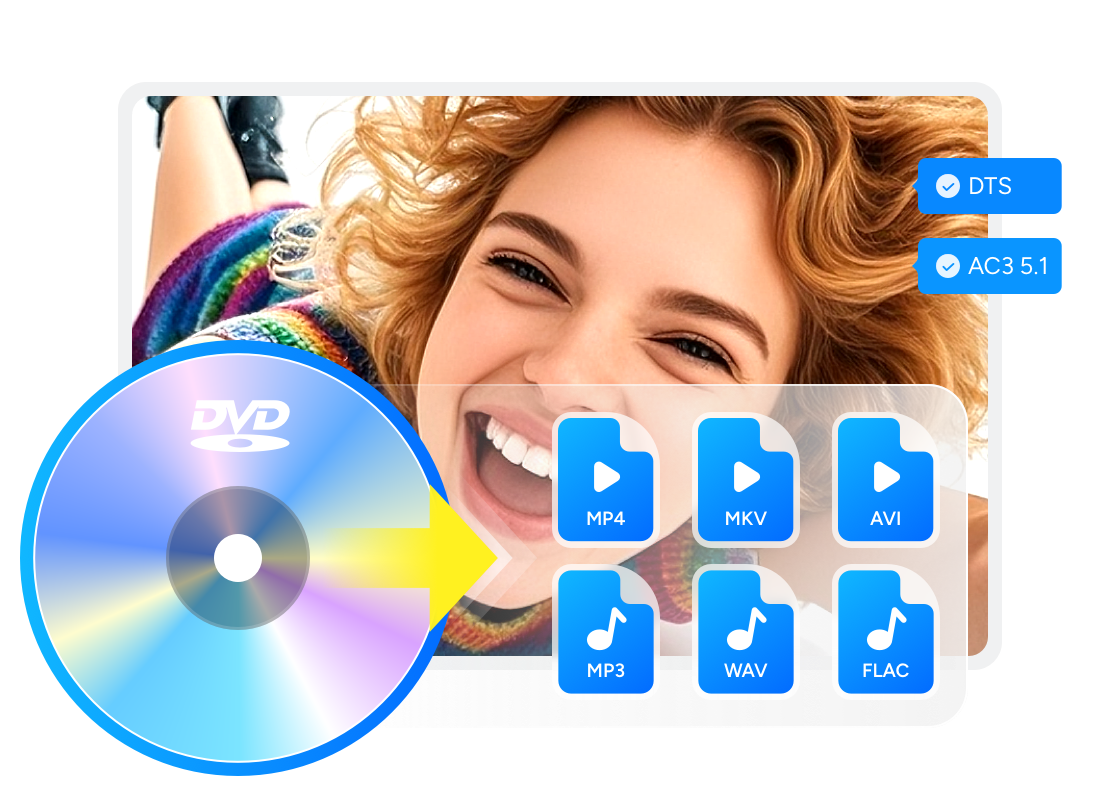
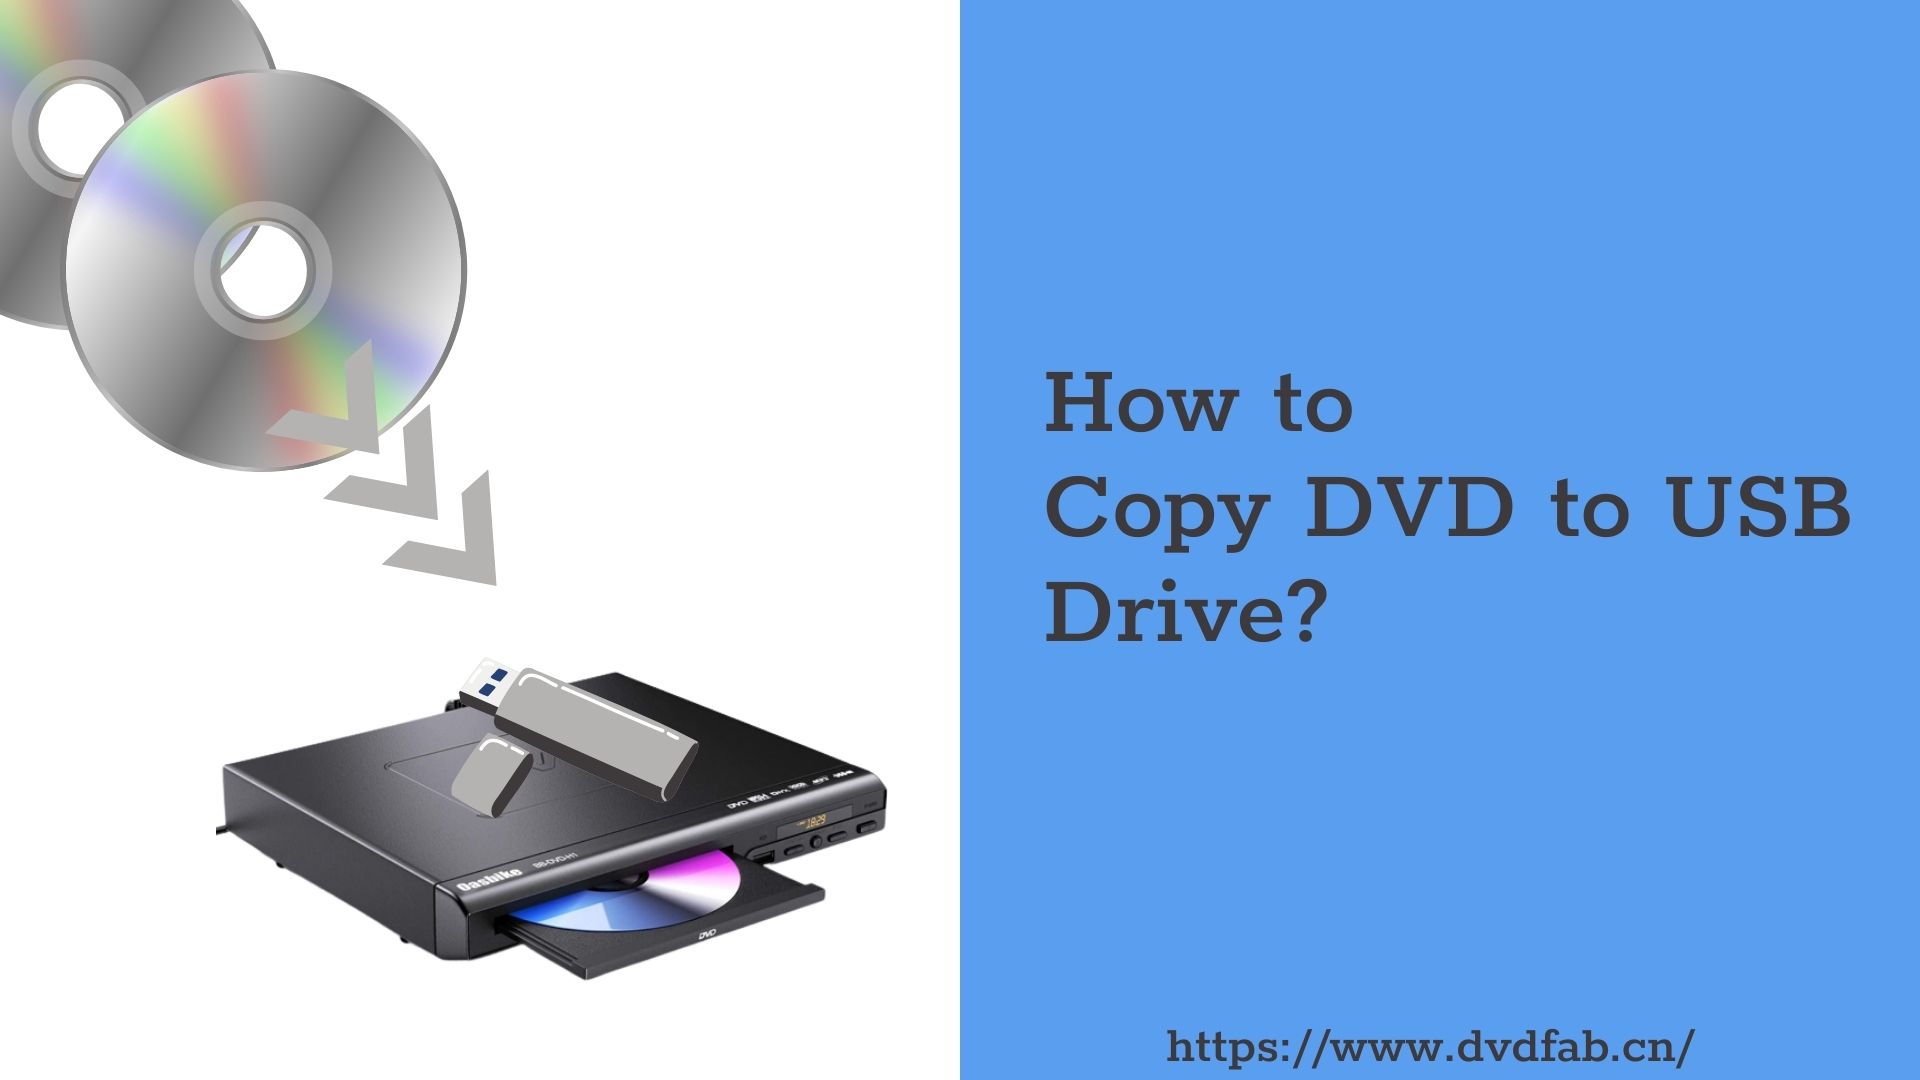
Best DVD to USB Converter in 2026: Tested Ways
Summary: To convert DVD to USB, you can choose from three ways. The first is using a professional ripper like DVDFab to bypass encryption and convert movies into MP4 files for Smart TVs or cars playback. The second is a direct copy and paste for unprotected data or home movies to USB. The third is hiring local DVD to USB transfer services if you lack a computer or a disc drive.
Table of Contents
I've spent years moving DVD collections to USB and other digital formats for families, small studios, and my own archive. During this work, I have frequently encountered the same technical issues: a TV refuses to play a copied file, a transfer fails at the FAT32 4GB limit, or the computer only displays a VIDEO_TS folder instead of a single movie. After testing these conversions across laptops, media boxes, and car head units, the results are consistent. While some discs are simple data DVDs that allow for direct copying, most movie DVDs are authored specifically for players and require conversion to a standard video file before a USB device will play them.
I also reviewed how users handle the same task in practice. A Reddit discussion on r/DataHoarder shared workflows from people who routinely back up and transcode their movie collections. Their insights confirmed that even with the same tools, results vary widely depending on drive quality, encoding choices, and playback hardware. This guide combines those experiences with my hands-on testing, guiding you from disc to smooth USB playback.
Quick Answer: My Picks to Copy DVD to USB
Transferring a DVD to a flash drive requires different workflows depending on your hardware and disc type. I have categorized three methods based on whether you need movie playback or a simple data backup.
| Use Scenario | My Recommended Method | How to Steps |
| Commercial DVD Movies for USB Storage and Playback | Professional DVD Ripper: DVDFab DVD Ripper, HandBrake, MakeMKV | Insert disc to DVD drive, use DVD Ripper to rip it to MP4 or MKV, and save it to you USB |
| Data DVD for Personal Bakcup Only | Direct Copy and Paste | Open disc folder and drag files to the USB drive. |
| No Computer or DVD Drive | Local transfer service or DVD-to-USB hardware | Drop off the disc at a shop and collect the USB later. |
💡1. Professional DVD Ripper (see details):
This is the only reliable way to handle commercial discs. These discs use encryption to block direct copying. A professional DVD ripper like DVDFab DVD Ripper and HandBrake can rip DVD video and converts it into a standard MP4 file. This ensures the movie plays on a Smart TV or car screen by resolving region codes and copy protection during the process.
💡2. Direct Copy and Paste (see details):
If your DVD contains personal photos or documents without protection, you can drag the files directly to the USB drive. This method is free and requires no software. However, it typically fails for movies DVD because playback devices cannot parse the raw folder structure found on a standard video disc.
💡3. DVD to USB Transfer Services Near You (see details):
If you do not own a computer or an external disc drive, local DVD to USB conversion services can digitize your collection for you. These businesses use professional hardware to move your DVD data to a USB stick or cloud storage. This is a hands-off solution for people who only use mobile devices and want to avoid buying extra equipment.
Way 1: Convert DVD to USB with a Specialized DVD Ripper
When your disc is a video DVD (with VIDEO_TS and VOB files), you cannot simply drag the files onto a USB stick. To make these playable on most devices, you'll need to convert DVD to MP4, MKV or other formats. The following is my review and test of three DVD ripping tool used for DVD to USB conversion.
DVDFab DVD Ripper (Fast, for Protected DVDs)
DVDFab DVD Ripper is a reliable DVD to USB converter on both Windows and Mac. It combines decryption and conversion into one step so you can transfer protected discs into formats like MP4 or MKV that work on TVs and car players. You can choose between keeping the original quality with lossless output or using H.264 and H.265 encoding to save space.
In my tests, I found that DVDFab 13.0.6.2 (released on June 10, 2026) can rip and compress a 4.3GB DVD movie down to a 890MB MP4 file in about five minutes, without losing visual detail. At this level of compression, a single 64GB flash drive can hold over 70 movies, which is a massive upgrade for anyone with limited storage. It essentially combines the 1:1 raw extraction of MakeMKV with the compression cabilities of Handbrake. I especially like having full control over audio tracks and subtitles, as it ensures the final file on my USB drive is exactly what I need for my specific playback device.
Pros:
- Can bypass most advanced DVD protections.
- Built-in device presets (TV, iPad, Xbox, etc.) save time.
- Hardware acceleration shortens conversion time.
- Offers both compressed and lossless output options.
Cons:
- Only MP4 and MKV formats are supported in free version.
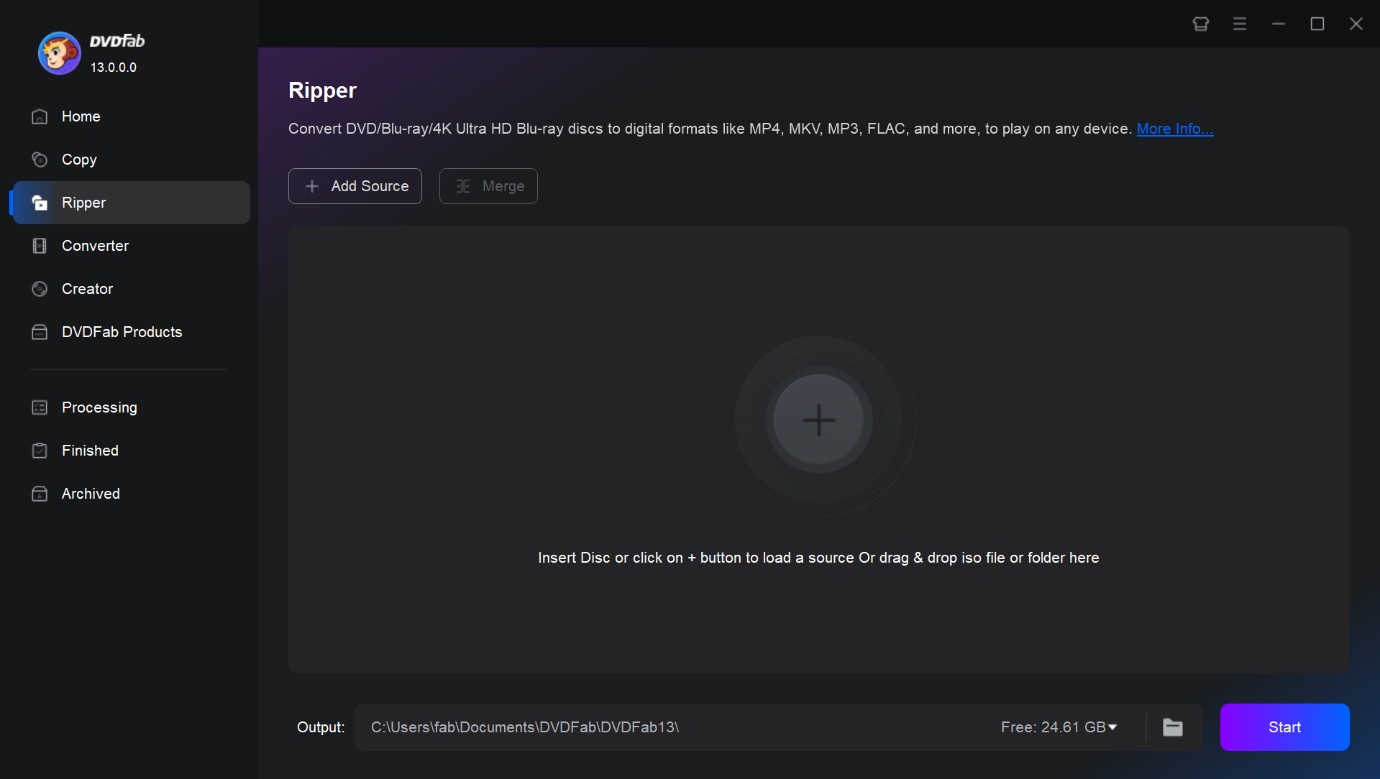
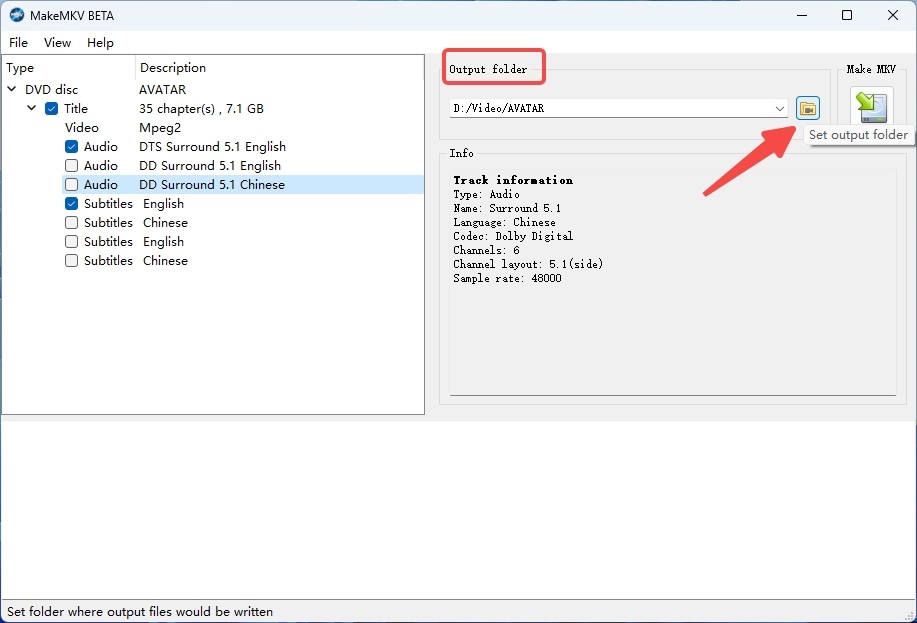
Step 1: Run DVDFab DVD Ripper and Load Your DVD
Open DVDFab and choose the Ripper module. Insert the DVD into your optical drive and DVDFab will detect the disc automatically. You can also add the source manually via "+ Add" or by dragging the DVD, ISO, folder into the interface.
Step 2: Pick Output Format or Preset Profile
After the DVD is loaded, go to the Profile liabrary. Here you have two straightforward options:
- Choose a video codecs for connected USB devices: DVDFab supports MP4, M4V, AVI, and many other formats. If you already know which format your device accepts, use the Filter option to quickly narrow results.
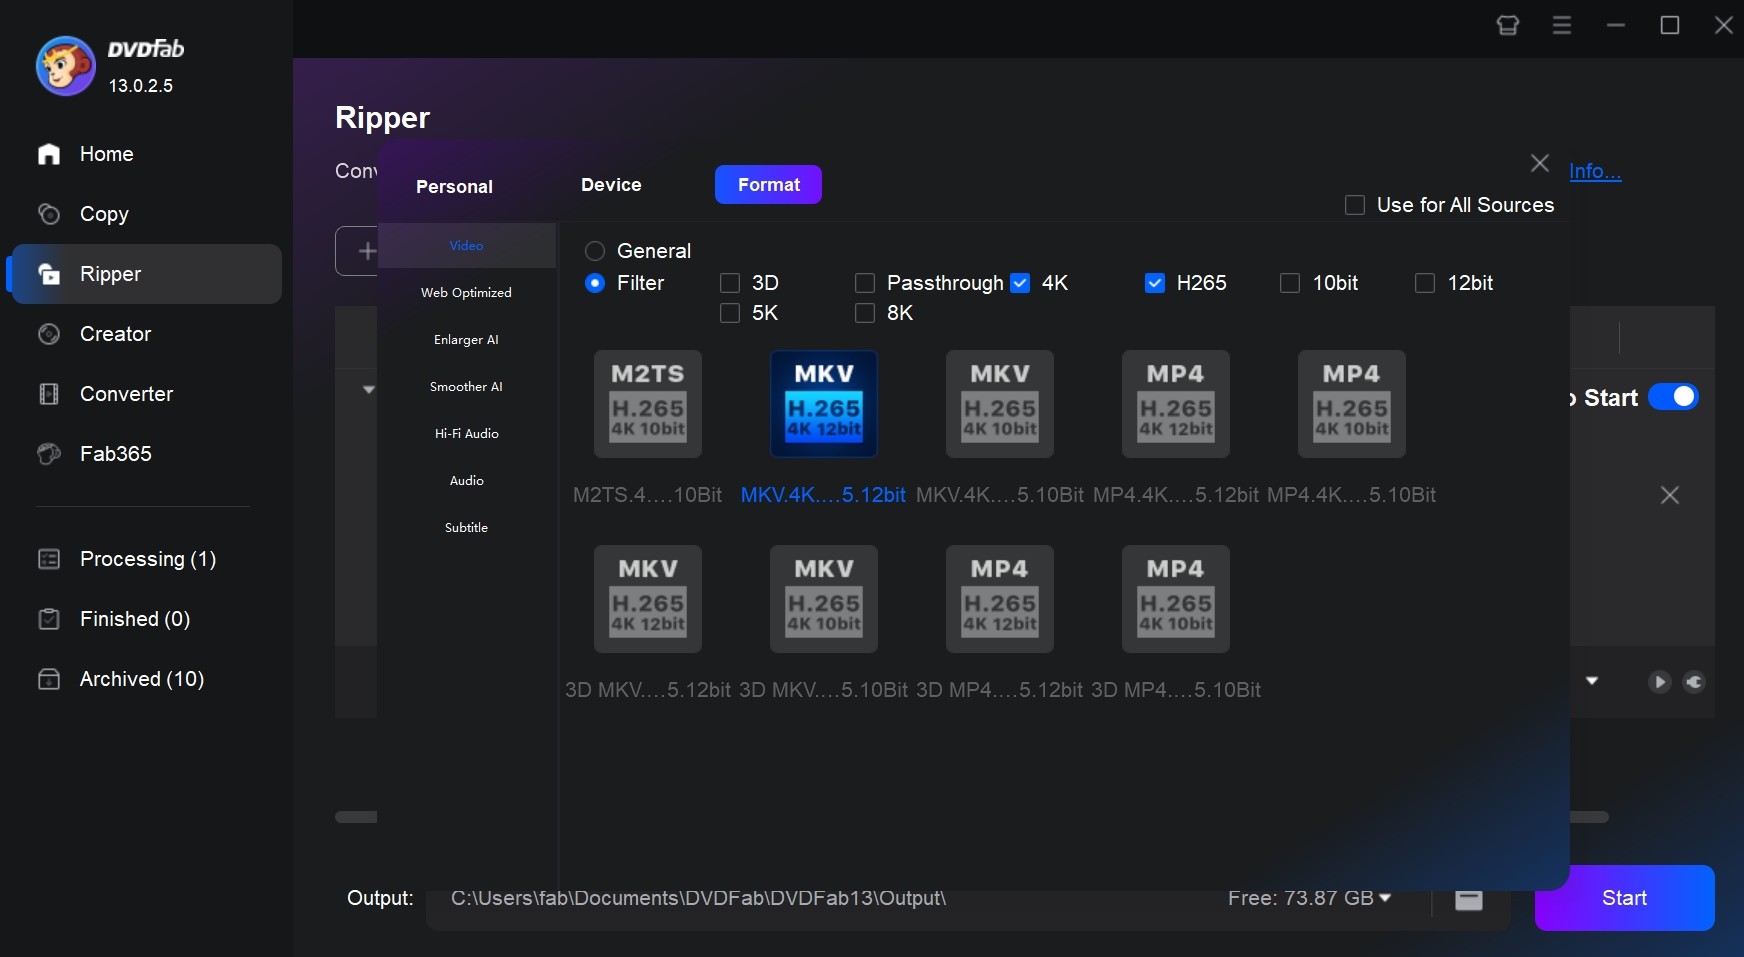
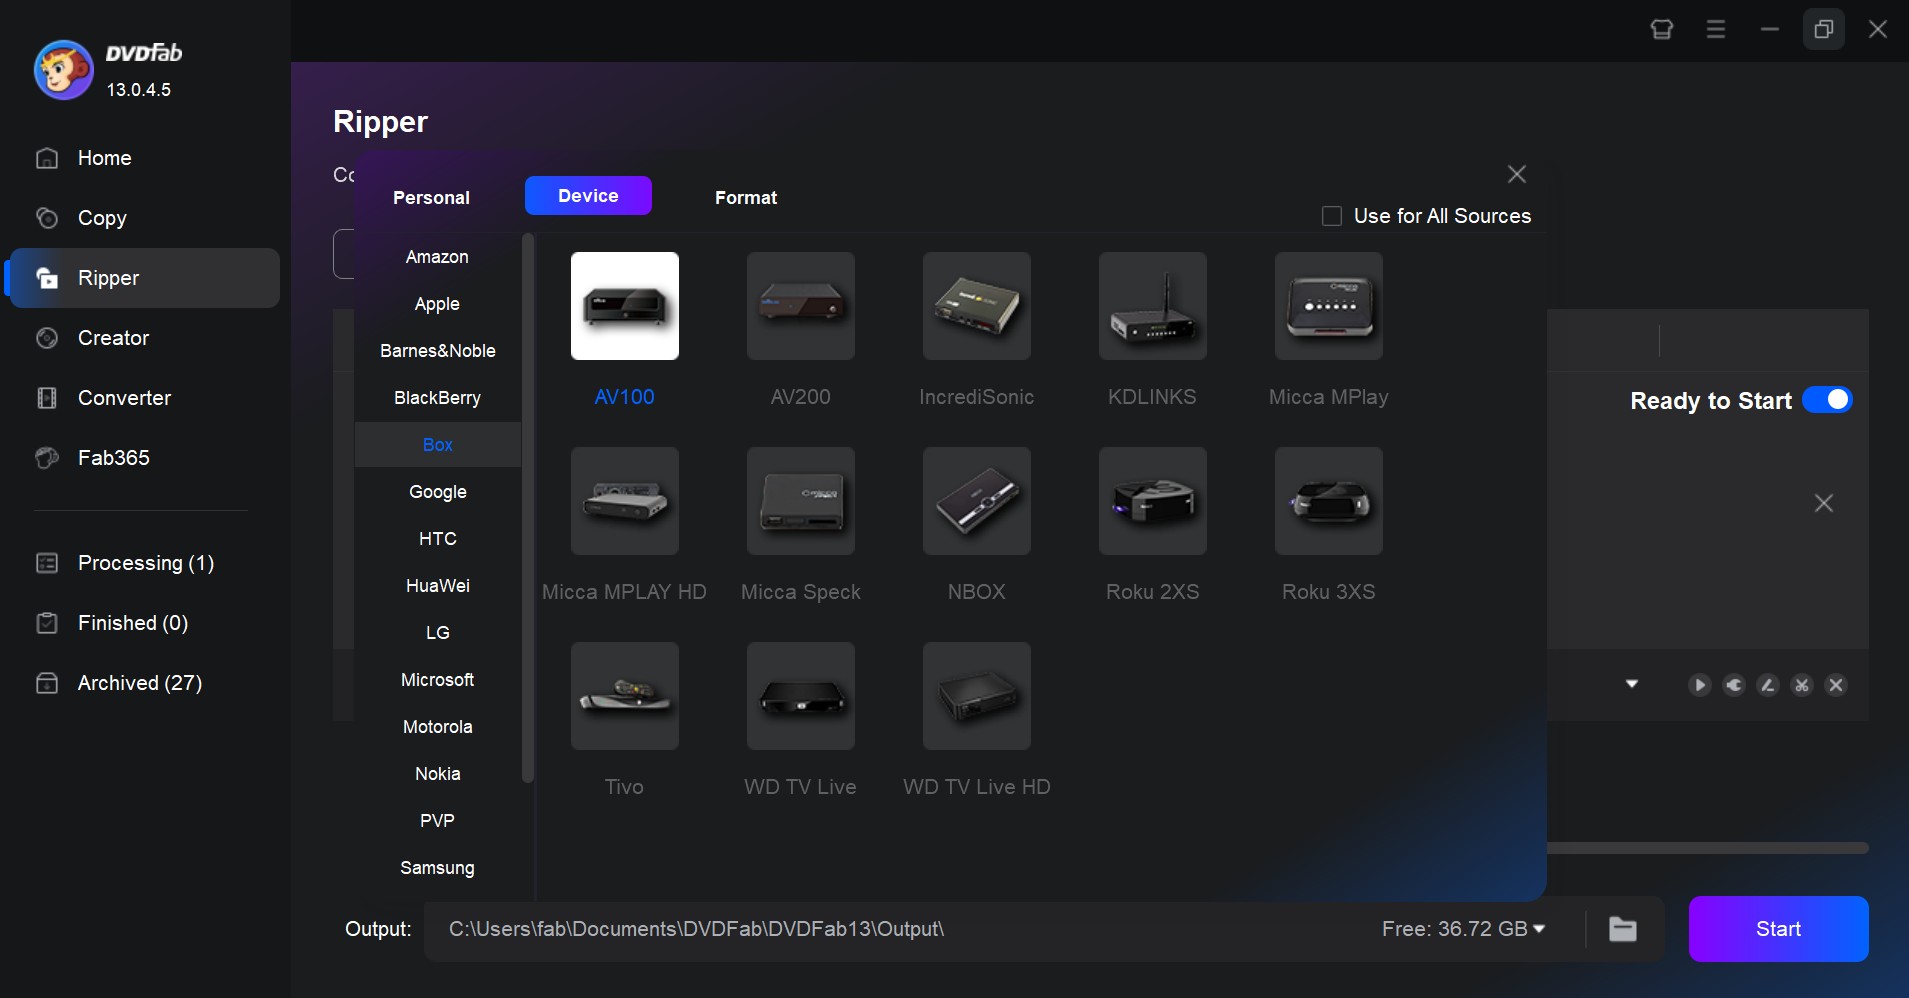
- Use a preset profile: For an even simpler workflow, it offers ready-made profiles for specific TVs, set-top boxes, game consoles, etc. Choose one of these presets and DVDFab will automatically apply the correct codec, resolution, and bitrate.
Step 3: Tweak Your Video Preferences
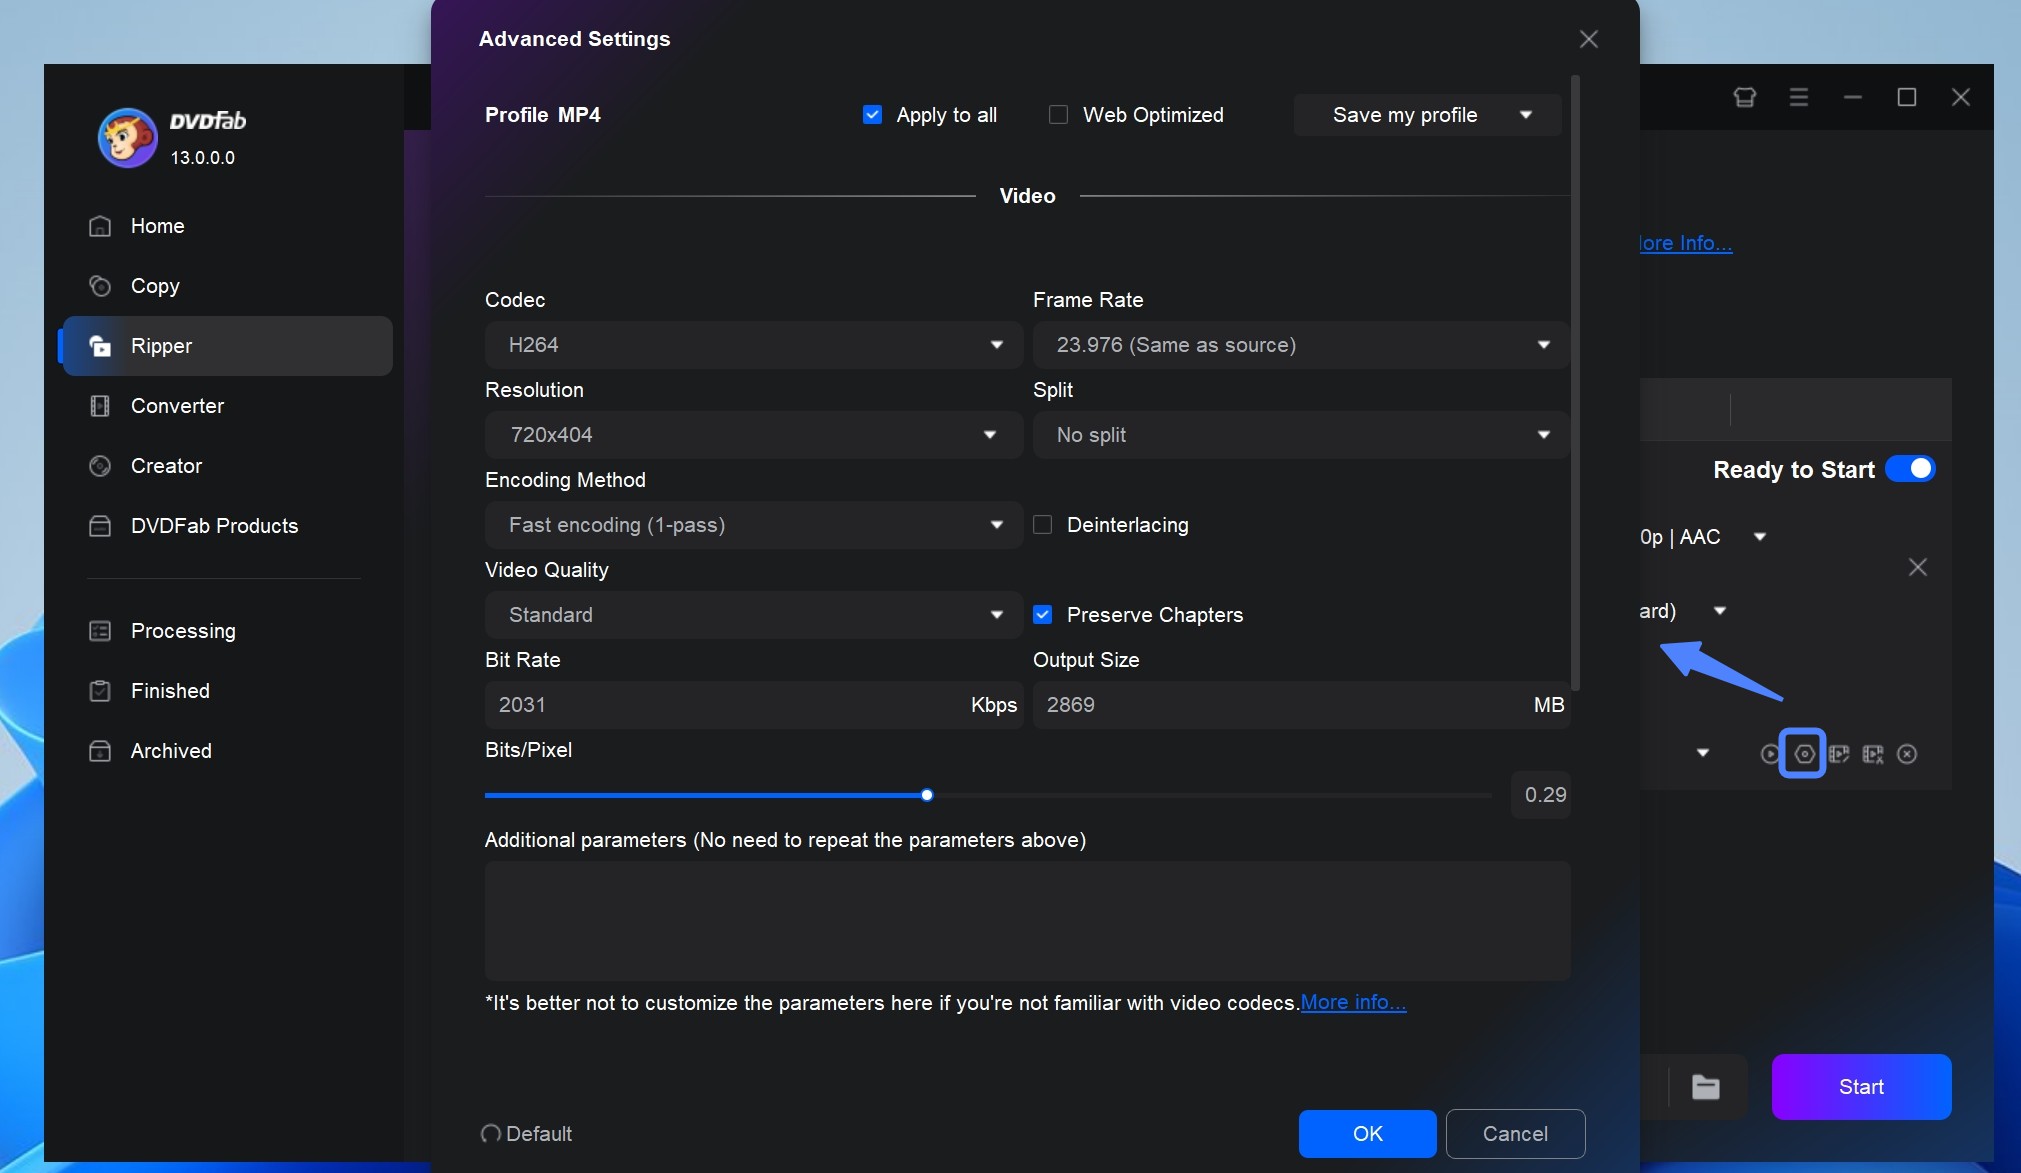
At this stage, you can fine-tune the output before ripping.
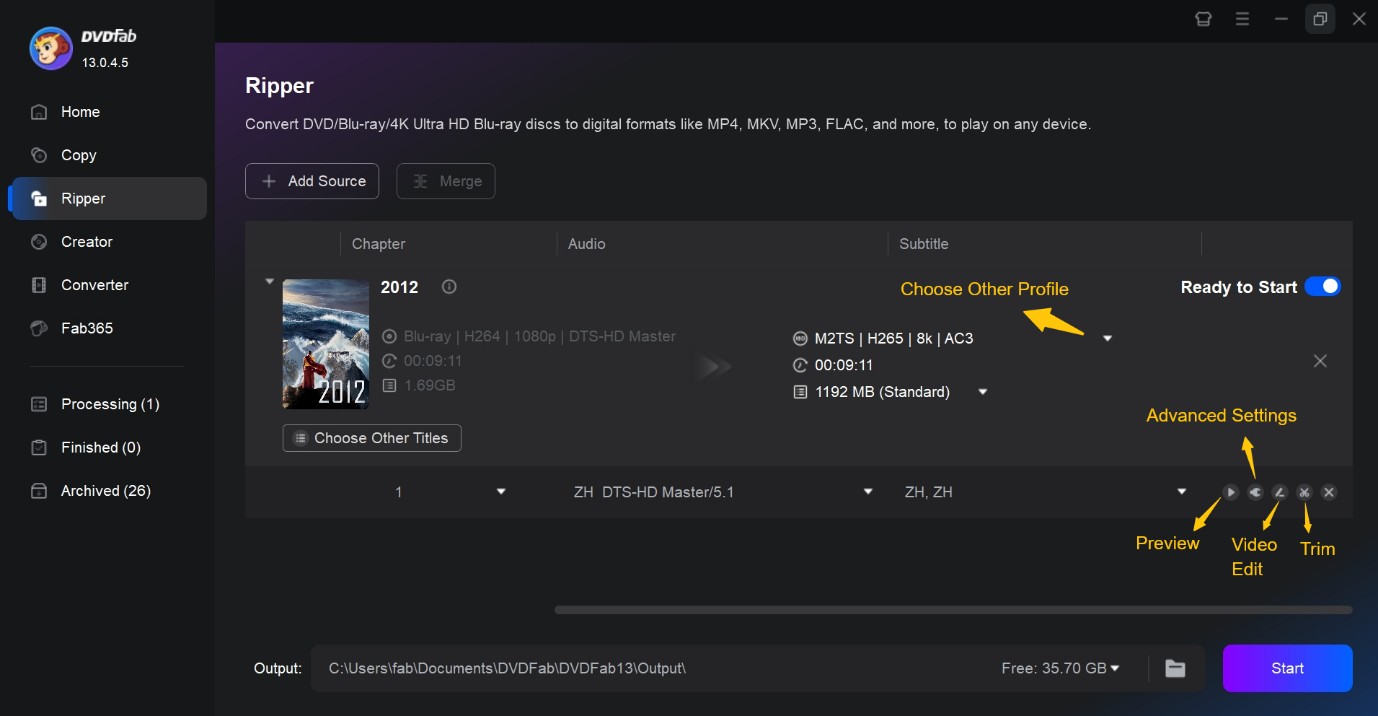
- Video Settings: Modify resolution and tweak bitrate or CRF for quality. Also, speed things up with hardware acceleration if you've got NVIDIA, AMD, or Intel.
- Audio options: Choose which language tracks to keep, downmix 5.1 audio to stereo if needed, or preserve the original AC3/DTS.
- Editing tools: Trim out unneeded clippings, crop those pesky black bars, rotate if necessary, and adjust brightness or contrast to your liking. All this is available under the edit menu, so preview until you're thrilled with the result.
Step 4: Start Ripping DVD to Digital Format
Once satisfied with your settings, click Start. DVDFab will process the disc, apply your chosen quality and editing options, and output the file into the destination folder.
Step 5: Transfer to USB and Check It Out
After ripping finishes, locate the output file and copy it to your USB drive. If you're dealing with a file over 4 GB, ensure your USB is formatted as exFAT to sidestep issues. Then, test the playback to confirm all's well.
MakeMKV (For 1:1 Lossless Ripping)
MakeMKV 1.18.4, released on June 15, 2026, is a good choice to convert DVD to USB if you prioritize image quality over storage space. It extracts the original video and audio from discs into MKV files without re-encoding the data. This direct copy method reduces processing time and power consumption. However, you should note that file sizes remain large because the software preserves the original bitrate which often reaches 10.4 Mbps. A 64GB USB drive will typically hold about 8 films when using MakeMKV.
In my tests, the main issue with this method is the file size limit on many flash drives. Many movies end up larger than 4 GB which causes a failure if your USB drive uses the older FAT32 system. I always format my drives to exFAT or NTFS before starting a rip to make sure the large files can be moved without any errors. While the files take up a lot of room, I choose this tool when I want a perfect copy for a home theater setup.
Pros:
- The software is currently free while it remains in beta.
- Since it does not re-encode, conversion is fast and energy efficient.
- It retains every audio track, subtitle, and chapter from your original disc.
Cons:
- Free key updates are unstable and poorly managed.
- There is no way to shrink file size.
- Convert DVD to MKV only.
Step 1: Connect your external drive and open MakeMKV. The software scans for available optical hardware and displays the disc contents. You must wait for the program to parse the titles and chapters before you can make any selections.
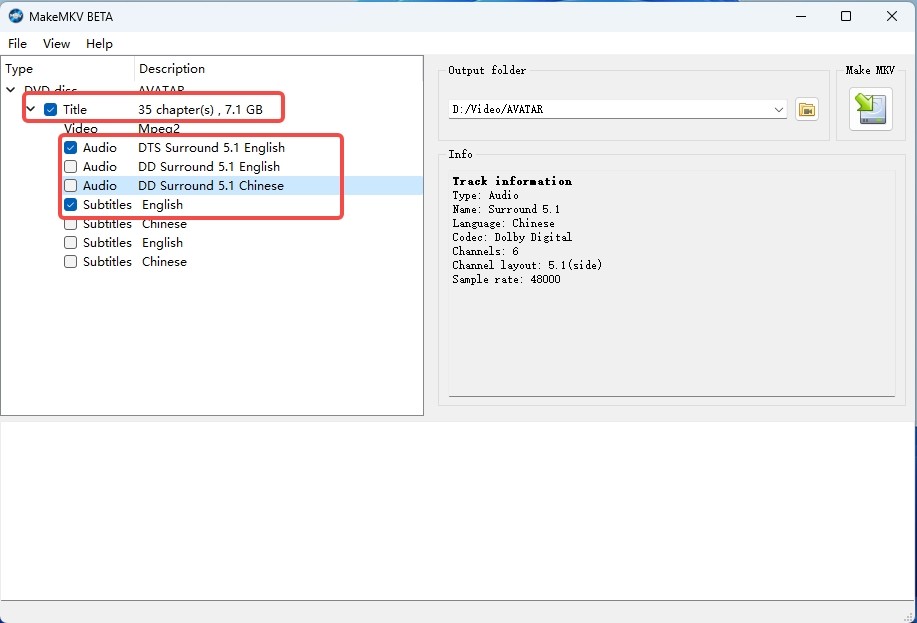
Step 2: Navigate the tree view to identify the main movie title. You can expand this title to check or uncheck specific audio and subtitle tracks. The interface provides the codec type and language for each stream so you can decide which data to include in the final MKV container.
Step 3: Set the destination folder for your movie file. When you are ready, click the "Make MKV" button.
Step 4: After MakeMKV finishes, copy the MKV file to your USB drive. Test playback on your target device. If the TV or player does not accept MKV or certain audio tracks, you may convert the MKV file later to MP4 using another tool.
HandBrake (Free, for Compressed Ripping)
HandBrake is a powerful and open-source video transcoding tool that is perfect for converting DVDs to MP4 and MKV before transferring movies to a USB drive. This free DVD to USB converter compresses the video during the encoding process, allowing you to reduce file size with a small trade-off in image quality. It supports a wide range of codecs and can downmix 5.1 audio to stereo AAC for better playback on devices that struggle with multichannel tracks.
In my tests, HandBrake 1.11.2 (released on March 22, 2026) compressed a 6.13GB source into a 984MB MP4 file. While this compression efficiency is high, the processing time is a drawback. The software took over 12 minutes to encode a single movie, making it less efficient for those with large disc collections. It is also important to note that HandBrake lacks the internal libraries needed to bypass commercial copy protection. You can only use it for unprotected home movies unless you install additional decryption files manually.
Pros:
- HandBrake is entirely free and open-source.
- Output is usually MP4 or MKV with modern codecs.
- Control the quality and bitrate to fit your specific needs.
- Add a stereo AAC track while keeping the original surround track for compatibility.
Cons:
- Does not bypass commercial DVD protections, and may need libdvdcss on some systems.
- It will often run slower compared with other converters.
- The range of settings can be daunting for first-time users.
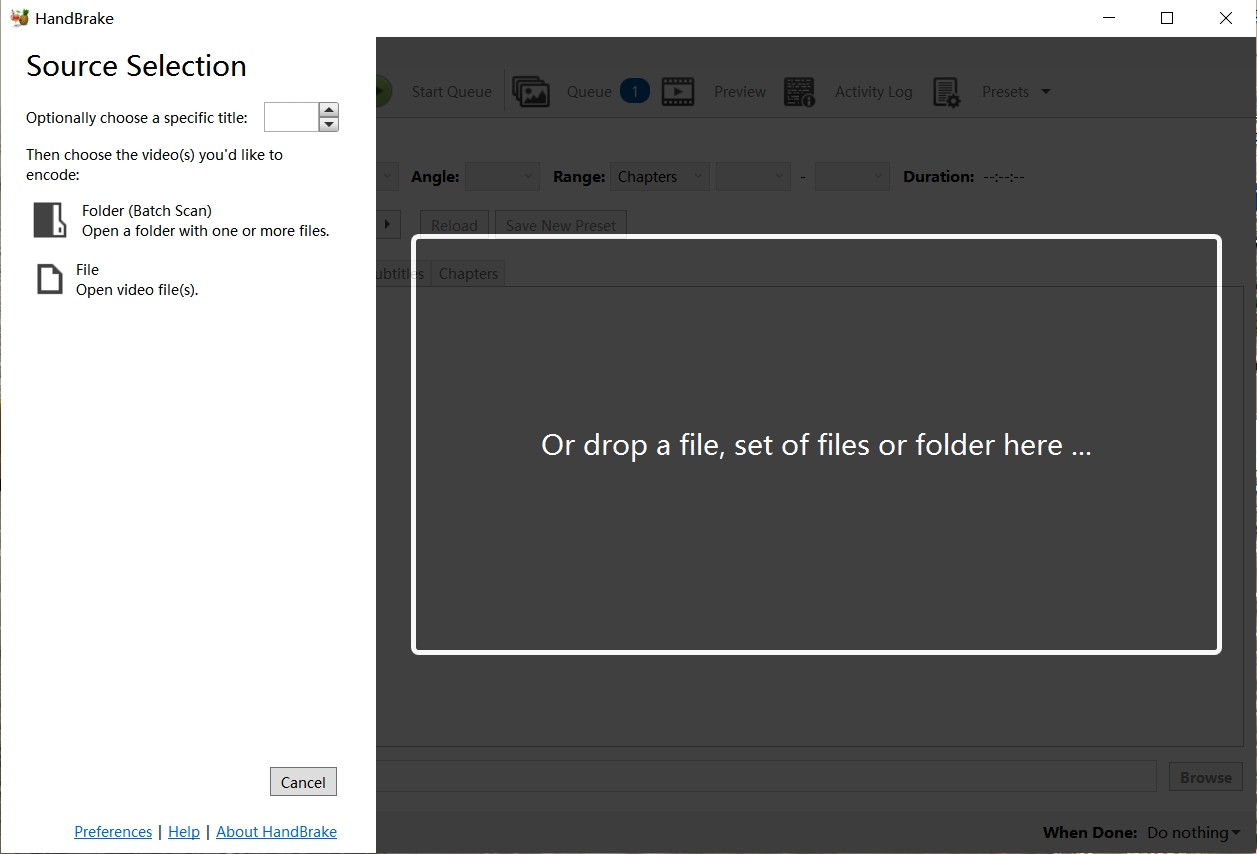
Step 1: Open HandBrake and click Open Source, then select your DVD drive. HandBrake scans the disc and lists the titles, including extras and bonus features.
Step 2: Select the longest title, which is usually the main feature. In Audio, keep the original surround track and add an extra track as AAC stereo downmix so basic TVs and players can switch to it. In Subtitles, choose the streams you need, including any forced subtitles.

Step 3: Choose a preset for your device, then tune video and filters in this order:
Pick a device-friendly preset such as TV 1080p30 Surround or Fast 720p30. Use the H.264 codec when you need the broadest playback compatibility, especially for standard-definition DVDs or older TVs that do not handle H.265 well.
Adjust bitrate according to the source quality you are working with:
| Source | Target Bitrate |
| DVD (SD) | about 3 Mbps |
| Blu-ray (FHD) | about 5-10 Mbps |
| Blu-ray (UHD) | about 30 Mbps |
Lower bitrates save space but can introduce visible artifacts, so raise the value when you notice banding or loss of fine detail.
- For DVD content that shows combing on modern flat screens, enable Deinterlace or Decomb to produce a clean progressive result.
- For film-based NTSC sources, consider inverse telecine to restore the film frame rate.
- Add Deblocking when the source looks blocky.
When older DVDs or low-bitrate sources look dark or grainy, open Filter, choose Denoise → NLMeans, and set Preset: Strong. This filter removes unwanted noise and helps the encoder keep detail in smoother gradients.
Command-line users can apply the same setting with HandBrakeCLI:
HandBrakeCLI -i input.vob -o output.mp4 -e x264 -b 3000 --denoise="nlmeans:preset=strong"
Step 4: Under Destination, choose where you want the converted file saved on your computer, and give it a clear name. Once everything is set, click Start Encode.
Step 5: Once the file has been encoded, safely eject your USB drive and plug it into your chosen device, be it a TV, media player, or car entertainment system.
Top DVD to USB Converters: Tested and Compared
To keep this practical, I ran the same movie (8 Mile, 1h50m14s, 6.13 GB) through DVDFab, MakeMKV, and HandBrake on my Windows 10. Hardware was an Intel Core i7-6700 CPU and an NVIDIA RTX 4060 Ti 8 GB GPU. Below is a table of features and test results.
| Feature | DVDFab | MakeMKV | HandBrake |
| Decryption ability | Yes, handles CSS, region codes, ARccOS, abd more | Limited, bypasses some DVD protections | None by default, needs libdvdcss plugin |
| GPU acceleration | Yes | No | Limited |
| Output formats | 1000+ video and audio | MKV only | MP4, MKV |
| Video editing options | Yes | No | Yes |
| Subtitles | Burn-in, external, multi-track | Pass-through (keeps original) | Burn-in or soft subtitles |
| Compression | Yes, with quality/bitrate presets | No, lossless remux only | Yes, full re-encoding |
| Test Results | 1m37s (MKV passthrough) 5m18s (H.264 MP4 encode) | 1m34s (MKV passthrough) | 12m28s (H.264 MP4 encode) |
| Output Quality | 720*480 DTS 5.1 | 720*480 AC3 5.1 | 720*362 AAC 2.0 |
My observations
Running the same disc through each tool made the differences clear:
- Passthrough speed: DVDFab and MakeMKV both finished in under two minutes. MakeMKV produced a slightly larger file, as it remuxes every stream by default. DVDFab outputs higher-quality audio with a smaller file.
- Encoding performance: DVDFab took advantage of GPU, finishing the H.264 encode in about five and a half minutes. HandBrake took over twice as long as DVDFab, with a loss in quality.
- Compatibility: The MP4 files from both DVDFab and HandBrake played on my Samsung TV and Honda car head unit without issue. The MKV files required playback on a laptop with VLC, since the TV rejected them.
After testing all three, their strengths became distinct. HandBrake excels at transcoding and compression, offering precise control for users. MakeMKV stands out for speed and lossless preservation. DVDFab DVD Ripper combines both strengths. It can perform passthrough output or hardware-accelerated encoding, giving users flexibility between archiving quality and efficient storage.
Way 2: Copy DVD to USB Directly Without Software
If your disc is a non-protected data DVD rather than a video DVD, there's a simple copy-and-paste method for transferring DVDs to a USB flash drive. The requirement is a DVD drive on your laptop, or an external DVD drive that can run your DVDs, and a USB flash drive. However, keep in mind that this method may not result in files playable on mobile players.
Copy DVD Files to USB Drive in Three Steps
On both Windows and macOS, the copy process is simple.
Step 1. Open the disc on your computer
Insert the DVD into the drive. On Windows, it should appear in File Explorer under "This PC." On macOS, the disc will mount in Finder's sidebar. Open the disc folder and check what files are present.
Step 2. Move the files to local storage
Select the video files you want to keep and copy them to a folder on your computer. This extra step reduces the risk of corrupted transfers, especially if the disc has scratches or the drive spins inconsistently. Wait until the copy finishes and confirm the files play correctly on your computer.
Step 3. Transfer the files to the USB drive
Open the USB stick or external SSD. In Explorer or Finder, drag the verified files onto the USB. After the copy completes, safely eject the USB drive. You now have a working copy of the DVD content on a portable medium.
Why You Can't Just Copy and Paste DVD Files to USB?
A direct file transfer fails because the storage structure of an optical disc is fundamentally different from the file systems used by flash drives, which prevent a simple copy and paste from working on most playback devices.
💡The Complexity of VIDEO_TS Folders
Movie DVDs do not store video as one continuous file. The data is located in a folder called VIDEO_TS which contains VOB and IFO files. VOB files hold the video but the system splits them into segments. Many users who transfer dvd to usb realize that media players cannot read this folder. A single file must be created for the player to work correctly.
💡Decrypting DVD Protections
Commercial discs use encryption like CSS and to Region codes to limit where a disc can be played. When you convert dvd to usb, you need a tool that can bypass these protections. Simple copying does not remove the encryption. The data remains locked and will not play on a flash drive.
💡Hardware Compatibility Issues
Hardware like smart TVs and car players has limited codec support. These devices usually play MP4 files using H264 compression. Movie discs use the MPEG2 codec which many USB ports cannot decode. To copy dvd to usb and ensure it plays, the video must be changed to a format the hardware can recognize.
Way 3: How to Transfer DVD to USB Without Computer
Not everyone wants to install software, connect a drive, and manage encoding settings. In fact, I often get asked if there is a way to transfer DVDs to USB without touching a computer at all. The answer is yes, but it usually means turning to retail digitization services or stand-alone hardware solutions.
DVD to USB Service Near You
Several large retailers and photo service chains in the US offer DVD-to-digital programs. Walmart, CVS, and Walgreens, for example, accept home movie DVDs and even VHS tapes. They process the disc in their lab, upload a copy to cloud storage, and for an extra fee will provide the movie on a USB flash drive.
| Method | Advantages | Limitations |
| Retail digitization services |
|
|
From my own test with Walmart's service, a two-hour DVD returned as an MP4 on a 16 GB USB stick. The quality was comparable to an at-home rip with HandBrake at default settings, though I had no control over bitrate, resolution, or subtitle handling. Beyond these technical limits, the service is also expensive. At Walmart, I paid $24.96 per disc for a basic transfer, and the cost rises if you add cloud delivery or extra copies.
DVD Recorder with USB Output
Another option is using a DVD Player or Recorder with USB recording feature. These devices plug directly into your television or power outlet, and many models include a USB port for direct recording. You insert a DVD, press record or copy, and the unit writes an MPEG-2 or MP4 file straight to a flash drive.
| Method | Advantages | Limitations |
| DVD Recorder with USB Output |
|
|
I tested an older Panasonic DVD recorder with USB support: it successfully copied a homemade wedding video DVD to a 32 GB stick, creating a single 2.7 GB MPEG-2 file. Playback was smooth on the recorder itself, but my Samsung TV required conversion to MP4 before it would recognize the file.
Transferring DVD to USB without a computer is best suited to home video discs or users uncomfortable with software setup. If you have a stack of commercial movies, or if you care about fine control over quality, formats, and subtitles, computer-based tools such as DVDFab, MakeMKV, or HandBrake are still the practical route.
Formats and Device Compatibility for USB Playback
Up to this point we've looked at how to copy or convert a DVD, but the real test comes when you plug the USB stick into a television, media box, or car head unit. Devices differ widely in what they will recognize. Choosing the right format and understanding the limits of USB file systems avoids the frustration of "file not supported" messages.
Use MP4 for universal TV and media players
In repeated tests across Samsung, LG, and Sony televisions, as well as car infotainment systems, MP4 with H.264 video and AAC audio had the highest playback success. Most modern devices treat this as the default standard. File size after encoding is modest, and quality remains close to the original DVD. For a disc around two hours, expect 1.5–2 GB at standard quality settings.
Keep MKV for quality and multiple tracks
If you value original quality, extra audio tracks, or subtitle streams, MKV is the better container. MakeMKV outputs MKV directly, and DVDFab also supports it. The trade-off is compatibility. Many TVs simply ignore MKV files or fail to parse certain audio codecs inside them. MKV is a good choice if you plan to play on a laptop with VLC or Plex.
USB file system and size limits
The physical format of the USB drive often causes more problems than codec issues. According to MediaZilla's guide on formatting USB drives for TV playback, FAT32 is still the broadest USB file system in use, but it restricts individual files to 4 GB. That means long movies or high-quality MP4s can run into fail-to-copy or fail-to-play problems. exFAT removes the file size ceiling and is supported by most modern TVs and computers, though some older media boxes may not recognize it. NTFS works well on Windows devices but has more limited support among TVs. When creating a USB copy, using exFAT for larger files is usually the best compromise, while keeping a FAT32 drive handy for older playback devices.
FAQs
Is it legal to convert DVD movies to USB?
Laws vary by country. In the US, converting commercially copy-protected DVDs often falls into a gray area under the DMCA, even for personal use. Some jurisdictions allow format shifting for private use, but others do not. Home-authored DVDs (weddings, camcorder footage) are safe to copy. For commercial movies, the safest approach is to check local copyright law and use the conversion strictly for personal use.
Can I use ISO or VIDEO_TS on USB playback?
Yes, you can copy a VIDEO_TS folder or ISO image to a USB stick, but playback depends on the device. On a computer, software such as VLC or Kodi will read VIDEO_TS or ISO directly, menus and all. On most TVs or car players, these structures are not recognized. They look for a single video file, not a DVD file tree. If you want reliable playback from USB, convert the disc to MP4 instead. VIDEO_TS and ISO are best kept for archiving.
Why does my USB fail to copy files over 4GB?
This usually comes down to the FAT32 file system. FAT32 cannot store a single file larger than 4 GB, even if the drive has plenty of free space. Two-hour DVD rips often exceed that limit. The solution is to reformat the USB drive to exFAT (supported by most modern TVs and Windows/macOS) or NTFS (widely supported on PCs, but not all TVs). If reformatting is not possible, split the video into two parts during encoding.
How to handle DVD subtitles for USB playback?
DVD subtitles are stored as separate image streams, not text. When converting, you have two choices:
- Burn in: subtitles are overlaid permanently onto the video. This guarantees visibility on all devices.
- Soft subtitles: kept as switchable tracks in MKV or MP4. This is flexible but requires the player to support them.
In practice, burn-in is safest for TV and car playback. If you are building a digital library for Plex or VLC, soft subtitles are fine.
Which is better for USB playback MP4 or MKV?
For universal playback, MP4 is the safer option. Televisions, set-top boxes, and car systems almost always accept MP4 with H.264 video and AAC audio. MKV preserves full quality, multiple audio tracks, and subtitles, but many devices either ignore MKV entirely or choke on certain audio codecs like DTS.
What format should I use to play DVD from USB on TV or car?
MP4 with H.264 video and AAC audio is the safest choice for most TVs, media boxes, and car players. MKV is useful when you want to keep more audio tracks or subtitles, but it is less universally supported. If you are unsure, choose MP4 first.
Why does my TV not play video from USB?
Most TVs only support a handful of formats and codecs. Even if the file copied correctly, the TV may not recognize the container (AVI, MKV) or the codec inside (MPEG-2, DTS). For maximum compatibility, encode to MP4 with H.264 video and AAC audio. Another check is the USB file system—older models may only read FAT32. In one of my tests, the same file that failed on a Sony TV played fine on a Samsung TV via the same USB stick.
Conclusion
Converting a DVD to USB is no longer a mystery once you know whether the disc is a simple data disc or a structured video DVD. Direct copies work for home-authored discs, but most commercial movies require conversion with tools such as DVDFab, MakeMKV, or HandBrake. With the right format and file system, the USB copy will behave predictably on modern devices and spare you from repeated trial and error.
 How to Rip and Transfer DVD to iPad/iPhone: Free and Paid Options in 2026By Wenny Yan - Jun 24, 2026
 Top 6 ISO to MP4 Converters in 2026: Tested & GuideBy Diana Smith - Jun 18, 2026
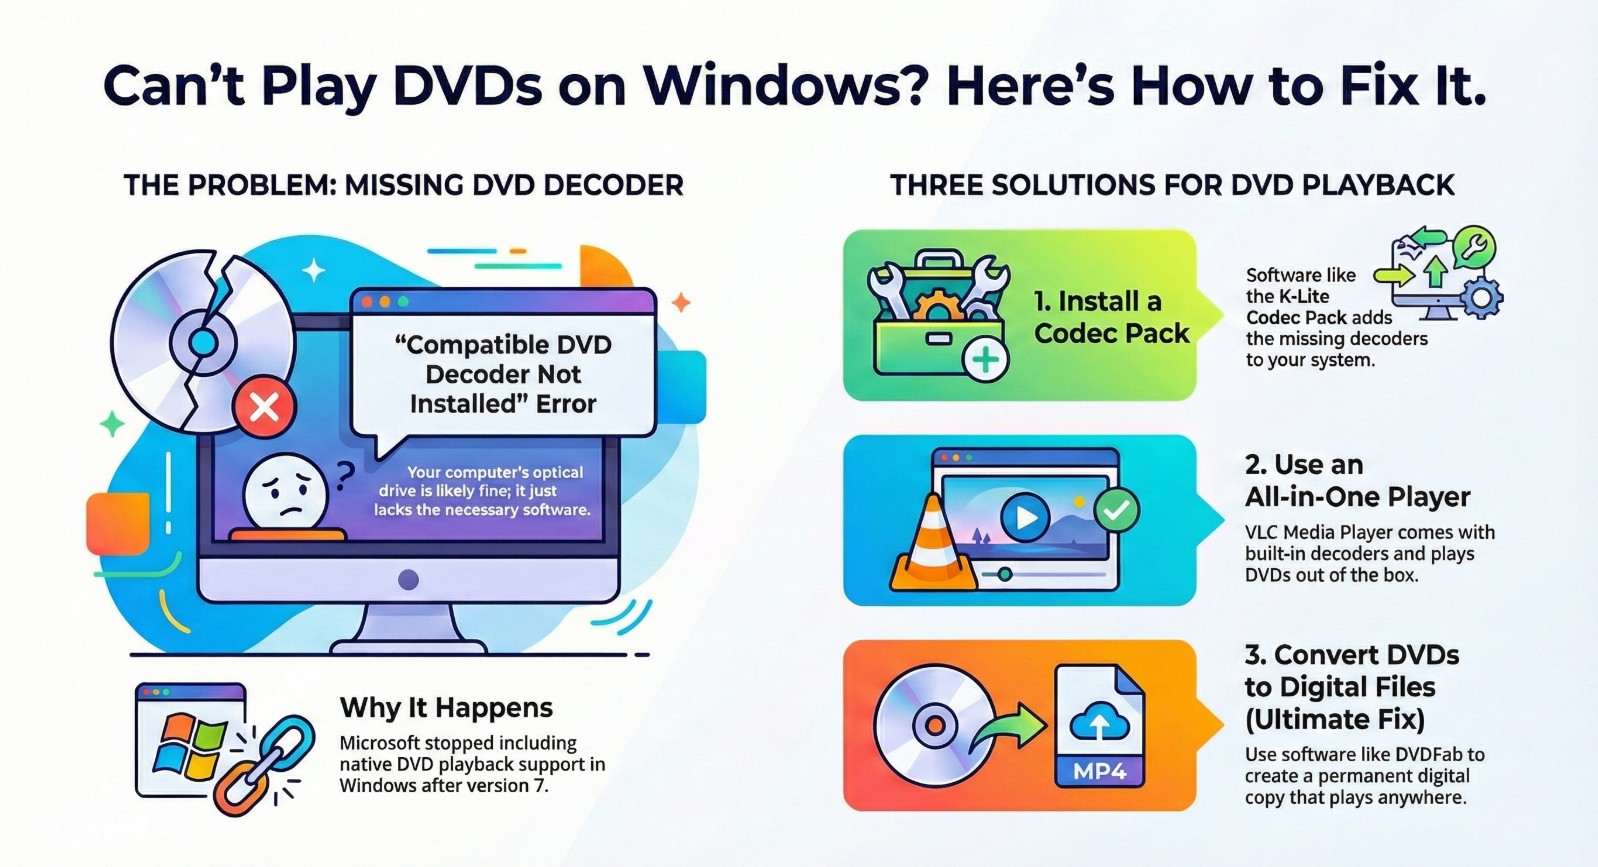 Best Free DVD Decoders for Windows XP/8/10/11: Fix DVD Playback ErrorsBy Diana Smith - Jun 17, 2026
 Best Free DVD Ripper for Mac in 2026: Tested Tools to Rip DVD on Mac EasilyBy Diana Smith - Jun 16, 2026