How to Burn YouTube Videos to DVD? [Win/Mac/Online Guide]
Summary: Burning YouTube videos to DVD usually involves two main steps: saving the video as a local file and using DVD creator software to turn it into a playable DVD. A professional tool such as DVDFab DVD Creator is a better fit when you need DVD menus, ISO output, subtitles, and disc burning options, while DVDStyler and DVD Flick are free choices for users who only want basic DVD authoring.
Table of Contents
YouTube is convenient for online viewing, but a DVD can still be useful when you want to play a video on a TV, share a disc with family, or keep an offline copy of a personal project. If you have a local YouTube video, burning it to DVD can make it easier to watch without relying on an internet connection or a streaming app.
In this guide, I will show you how to burn YouTube video to DVD on Windows, Mac, and online. I will also compare several YouTube to DVD converter options, explain where online tools can help, and show why desktop DVD creator software like DVDFab is usually the better choice when you need a playable DVD with menus, subtitles, or ISO output.
Before You Start: Save the YouTube Video Locally
Before you can burn YouTube videos to a DVD, you'll first need to download your favorite videos to your computer. DVD creator programs cannot burn a DVD directly from a YouTube link. They need a file on your computer, such as MP4, MOV, AVI, or MKV.
Downloading YouTube content is easy with the right tools, such as StreamFab YouTube Downloader. We won't dive deep into the downloading process here, but keep this step in mind.
How to Burn YouTube Videos to DVD on Windows and Mac
Once your videos are saved locally, YouTube to DVD conversion software comes in handy.
Method 1: Burn YouTube Videos to DVD with DVDFab DVD Creator
DVDFab DVD Creator is a professional YouTube to DVD converter that can burn popular video formats from YouTube, HD camcorders, smartphones, SD cards, and other devices. After you have a local YouTube video file, you can import it into the program, choose a DVD menu template, adjust basic playback settings, and burn the project to a blank disc. You can also save it as an ISO file or DVD folder if you want to test it before burning.
I would recommend this tool for users who want a clearer interface with fewer manual settings. It is especially useful when you need a stylish DVD menu, several video titles, subtitle options, or a disc that feels closer to a regular movie DVD. DVDFab DVD Creator lets you design and customize your own DVD menu with a variety of templates, giving you more room to add a personal touch.
Available on:
Key features:
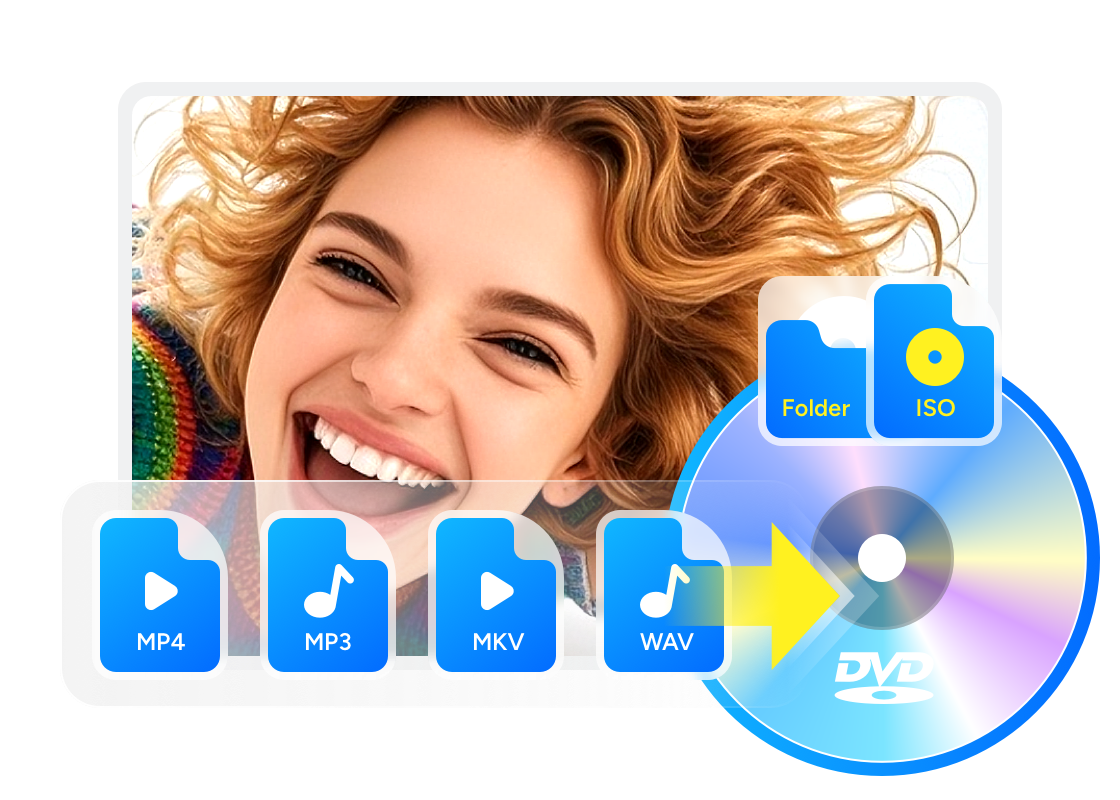
- Transfer any YouTube video to DVD disc, folder, and ISO file.
- Convert video to DVD-9, DVD-5, DVD+R/RW, DVD-R/RW, DVD+R DL, and DVD-R DL.
- Support batch burning at GPU-accelerated speed without quality loss.
- Crop, rotate, adjust color settings, and add watermarks using the built-in editing tools.
- Provide various stylish menu templates and allow you to personalize all elements and widgets.
- Display metadata information for the YouTube videos on DVD menu to keep everything organized.
How to burn YouTube videos to a DVD with DVDFab DVD Creator:
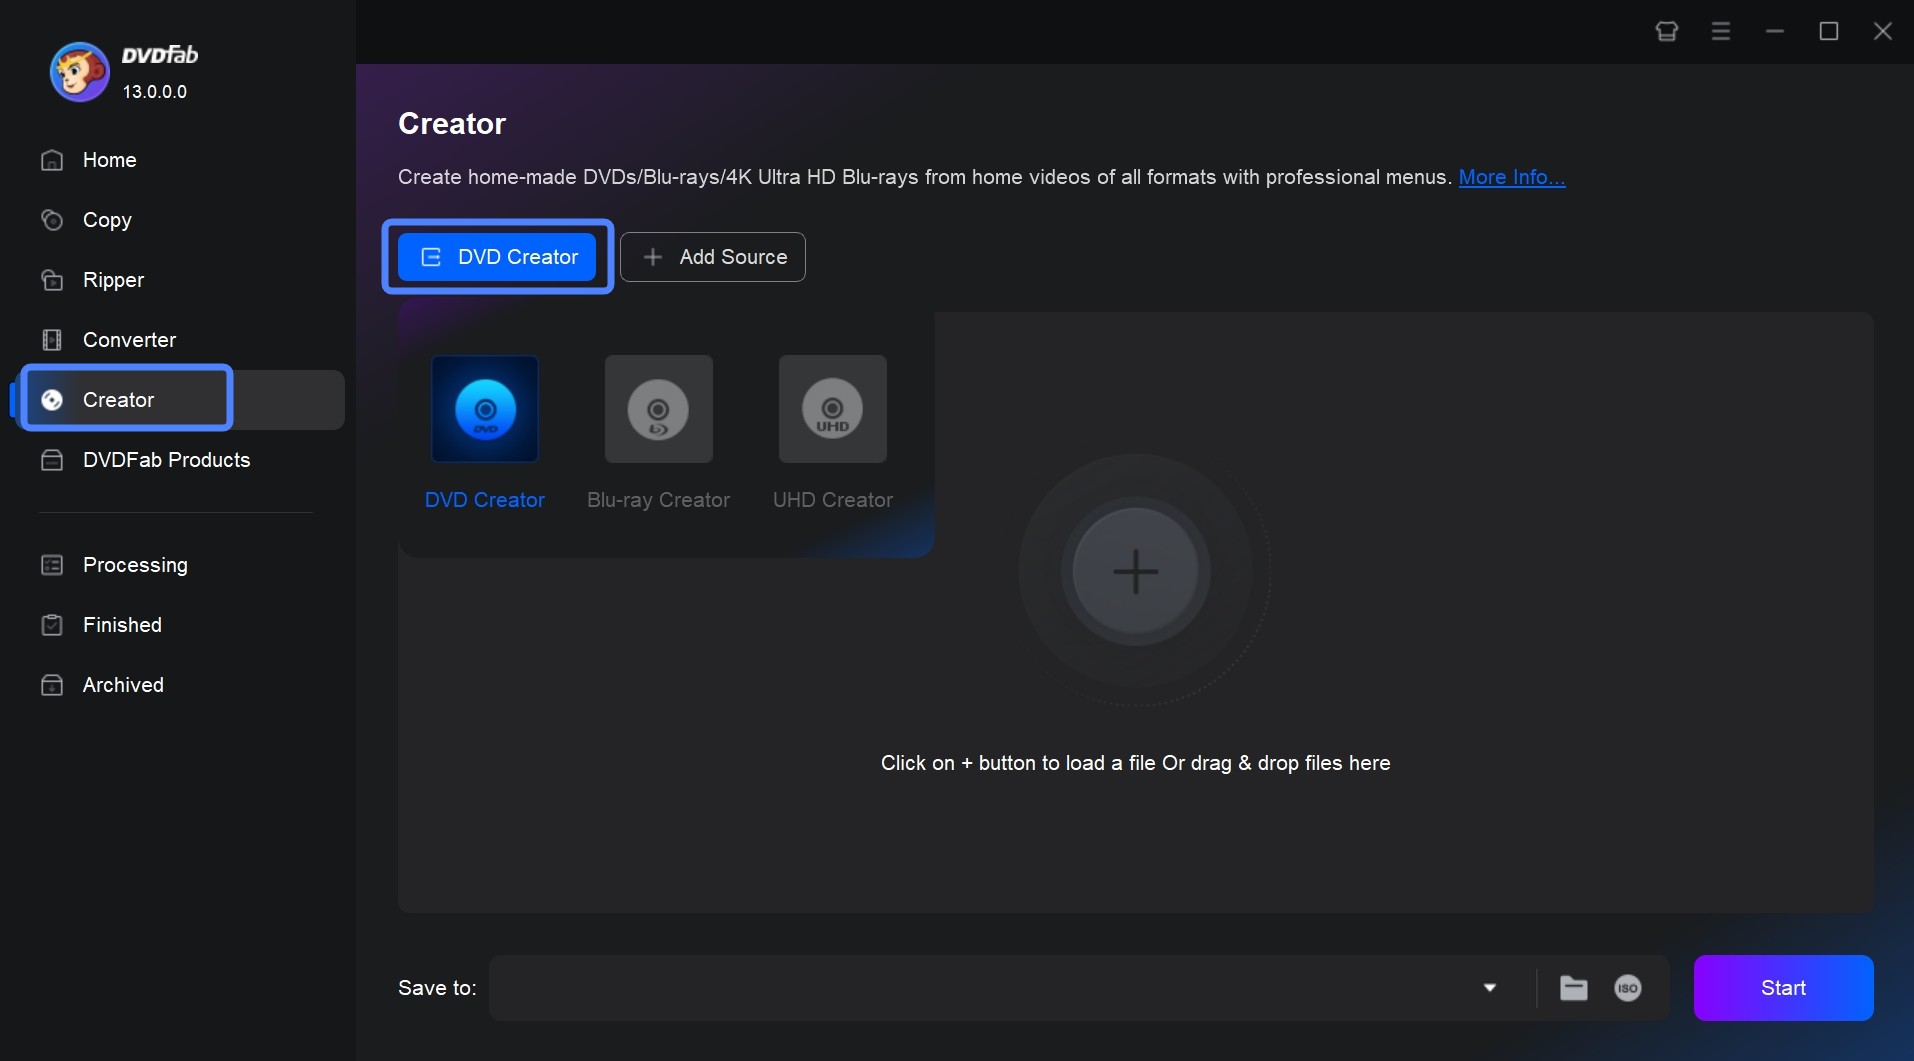
Step 1: Launch DVDFab DVD Creator, and load the source YouTube videos.
Get this tool launched on Windows or Mac based and select the "Creator" module and "DVD Creator" mode. Load your YouTube videos with the "Add" button or by dragging and dropping the file onto the main page.
Step 2: Customize the output DVD via "Advanced Settings", "Video Edit" and "Trim".
After loading your video, you will see all its the input and output information on the interface. Here you can choose the audio tracks and subtitles you want to burn. You can also rearrange the playback order if you load multiple YouTube videos.
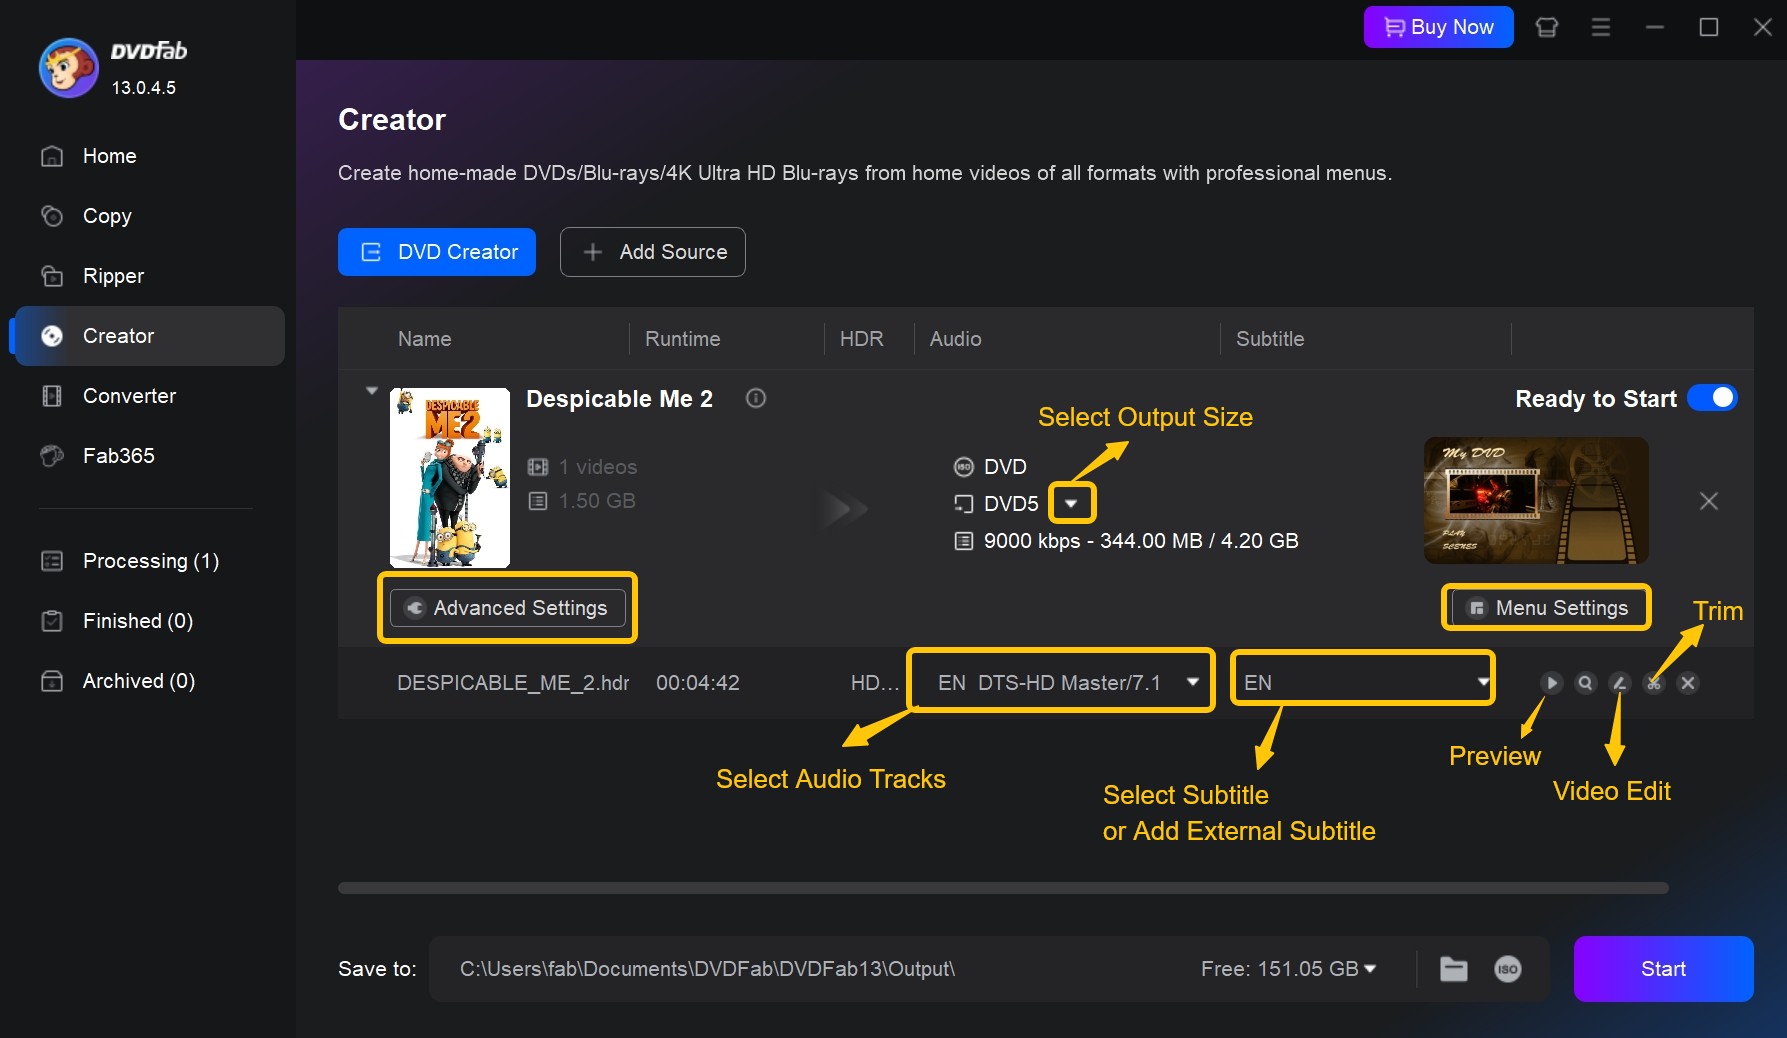
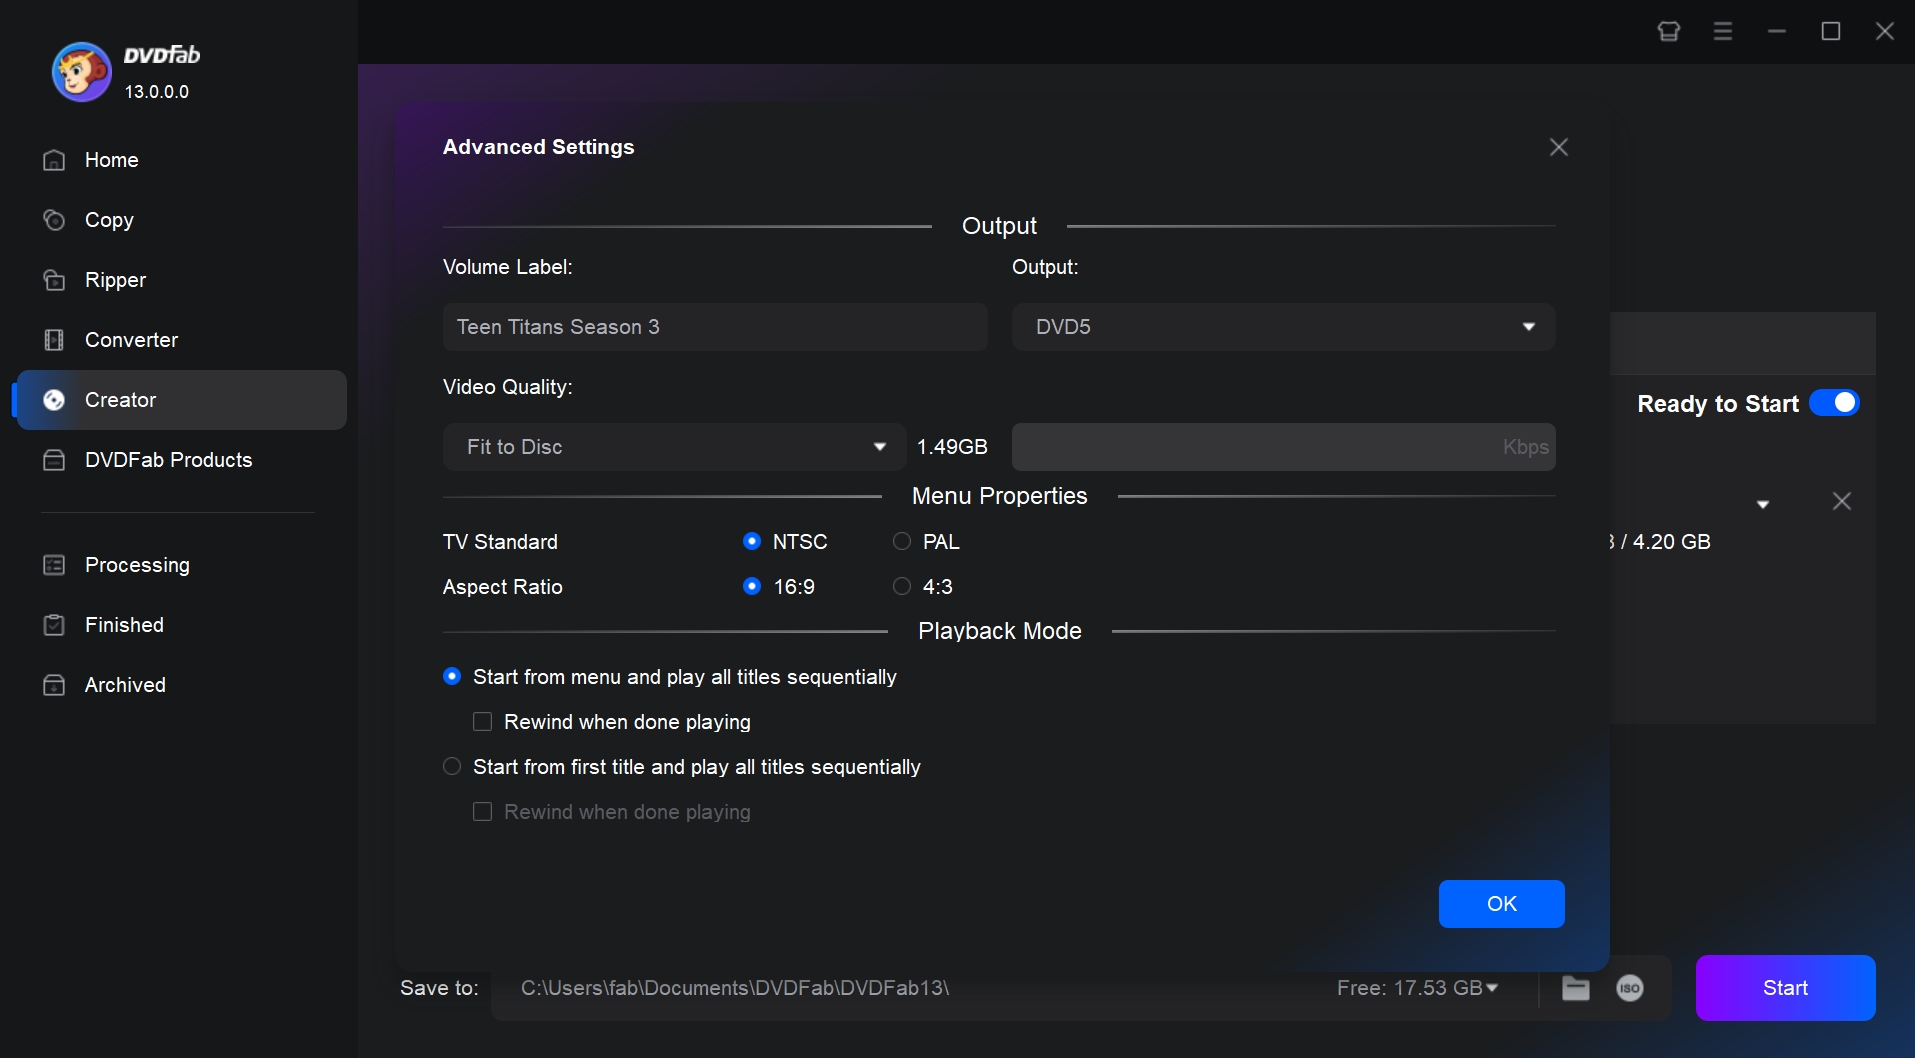
Then, click "Advanced Settings" on the main interface and you will be able to enter the name of your DVD, and set the output destination as DVD 5 or DVD 9.
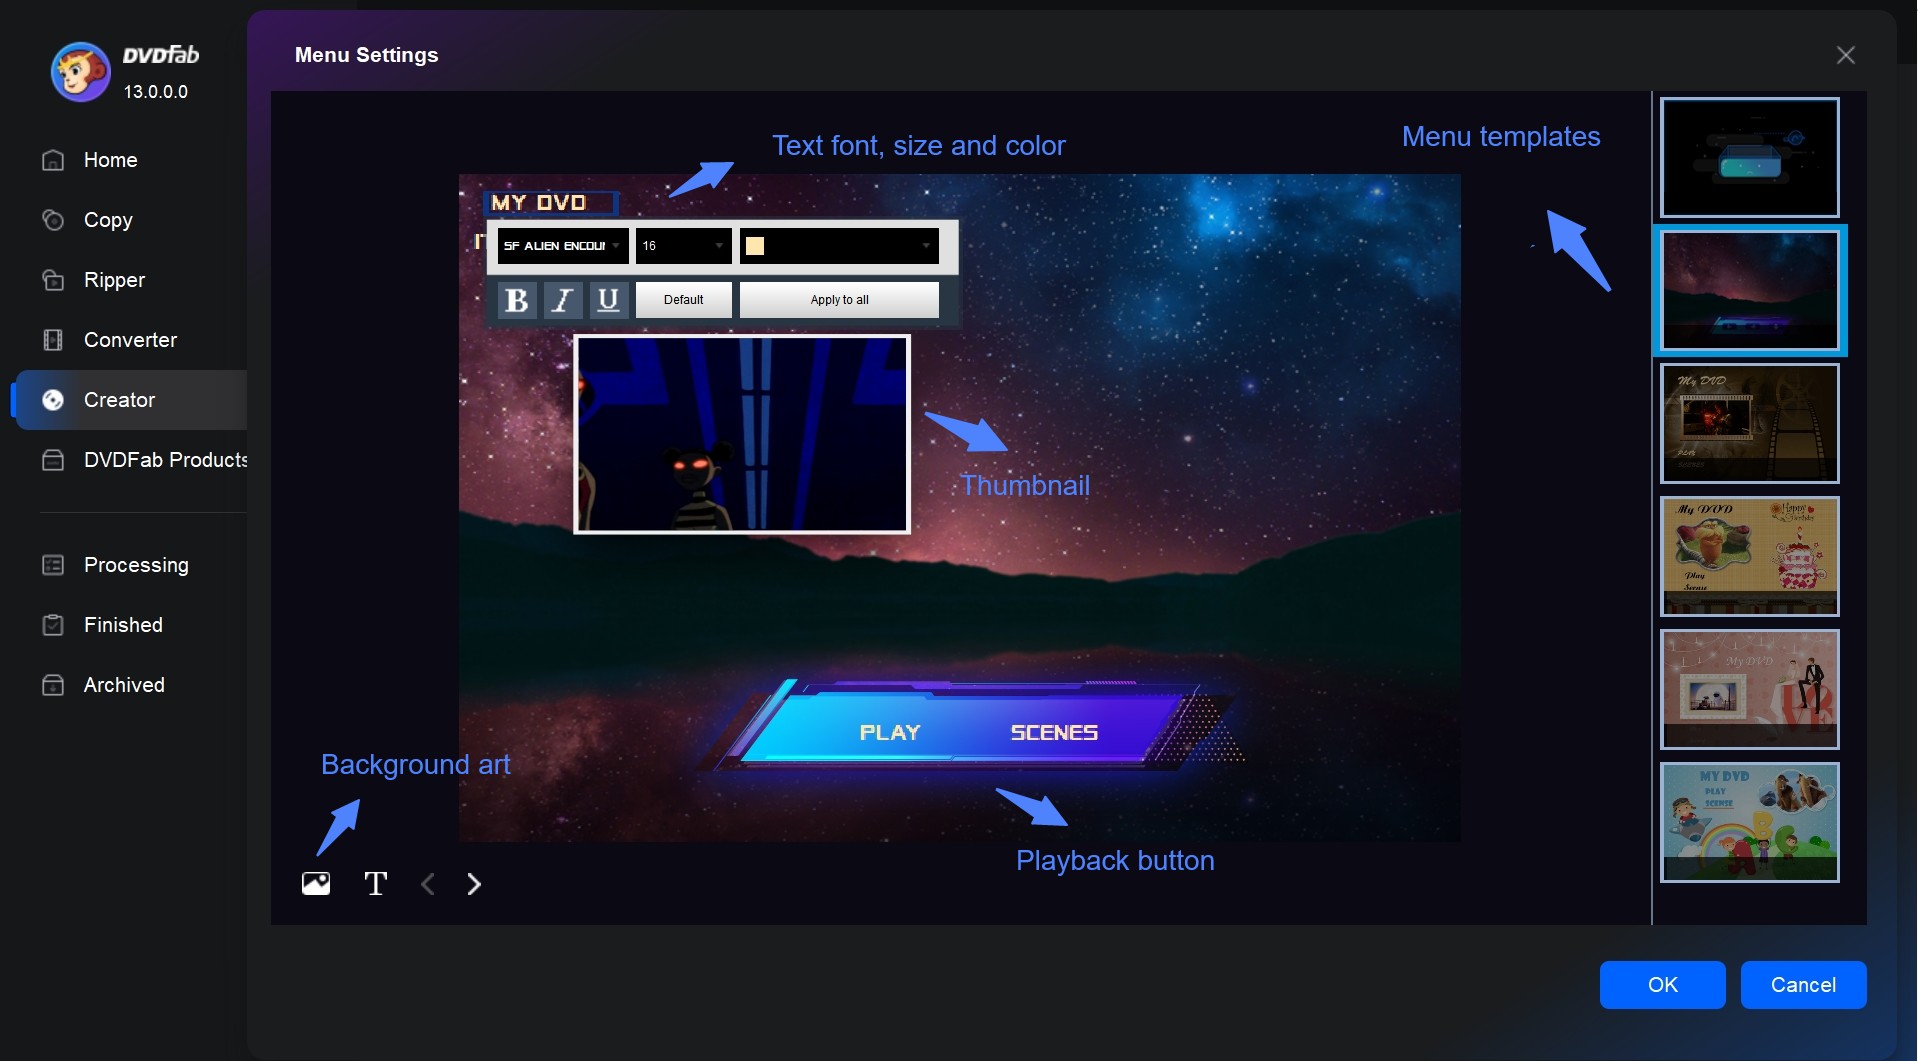
Step 3: Create DVD menu with "Menu Settings".
Then click "Menu Settings", and you will see many colorful menu templates. You are free to adjust the text font, size, and color, the thumbnail, the playback buttons, or add your favorite words and images to decorate your DVD.
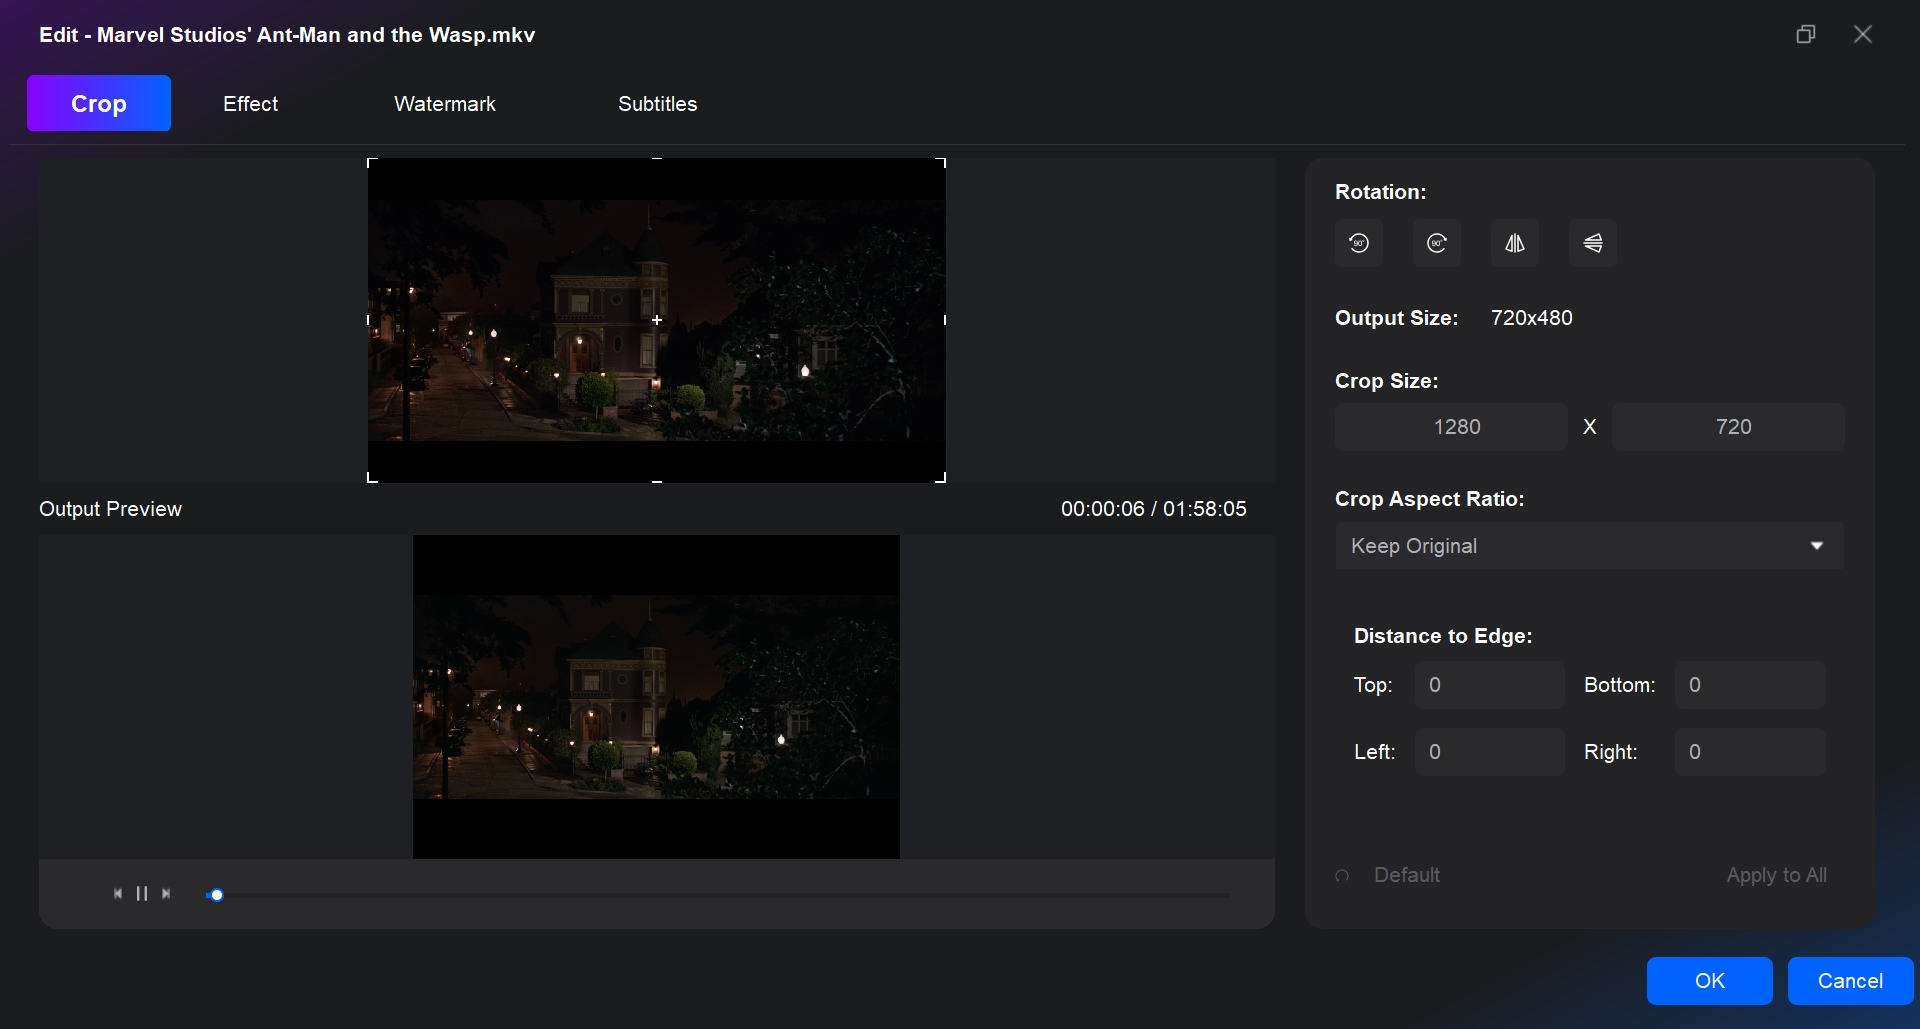
After that, You can seamlessly edit your videos within the software. Click "Video Edit", then you can crop the frame size and rotate the YouTube video if needed. Next, adjust the color effect such as saturation, brightness, and contrast to enhance the visual quality. If desired, add a watermark to personalize your content. Besides, "Trim" module allows you to cut out unwanted parts of your video.
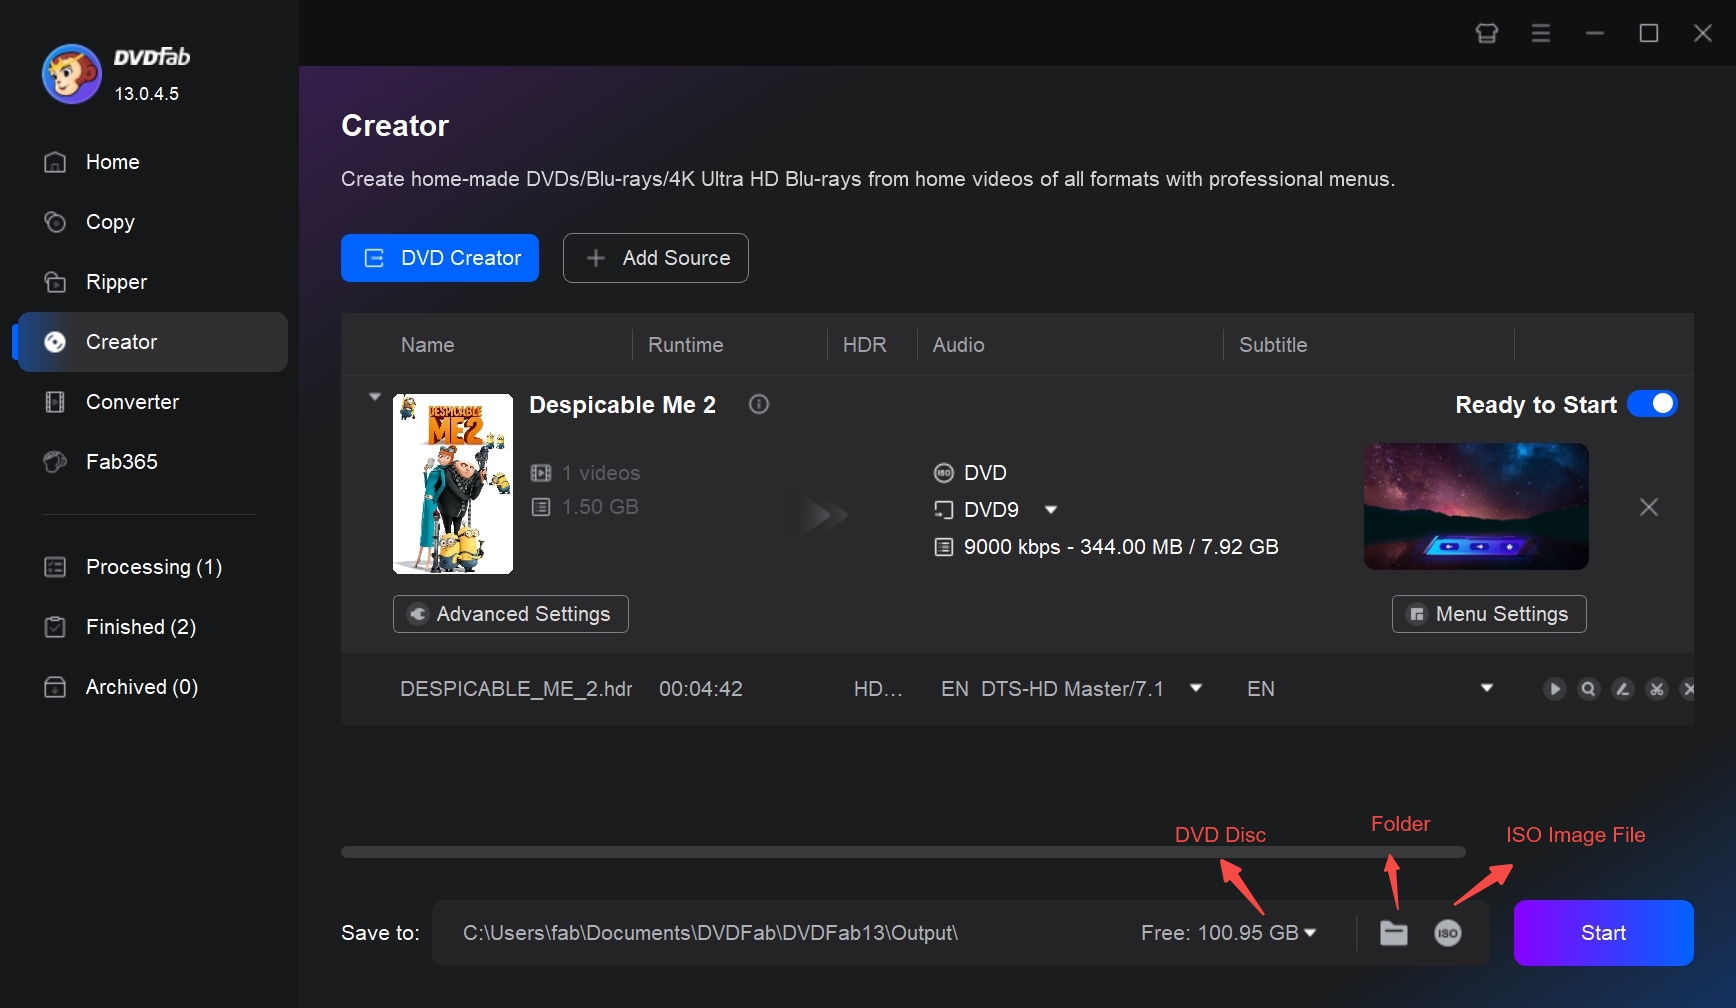
Step 4: Set the output destination, and start to burn YouTube video to DVD.
You can convert video to DVD disc, or save it to DVD folder or ISO file, using the different options available in this burner. Finally, click the button "Start" in the lower-right corner and start burning process.
Method 2: Burn YouTube Videos to DVD with DVDFab DVD Creator
DVDStyler is also a great free choice if you want to make a DVD out of a YouTube video that you already downloaded. This open-source DVD authoring tool can burn MP4 to DVD, and also works with video formats like MKV, AVI, MOV, and more. Though it's a free converter, it provides built-in menu templates. The available presets are neutral in theme, so they suit many kinds of projects. Of course, you can get creative and make your own by changing the text, buttons, backgrounds, and navigation to match your project's theme.
Although the official website is still online, the latest DVDStyler release dates back to 2021. As a result, you may run into limited format compatibility and slower responses from the maintainers. But as a free YouTube to DVD converter, its features are already sufficient.
Available on: Windows, macOS, and Linux
Key features:
- Burn MP4 to DVD and BD ISO/Folder.
- Supports both NTSC and PAL standards.
- Create professional DVDs with personalized menus.
- It does not offer video editing tools.
How to convert YouTube videos to DVD using DVDStyler:
Step 1. Install DVDStyler on your computer form the official site. Then download the YouTube videos you want to burn to your local hard drive.
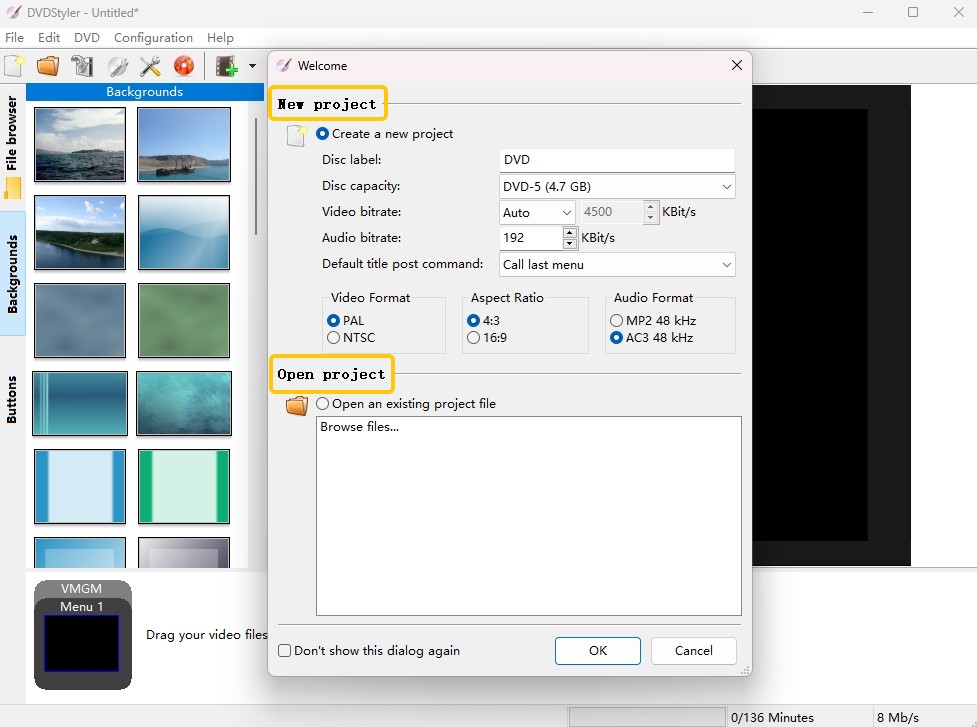
Step 2. Launch DVD Styler, and select "Create a new project" in the welcome window. You can also set the disc label, adjust the video and audio bitrates, and choose DVD5 or DVD9.
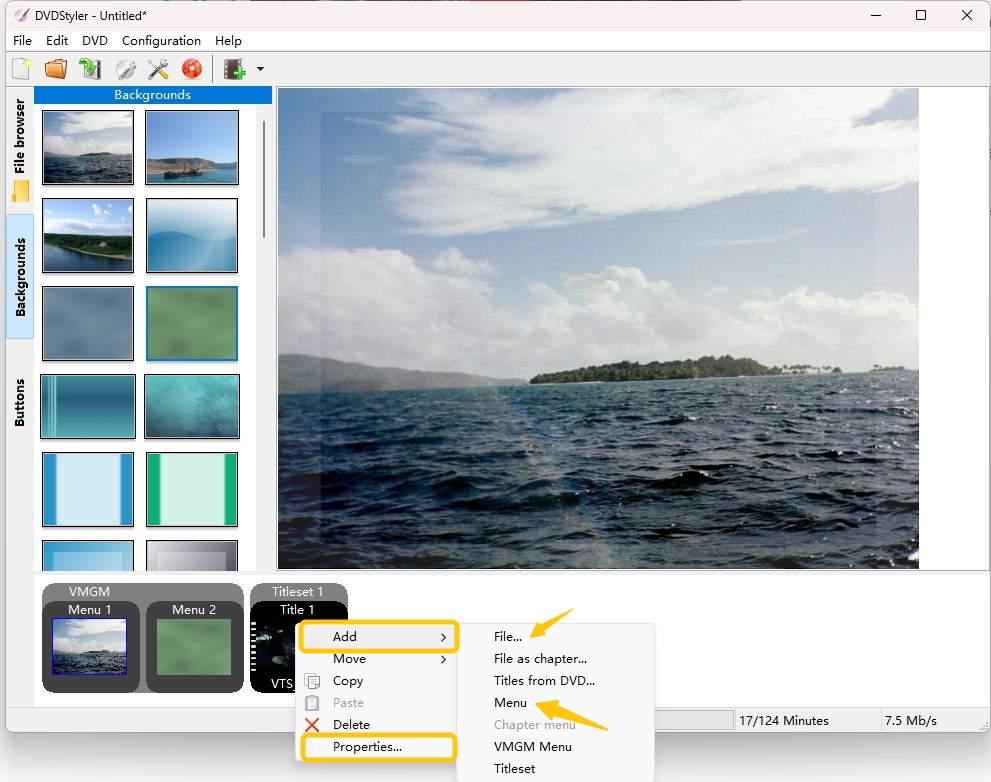
Step 3. Select a menu template from template presets. Use the "Add File..." button to import your videos into DVDStyler. When the videos appear in the main interface, it means they have been uploaded successfully.

Step 4. Go to the DVD Options and Settings panel to adjust any other settings to control your output style, including menus and video quality.
Step 5. Click the red "Burn" button to start making your own DVDs for backup or sharing with your family members.
Method 3: Burn YouTube Videos to DVD with DVD Flick
Users like DVD Flick for what it is: a free, open source DVD burner that's straightforward and surprisingly flexible. It handles a bunch of video formats without fuss, and the built-in menu templates are easy to tweak if you want something a bit more personal. You can drop in subtitles and extra audio tracks, and still get control over basics, like aspect ratio and bitrate. But it can take a very long time to encode and burn, especially with longer projects in terms of speed. If you are not in a hurry and you want a no-cost tool that just gets the job done, DVD Flick is still worth a shot, but expect to let it run for a while.
Available on: Windows 2000 Professional, or any edition of Windows XP / Vista / 7
Key features:
- Convert 40 different types of videos to DVD format.
- Choose from several pre-designed templates or make your own using the built-in menu editor.
How to Use DVD Flick for YouTube to DVD Conversion:
Step 1: Download and install the DVD Flick software on your computer. Open the program to start a new DVD project.
Step 2: Add your YouTube video files by clicking on the "Add title" button.
Step 3: Go to "Project settings" to define key parameters, including target size, video format and more.
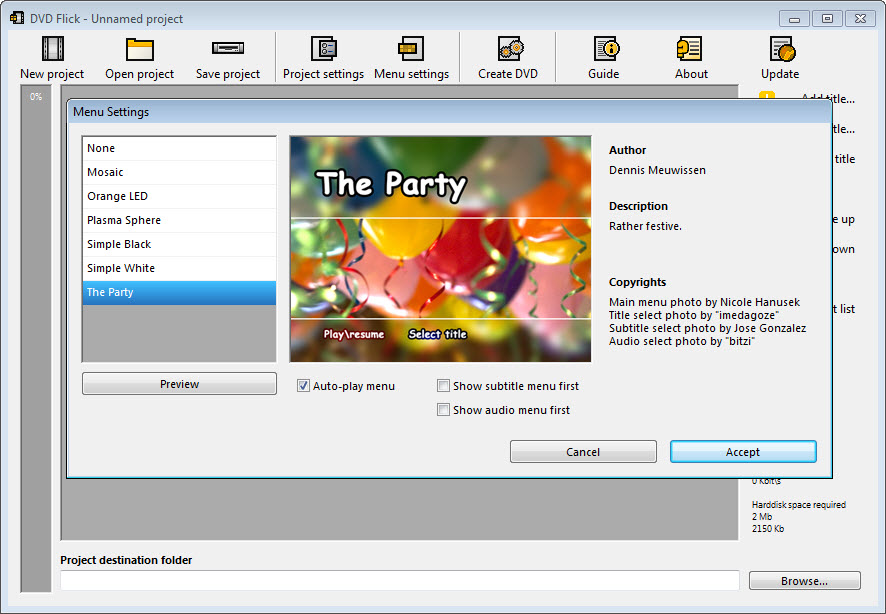
Step 4: You can choose a basic menu style or turn it off using the Menu options tab, even if DVD Flick doesn't support advanced menu creation.
Step 5: Click "Browse" at the bottom to select the destination folder. Then click "Create DVD" to begin encoding and burning.
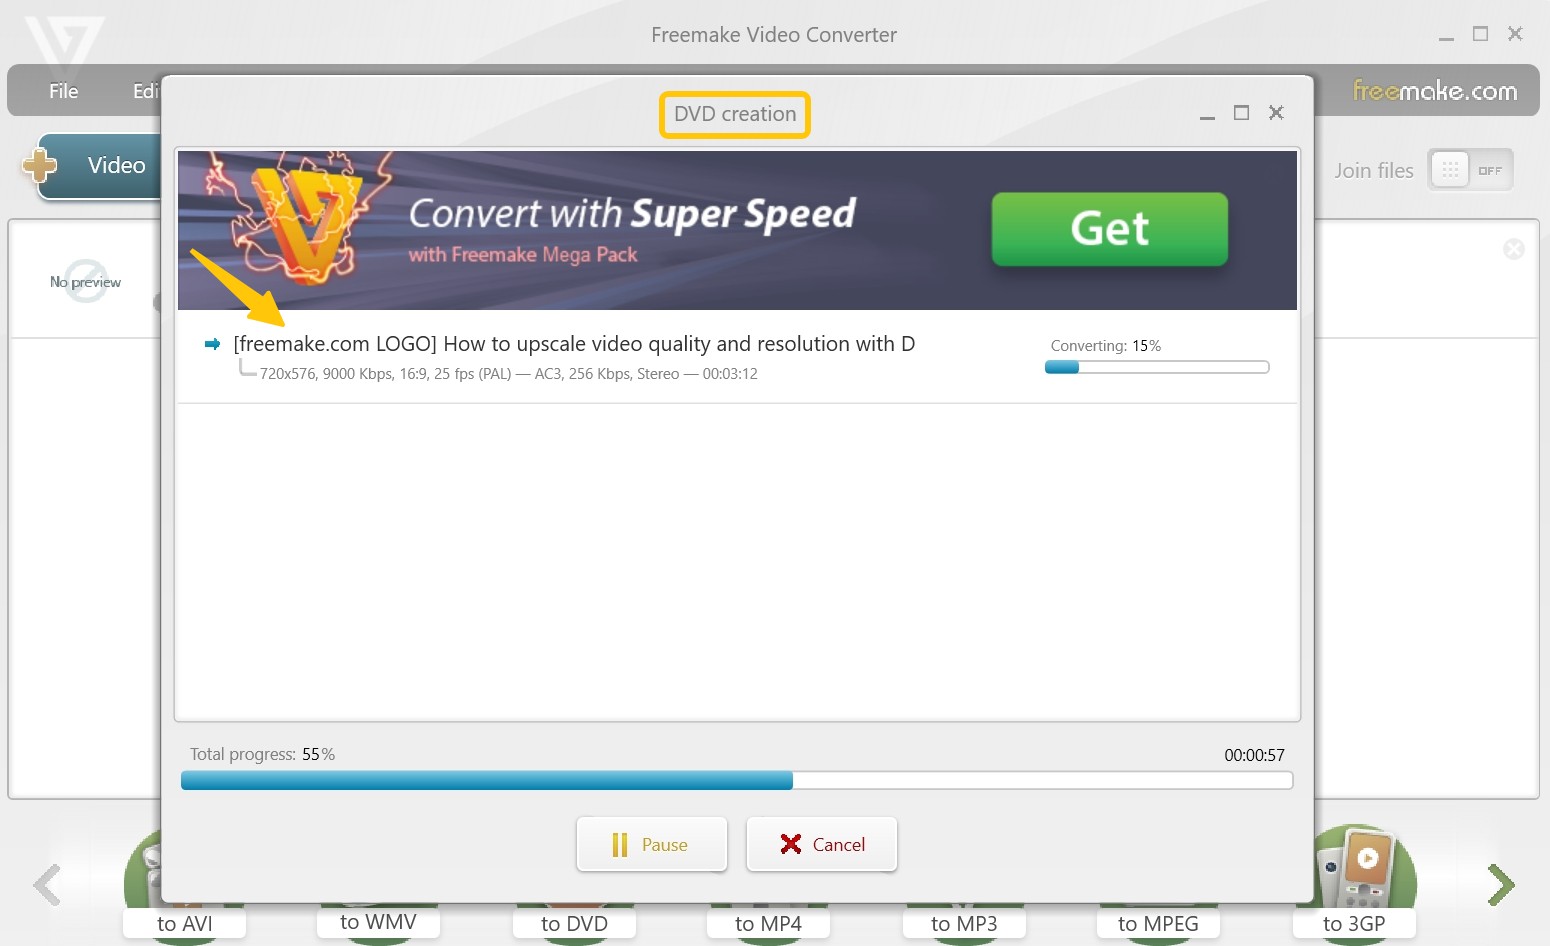
Method 4: Burn YouTube Videos to DVD with Freemake Video Converter
Freemake Video Converter is a Windows based tool for users who want to convert local videos and burn simple DVD projects. It supports many common video formats and can handle different types of content, such as TV clips, music videos, live recordings, and animated videos. Freemake also offers a separate video downloader, but this feature should only be used when you have the right to save and use the video. However, its menu options are more limited than dedicated DVD creator software. The free version also adds Freemake branding to the output file, and some advanced features require paid packs.
Available on: Windows 11, 10, 8, 8.1, 7, Vista
Key features:
- Add multiple videos, and arrange playback order.
- Support for 500+ formats and devices.
- It offers a separate Freemake Video Downloader.
- Come with a basic video editing tool.
How to burn YouTube videos to DVD with Freemake Video Converter:
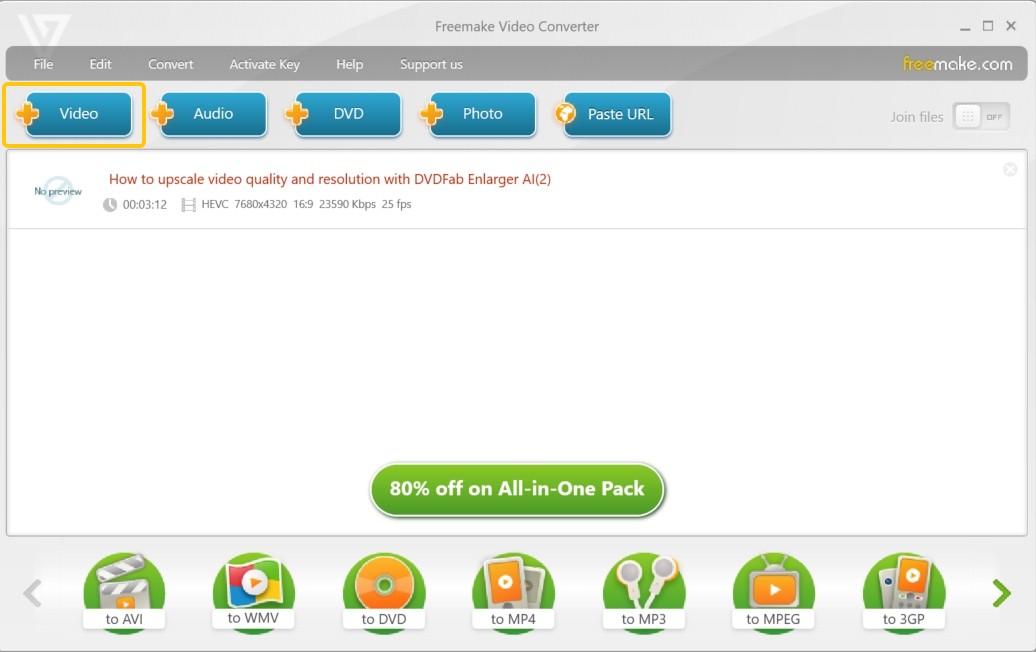
Step 1: Ensure you have Freemake Video Downloader installed. Launch the converter, and click "+Video" to import the downloaded YouTube files into the project.
Step 2:You can enhance your DVD by importing extra audio tracks or subtitle files. Once your content is ready, click "to DVD" at the bottom of the screen.
Step 3: The pop-up settings window allows you to rename, select DVD menus, and choose the output path.
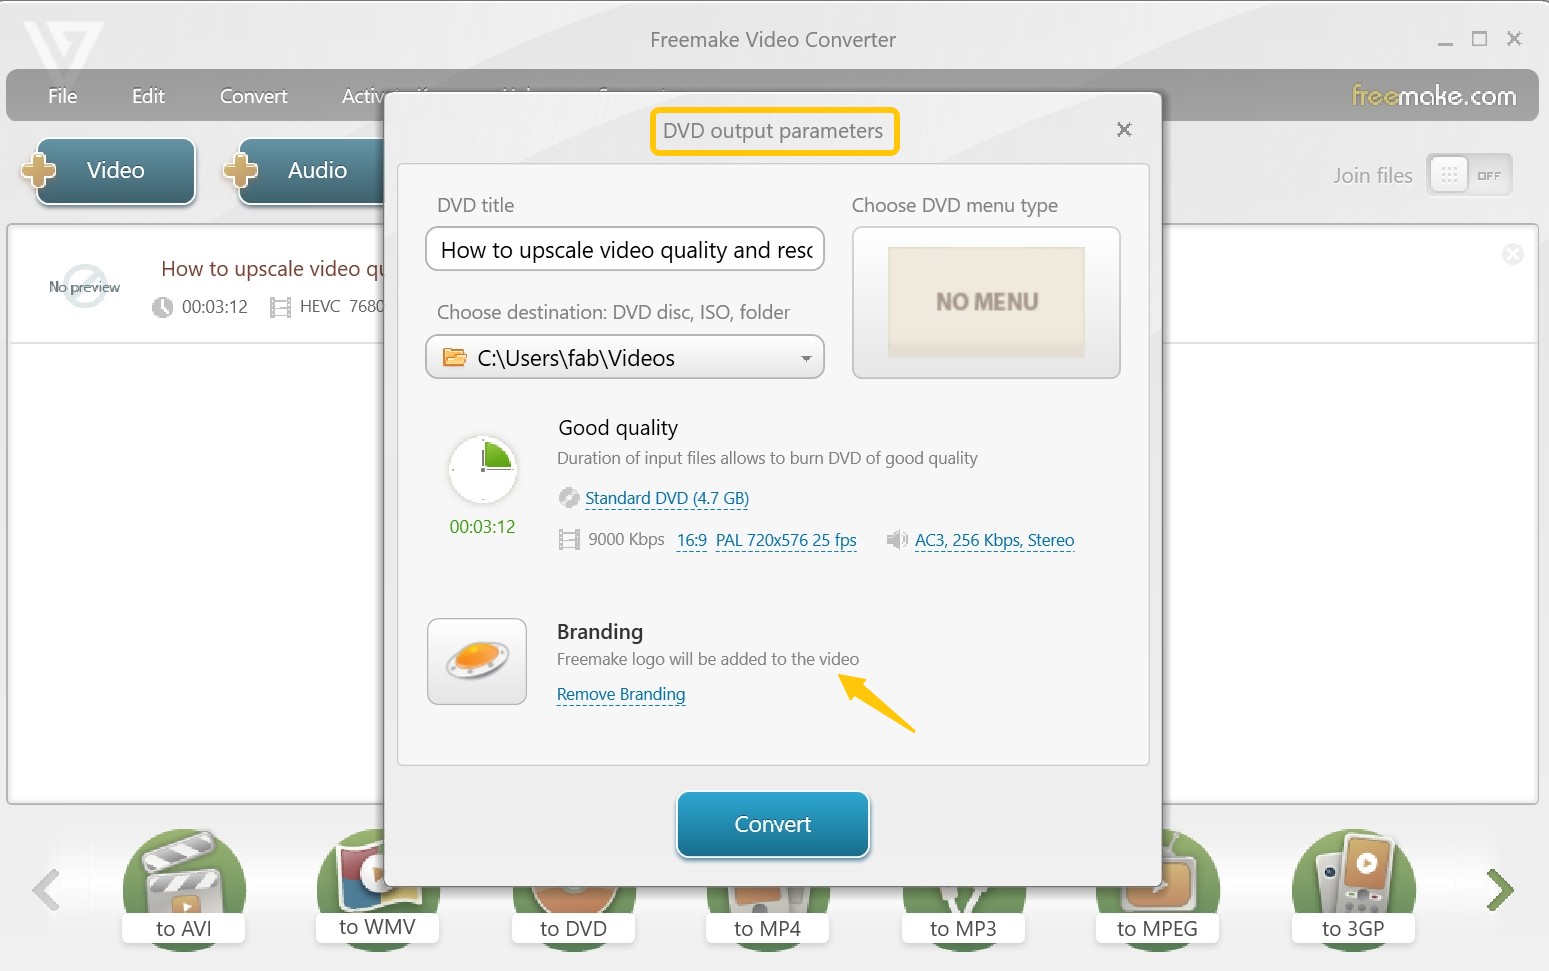
Step 4: Finally, click “Burn” to begin writing your YouTube videos to the DVD.
How to Burn YouTube Videos to DVD Online?
A YouTube to DVD converter online can help with format conversion, but it cannot handle the full DVD burning process. Online tools such as Zamzar can convert a local video file from one format to another, but they cannot create a DVD menu, build a VIDEO_TS structure, or burn a physical disc from your browser.
This is why online tools are not a good fit for long YouTube videos or complete DVD projects. Zamzar's free service only supports uploads up to 50 MB, which is too small for many full length videos. And the converted files are only available for download for 24 hours before deletion. Even if the file is accepted, you still need desktop DVD authoring software and a DVD burner, such as DVDFab DVD Creator, to make a playable disc.
For a short video clip, an online converter may be enough to change the file format. For a DVD that can play on a standard DVD player, a desktop DVD creator is still the better choice.
How to Use ZamZar to Convert YouTube Videos for DVD Burning
Step 1: After saving YouTube videos to your local drive using YouTube Downloader, visit ZamZar's MP4 to DVD conversion page.
Step 2: Upload the video you downloaded. If the file size exceeds 50MB, you need to purchase a package. The $39 plan supports files up to 2GB.
Step 3: Click "Convert To" and select DVD from the drop-down list.
Step 4: Hit "Convert Now" to convert your file to MPG format. Then, use a DVD burner like DVDFab or DVD Flick to create your DVD.

FAQs
Can I legally burn YouTube videos to DVD for personal use?
Laws vary by country and even by region. Read your local rules and the platform's terms first. In many places, burning YouTube video to a DVD just for yourself (no sharing, no selling) can fall under ideas similar to "fair use" or private copying. If you burn videos you don't own the rights to and sell, trade, upload, or give them out, you're very likely breaking copyright law.
Can I burn a CD from YouTube?
Yes, you can burn a CD from YouTube, and lots of free burners can do this job. The process is similar to the steps we've provided above for burning YouTube videos to DVDs. Just download the YouTube audio files to MP3 format or extract it from the video files, and then burn the MP3 to a blank CD using Windows Media Player or third-party CD-burning software.
What format should I convert YouTube videos to for DVD burning?
To minimize quality loss and ensure the format compatibility for most DVD burners, we suggest you choose MP4 as the download format. If you can select the video and audio codecs when downloading YouTube videos, we recommend you choose H.264 for video and AAC for audio to get a better viewing experience.
Conclusion
Burning YouTube videos to DVD is not just a simple file conversion task. You need to download YouTube video file first and than use a DVD creator to build a playable DVD structure. Online converters may help with small format changes, but they cannot replace desktop DVD authoring software.
If you want to create DVDs with menus, subtitles, ISO output, and disc burning options, DVDFab DVD Creator is a practical choice. If you prefer a free tool and do not mind a more traditional interface, DVDStyler is also worth trying. For older or simpler Windows projects, DVD Flick and Freemake may still work, but they are better treated as basic options. Once you understand these points, it becomes much easier to burn YouTube videos to DVD and create a disc that works the way you expect.
 7 Best & Free DVD Menu Creators in 2026: How to Make a DVD Menu on Windows & MacBy Diana Smith - Jul 16, 2026
 How to Make DVDs on Mac and Windows with Easy Steps?By Wenny Yan - Jul 13, 2026
 How to Burn MP3 to DVD: Best Audio DVD Creators Compared (2026)By Wenny Yan - Jul 10, 2026
 How to Burn Video_TS to DVD on Windows and Mac: 4 Methods That WorkBy Diana Smith - Jul 1, 2026