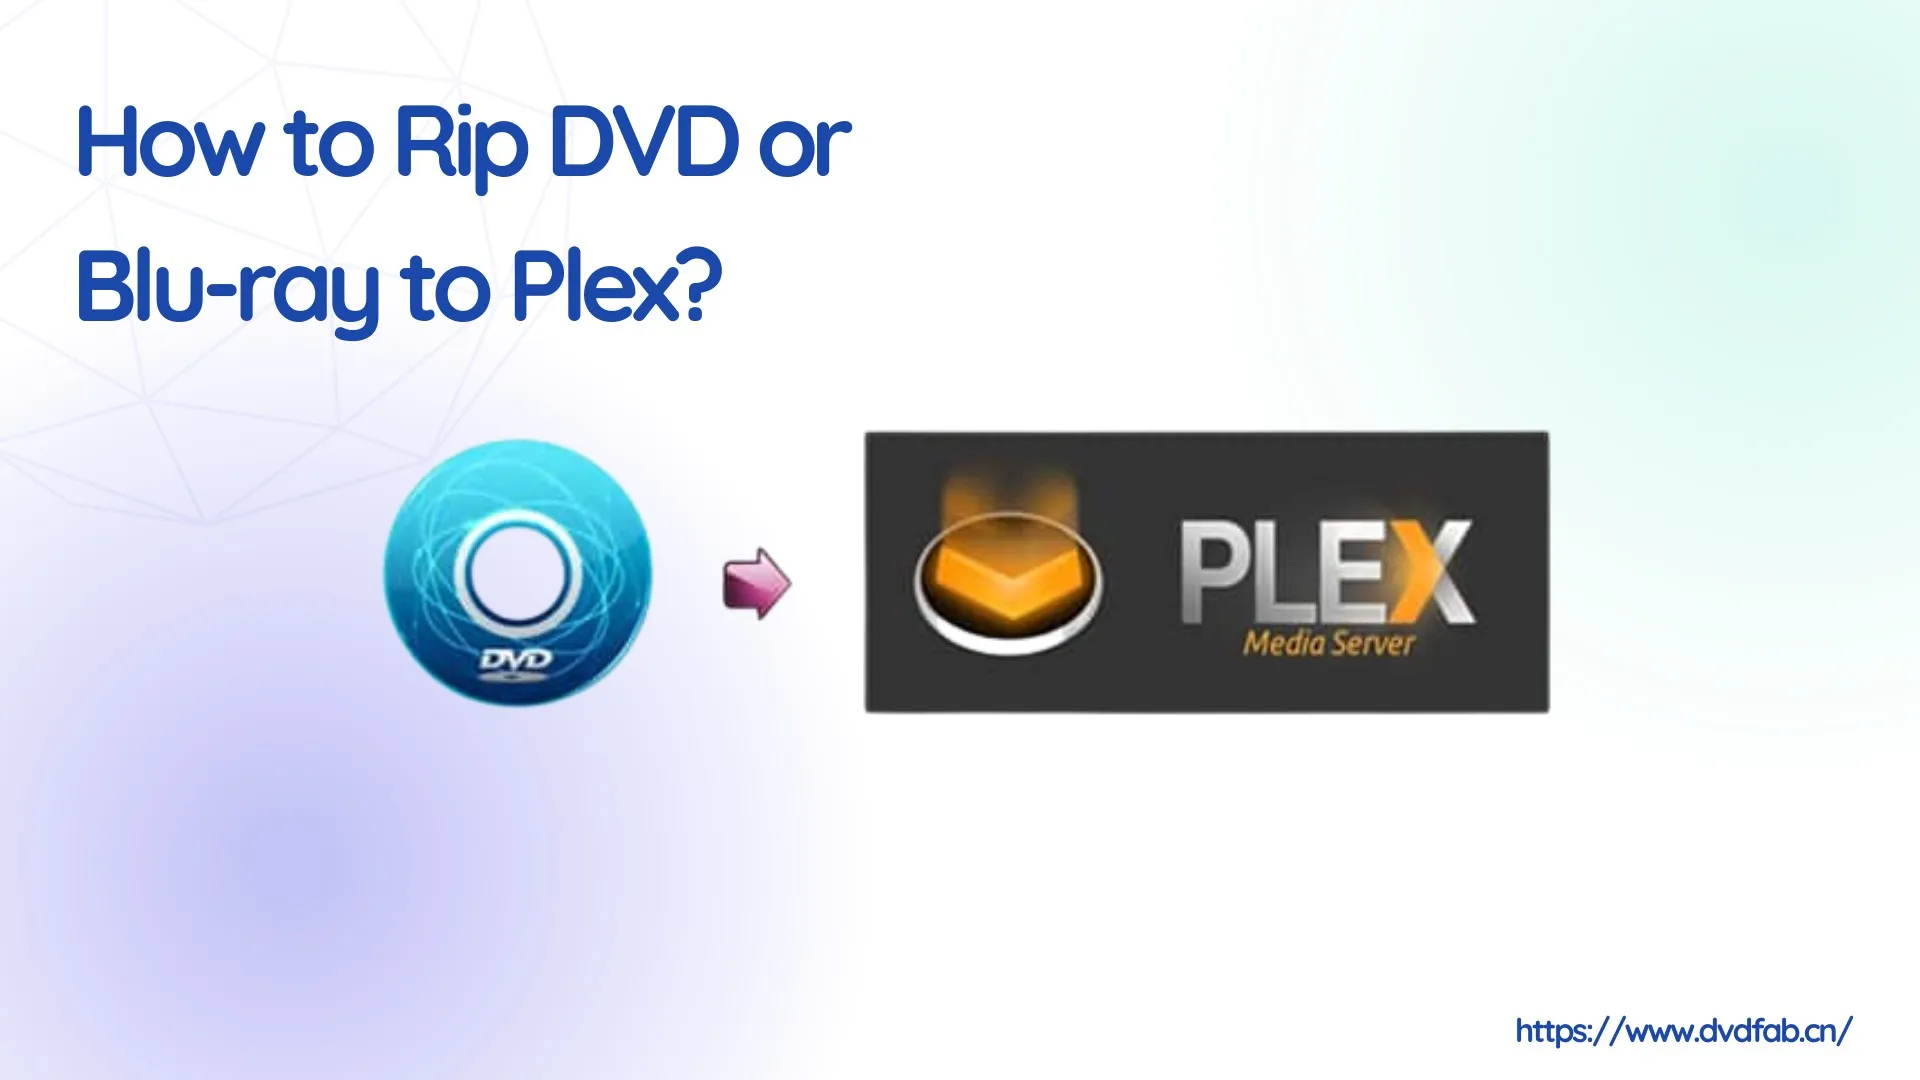
How to Rip DVDs for Plex: Guide to Formats, Tools, and Library Setup
Summary: To rip DVDs for Plex, use DVDFab DVD Ripper for an automated, one-click solution that handles decryption and compression, or a free workflow combining MakeMKV (for lossless ripping) and HandBrake (for compression). First, convert discs to MP4 (H.264) to ensure Direct Play. Then, organize your files using proper naming conventions like Title (Year) and add them to your library. This process ensures smooth playback and accurate metadata matching on Plex.
Table of Contents
When I first started ripping DVDs for Plex, I hit a hard limit: the media server ignores raw VIDEO_TS folders and extracted ISO files. A quick search on the r/PleX subreddit confirms this common operational hurdle—the platform cannot natively navigate physical disc menus or bypass commercial encryption. This strict architecture essentially locks your physical media out of your digital streaming library.
During my recent performance tests on Windows 10, hardware-accelerated conversion software proved essential. Converting discs into direct-play MKV or MP4 formats prevents heavy transcoding from crushing your server's CPU. Read on to discover the most efficient tools for ripping DVDs for Plex while preserving 1:1 visual quality.
Best Format Settings for Ripping DVDs for Plex
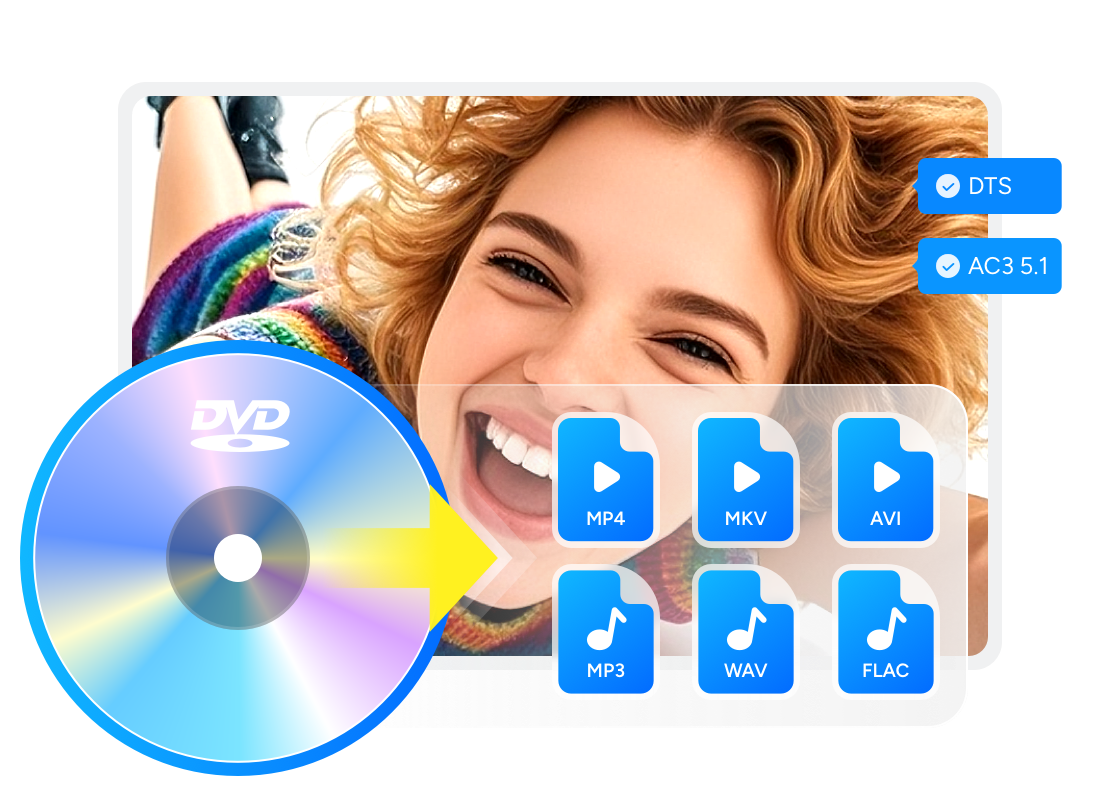
To enjoy your DVD collection with Plex, you'll first need to convert DVD to USB or other Plex-supported digital formats. Plex's own format guidelines show that MP4 (H.264 + AAC) and MKV are the safest choices on most devices. Other formats such as AVI, MOV, ASF, WMV, or MPEG may play on certain Plex clients, like Plex for Xbox and LG webOS Smart TVs, but they are more likely to require Direct Stream or transcoding and are not recommended as primary target formats.
A practical baseline for ripping DVDs to Plex looks like this:
📌Plex may usually play videos that meet the following criteria directly:
| Setting | Recommended Value |
| Container | MP4 (.mp4) for maximum compatibility; MKV if you need multiple audio or subtitle tracks |
| Video_Codec | H.264 (AVC) |
| Audio Codec | AAC 2.0 for broad support; AC3/EAC3 5.1 if your devices support surround |
| Resolution | Keep original DVD resolution (720×480 NTSC / 720×576 PAL), or upscale to 720p/1080p if needed |
| Frame Rate | Match the source (24/25/30 fps; many newer clients also handle 60 fps) |
| Bitrate | Around 4–8 Mbps is usually enough for clean H.264 video from a DVD source |
| Bit Depth | 8-bit (safest) |
| Subtitle | Prefer text subtitles such as external or embedded '.srt' for best compatibility; image-based DVD subs (e.g. VobSub/IDX+SUB, PGS) often trigger transcoding, so avoid them as the main option. |
This combination generally delivers good quality while maintaining broad compatibility across Plex apps and devices. If your media doesn't meet these guidelines, Plex can still play it by transcoding on the fly, but that can be resource-intensive—especially for high-resolution files or multiple simultaneous streams.
How to Rip DVDs for Plex in One Click (Fast & 100% Working)
If you check Reddit communities, you will see a common trend: people often suggest using MakeMKV and HandBrake together. While this free method works well enough for some discs, it frequently fails when encountering modern copyright protections on commercial discs. It also gets messy when you want to keep specific subtitles, commentaries, or bonus features. You have to juggle two different programs, and after waiting hours for the video to process, you might still find your subtitles missing in Plex. To skip this hassle, DVDFab offers a much easier solution.
Step 1. Download the Best DVD Ripper for Plex - DVDFab DVD Ripper
DVDFab DVD Ripper is a "one-click" tool that can rip any DVD disc, ISO, or folder to Plex-supported formats. It handles copy protection on both old and new discs, seamlessly outputting Plex-friendly files. You can choose small, high-quality MP4 (H.264 + AAC) files for maximum Direct Play compatibility across Plex apps, or use lossless MKV passthrough to preserve the original video/audio streams and subtitles. Additionally, it allows you to select specific titles, chapters, audio tracks, and subtitles, and even edit the video for a fully personalized result.
Beyond these ripping capabilities, DVDFab stands out as the best DVD ripper for Plex due to its exclusive "Meta Info" feature. It automatically synchronizes and generates .nfo files containing accurate original titles, cast lists, and cover art. This ensures your Plex library populates with the correct metadata, eliminating the need for manual scraping.
Click the button below to download and install DVDFab DVD Ripper.
👍Key Features:
- Keep updates to support newly released DVDs.
- Convert DVD disc, ISO, Video_TS folder to Plex formats like MP4, MKV, MOV, etc.
- Compress large video files efficiently to save storage space on your NAS or hard drive.
- Accelerate the ripping process using GPU hardware and supports batch processing for large libraries.
- Allow you to select specific audio tracks and subtitles to customize your viewing experience.
- Generate .nfo files to automatically synchronize movie metadata with Plex.
- Offer a free but limited version - DVDFab HD Decrypter - that can rip most encrypted DVD or Blu-ray to MP4 & MKV format only.
I use DVDFab DVD Ripper (v13.0.5.9) to bulk digitize my collection. Its cloud decryption reliably handles even the newest 2026 releases like Jurassic World: Rebirth. With GPU acceleration, I can batch process multiple movies at once, compressing a 6GB DVD down to a 1.9GB MP4 (saving ~69% space) without visible quality loss. And I really like its metadata feature. The software generates .nfo files alongside the video, ensuring Plex instantly loads the correct posters and cast info—saving me hours of manual fixing. The ripped files just play smoothly on Plex.
Step 2. Load the DVD and Select a Plex Supported Format
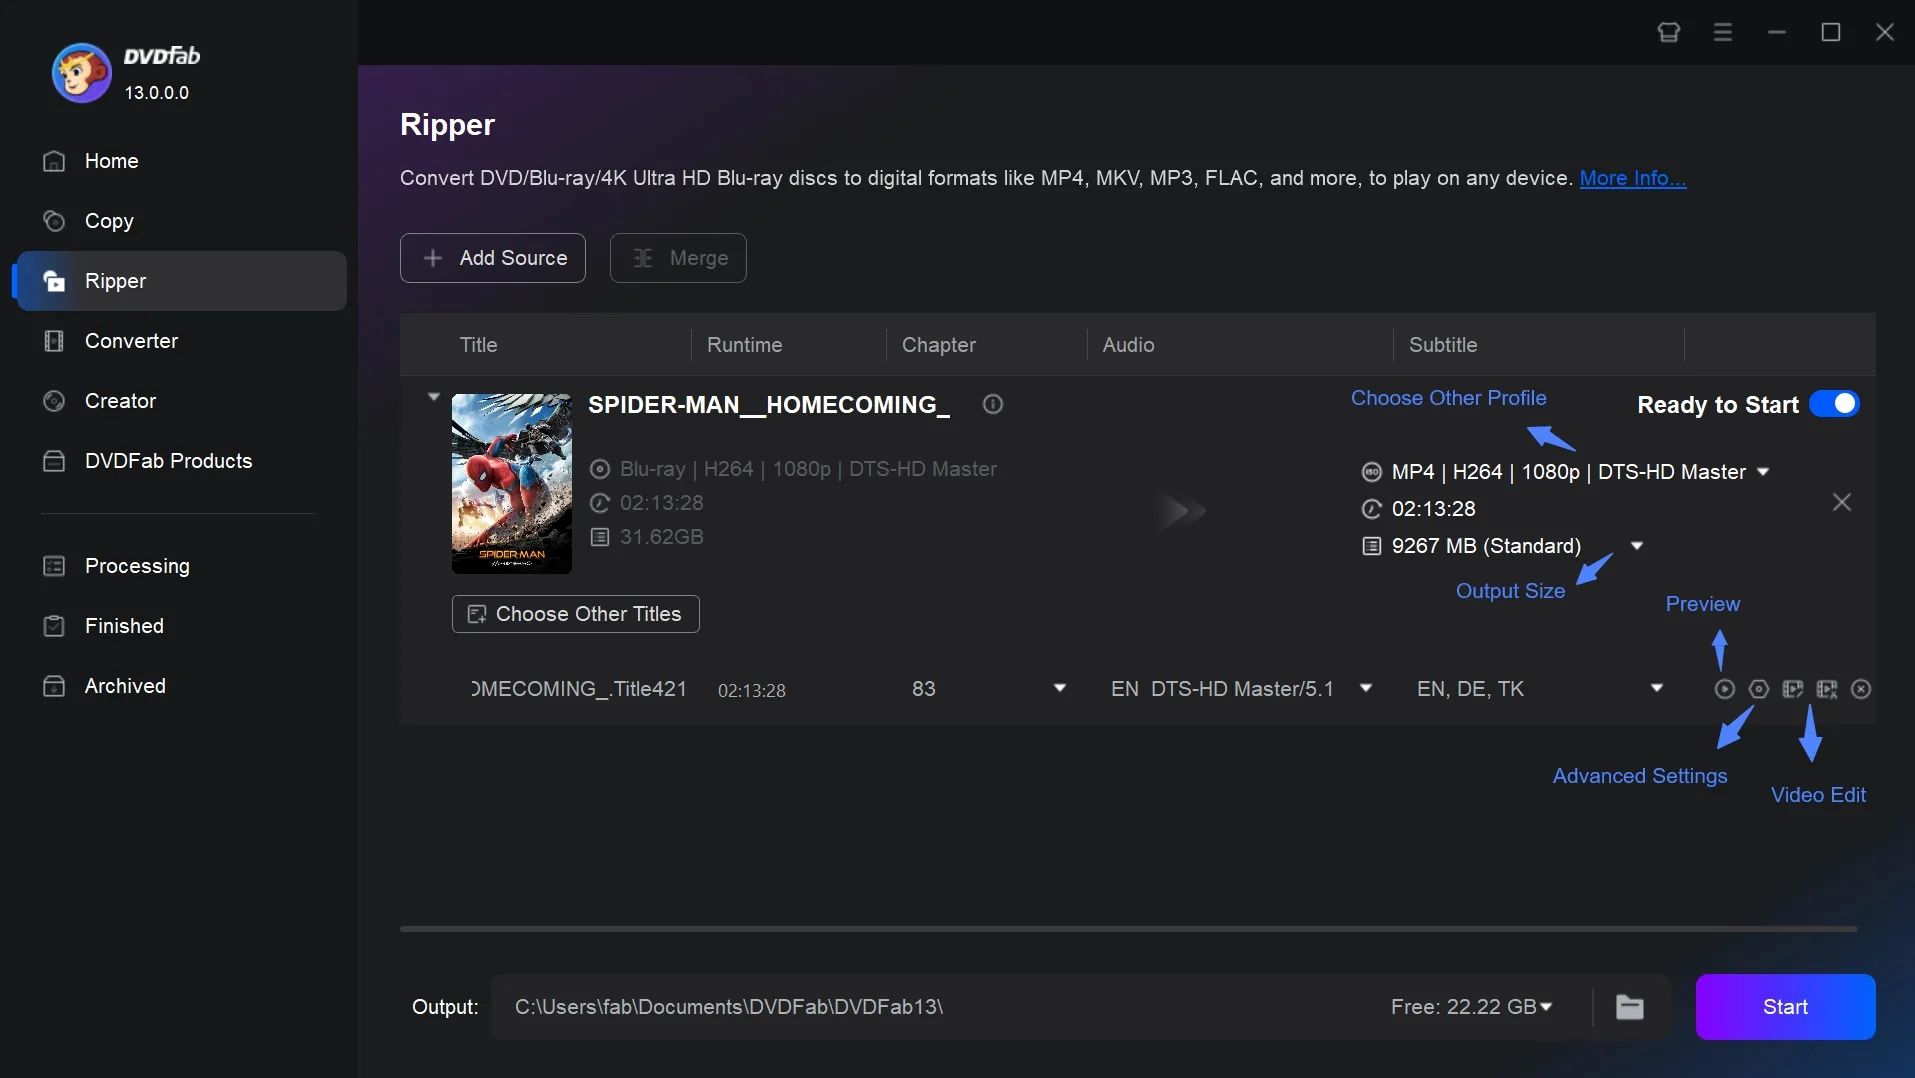
Open DVDFab, navigate to the "Ripper" module, and insert your DVD or load an ISO file/folder.
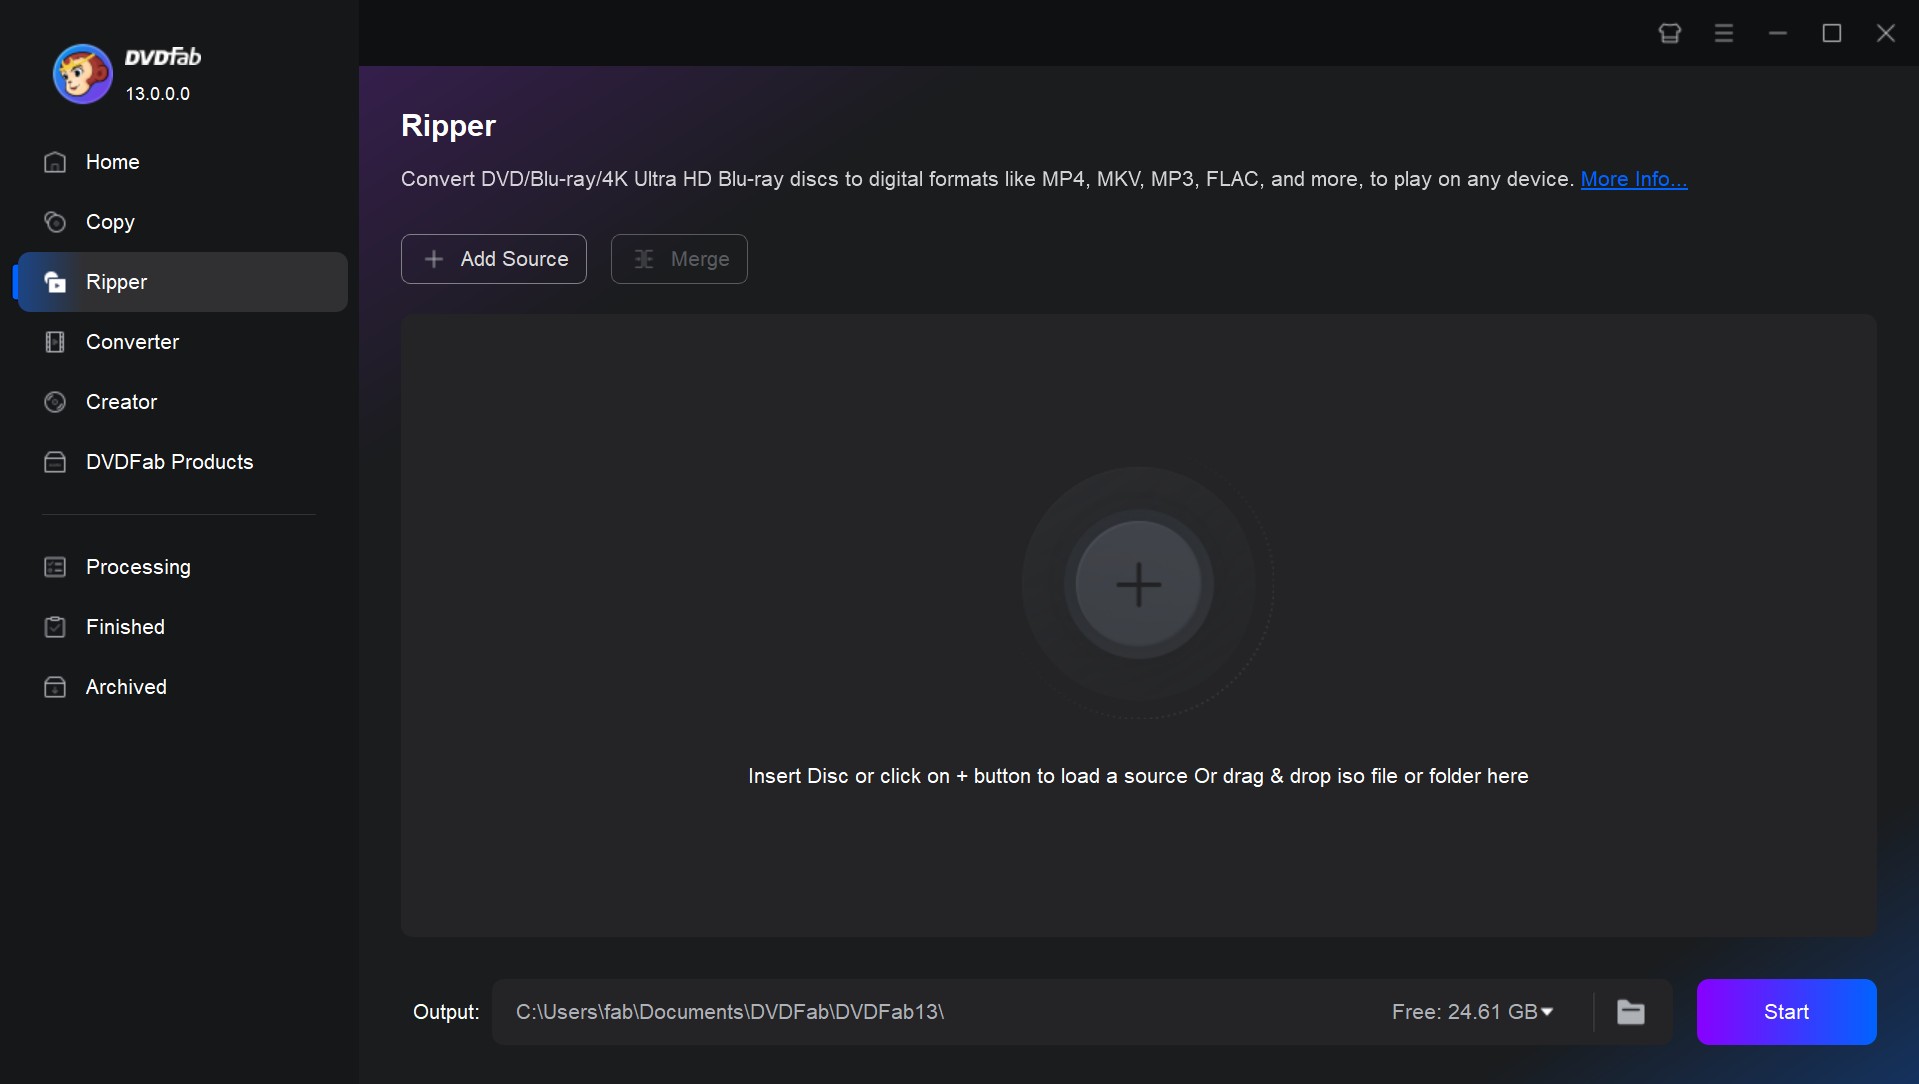
From the "Choose Other Profile" menu, select Format → Video → MP4 if you want maximum compatibility across Plex clients; this will give you an MP4 container with H.264 video and AAC audio by default. If you prefer to keep everything in a richer container, you can choose MKV instead.
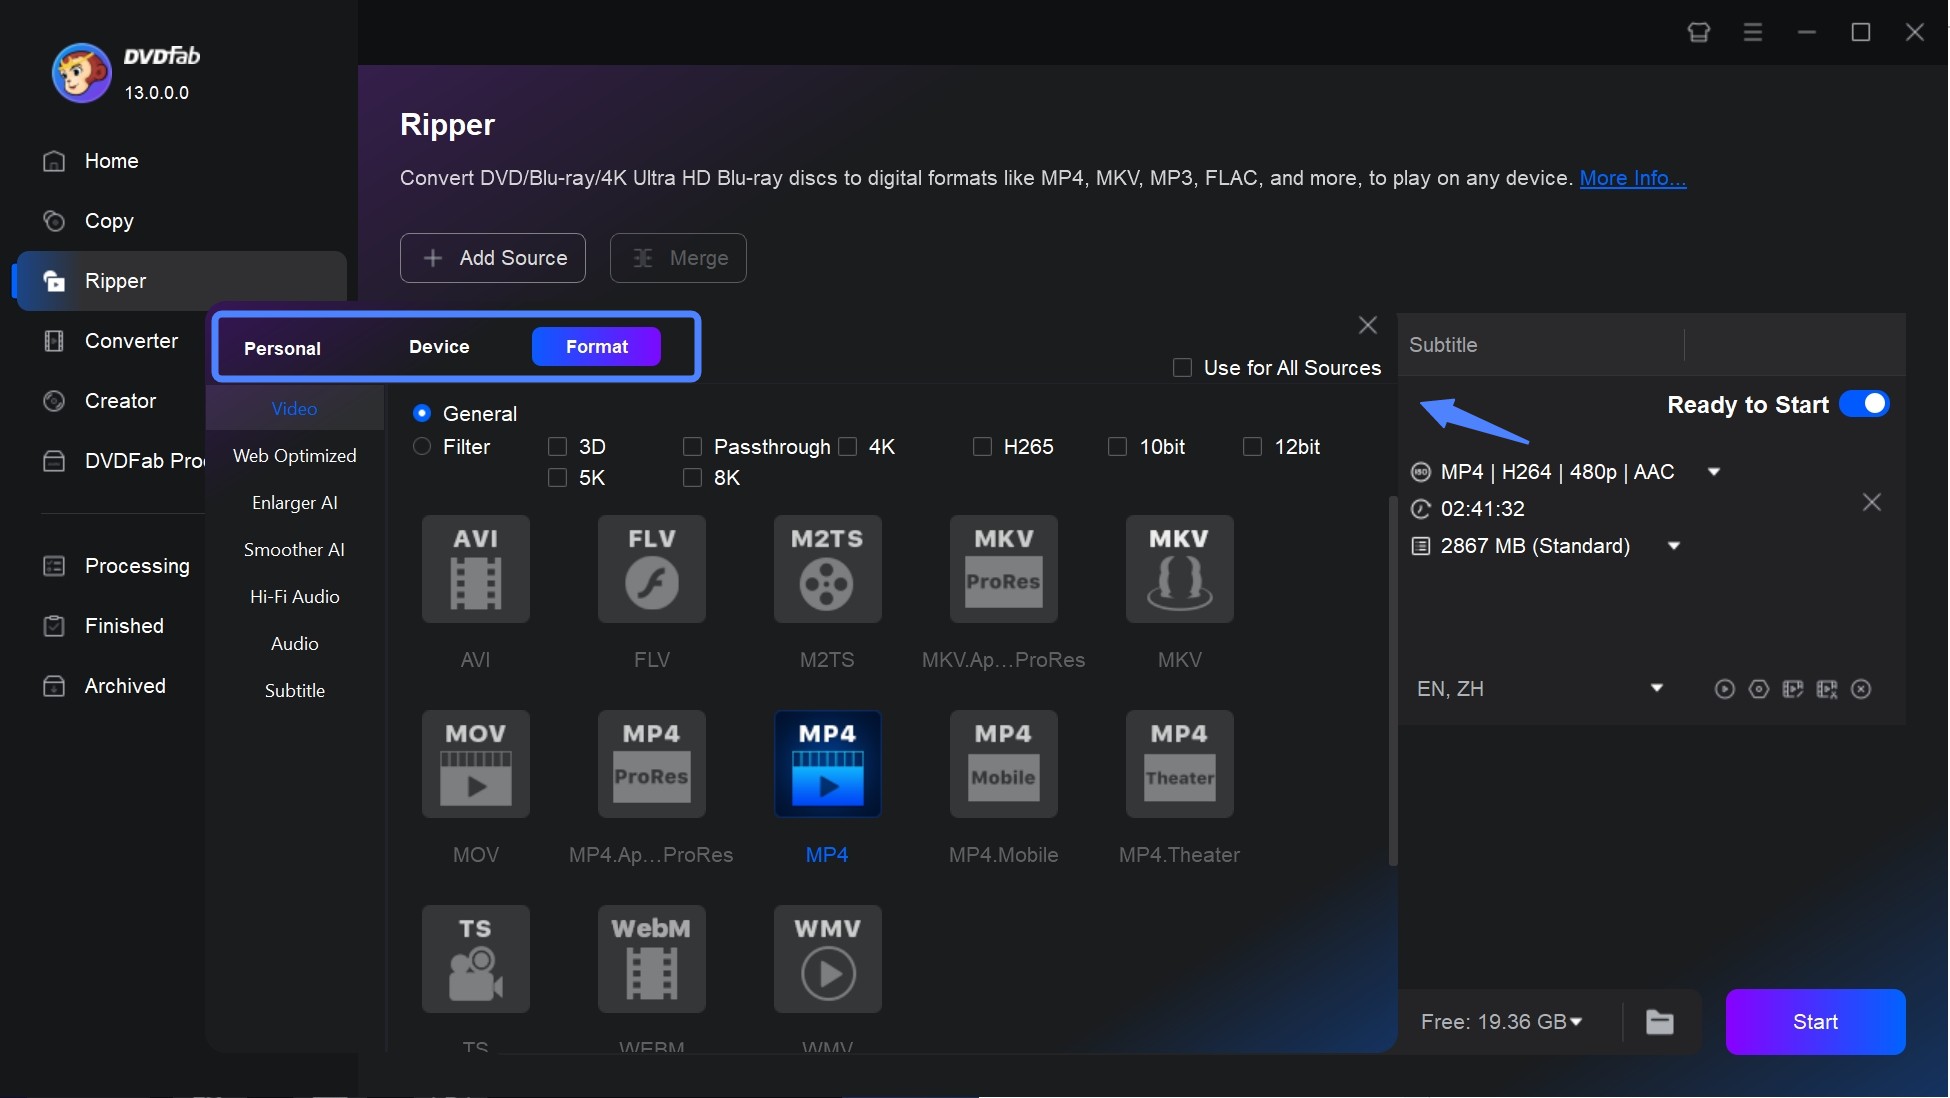
While resolution, frame rate, and bitrate are pre-set for convenience, you can still customize them in the "Advanced Settings" menu if needed.

Then go back to the main interface. Here you can choose the titles you want to rip and select chapters, audio tracks, and subtitles as you like. If you also want to edit the video, like trimming, cropping, cropping, trimming, merging video, adding watermarks and subtitles, and even adjusting video color, just click on "Video Edit".
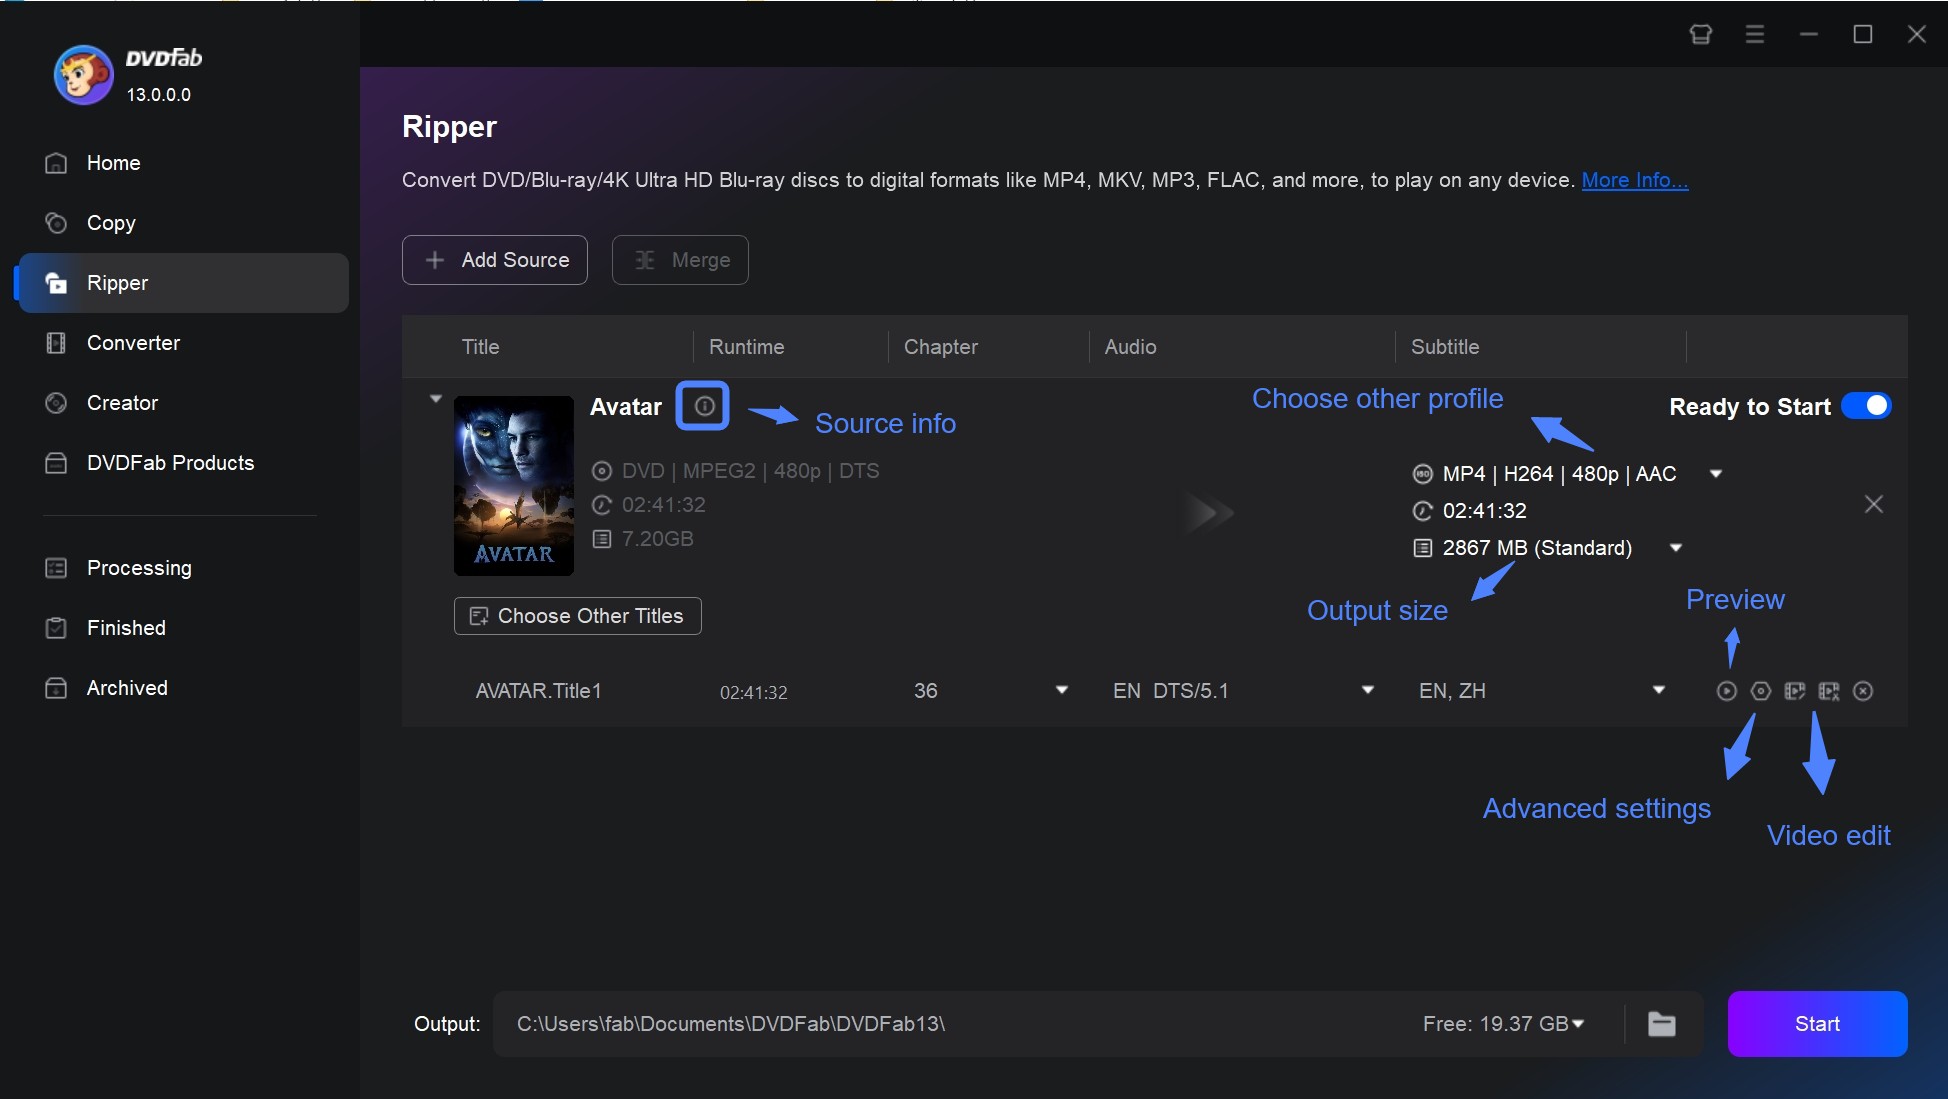
Step 3. Start to Rip DVDs to Plex
Once you are satisfied with the settings, choose a destination folder for your file at the bottom of the window. Finally, click the "Start" button.
How to Rip DVDs for Plex with MakeMKV & HandBrake (Free But Limited)
Reddit users usually recommend the MakeMKV + HandBrake combo to rip DVDs to Plex. First, you use MakeMKV to rip a raw, lossless MKV backup from your DVD, which preserves the exact video and audio quality. Then, you switch to HandBrake to transcode those large MKV files down into smaller, Plex-friendly MP4s. While completely free, this workflow is more complex, and you can often run into headaches like decryption errors, out-of-sync audio, or missing subtitles.
Pros:
- This open-source combination offers a free workflow.
- MakeMKV extracts 1:1 lossless MKV remuxes.
- HandBrake utilizes HEVC encoding to compress file sizes.
Cons:
- The two-step conversion workflow extends the total processing time per DVD.
- Raw uncompressed MKV files require massive temporary local storage.
- Manual subtitle extraction and track management often cause out-of-sync audio.
- MakeMKV struggles to bypass newer commercial disc encryptions.
I pick MakeMKV because it is free (while in beta). Since MakeMKV only outputs MKV, I don't have to mess with settings. It handles the encryption on my some older discs fine, so I use it to grab the raw file first. Then, I run it through HandBrake to compress it to MP4. It saves space on my Plex server without killing the video quality, though I have to admit, the process is really time-consuming.
Step 1: Rip DVD to a Lossless MKV with MakeMKV
MakeMKV is a free tool perfect for ripping DVDs and Blu-rays to MKV. It preserves the original video and audio quality perfectly, creating a digital copy that looks exactly like the disc. Just a heads-up: it only outputs raw "remuxes", meaning the files are massive - potentially reaching 4GB to 8GB for a single DVD. Make sure your hard drive has plenty of storage space before you start. To create a lossless backup with MakeMKV, follow these steps:
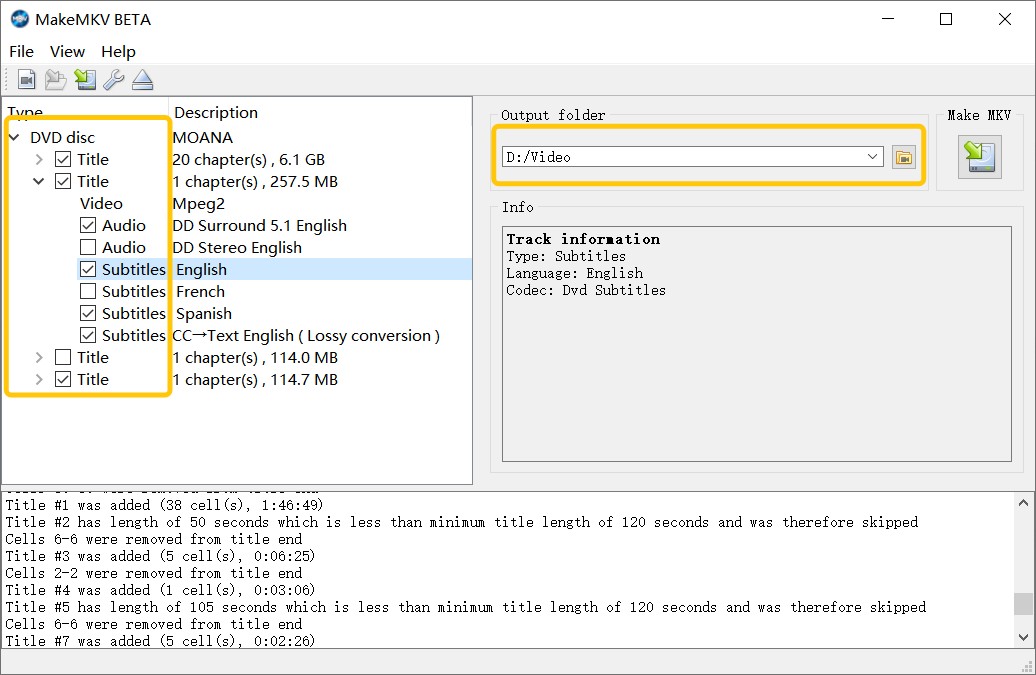
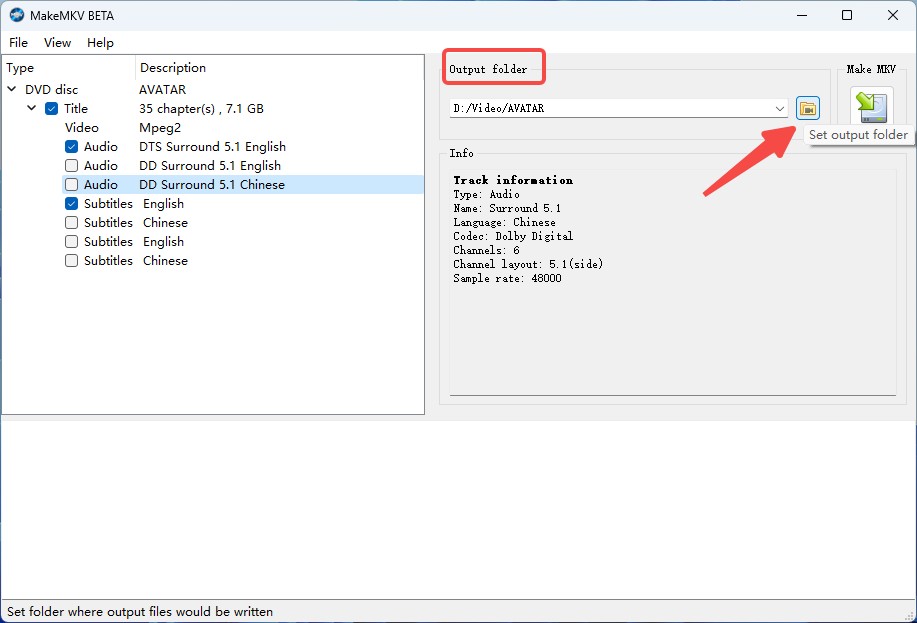
- Scan the Disc: Insert your DVD and launch MakeMKV. Click the large optical drive icon to read the disc structure.
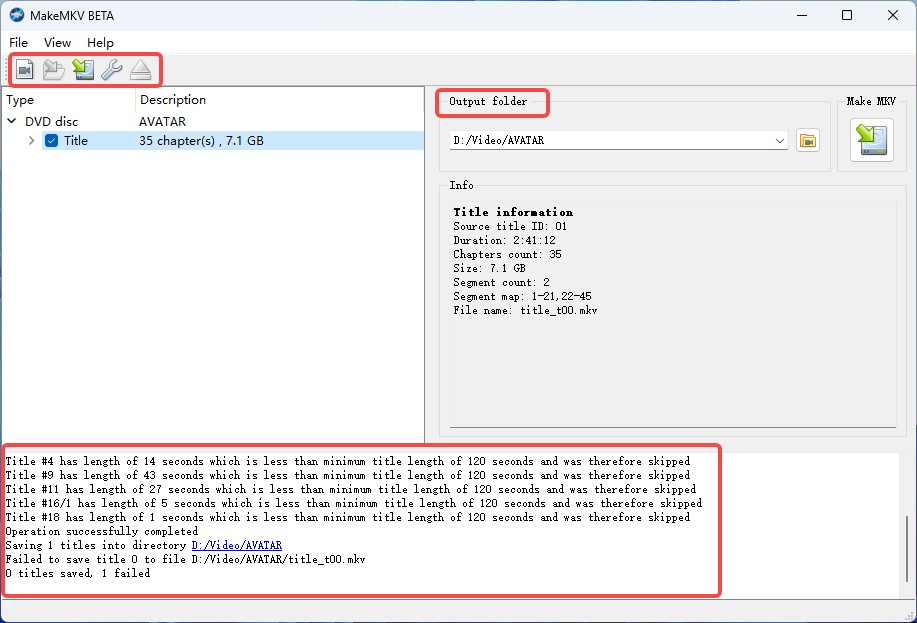
- Select the Main Title: Once the scan finishes, you will see a list of "Titles." Select the Main Movie title with the largest file size and longest duration. Uncheck the smaller clips (trailers and warnings) to avoid clutter.
- Save the File: Select an output folder and click "Make MKV."
Step 2: Convert MKV to MP4 for Plex Streaming with HandBrake
Since the file from Step 1 is large (approx. 4–8 GB) and may not Direct Play on all devices, you need to use HandBrake to compress it into a streamlined MP4. HandBrake allows you to choose the output format, adjust the video resolution, frame rate, and audio quality to optimize the Plex viewing experience. You can also add subtitles, cut the video, and use filters to enhance the image.
💡Note: You might ask, "Why not just use HandBrake directly"? Well, even if you install libdvdcss, HandBrake still struggles with the complex encryption on newer commercial discs. That's why I use MakeMKV first. It handles the some protections that HandBrake can't touch, giving me a clean, unencrypted file to work with in the next step.
To compress that large MKV file into a smaller MP4 (H.264/AAC) that Plex handles efficiently, follow these steps:
- Load the File: Launch HandBrake and drag your ripped MKV file into the window.
- Choose a Preset: Go to the "General" preset list and select "Fast 480p30" or "HQ 480p30", which better matches the native quality of the DVD.
- Configure for Plex: In the "Summary" tab, set the Format to MP4 and check "Web Optimized".
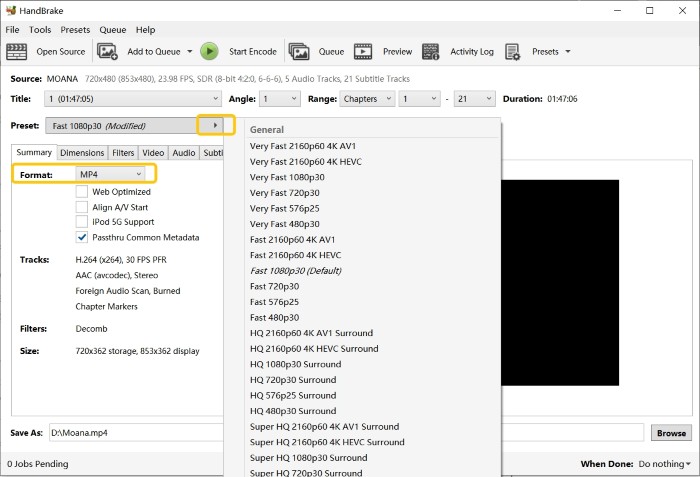
- Start Encoding: Click the "Start Encode" at the top. Once the process is complete, add the ripped file to your Plex media library.
Ripping DVD for Plex: What's the Best Solution?
In this section we list the top 2 solutions we mentioned before, both free and paid. The comparison table below shows the difference in features of best DVD Ripper for Plex.
| Feature | DVDFab DVD Ripper | MakeMKV | HandBrake |
| Encryption Support | CSS, RC, Sony DADC, Cinavia and more | Common protection, like Region code, AACS | Cannot handle encrypted DVDs directly |
| Lossless Ripping | Yes (supports full-quality rips) |
Yes (lossless MKV output) |
No (compresses output) |
| Output | MP4/MKV (H.264/H.265) with presets for Plex; small, stream-ready files | Lossless MKV only (no compression). Great for archival; very large files; needs a second tool to compress for Plex | Transcode only (H.264/H.265). Plex-friendly, but you must tune settings yourself |
| Compression | Optional: High-quality compression available | No compression | Highly configurable compression |
| Batch Conversion | Yes |
Limited in GUI; batch possible via CLI (makemkvcon) only |
Queue supported; some workflows need external scripts |
| Speed | Hardware acceleration supported for faster ripping | Fast | Moderate (depends on compression settings) |
| Best For | Customizable and advanced DVD ripping | Quickly converting DVDs to lossless MKV files for Plex | Free Option for Tech-Savvy Users |
| User Rating | 4.5/5 | 3.7/5 | 3.4/5 |
📌Why professional tools still matter: Free apps are excellent for enthusiasts, but they typically don’t decrypt every disc and often require two-step workflows (remux → transcode) to get small, Plex-friendly files. A professional ripper bundles decryption, compression, presets, batch jobs, and hardware acceleration—saving time and avoiding Plex transcoding on your devices.
How to Organize & Add Your Ripped DVD to Plex Library
Ripping your discs is only half the way. If you do not name and organize your files correctly, Plex will fail to recognize them, leaving you with a library full of generic file names and missing cover art. Plex relies on a specific folder structure to fetch metadata automatically.
Official Naming Conventions: Movies vs. TV Shows
Plex official naming rules require you to separate movies and TV shows into different main folders. Mixing them confuses the scanner.
For Movies: The standard format is Movie Title (Year).
- : /Movies/Jurassic Park (1993).mp4 /Movies/Avatar (2009).mkv
For TV Shows: You must use a hierarchy of Show Name > Season Folder > Episode File. The file name must contain the season and episode code (SXXEYY).
- e.g.: /TV Shows/The Office (US)/Season 01/The Office (US) - S01E01.mp4
💡Tips: Always include the release year in parentheses. This helps Plex distinguish between a movie and its remake (e.g., The Mummy 1999 vs. 2017).
How to Upload Ripped DVDs to Plex and Refresh Your Library
Once your files are named correctly, moving them to Plex is simple.
Step 1: If you don't already have a Plex account, go to Plex.tv and create one. Then, download and install the Plex Media Server on your computer or NAS device.
Step 2: Sort the ripped videos into folders based on what they are (like movies or TV shows) and give the files the right names. Keep in mind that Plex uses the names of files and folders to match metadata correctly.
Step 3: Start the Plex Media Server. If this is the first time you're running it, you'll need to register it through your browser.
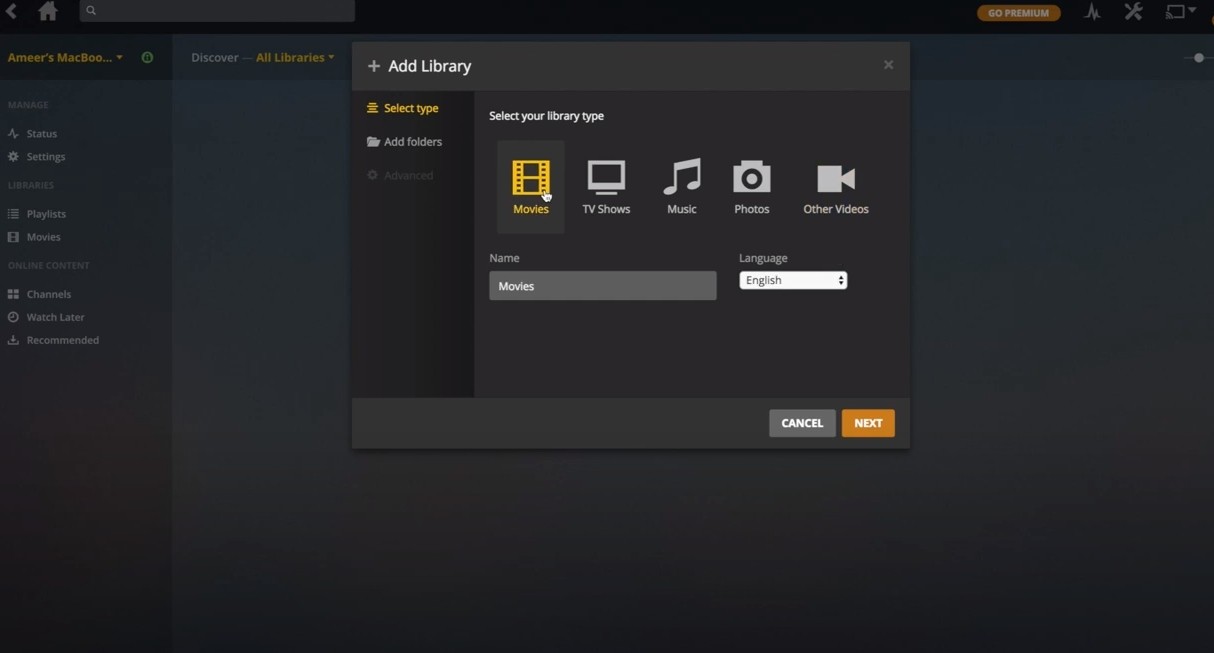
Step 4: To add a new media library, click the "+" button next to Libraries on the main screen. Choose the type of library (like "Movies" or "TV Shows"), give it a name, choose a language, and then click Next.
Step 5: Click "Browse for Media Folder" and choose the folder where the ripped files are stored.
Step 6: After clicking "Add Library", Plex will start scanning the content and fetching metadata.
How to Handle "Extras" and "Behind the Scenes" Content in Plex
One of the best parts of DVDs is the bonus content, like deleted scenes or director interviews. You can keep these in Plex by using specific suffixes at the end of the filename.
Supported Suffixes:
- -deleted (Deleted Scenes)
- -featurette (Behind the Scenes)
- -interview (Cast/Director Interviews)
- -trailer (Movie Trailer)
When you view the movie page in Plex, these extras will appear neatly at the bottom, giving you the full "Special Edition" DVD experience digitally.
FAQs
1. Plex does not recognize media files
- Reason: The file format is not supported, or the way files are named isn't standard.
- Solution: Verify the video format is Plex-compatible (e.g., MP4, MKV) and rename your files and folders according to the Plex official naming rules discussed in Part 5.
2. Video playback stuttering
- Cause: Video file encoding is too high or network bandwidth is insufficient.
- Solution: It is suggested to convert the video to a more compatible encoding format (e.g. H.264). Next, lower the video transcoding quality setting of the Plex server or use the hardware acceleration feature.
3. Subtitles cannot be displayed
- Reason: Incompatible subtitle file format or not properly embedded in the video.
- Solution: srt is preferred. Avoid image-based VobSub/PGS as they often trigger transcoding. Name external subtitles as "Movie Name (Year).eng.srt" and store in the same directory.
No. Plex itself does not have built-in capabilities for ripping DVDs. You can use third-party software to rip DVDs, and Plex can be used to organize and stream the ripped files. An overview of the procedure is as follows:
- To extract the video files from the DVD, use DVDFab DVD ripping software.
- Make sure to rip the DVD to an MP4 or MKV file type, which is supported by Plex.
- Make sure that the ripped files have the proper names so Plex can easily organize them.
- To add the ripped DVDs, open your Plex Media Server and navigate to the library. Use the “Add Library” feature to point Plex to the folder containing your ripped files.
DVDFab Blu-ray Ripper is a dedicated tool for ripping Blu-ray for Plex. It can convert any Blu-ray discs, ISOs or Folders to Plex-compatible formats like MP4, MKV, and more.
- Step 1: Launch DVDFab Blu-ray Ripper and load your Blu-ray disc.
- Step 2: Click on "Choose Other Profile" to pick the profile for Plex. Choose the titles, audio tracks, and subtitles you wish to keep. Explore the "Advanced Settings" and integrated "Video Editor" to tailor the final video.
- Step 3: Select an output directory and start to rip Blu-ray to a Plex format.
Once you've ripped your old DVDs for Plex, you don’t have to throw the physical discs away. You can keep them as a backup in case a file gets corrupted, or store them in slim cases or binders to save space.
Conclusion
To rip DVDs to Plex, you need a reliable conversion tool and a structured library. DVDFab DVD Ripper provides a fast, automated solution for commercial discs, while the MakeMKV and HandBrake workflow offers a free alternative for users who prefer manual control. Beyond the ripping process, you must use proper file naming conventions to add DVDs to Plex correctly. Following these steps ensures your media server identifies every movie accurately and delivers smooth playback across all your devices.
 How to Convert ISO to MKV: Lossless Remux vs H.265 Re-encodeBy Wenny Yan - Jun 3, 2026
 How to Compress ISO Files: 4 Methods for Storage, Playback, and ArchivesBy Diana Smith - Jun 2, 2026
![How to Convert DVD to AVI Free and Easily [2026 Updated]](https://r6.dvdfab.cn/upload/resource/en/dvd-to-avi-QL6y.jpg) How to Convert DVD to AVI Free and Easily [2026 Updated]By Diana Smith - Jun 2, 2026
How to Convert DVD to AVI Free and Easily [2026 Updated]By Diana Smith - Jun 2, 2026![Top 12 DVD to MP4 Converter Software for Win & Mac [2026 Tested]](https://r3.dvdfab.cn/upload/resource/convert-dvd-to-mp4-p2X3.jpeg) Top 12 DVD to MP4 Converter Software for Win & Mac [2026 Tested]By Diana Smith - May 22, 2026
Top 12 DVD to MP4 Converter Software for Win & Mac [2026 Tested]By Diana Smith - May 22, 2026