6 Best Blu-ray Burners for Mac: Software & Hardware Guide
Summary: To burn Blu-ray on a Mac, you need an external Blu-ray drive and specialized software. This article reviews the 6 best Blu-ray burning software for Mac, including top-rated options like DVDFab Blu-ray Creator and Roxio Toast. Read on for a hardware buying guide and learn how to import your MP4/MOV files, customize premium disc menus, and fast-burn your video projects to BD-R discs.
Table of Contents
Burning Blu-ray on a Mac means solving two problems before you start: Apple removed internal optical drives years ago, so you need a compatible external Blu-ray drive, and macOS no longer includes authoring software that can produce a disc playable on a Blu-ray player. Disk Utility can write files to a blank disc, but a standard Blu-ray player won't recognize it.
Back in my college days, I wanted to burn a friend's favorite 4K movie onto a disc as a birthday present, only to find that regular DVDs no longer cut it. That's when I realized that to burn Blu-rays on my Mac was the true solution—whether for safeguarding family memories, archiving creative projects, or distributing high-quality videos for work. Based on my own exploration and needs, I've rounded up the top 6 Blu-ray burners for different Mac systems and how to burn Blu-ray with them to help you make an easy choice.
6 Best Blu-ray Burning Software for macOS [Tutorial Included]
Next is a review of the top Blu-ray burners for macOS. Each tool covers the overview, features, pros and cons, and detailed steps to burn Blu-rays on a Mac.

How I Test:
To keep the evaluations useful and objective, I run tests across all Blu-ray authoring apps on an iMac (M4) with macOS Sequoia 15, using an ASUS BW-16D1X-U external drive and Verbatim BD-R 25GB discs. Each burner was evaluated on its latest macOS build with H.264 MP4/MOV sources, and finished discs were verified on a Sony BDP-S6700 connected via HDMI to a 4K TV.
No 1. DVDFab Blu-ray Creator
- Work on: macOS 10.13 - 15.x and Windows 11/10/8.1/8/7
- Best for: fast output of customized Blu-ray discs
DVDFab Blu-ray Creator for Mac is a professional Blu-ray burning software that offers a user-friendly interface suitable for a variety of burning need. It fills the gap left by discontinued industry standards like Adobe Encore. For video editors and creators frustrated by the lack of modern authoring tools on macOS, this software offers a perfect balance: it provides the menu customization capabilities, but without the steep learning curve.
During my testing with DVDFab 13.0.5.8 on an iMac(M4), what I like most is its fast speed and high success rate. This week, I burned all the videos from (18 MP4 and MOV files in total) my family and friends' gatherings this year into Blu-ray collections and all were successfully burned and smoothly played on a Sony Blu-ray player. On average, it took about 15 minutes to finish each disc. We also noticed that starting with version 13.0.4.5, the Creator module integrated a built-in Video Editor.
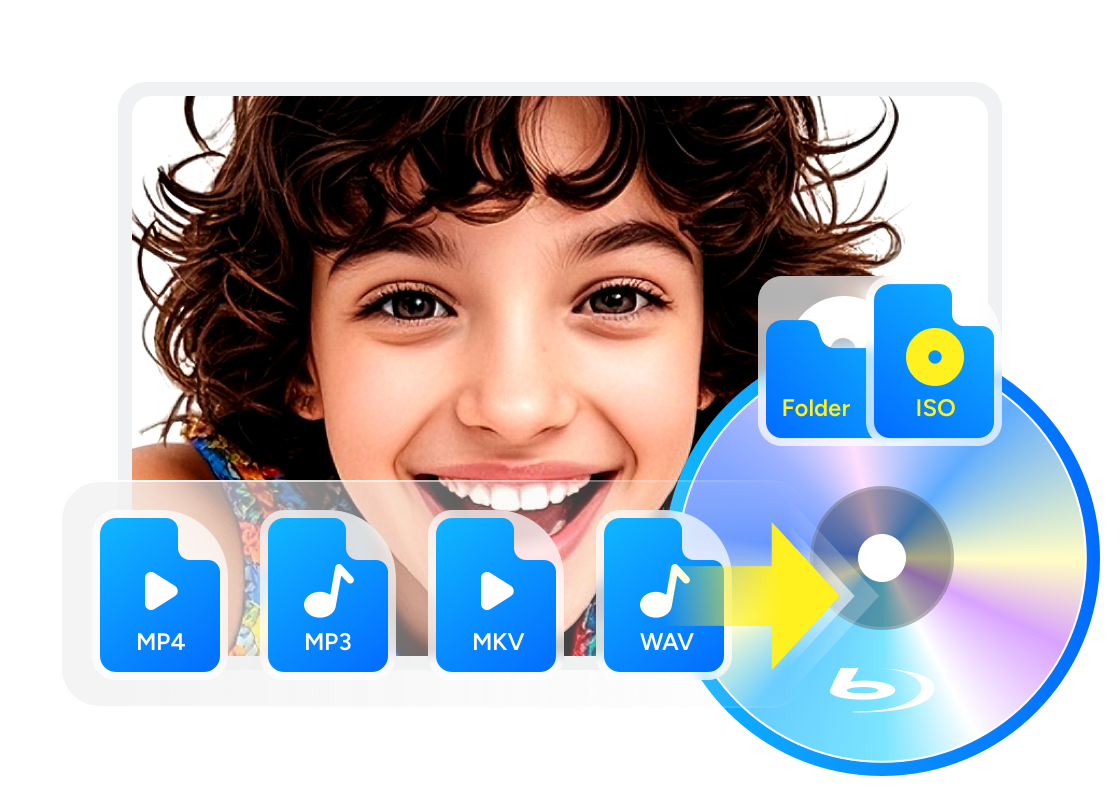
- • Burn 200+ video format to Blu-ray disc, ISO image file or folder
- • Crop, trim, and adjust videos directly within the creator module
- • Output diverse Blu-ray such as BD-R, BD-RE, BD-50, BD-25, BD-5 and BD-9
- • Burn videos to Blu-ray in 1:1 ratio without quality loss
- • Utilizes multi-core CPU and GPU acceleration for up to 20x faster processing
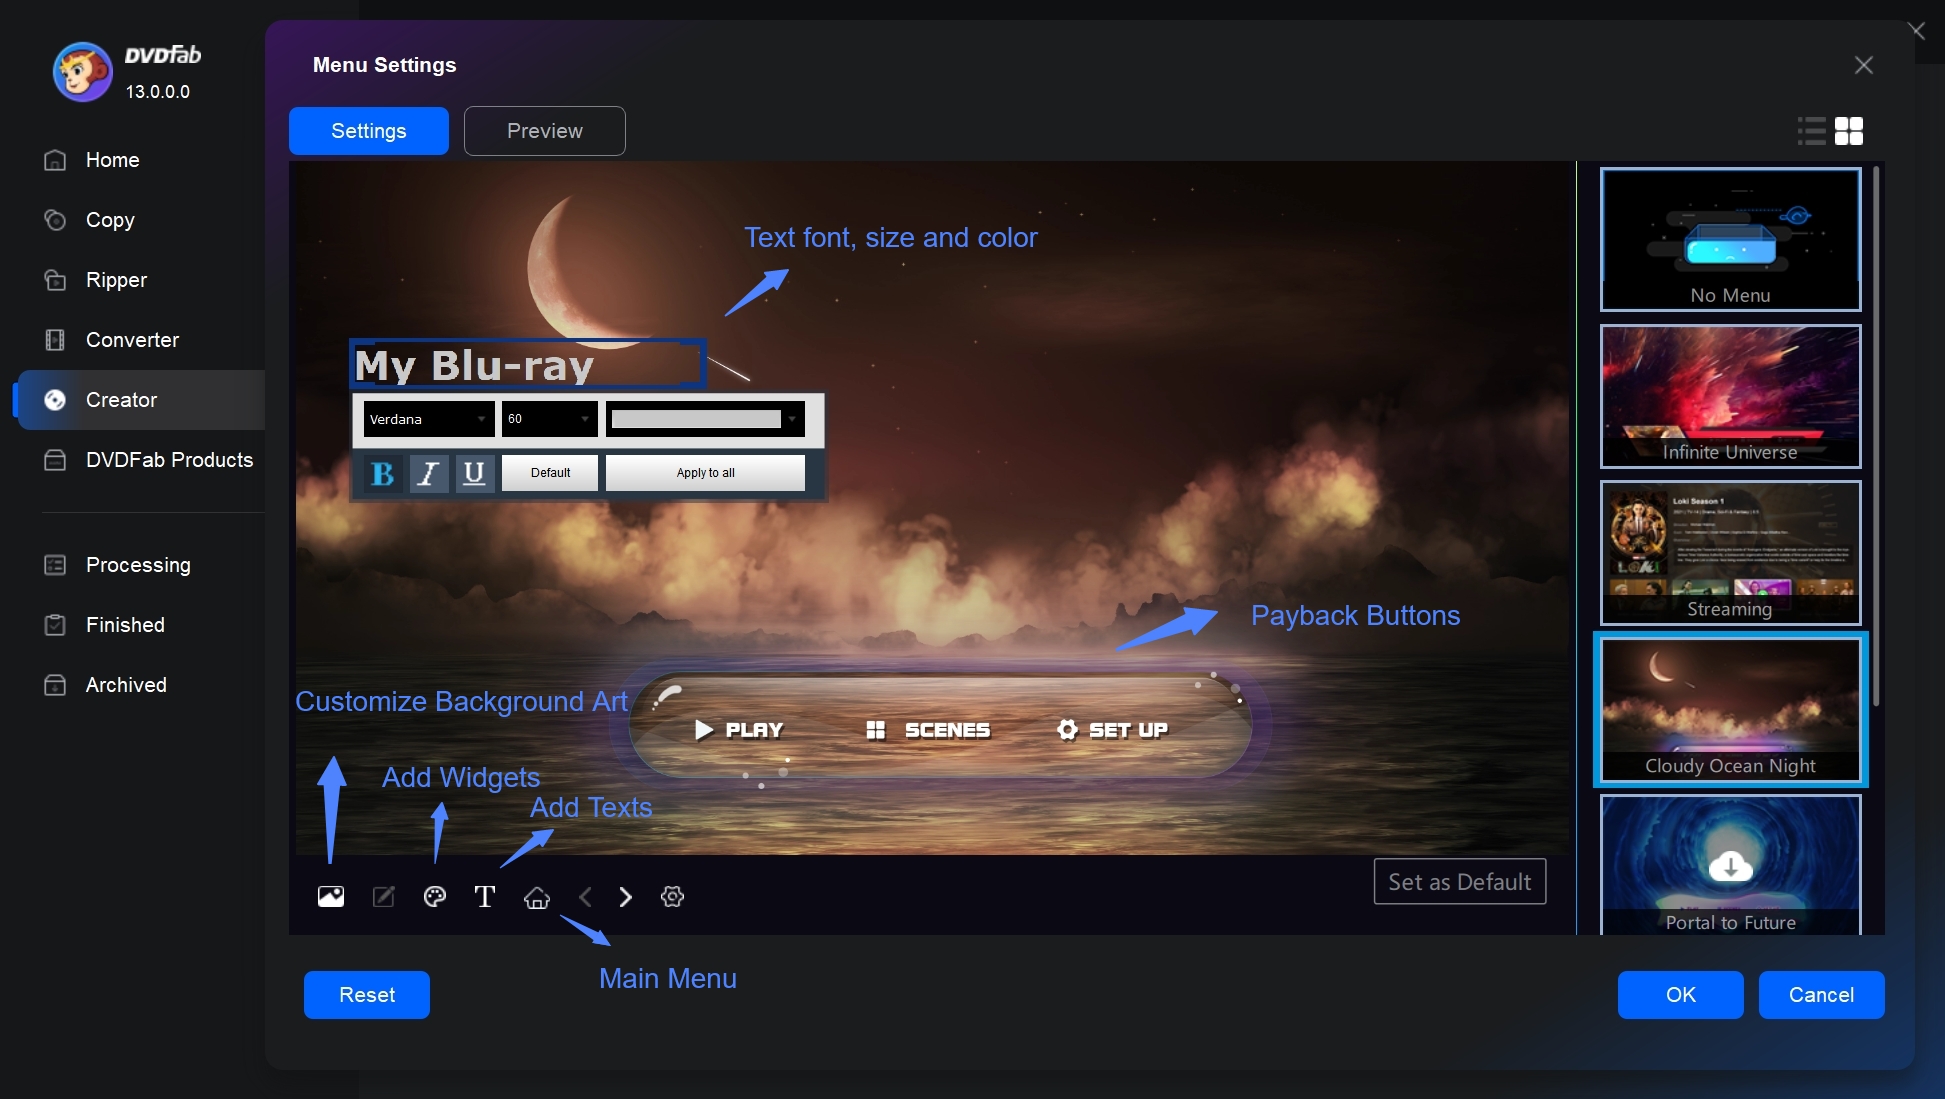
- • Customize Blu-ray menu flexibly and offer built-in menu templates
- • Display metadata info about the source video on the Blu-ray menu
- Not compatible with Linux operating systems yet
- Full feature set requires a paid license
How to Burn a Blu-ray on Mac with DVDFab Blu-ray Creator
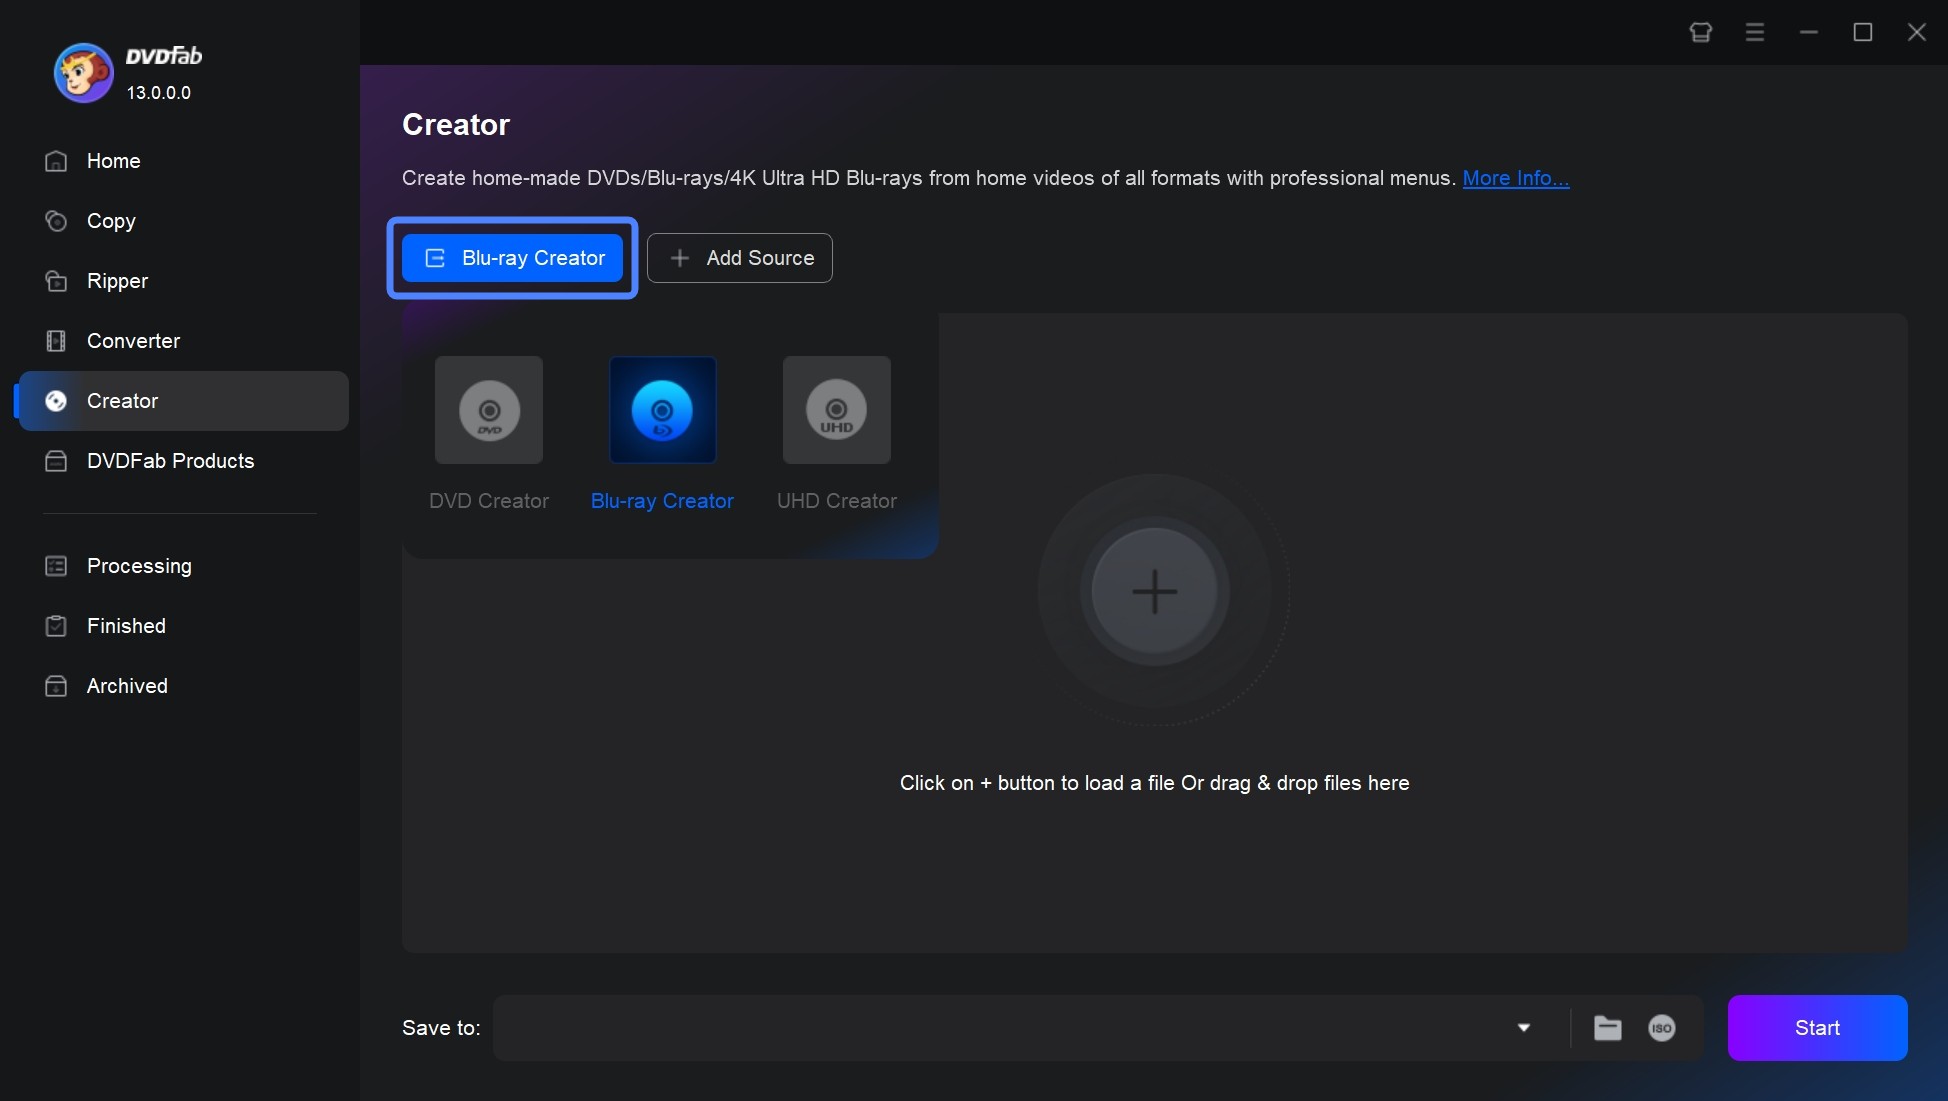
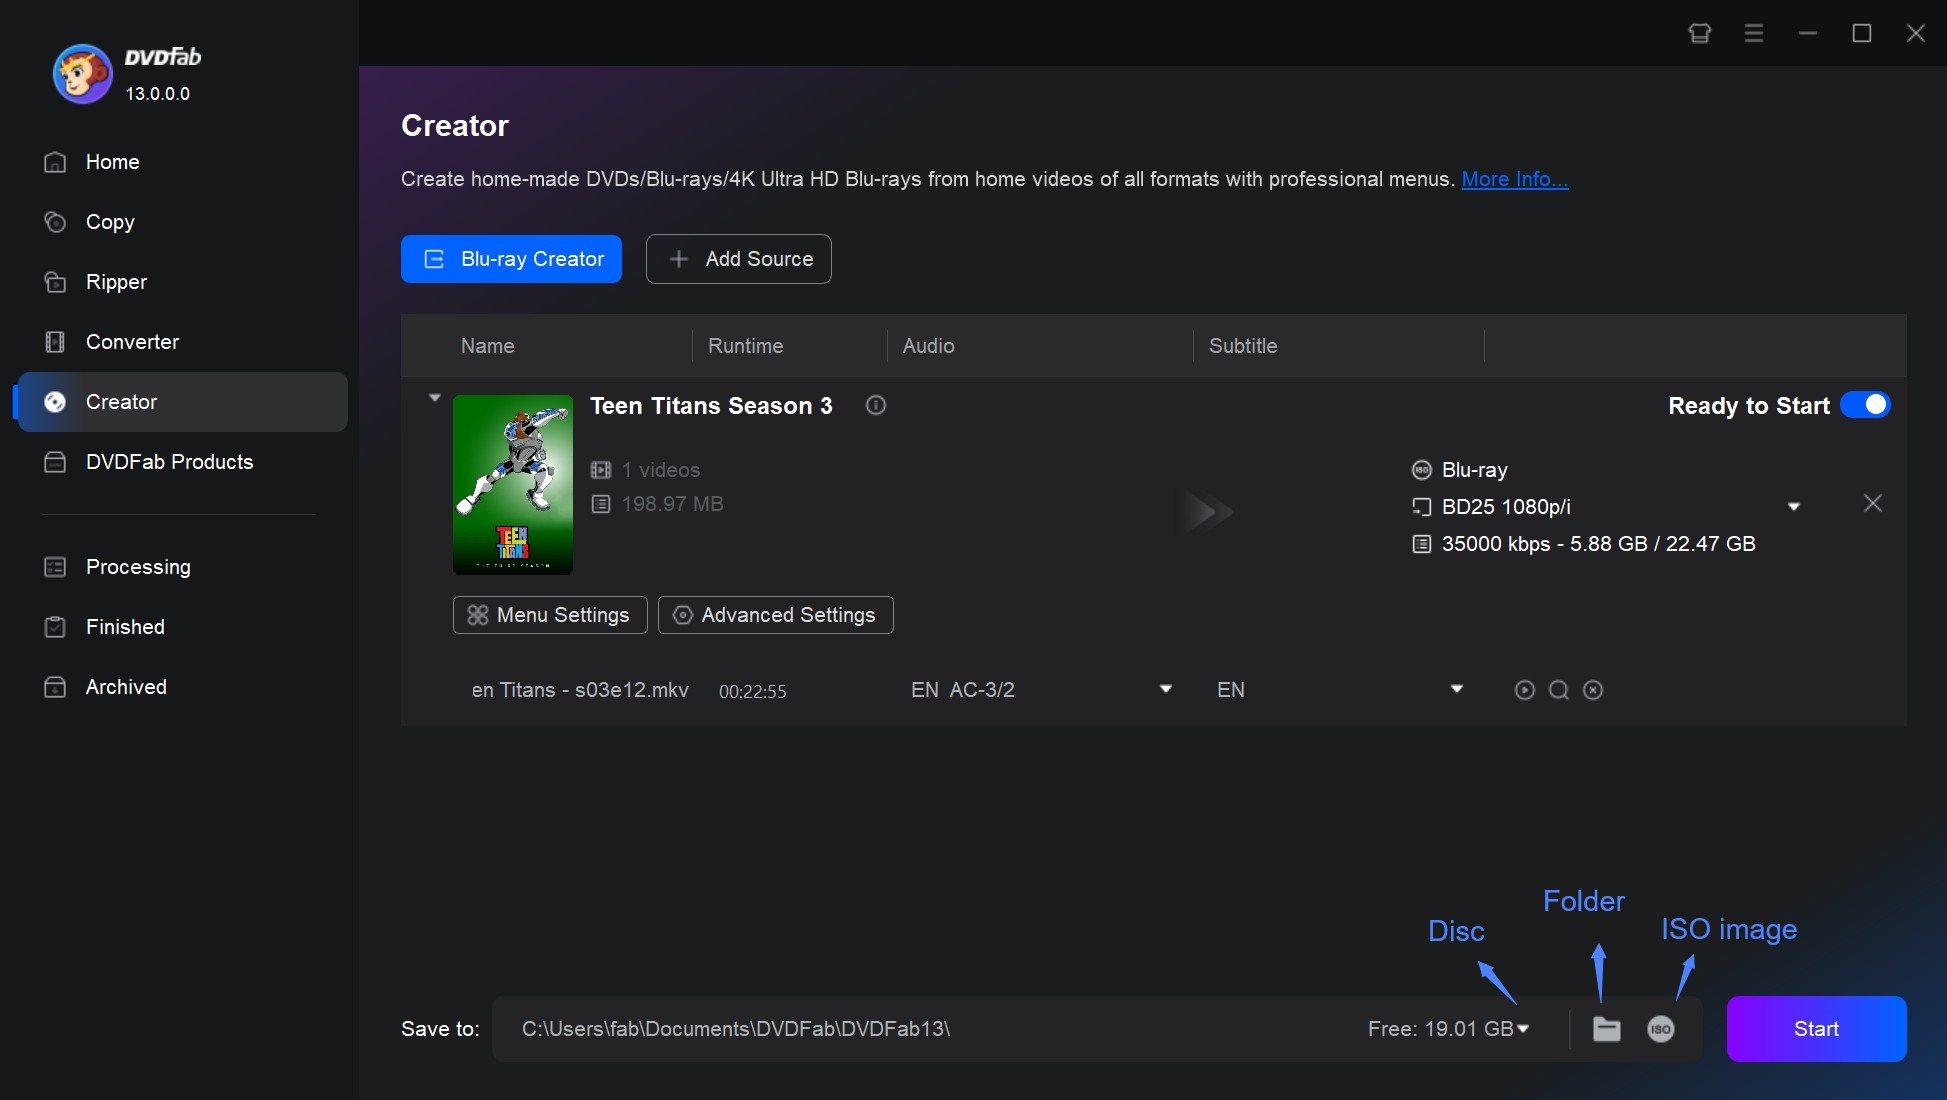
Step 1: Free download and install DVDFab 13 on your Mac. Open the software and click on the "Creator" option, followed by "Blu-ray Creator". You can then import your video source either by clicking on the "+" button or simply dragging and dropping it onto the user interface.
Step 2: With your video now loaded, the next step is to select the audio tracks and subtitles. You can also add external subtitles if required.
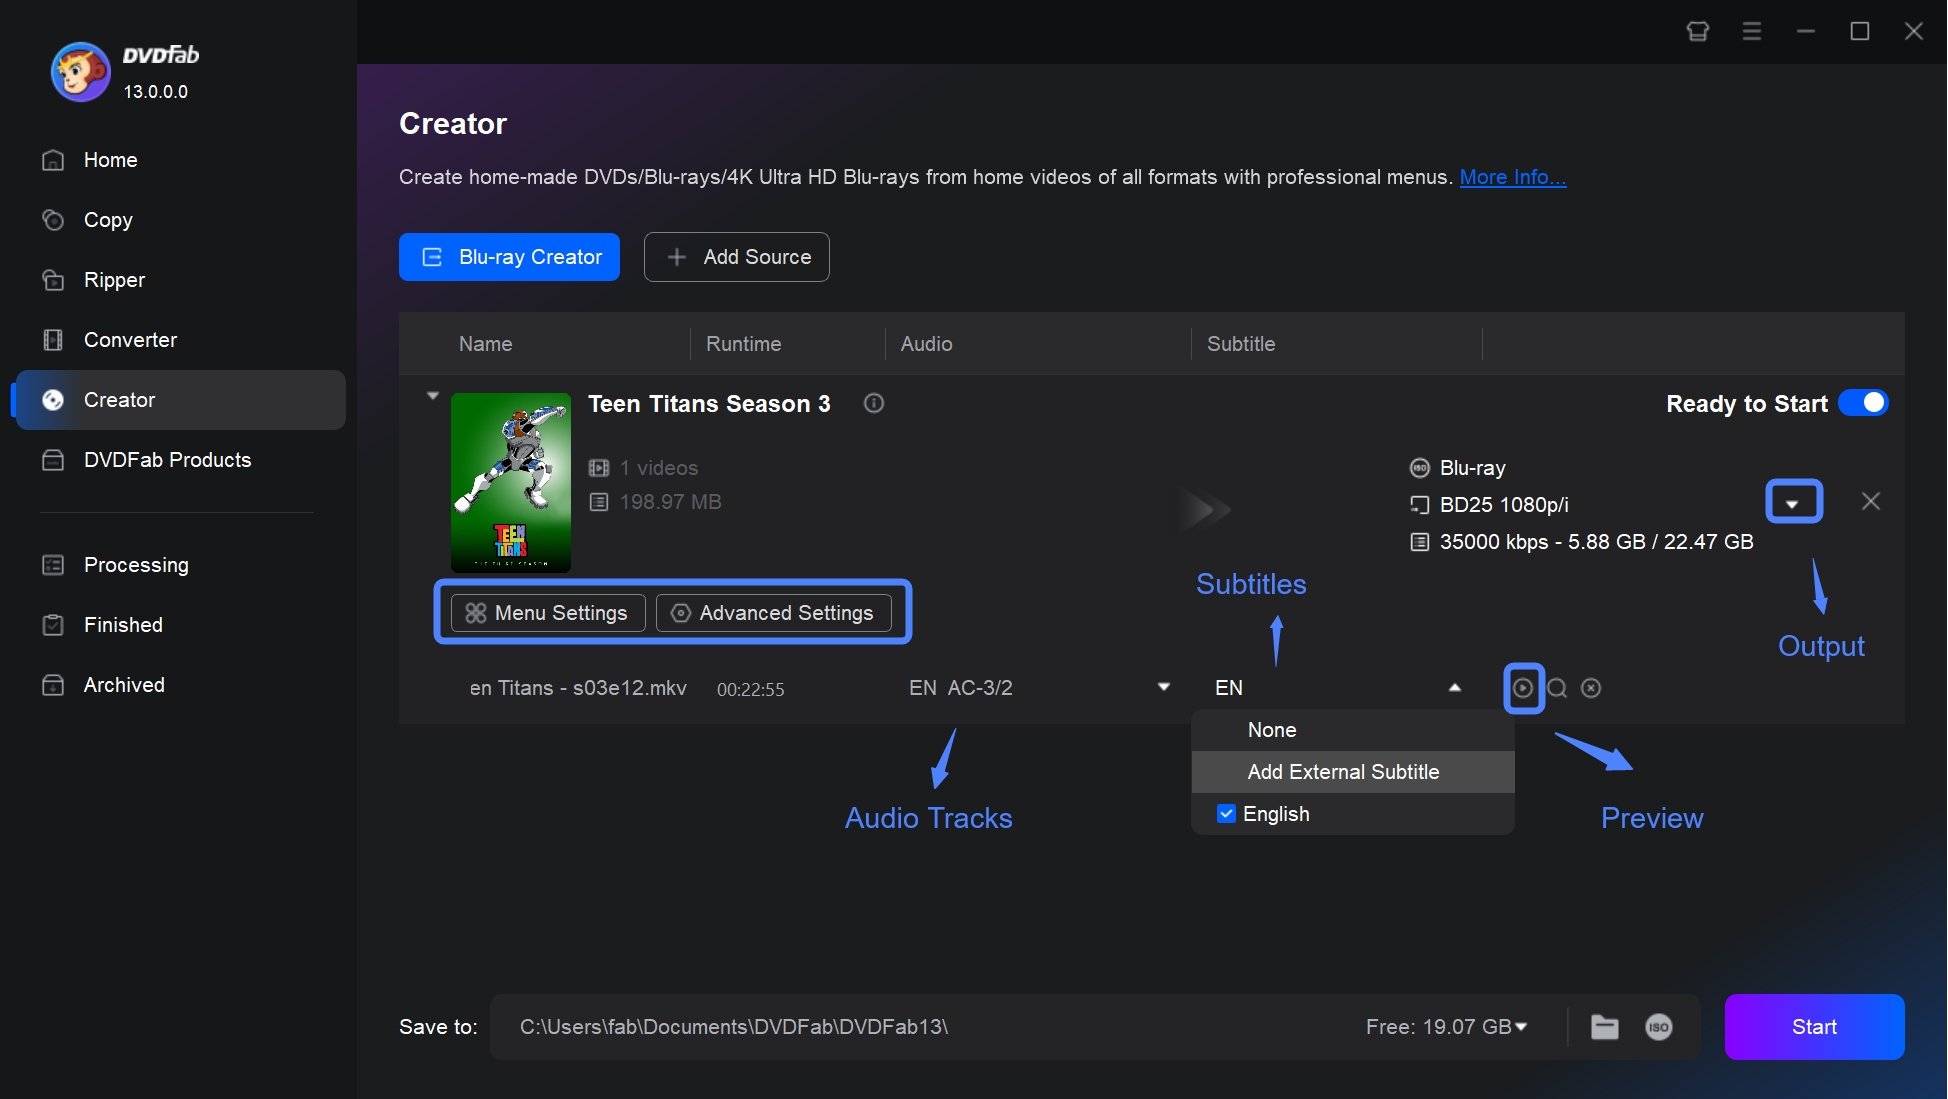
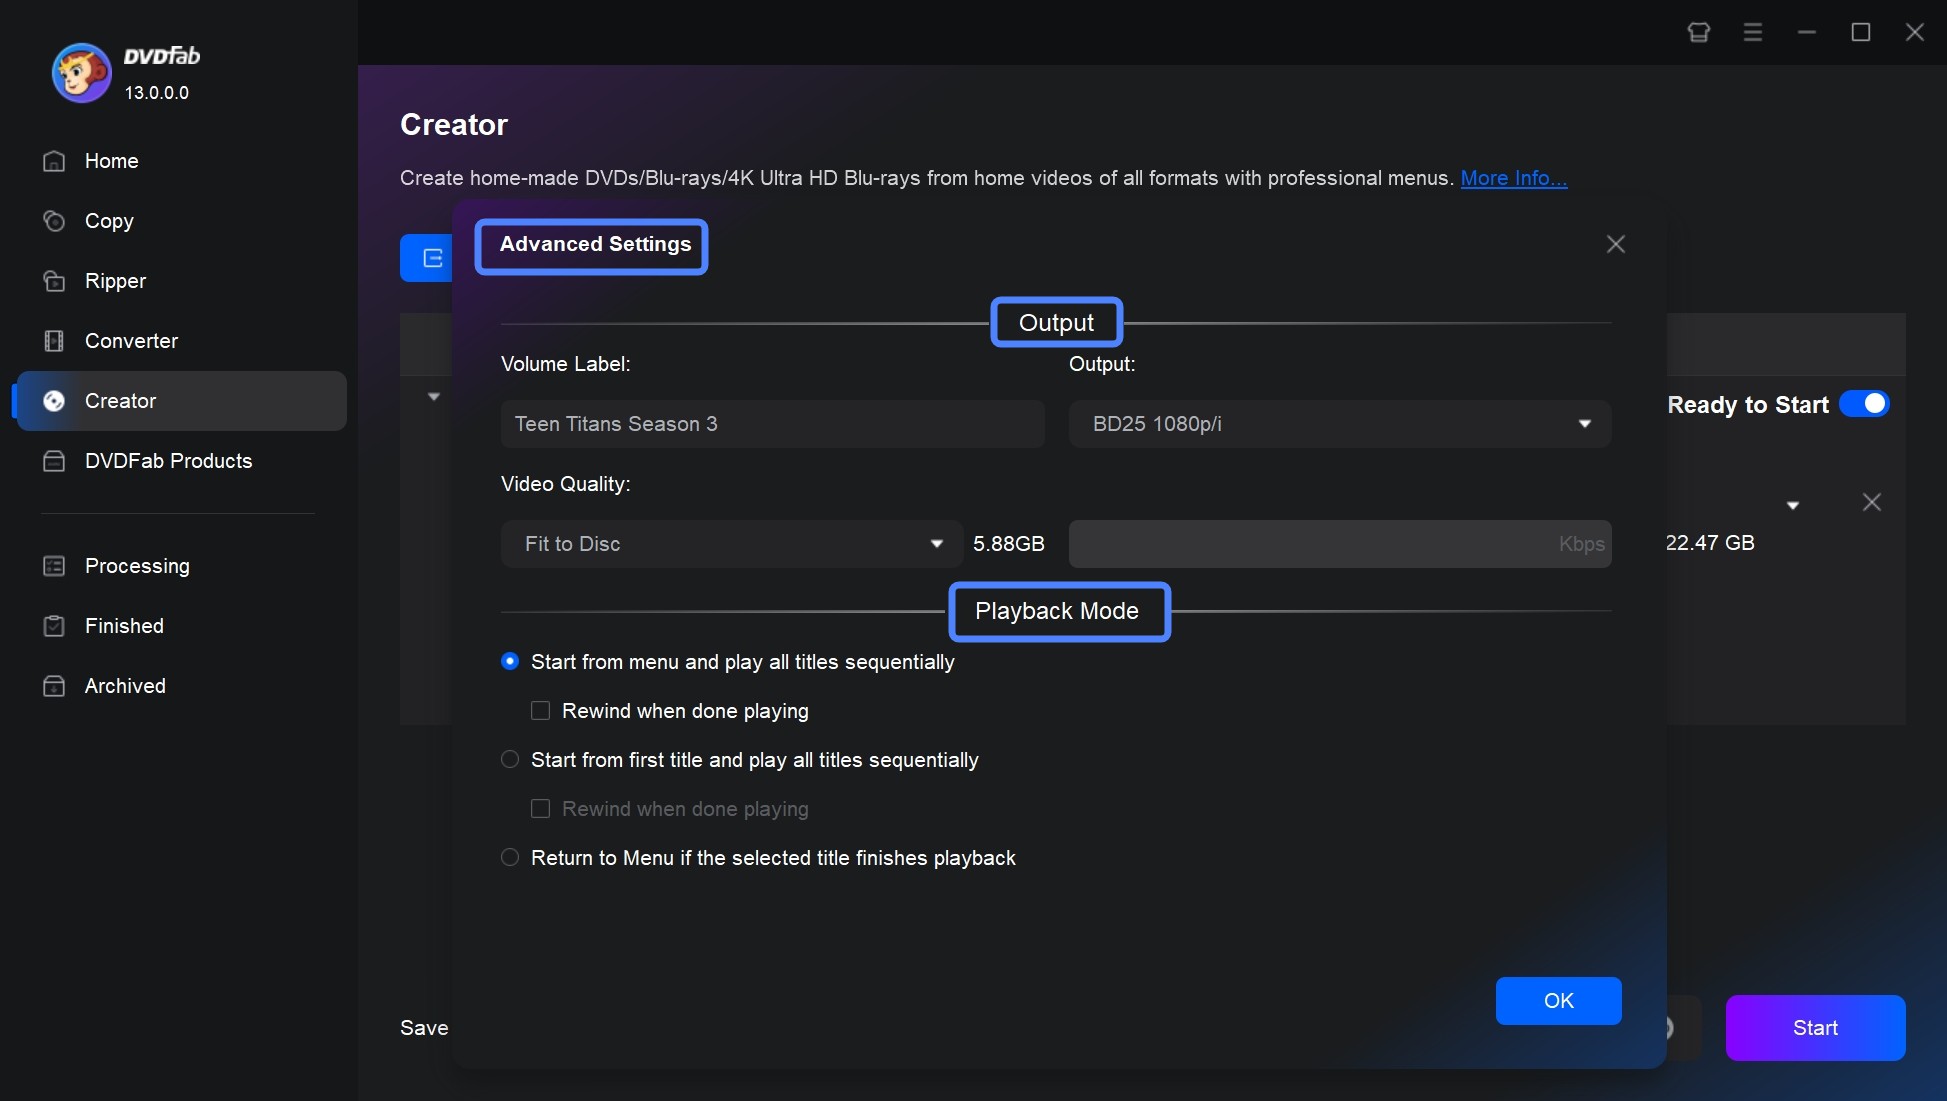
Next, click on the "Advanced Settings". Here, you can adjust output Blu-ray parameters like the volume label, output format and quality, and playback mode according to your needs.
Then enhance the uniqueness of your Blu-ray by setting a personalized menu template in the "Menu Setting".
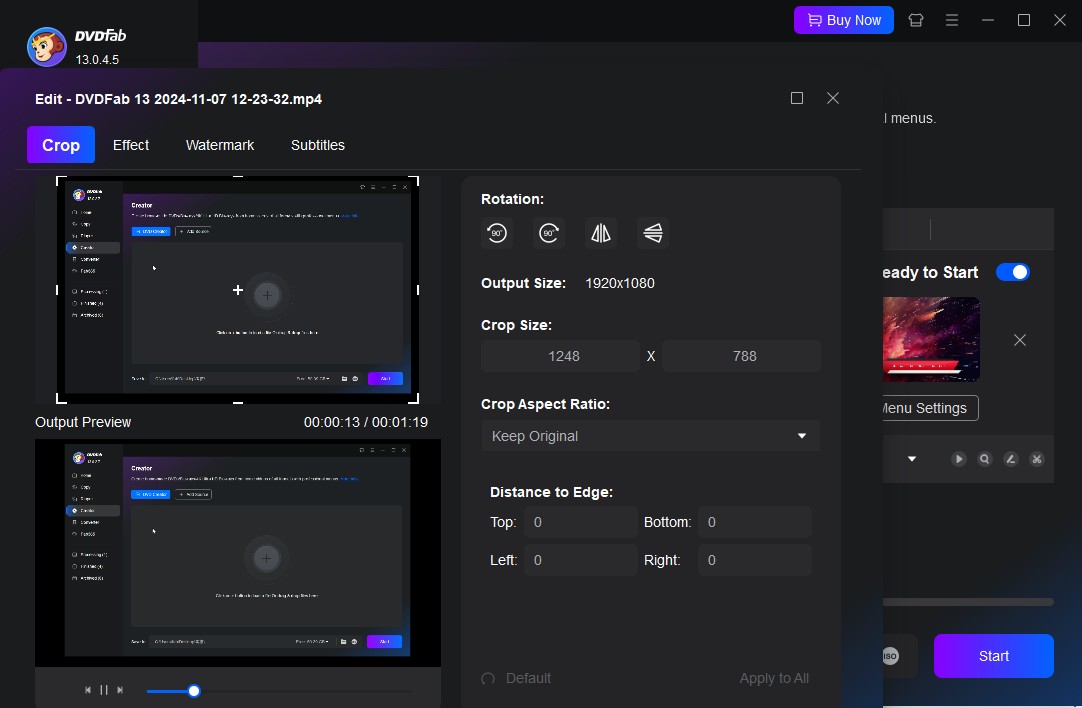
If you need to enhance your videos before burning, the built-in editor in DVDFab allows you to crop scenes, refine effects, insert watermarks, and adjust subtitles.
Step 3: After all the settings have been adjusted, choose the appropriate output directory. Now, all that's left is to initiate the burning process by clicking the "Start" button. The DVDFab Blu-ray Creator allows batch burning mode to further simplify the task. With these three simple steps, you can comfortably burn Blu-ray on Mac.
No 2. Express Burn
- Work on: macOS 10.5 or above; Windows 11, 10, 7, 8, 8.1
- Best for: burning CD/DVD/Blu-ray and data disc
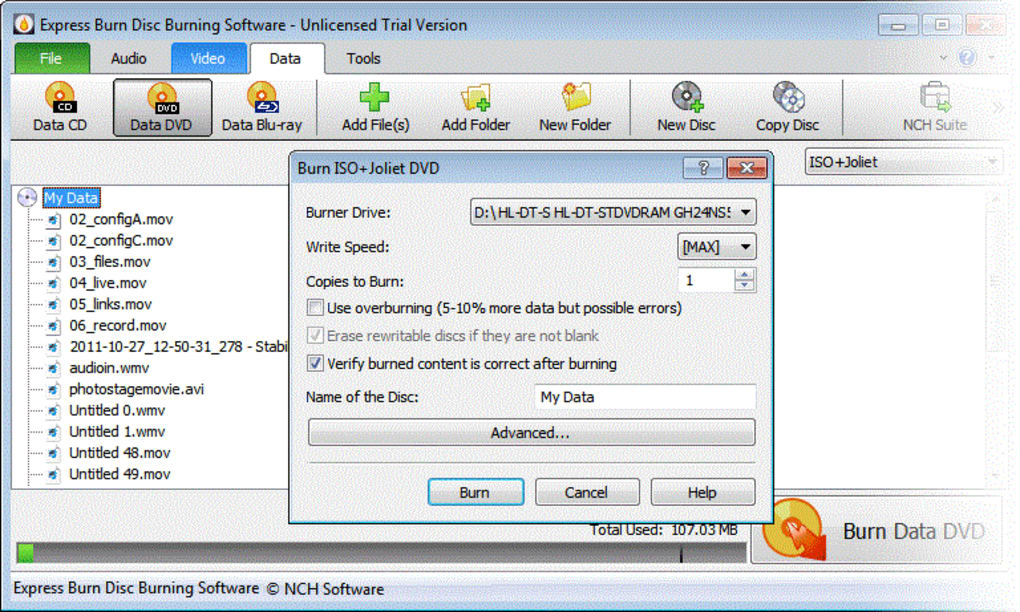
Express Burn handles audio, video, and data files and supports burning to CD, DVD, and Blu-ray discs. It supports common video formats including AVI, MPG, VOB, and MP4, and can create customized disc menus with chapters. The software supports ISO/Joliet, UDF, and hybrid disc formats and can generate ISO image files.
In testing, the interface was clean and installation was fast. The downside was file-loading speed: importing a two-minute MP4 took five minutes to process before the project was ready to burn. The output disc followed the BDMV structure and passed playback tests on a Blu-ray player. For straightforward disc-burning tasks where time is not a constraint, it works reliably. Users on Apple Silicon should verify current ARM compatibility on the Express Burn website before purchasing the premium edition.
- Re-encode video file for standard movie disc
- Allow burning in both widescreen or standard formats
- Include menu and button templates with over 20 template screens
- Allow to add custom images to any template and create/manage chapters on Blu-ray
- Work with recordable/re-recordable discs (CD-R, CD-RW) and dual layer DVDs/Blu-rays
- Burn Blu-ray data or video discs
- Premium edition is priced higher than comparable tools
- There are limited options for tailored menu creation
- No real-time preview before burning
- Errors and crashes have been sporadically reported by users
How to Create Blu-ray with Express Burn for Mac?
Step 1: Open Express Burn. Go to the "Video" tab and choose "Video Blu-ray" to start a Blu-ray video project. Then click "Add File(s)" or "Add Folder," to import your videos, or drag them into the window. If a format needs decoding, you need to allow the software to download a plugin or use installed codecs. Then, click "Play" to preview and verify each source.
Step 2: Now you can customize your Blu-rays. "Create Menu" module allows you to reate a menu with templates, edit the title and background, and add extra pages when you have many videos. In "Video Settings" menu, you can set quality and frame rate. Accept the defaults if you are not sure.
Step 3: Insert a blank BD-R or BD-RE. Click "Burn Video Blu-ray" to burn the Blu-ray on macOS. The process can take time and produces a Blu-ray that works in standard home players.
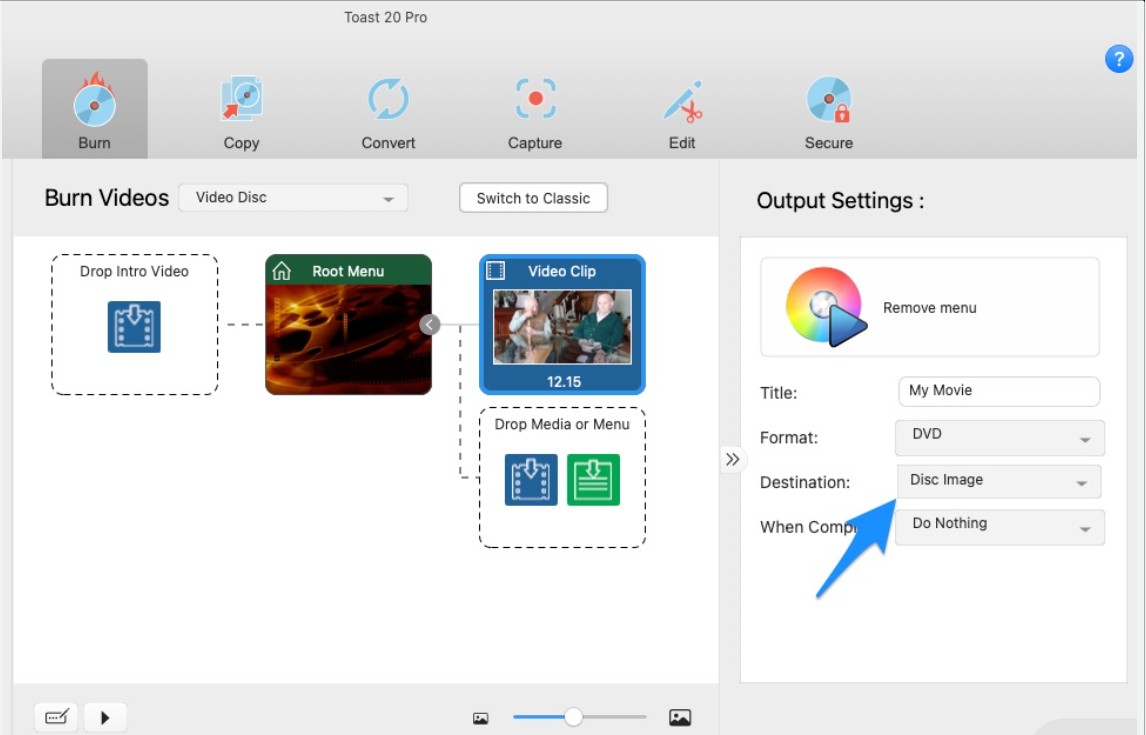
No 3. Roxio Toast Pro
- Work on: macOS Monterey 12.0, Ventura 13, Sonoma 14, and Sequoia 15 (Intel and Apple Silicon)
- Best for: Mac-only users who want a single app for Blu-ray, DVD, audio, and data burning
Roxio Toast Pro is a long-standing Mac-only disc authoring suite built around the idea that burning, copying, and converting should live in one place. Unlike most tools in this list that focus on video Blu-ray output alone, Toast extends to audio CDs, data DVDs, and USB drive archiving from a single interface. It runs natively on both Intel and Apple Silicon Macs under current macOS versions, which sets it apart from several tools in this list with uncertain ARM support.
During testing, the menu creation tools were the strongest of any app tested: template variety was high and chapter customization was straightforward. Worth noting: the first burn attempt failed before subsequent runs completed without issues. Running multiple resource-heavy applications simultaneously while burning increases the likelihood of errors. The software bundle also installs additional components during setup; review what is included before completing installation to avoid unwanted add-ons.
- Burn photos, videos, audio and data files to CDs, DVDs, Blu-ray discs
- Burn Blu-ray discs that are compatible exclusively with Mac system
- Allows for customizable disc menus, giving users control over their projects
- Includes built-in photo editing tools to enhance images before burning
- Installation process on Mac may be interrupted by "We Have Encountered a Problem."
- The software bundle comes with intrusive adware.
- Limited customized options when creating menus.
How to Use Roxio Toast Blu-ray Burner for Mac?
Step 1: Run Roxio Toast 20 and select "Blu-ray Video" under the "Video" section. Drag and drop the video files you want to burn into the interface, and then arrange them according to your needs.
Step 2: Adjust disc options like disc name, auto-play disc on insertion, and video quality under the "Options" menu. You can customize the menu title, style, and aspect ratio under the "Menus" tab.
Step 3: Adjust the information for each movie by clicking on the "Edit" button next to each track. You can choose the frame to be used as the menu button picture and set basic chapter markers in the Video tab.
Step 4: Encode the video by selecting "Save as Disc Image" and choosing a location to store the image. Once encoding is complete, select "Image File" under the "Copy" icon. Drag the disk image into the window, insert a writable Blu-ray disc, and click the red button to start burning.
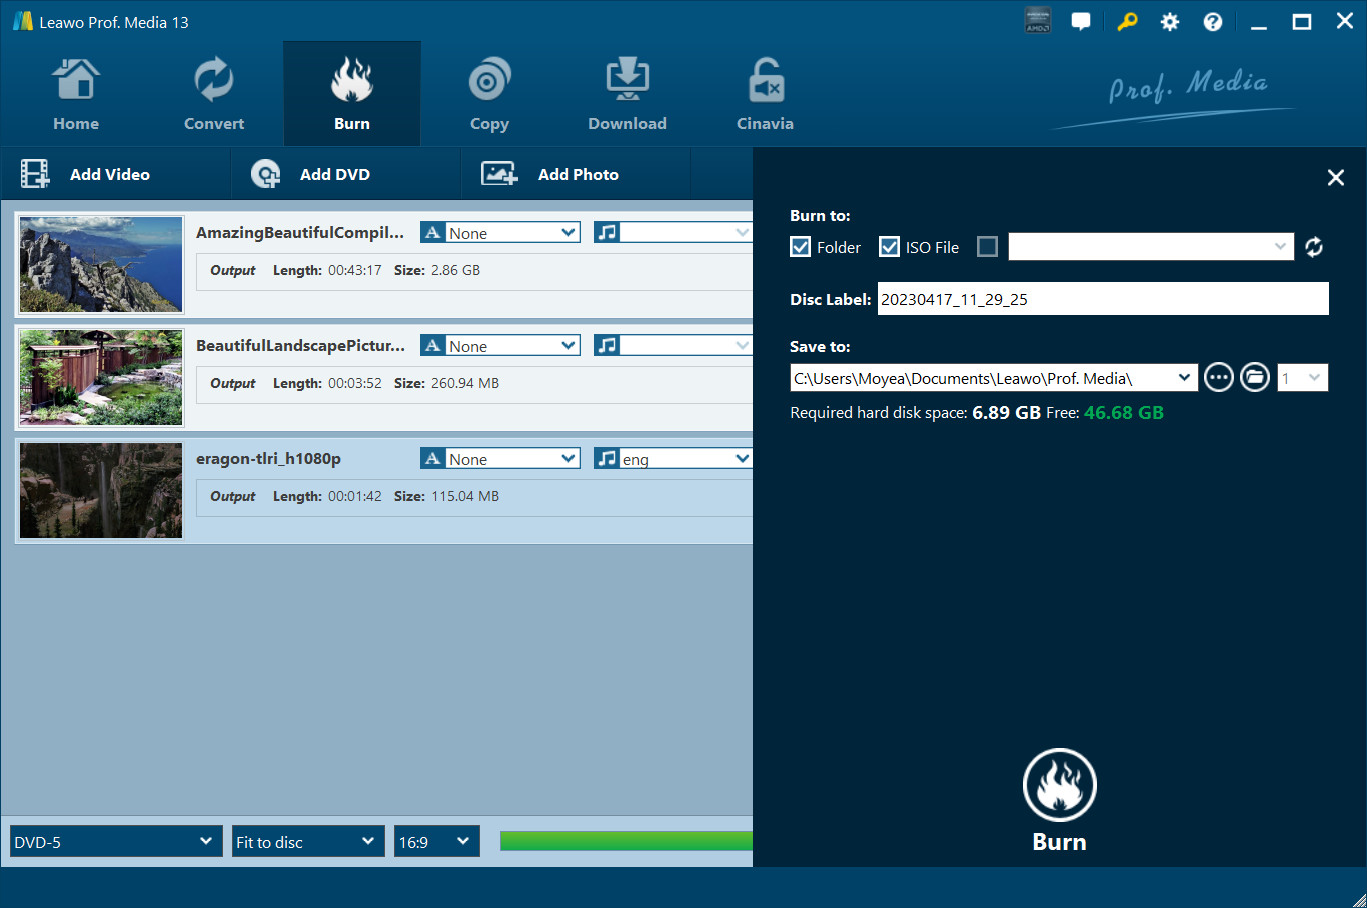
No 4. Leawo Blu-ray Creator
- Work on: Windows 7/8/8.1/10/11 and macOS 10.13/10.14.../12/13
- Best for: burning 3D Blu-ray movies
Leawo Blu-ray creator supports popular formats such as AVI, MP4, MKV, MOV, and WMV, and offers more than 40 free disc menu templates along with a built-in Blu-ray menu creator for customization. It also provides additional features like 2D to 3D conversion, adjustable 3D depth, and an integrated video editor to trim, crop, add effects, and watermark videos before burning. This Blu-ray burning software for Mac is perfect for anyone looking to burn, customize, and enjoy high-quality Blu-ray disc video playback on their MacBook.
I burned a 1.5-hour movie using this tool and the disc played back correctly. The burn took about 30 minutes. Menu templates are plentiful, but the layout customization is shallow: text and button placement in particular can look uneven on the finished disc. If menu precision is not a priority, Leawo delivers a working result at a competitive price point.
- Burn 180+ video format to BD-25/BD-50, Blu-ray ISO or Folder
- It allows you to create 3D Blu-ray or DVD movies effortlessly
- Come with multiple preset menu templates and an internal menu designer
- Enables you to create photo slideshows and albums directly on disc
- The performance might be a bit slow.
- The image and the menu button may be misaligned.
- The "Play" function in the main menu is unmodifiable.
How to Burn Blu-ray on Mac Using Leawo?
Step 1: Drag and drop your video files to Leawo Blu-ray Burning Software, or click "Add Video Files" or "Add Photo" to load your source files.
Step 2: After loading the video files, adjust the settings according to your preference. Under "Conversion", decide if you want to choose the "priority native code" option. In "Performance", you can select the burning engine and video mode. The "Connection" option allows you to modify the proxy and update frequency. Additional choices like external subtitle, encoding, screenshot location and format can be set in the "Others" section.
Step 3: With the disc inserted and settings in place, burn your desired video onto a DVD or Blu-ray disc by simply clicking on the "Burn Now" button.
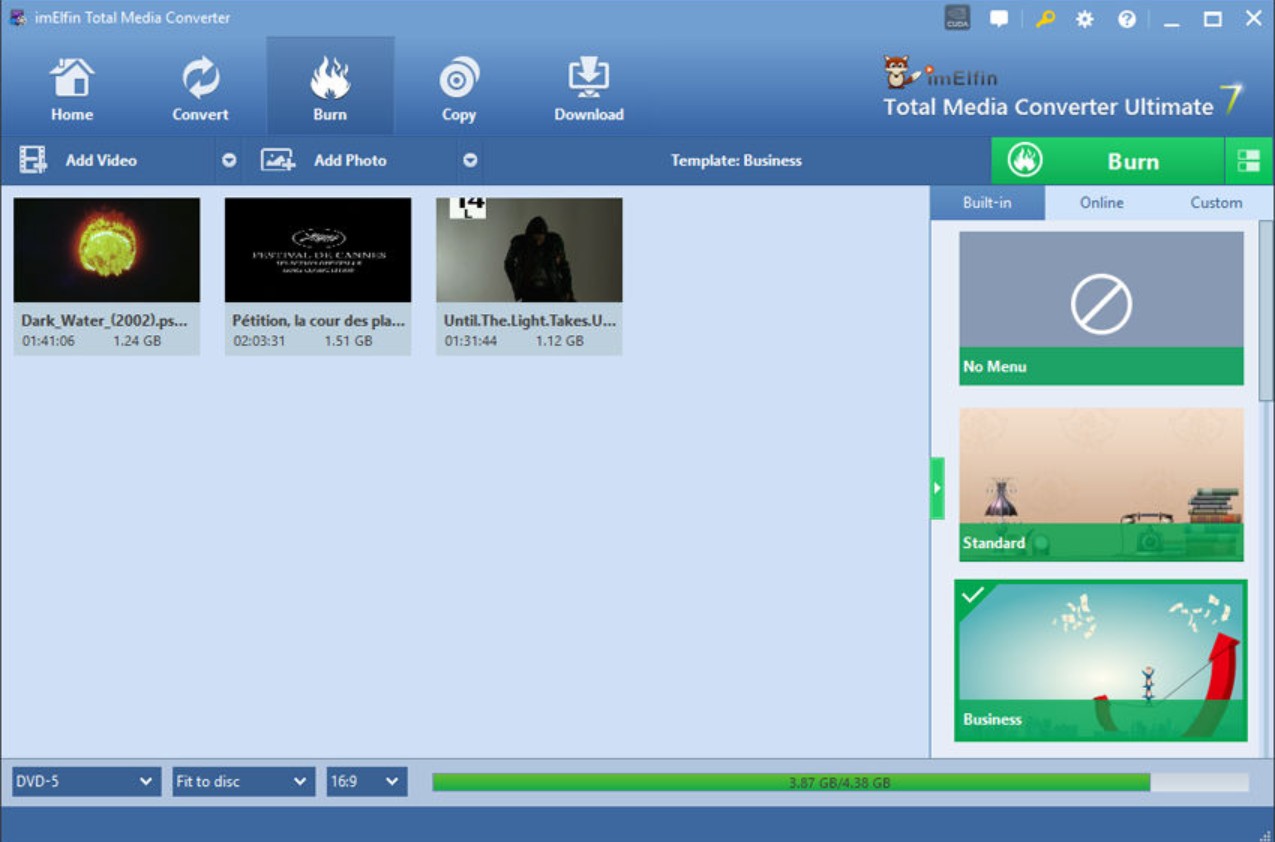
No 5. ImElfin Blu-ray Creator
- Work on: Mac OS x
- Best for: burning 3D Blu-ray movies
ImElfin Blu-ray Creator is another Blu-ray burning software that supports creating high-quality Blu-ray and DVD discs from all common video formats such as MP4, MOV, WMV, and AVI. As a dedicated Blu-ray burner for Mac, it offers over 40 built-in disc menu templates across various themes like business, education, and holidays, with easy customization options to personalize menus, backgrounds, buttons, and captions. The software features a real-time preview function to ensure error-free burning, making it easy to burn Blu-ray on Mac with just a few clicks.
The Blu-ray software for macOS hasn't been updated since September 2019, and I couldn't find any safely downloadable version newer than 8.1.0. The interface is straightforward, so it's easy to use even without a tutorial. However, it's slow: burning a Blu-ray on my iMac from a two-hour MOV file took me over an hour. That said, I like that it can burn both DVDs and Blu-ray discs, and that you can add music to the menus. This is a nice touch that lets you creatively pair your keepsake discs with your favorite songs so the menus don't feel dull and plain.
- Burn multiple video formats to Blu-ray disc with up to 1080p resolution
- Burn videos into BDMV ISO and AVCHD ISO image files
- It can convert standard 2D videos into 3D Blu-ray format
- Relatively slow Blu-ray burning speed.
- Lack of timely technical support.
- This Mac version has no longer been updated since 2019.
How to Burn Blu-ray on Mac with ImElfin Blu-ray Creator?
Step 1: Open ImElfin Burning Software for Mac and import your videos or ISO files by clicking the add icon or by dragging and dropping the files onto the panel.
Step 2: Then, you can adjust the output disc type, size ratio, and video quality to customize your output Blu-ray. Edit your videos and apply 3D effects if you need. You can also personalize the Blu-ray theme, background and button type in the design options.
Step 3: Choose your output preference, name your volume label, and set a custom path to save your file. Depending on your region, adjust your TV Standard to "NTSC" or "PAL".
Step 4: Start the burning process by clicking "Burn Now". Once finished, your file will be saved in the location specified in step 3.
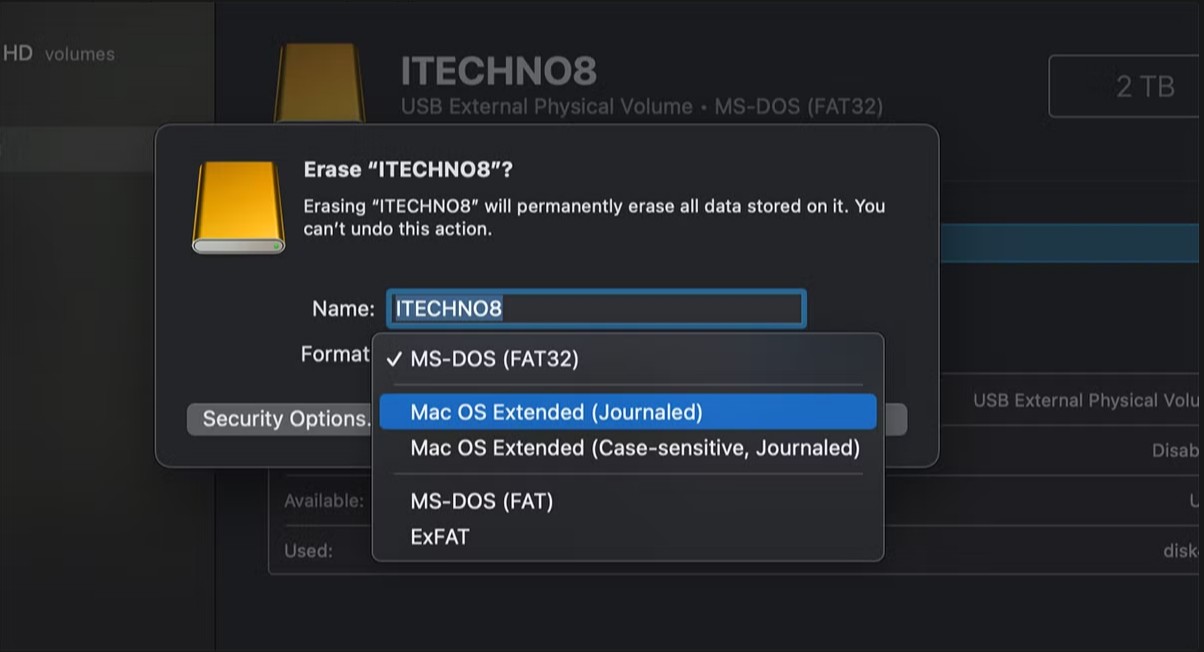
No.6 Disk Utility
- Relatively compatible system versions: OS X 10.6–10.11 (depending on hardware compatibility).
- Not recommended systems: macOS 10.12 Sierra and later, especially on Apple Silicon (M1/M2/M3) devices.
- Best for: burning data Blu-ray for free
Mac's built-in tool, Disk Utility, allows users to burn data to blank discs, including Blu-ray Discs if you use a compatible external drive. While Disk Utility is a free way to back up or share files, it burns Blu-ray data discs only. To put it in another way, it cannot burn video Blu-ray discs playable on standard Blu-ray players. The burned files and folders open as data on computers with Blu-ray drives, but not as a formatted video disc for traditional Blu-ray and DVD players.
- Free and built-in tool on every Mac, with no need to install extra software.
- Simple and quick for burning data to Blu-ray discs (documents, photos, videos as files).
- No learning curve for basic file burning.
- Supports various disc formats for general data storage or backup.
- Cannot create video Blu-ray discs playable on players.
- Lacks options for menu creation, video formatting, or editing.
- May not recognize all external Blu-ray drives, especially on newer macOS versions.
- Limited user guidance.
How to Burn Data Blu-rays on Mac with Disk Utility
Step 1: Insert a blank Blu-ray disc into your MacBook. Enter Utilities module and then Open Disk Utility.
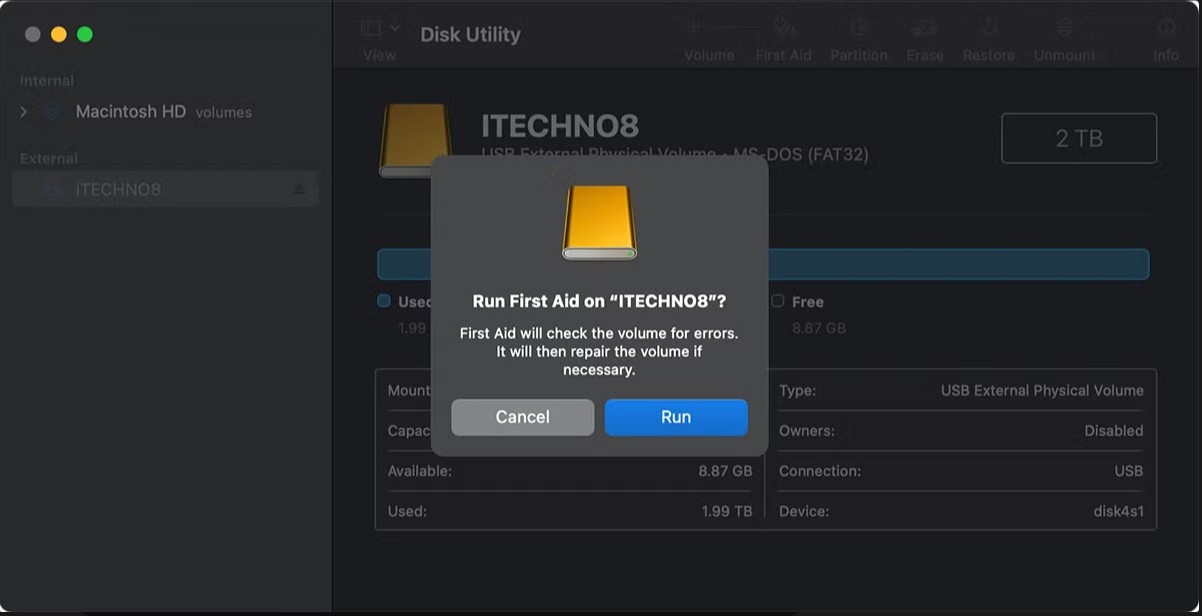
Step 2: In the Disk Utility window, go to File → New → "Disk Image from Folder."
Step 3: Select the file or folder to burn to the Blu-ray disc. Click "Save" to create a disc image. Then, drag the image onto the disc icon on your desktop.
Step 4: Right-click on the disc icon and select "Burn disc image to Disc". Follow the prompts to burn the image to your disc.
Comparison of 6 Blu-ray Burning Software for Mac
Above, we've already detailed the features and hands-on experience of six Mac Blu-ray burning software. If anything still feels unclear, please refer to the comparison table below. We have summarized the six most important decision factors for a Blu-ray burner on Mac to help you compare more intuitively. We've also included real user ratings to inform your decision.
| Features | Format Support | Menu Features | Burning Speed | Output Quality | Bonus Features | User Rating |
| DVDFab Blu-ray Creator | ✅200+ Inputs ✅BD-50/25/9/5 | Fully custom and Built-in templates | Fast with GPU acceleration | High-quality (with HDR support) | 3D Blu-ray support, batch conversion | 4.5/5 |
| Leawo Blu-ray Creator | ✅180+ Inputs ✅BD-50/25 | Pre-designed templates | Moderate | Good | 3D Blu-ray creation, slideshow support | 4.0/5 |
| Express Burn | Common Inputs | Limited menu options | Fast for small projects | Good | / | 3.2/5 |
| Roxio Toast | ✅Standard Inputs ✅CD/DVD/BD | Highly customizable menus | Moderate | High-quality | DVD creation, data burning, audio tools | 4.3/5 |
| ImElfin Blu-ray Creator | Standard Inputs | Pre-designed templates | Moderate | Good | / | 4.0/5 |
| Disk Utility | Data Only | None | Slow | / | / | N/A |
My Top Picks:
#1 DVDFab Blu-ray Creator: Burn any video to 1080p Blu-ray discs on macOS with stylish menus
#2 Roxio Toast: Burn photos to Blu-ray on Mac to make digital albums
#3 Disk Utility: Burn data Blu-rays on macOS without installing any third-party program
Top 3 External Blu-ray burners for Mac [Hardware Guide]
Choosing the right external Blu-ray drive is the hardware side of the equation. All three drives below are USB-bus-powered and work with the software tools in this article. They are compatible with both Intel and Apple Silicon Macs when used with the appropriate software.
ASUS BW-16D1X-U (Best for Speed)
This external Blu-ray drive boasts a turbo drive design with up to 16x write speed. It utilizes USB 3.0 for fast data transfer and is fully plug-and-play compatible with both Mac and Windows.
Pioneer BDR-XS07S (Best for Portability)
A premium choice for MacBook users. This silver, slot-loading drive is ultra-slim and stylish. It supports USB 3.2 Gen 1 (Type-C connection friendly) and can handle BDXL (100GB+ discs) and M-Disc for long-term archiving.
Verbatim External Slimline (Best Value)
It's a compact and budget-friendly option. It features a USB 3.2 Gen 1 interface and is M-Disc ready. It’s lightweight, making it ideal for travel, and widely compatible with macOS X 10.6 or later.
One note that applies to all three drives: when burning on a MacBook, always connect the drive directly to the Mac's USB port rather than through a hub, and keep the MacBook plugged into power during the burn. Writing data to a disc draws significantly more current than reading, and a drop in USB power can cause the drive to disconnect mid-burn.
Frequently Asked Questions
How to burn an ISO to a Blu-ray disc on Mac?
You can burn an ISO to a DVD disc on Mac with the built-in Finder. However, you will need a third-party software like DVDFab Blu-ray Copy for Mac if you want to burn ISO files to Blu-ray discs. Here are the burning steps:
- Step 1: Open DVDFab Blu-ray Copy for Mac and load your disc image files.
- Step 2: Choose a burning mode and customize the output Blu-ray.
- Step 3: Insert a Blu-ray disc into the drive and click the "Start" button.
Why does my external Blu-ray burning fail or disconnect on Mac?
It is likely a power supply issue, not a software bug. As experienced users on r/mac point out, writing data to a disc requires significantly more electrical current than simply reading a disc.
Many MacBook USB ports (especially on older models) limit the power output to save battery. When the laser ramps up to full power for burning, the voltage can drop instantly, causing the drive to reset or disconnect mid-burn.
✅ Solution:
- Always plug your external burner directly into the Mac's port, not a hub.
- If possible, use a burner that has its own separate AC power adapter.
- Plug your MacBook into a power source while burning.
Is it legal to burn Blu-ray discs on Mac?
Burning Blu-ray discs from your own video files for personal use is generally permitted in the United States. Distributing or selling content you do not hold distribution rights for is not. Laws vary by jurisdiction, so review the regulations that apply to your location before burning content you did not create or do not have explicit rights to distribute.
Can I burn a Blu-ray on Mac with iDVD?
No. iDVD was built for DVD-Video burning only and never supported Blu-ray discs. Apple discontinued the app in 2011, so it is not available on current Macs. If you have an older Mac that still has iDVD installed, it will burn DVD-Video projects but cannot write to BD-R or BD-RE media. For Blu-ray authoring on macOS, a dedicated third-party tool is required.
Does Mac have a built-in DVD burning program?
macOS includes "Burn Folders" for writing data to CDs and DVDs, and older Macs shipped with iDVD for creating playable DVD-Video discs. Both are limited to DVD and cannot handle Blu-ray. iDVD was discontinued in 2011 and is not available on current Mac models. For video Blu-ray authoring (discs playable on a Blu-ray player), a third-party application is required.
Conclusion
Each of the six Mac Blu-ray burning software featured here offers distinct advantages, from speed and menu customizations to specialized support for 3D or data discs. If you need full-featured video authoring, third-party software like DVDFab Blu-ray Creator stands out. For simple data backups, Disk Utility remains a convenient built-in solution to burn Blu-ray on macOS. Take your time to match the burner's strengths to your specific workflow and quality needs.