How to Burn a CD/DVD on Windows 10? Check the 8 Best CD/DVD Burners
Summary: Burning a CD is a way to share files with others, transfer data between devices, and back up important files. Windows 10 offers built-in features that are used to burn CDs easily. This article also introduces the other best disc burners to help you burn a CD/DVD on Windows 10 with no hassle.
Table of Contents
"Does Windows 10 have CD burning software?" "How to burn a CD/DVD in Windows 10?"
This is a common concern among Windows users who still want to burn discs. Maybe you like recording everyday life and want to burn your family videos to a DVD for relatives who still use a DVD player, or you want to burn a CD on your Windows 10 computer to create a custom music playlist for your car.
The good news is that Windows 10 already comes with a built-in CD burner that can handle basic tasks like backing up files and creating a music mix. At the same time, there are many safe third-party CD burner Windows 10 programs that offer more advanced burning features. In the following sections, I share how to use both the built-in tools and external software to burn a CD/DVD on Windows 10 step by step.
What Do You Need to Burn CD Windows 10?
Burning a CD on a Windows 10 computer is a pretty straightforward process. However, there are some essential tools and steps you will need to follow in order to successfully accomplish this task. They are as follows:
- CD/DVD Burning Software: Windows 10 has a built-in feature to burn CDs. However, if you want more functionalities then you might consider using third party software like DVDFab DVD Creator and Ashampoo.
- Blank CD: You'll need a writable CD (CD-R or CD-RW). A CD-R can be used only once while you can erase and re-write on a CD-RW.
- CD/DVD Optical Drive: Ensure your Windows 10 computer has an optical media drive that can write to the disc type chosen. Your optical drive can be internal, or a drive plugged into the PC by using a USB.
- Data to Burn: Of course you'll need the data (music, photos, videos, files etc.) you want to burn onto the CD.
How to Burn a CD/DVD on Windows 10 With Windows File Explorer?
Windows 10 has an in-built CD/DVD burning feature that allows you to burn data onto a disc without having to install any third-party application. It is quite convenient and very straightforward to use. Whether you want to burn pictures, music, documents or any other type of file, you can easily do so using this feature.
Choose the Burning Mode to Write CD on Windows 10
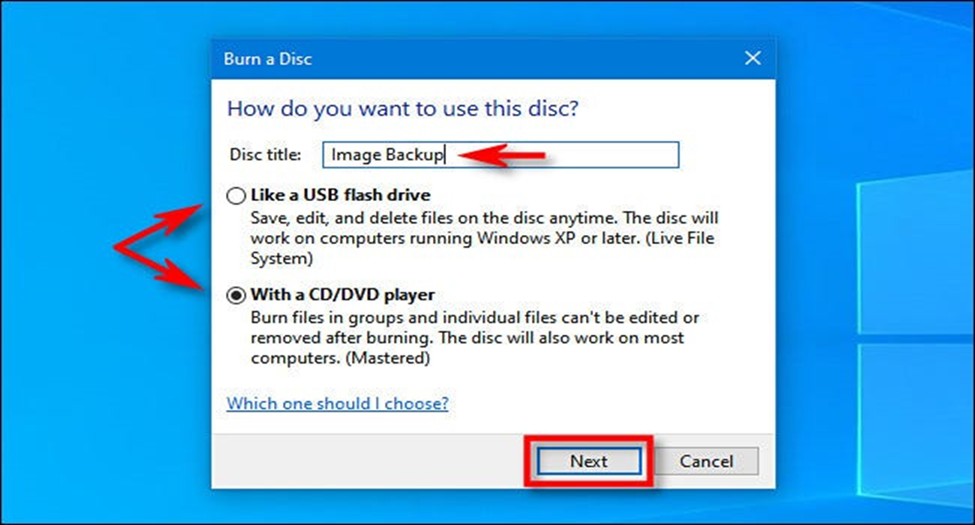
First, launch your windows machine to get started. Insert a blank CD that is recordable into the optical drive. Once you insert the CD, a pop-up titled "Burn a Disc" will appear on the window screen. The pop-up asks you the option you want to use to handle the writing process of your disc. The following is the explanation of these two options:
a. Writing like a USB flash drive
It easily allows you to write and erase files to the disc easily by using a live file system. When you are using a CD-R disc that allows write-only, immediately you erase a file, it will no longer appear in windows, but the space in the disc will be taken up. However, when you use both a read and writable CD disc, you will be able to erase files stepwise without the need to wipe your disc at once.
b. Writing with a CD/DVD player
It's an ancient method of burning discs. When you are copying files to the drive, they get copied on a staging area in a hard drive disc. Once the copying is done, files are written at once when one selects Burn in the File Explorer. Such discs are more compatible with older versions of windows.
Once you decide on the writing method to use, select it immediately. Enter your desired disc title in the title section and click Next.
The next step after clicking Next will depend on the option you choose; each will be handled separately as below:
How to Burn a CD on Windows 10 "Like a USB Flash Drive"
Once you choose the Like a USB flash drive burning mode, follow the steps below to burn your CD in Windows 10.
Step 1. Add files to the disc in File Explorer
1. After selecting this mode, a File Explorer window for the disc drive will open automatically.
2. Drag and drop files and folders into this window, or copy and paste them.
3. In the background, Windows will write the files to the disc. As long as the disc has free capacity, you can keep adding, renaming, and removing files.
Step 2. Manage and finish your disc
1. If you no longer need certain files on the disc, you can delete them in File Explorer. For a Live File System disc, this frees up space for new files.
2. When you're done adding or changing files, right-click on the disc drive in File Explorer and choose Eject.
3. Wait for the drive to finish writing and then take out the disc. Your CD is now ready to be used on computers and drives that support Live File System discs.
How to Burn a Mastered CD in Windows 10 "With a CD/DVD Player"
After choosing With a CD/DVD player as the burning mode, Windows will stage your files first and then write them to the disc all at once. Follow these steps to burn a mastered CD on Windows 10.
Step 1. Add files to staging area
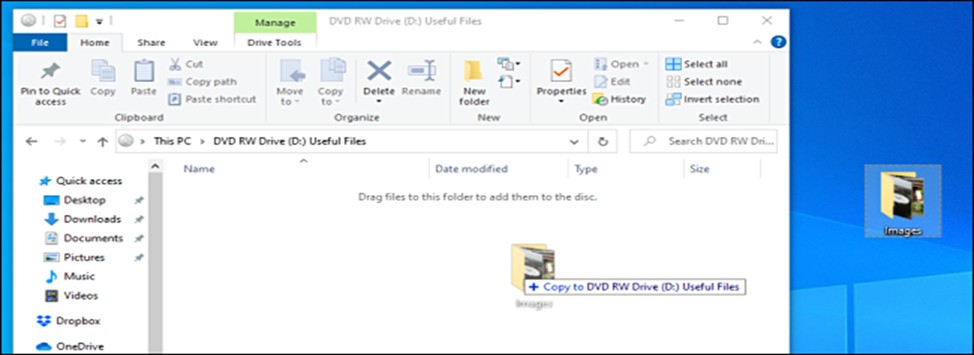
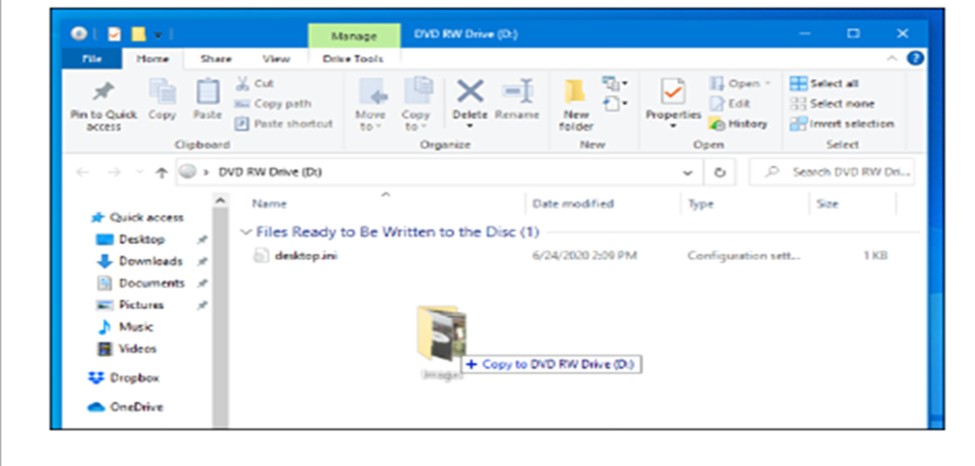
1. When you choose With a CD/DVD player, Windows opens a File Explorer window for the disc drive called "Files Ready to Be Written to the Disc."
2. Drag and drop or copy and paste the files and folders you want to burn into this window. These files are copied to a temporary location on your hard drive, but they haven't been written to the disc yet.
Step 2. Start burning the disc
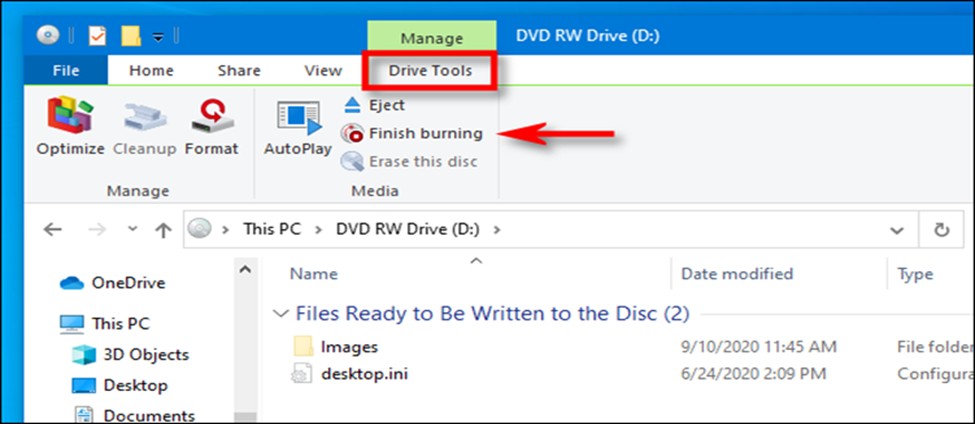
1. After you've added all the files, open File Explorer and click on Drive Tools in the toolbar. Then click on Finish burning. You can also right-click the optical drive icon in File Explorer and choose Burn to disc.
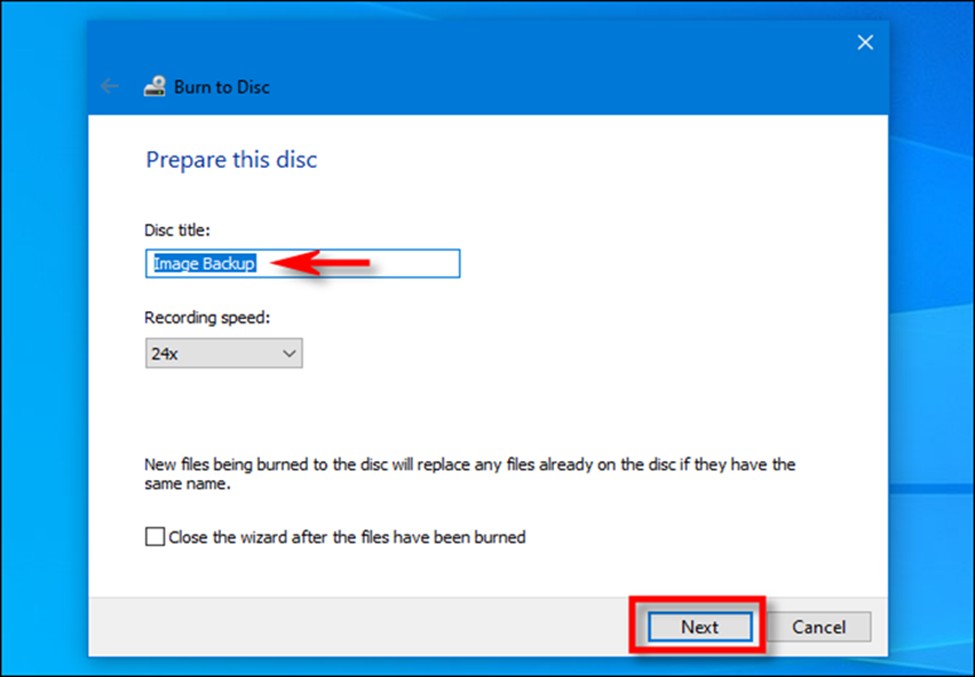
2. A wizard called "Burn to Disc" will show up. Type in a name for the disc, pick the speed you want to record at (the highest speed is usually fine), and then click Next.
Step 3. Wait for the burning process to complete
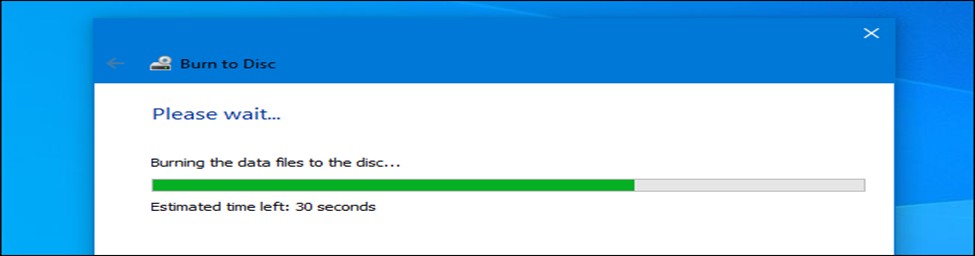
1. While the files are being written to the disc, Windows will show a progress bar and the estimated time. The disc will usually come out of the drive on its own when the burning is done.
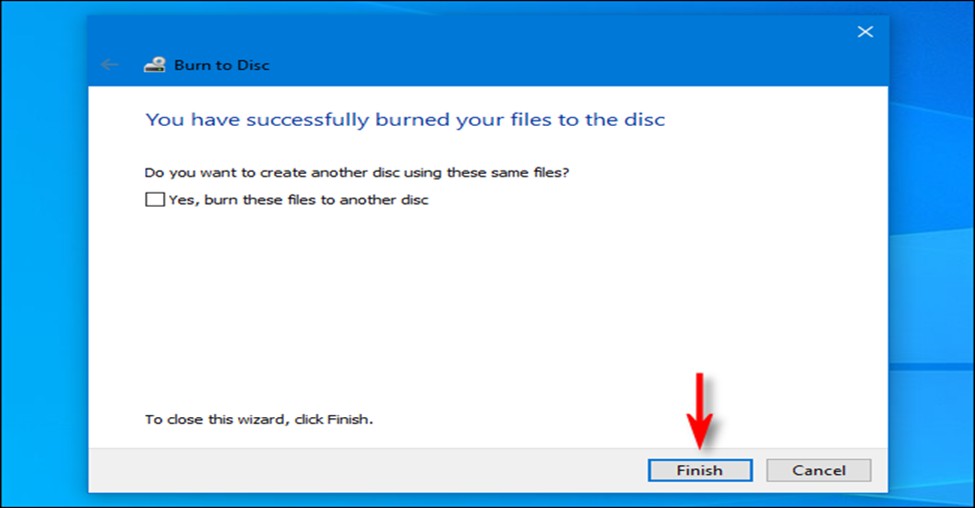
2. A final dialog may ask if you want to burn the same files to another disc. If you want another copy, select "Yes, burn these files to another disc." Otherwise, click “Finish” to close the wizard. The burned CD will be ready for use.
How to Burn a CD/DVD on Windows 10 with the Best CD Burner?
While using Windows 10 built-in software for burning CDs/DVDs is certainly convenient, it does come with its limitations. First, the DVDs you burn are essentially data discs. Even if you copy MP4 files onto a DVD, most standalone DVD players will not be able to play them, because the Windows 10 built-in tool does not have DVD authoring capabilities. Second, the features are quite basic, giving users limited control over the burning process. Moreover, it may not always provide the highest quality for your burned CDs or DVDs. With that in mind, turning to a more professional CD/DVD burner tool can be a worthwhile consideration.
Here are the distinctive features of the following software:
- DVDFab DVD Creator: Best for professional-quality DVD/Blu-ray creation with customizable menus.
- CDBurnerXP: A free, lightweight tool for burning CDs/DVDs with a simple interface.
- LiquidCD: An advanced but older Mac burning tool with extra control.
- ExpressBurn Free: A fast, no-cost CD burning tool ideal for simple audio and data disc creation.
- DeepBurner Free: A straightforward, free disc burner for Windows.
- Ashampoo Burning Studio 22: An all-in-one burning suite with backup and ripping features.
- Burn: A basic, no-frills disc burner for macOS users.
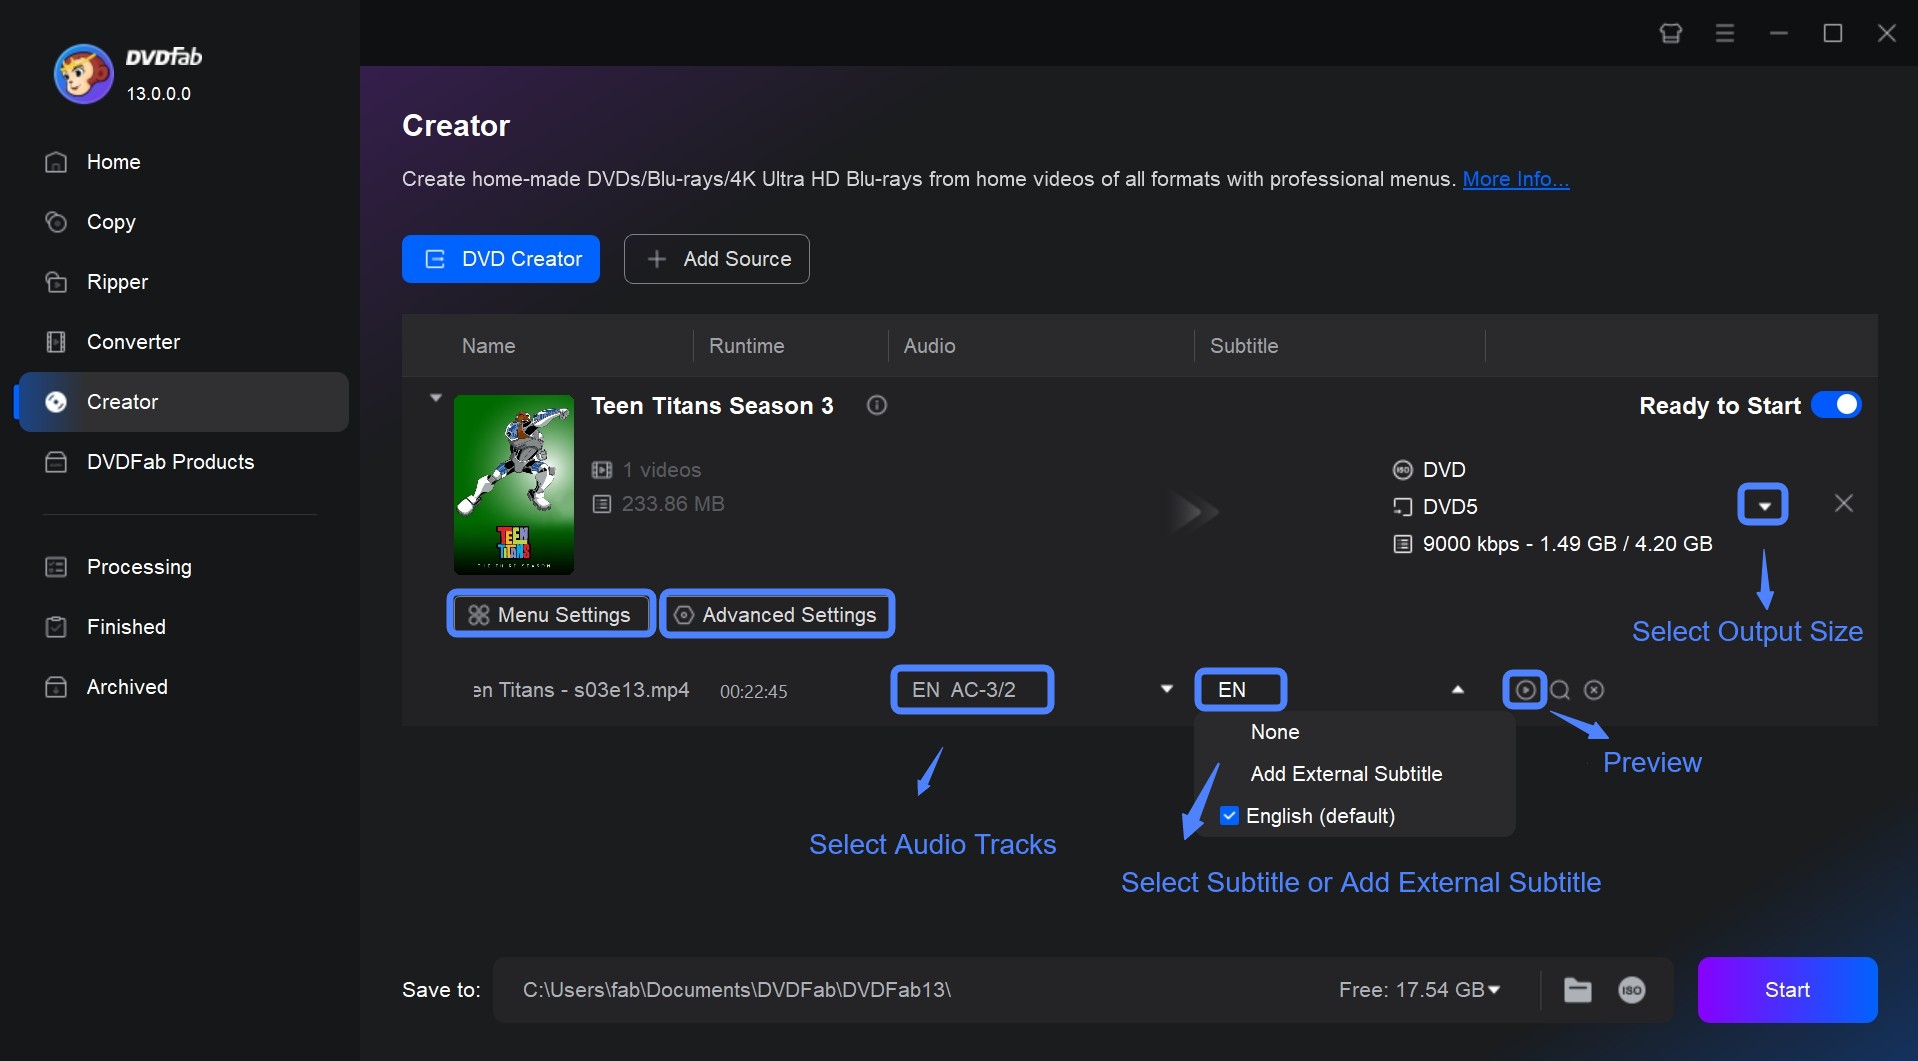
DVDFab DVD Creator
DVDFab DVD Creator is a professional disc burner that works with Windows 10. It can burn a lot of different video formats to DVDs, like MP4 and MKV. It also has advanced features like the ability to customize DVD menus and process multiple files at once. It gives great results and is good for people who want more control over the burning process.
It can only make DVDs, not burn MP3 to DVD or CD, but there is a way around this that works better. You can convert your audio files into video files, burn them to a DVD with DVDFab, and then play that DVD in your car player just like a regular CD. This is because many modern devices can play both CDs and DVDs. I have tried this method, and in my experience, the sound quality is better than what you get when you burn music with the built-in Windows 10 burning tool. A DVD also has a lot more space to store things. When you want to burn CDs on Windows 10, I suggest you give this method a try.
💻Available on:
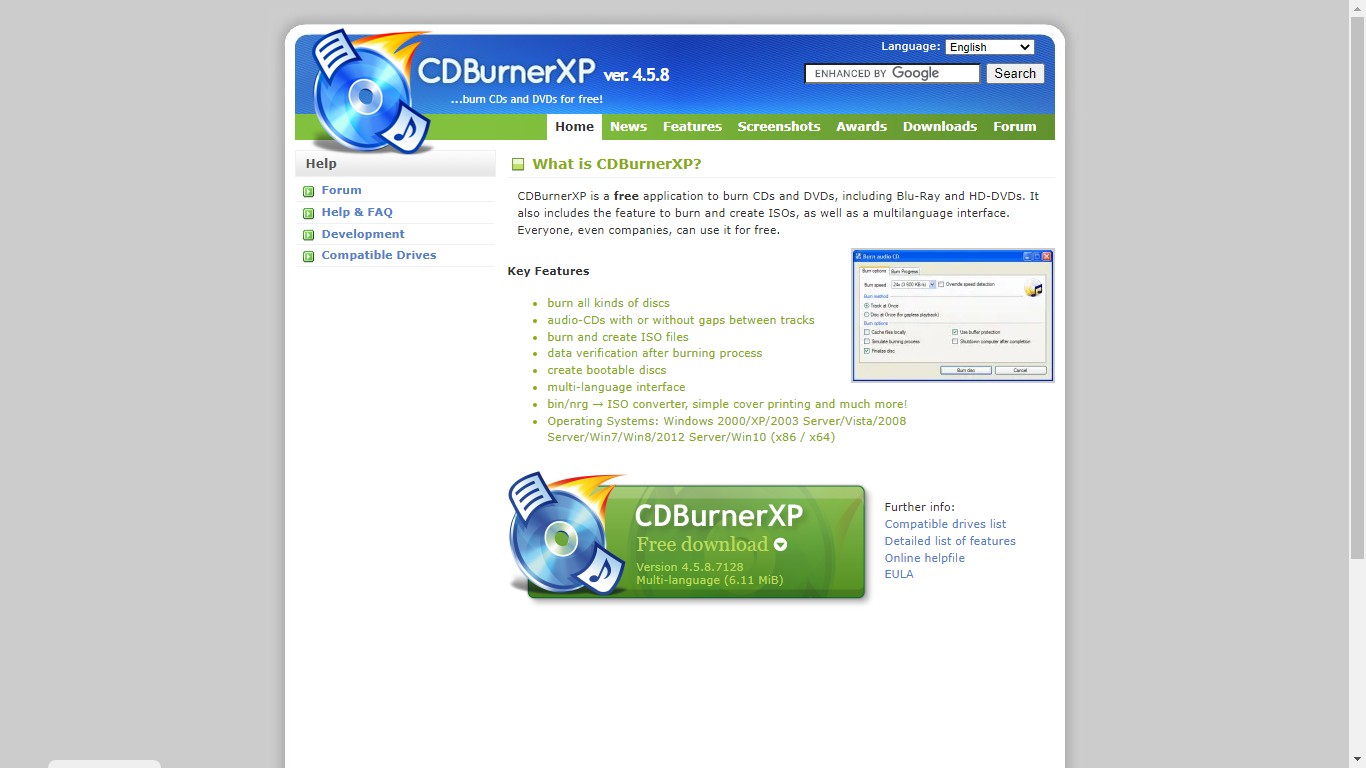
CDBurnerXP
For Windows 10, CDBurnerXP is a lightweight, free program for burning CDs and DVDs. Compatible with multiple Windows versions, it's can be used to burn CDs on any version of Windows and is well-known for its ease of use and support for ISO file creation. Its somewhat antiquated interface, lack of integrated disc-ripping tools, and comparatively limited advanced features are its drawbacks.
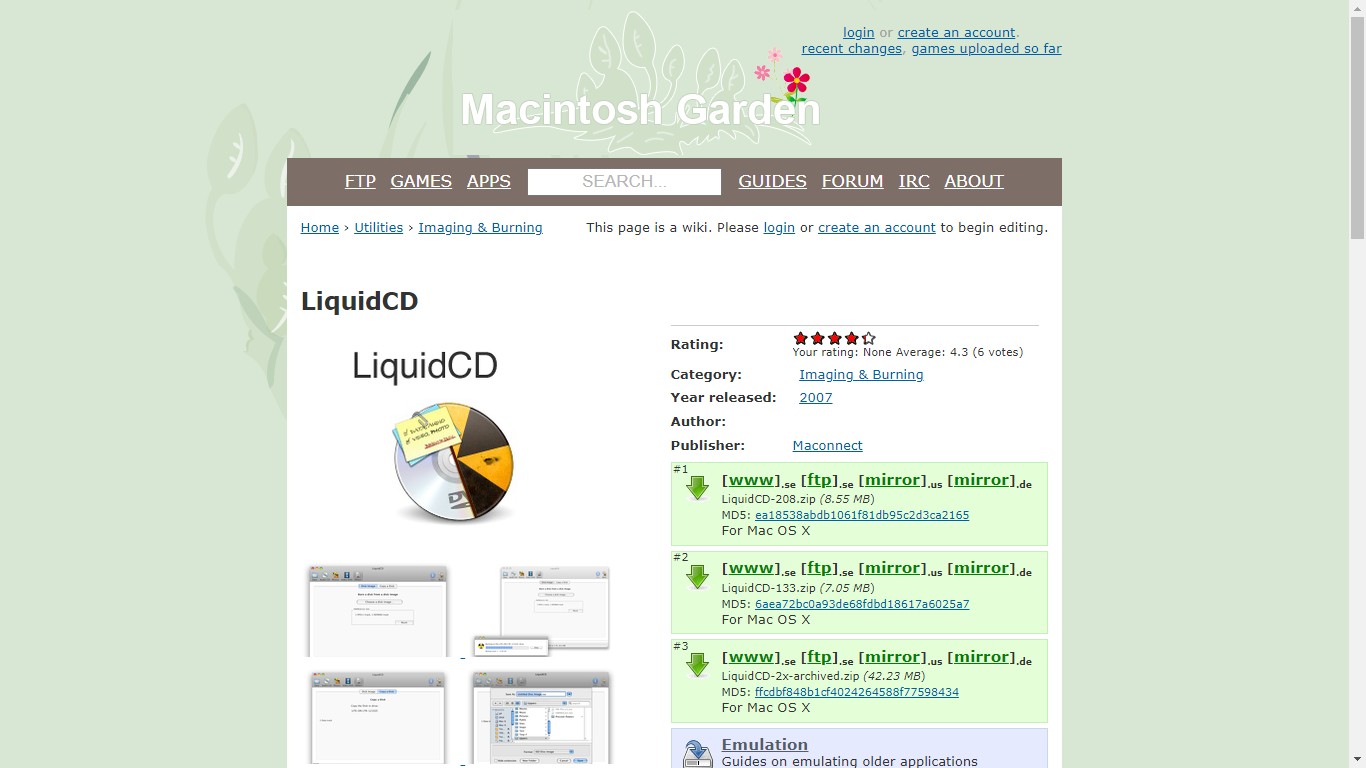
LiquidCD
LiquidCD is a free CD burner offering cross-platform support for Windows and Mac users. It can handle data discs, audio CDs and simple video DVDs, and is able to burn personal hybrid discs. It has a user-friendly interface and supports organizing data into folders and profiles. Nonetheless, it has a large installation size and consumes significant disk space, which could be a drawback for some users.
ExpressBurn Free
ExpressBurn Free by NCH Software is designed for fast and simple audio or data CD burning. It normalizes audio volume and is efficient for users with straightforward needs. However, the free version only supports burning CDs on Windows (DVD and Blu-ray burning require payment), and audio format support is limited, lacking features like ripping or advanced encoding.

DeepBurner Free
DeepBurner Free is a free CD burning software that focuses on simplicity. The Autorun Wizard makes it easy to create effective autoruns for beginners to write CDs on Windows 10. On the flip side, it does not support DVD or Blu-ray burning or personalized photo CD/DVD albums creation in the free version, and doesn't offer features for video discs or high-level customization.
Ashampoo Burning Studio 22
For Windows users, Ashampoo Burning Studio 22 is a flexible CD burning suite with a contemporary interface that supports a variety of audio and video formats in addition to backup and CD ripping capabilities. Both novice and seasoned users will love it. It is not as strong as some specialized professional software, though, and some advanced features require registration.
Burn
Burn is a straightforward disc burning application for Mac users that allows basic CD/DVD creation as well as editing MP3 tags and CD texts. It features a clean, intuitive interface suitable for beginners. However, it lacks professional features and is not suitable for users who require complex burning tasks.

FAQs
Burning music to a CD on Windows 10 is very simple because all you need to do is enter your library, in the music section, choose the songs, and finally click on 'burn.' You will then add a blank CD to your CD drive, select the CD type you want, and click on 'add tracks from your library.'
Now it's time for you to browse your library, select the songs you want to add to the burn list and click on 'add selected to CD.' If you want to add or remove a song, you can click on 'edit options' and makes the changes you want. You will then click 'OK,' and that sums up your query of 'burn music CD Windows 10.'
Many people are unable to burn their CD on Windows 10, and that is because the disc they are using it's not compatible with their computer. If you want to burn your CD easily, make sure to use a disk compatible with the optical drive of your system. Another thing you can do to resolve this issue is by changing the settings on your PC that might be disabled.
How to Burn an ISO File?
To burn an ISO file, insert a blank disc, then use Windows' built-in "Burn disc image" tool, macOS' Disk Utility (or Terminal with hdiutil burn), or Linux's wodim command. For more control, third-party tools like CDBurnerXP (Windows), ImgBurn (Windows), or Ashampoo Burning Studio offer advanced options. Always burn at a lower speed (4x–8x) for reliability and verify the disc after burning.
Final Words
Although CDs are no longer as popular as they once were, Windows 10 still comes with built-in CD burning features, allowing you to create your own playlists and enjoy them through your car stereo on long trips or on your home theater at night. However, burning CDs with Windows 10 built-in tool has its limitations, so you can choose one of the seven programs mentioned above according to your needs to achieve a better playback experience. For those seeking the most professional DVD burning option, we recommend the DVDFab DVD Creator software due to its powerful DVD burning features.
 How to Convert MP4 to DVD Format for Free on Windows, Mac & OnlineBy Diana Smith - Jan 31, 2026
![18 Best Free DVD Burner Software for Windows in 2026 [Expert Review]](https://r1.dvdfab.cn/upload/resource/en/best-dvd-burning-software-3mQn.jpg) 18 Best Free DVD Burner Software for Windows in 2026 [Expert Review]By Diana Smith - Jan 29, 2026
18 Best Free DVD Burner Software for Windows in 2026 [Expert Review]By Diana Smith - Jan 29, 2026 7 Best & Free DVD Menu Creators: How to Make DVD Menu on Windows & MacBy Diana Smith - Jan 28, 2026
![How to Convert MKV to DVD with Stylish Menu? [2026 Updated]](https://r3.dvdfab.cn/upload/resource/mkv-to-dvd-yO3k.jpeg) How to Convert MKV to DVD with Stylish Menu? [2026 Updated]By Wenny Yan - Jan 16, 2026
How to Convert MKV to DVD with Stylish Menu? [2026 Updated]By Wenny Yan - Jan 16, 2026