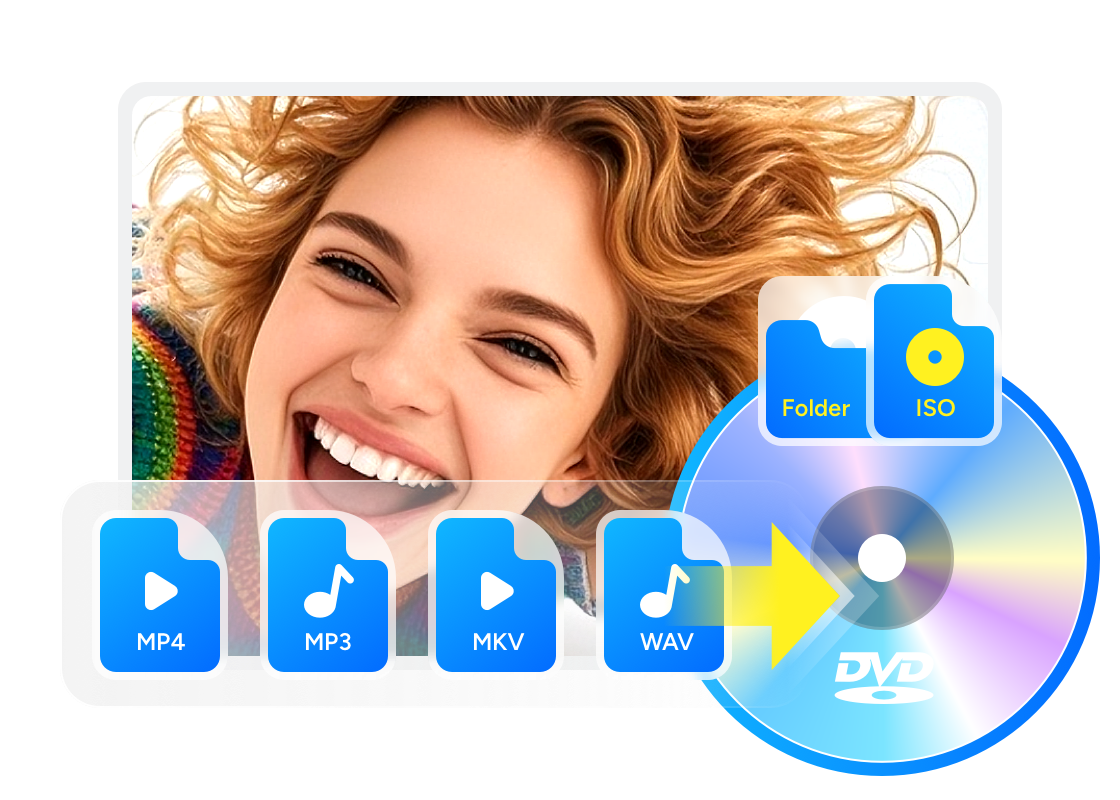
18 Best Free DVD Burner Software for Windows [2026 Review]
Summary: I know finding reliable DVD burning software is crucial for data backup and home theater playback. Based on the tests, I have categorized the top choices available today: standard free tools like ImgBurn for basic data or audio tasks, and comprehensive suites like DVDFab for advanced authoring and editing. Whether you are burning MP4s with custom menus or creating bootable ISOs, these rankings highlight the best options for every need.
"Why is burning a playable DVD so hard on Windows 11?"
A quick scroll through Reddit reveals thousands of Windows users frustrated by the same issues: built-in DVD Burner software that reject MP4 files, DVD drives disappearing after updates, or program that leaves huge watermarks.
Windows has long dropped native DVD authoring support, but reliable third-party tools are still essential for archiving memories. To save you from trial and error, our team test 18 of the best free DVD burning software options and reviews their features in depth. The introduction, comparisons and test notes will help you choose the best DVD maker that fits your needs.
My Top Picks: 6 Best Free DVD Burner Software in 2026
After testing 18 programs, we've summarized the feature highlights and "Best For" scenarios of the top 6 performers in the table below.
| DVD burner software | Best for | Inputs | Outputs | Menu creation |
| DVDFab DVD Creator | Burn playable DVDs with menus from any digital video format | 200+ video formats | playable DVD/ISO/folder | ✔ |
| ConvertXtoDVD | Create DVD menu with audio when burning DVD | video | playable DVD/ISO | ✔ |
| Nero Burning ROM | Burn DVDs with password protection | data, ISO, folder | data/playable DVD | ❌ |
| Ashampoo Burning Studio | Burn music DVDs/CDs | data, video, audio, ISO, folder | data/playable DVD | ✔(Only in paid version) |
| PowerISO | Make bootable DVDs to back up software | data, ISO, folder | data/playable DVD | ❌ |
| ImgBurn | Burn data DVDs from any files | data, ISO, folder | data/playable DVD | ❌ |
How We Test Free DVD Burner Software
To ensure this review is unbiased and technically accurate, our testing team burned over 50 physical discs to verify the speed, compatibility, and output quality of these programs. Below is our testing workflow.
1. Collect and compare features
We first review each program's features, focusing on supported input formats, authoring capability, whether selectable subtitles and audio tracks are supported, and whether it offers menu creation.
2. Test Environment
- OS: Windows 11 Pro (Version 24H2, Build 26100) & Windows 10 (22H2)
- Hardware: Lenovo Legion 5 Pro (AMD Ryzen 7, 32GB RAM)
- Drive: LG GP65NB60 External DVD Writer (Firmware 1.02)
- Media: Verbatim DVD-R and DVD+R DL
3. Carry out hands-on tests
We didn't just burn a simple MP4. We imported a mix of MKV, AVI, and WMV files into the same project to check for decoding crashes. For tools with menu creators, we customized the button and background to check for rendering glitches. We verified every disc on Sony BDP-S6700 Blu-ray/DVD Player (to check menu navigation) and VLC Media Player (to check for audio sync issues).
4. Rank free DVD burners based on tests and user feedbacks
After testing, we rank the software based on feature breadth and performance during our trials. We then verify our findings against real user feedback and independent professional reviews to double-check accuracy. We also reconcile the pros and cons reported across multiple sources and make minor adjustments to the ranking accordingly.
Detailed Review: 18 Best Free DVD Burning Software
Our content team has tested 18 free DVD burners, so all the information below is verified. As you read, please focus on six key factors for choosing a DVD burner: DVD authoring capability, input format compatibility, flexibility with subtitles and audio tracks, menu creation features, burning speed, and output disc quality. These are reviewed in detail below.
DVDFab DVD Creator
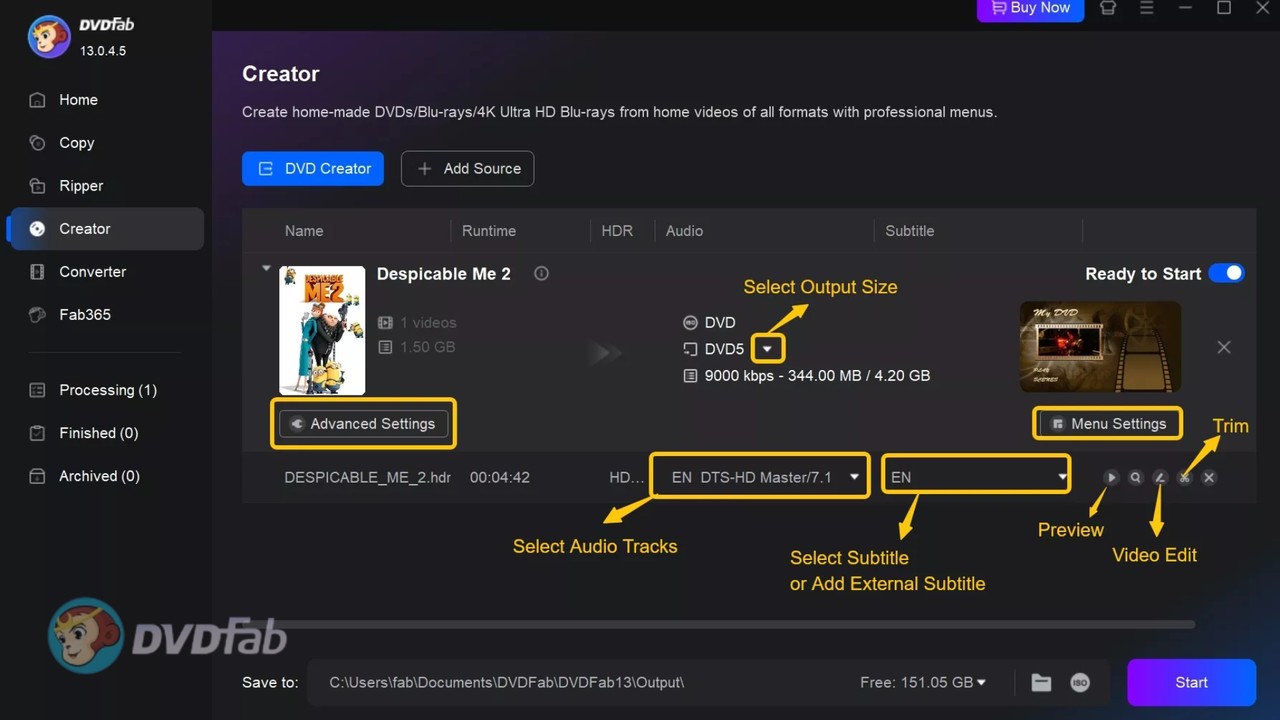
Why we pick it: A professional DVD burner that burns any video to a playable DVD with menu customization.
DVDFab DVD Creator is overall the best free DVD burner software that creates almost any video formats to playable DVDs. While it handles standard format conversion with ease, its standout capability lies in its hardware-accelerated engine, ensuring fast processing even on older PCs. Since version 13.0.4.5, it has added a video editing module to handle trimming, cropping, adding watermarks, and subtitle styling. With the new custom chapter feature, DVDFab DVD Creator maximizes your freedom to make your own DVDs.
During our testing, the workflow stayed consistent from import to burn. We burned a wedding video of about an hour and a half (a camera-shot MOV file) with DVDFab (13.0.5.5), applied a menu template, cropped the black margins, and the burning time was only 8 minutes 57 seconds with NVIDIA CUDA hardware acceleration. And the newly added editing features and menu customization are both smooth, with no stuttering during testing. The excellent real-world performance left a strong impression on us.
DVDFab DVD Creator gives a clear path from everyday video files to a DVD that plays on set-top players. It is a paid product with a 30-day free trial, during which you can use all features without forced watermarks and even burn 1080P Blu-rays. We rank it highly in the 2026 best DVD burner software list for menu creating ability, built-in editor, subtitle handling, and practical GPU acceleration and stable performance.
- Burns 200+ video formats (MKV, MP4, AVI, MOV, etc.) to DVDs.
- Output: Burns to DVD-9, DVD-5, DVD-R/RW, and ISO/Folder.
- Tech: NVIDIA CUDA / Intel Quick Sync / AMD acceleration support.
- Subtitles: Full support for external SRT/ASS/SSA subtitles.
- Advanced video editor with color filters, crop, watermarking, and subtitle styling.
- Beginner-friendly workflow with professional-grade results.
- Create quality DVDs with navigation menus.
- Detailed controls for output quality.
- GPU acceleration significantly reduces burning time.
- Requires more disk space for installation than lightweight alternatives.
OS: Windows 11/10/8.1/8/7 (32/64 bit), macOS 10.13 - 15.x
Rating: 4.6/5
ConvertXtoDVD
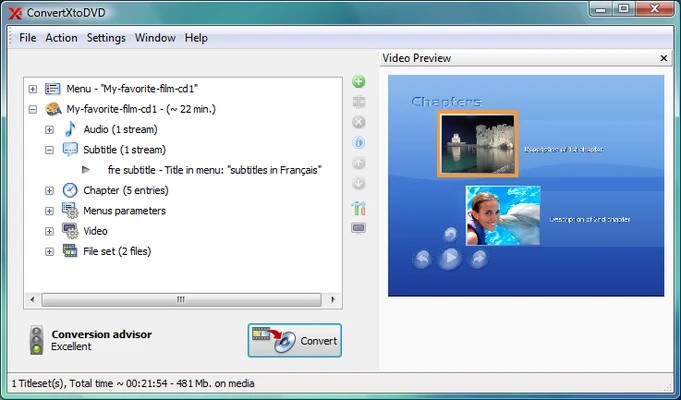
Why we pick it: It allows you to create your own menu themes while burning DVDs.
ConvertXtoDVD is DVD burner software that turns digital video formats into playable DVDs. It makes a correct VIDEO_TS structure, supports multiple audio and subtitle tracks, and writes to disc, folder, or ISO. Since its first release in 2006, it has undergone multiple major updates. Version 7 adds a 64-bit build that improves stability with large sources and modern Windows systems.
In our recent re-evaluation of ConvertXtoDVD 7.5.0.138 (released December 2025), we noted several critical improvements. First, the built-in menu template editor remains a standout feature, allowing you to customize backgrounds, buttons, and sounds. Also, the latest patches fixed hardware decoding freezes and added compatibility for Windows 11 ARM, ensuring smoother performance on newer Surface or Snapdragon-powered laptops. Although it continued updating the 64-bit version in 2025, the interface shows virtually no improvement: the button layout feels messy, as if it were still from the Windows XP era. We also encountered wrong aspect ratios with vertical video.
If you need robust menu control such as adding an intro or music to menu, ConvertXtoDVD stands out for its template editor. It's paid software and the trial is watermarked, but its authoring ability and reliable output keep it near the top of our picks.
- Create and save custom menu templates with the advanced editor.
- Supports multiple subtitle formats, including .ssa, .smi, .ssa, and PGS.
- Optimized for Windows 11 ARM 64-bit architecture.
- Powerful template editor for personalized DVD menus.
- Recent updates fixed hardware decoding freezes.
- Handles large projects efficiently on modern PCs.
- The free version places a watermark on the output.
- The button layout is messy and hard to navigate.
OS: Windows 7/8/10/11
Rating: 4.3/5
Nero Burning ROM
Why we pick it: A security-first DVD burner software
Nero Burning ROM is DVD burning software focused on precise control over disc formats and verification. It burns ready DVD-Video from VIDEO_TS folders or ISO images. In other words, it does not convert MP4 or other digital video files into DVD-Video, but it can write VIDEO_TS folders or ISO images to a physical disc that plays correctly. Beyond that, it can also burn CDs and Blu-ray discs, and creates bootable discs.
Unlike standard burners such as VideoByte, this DVD maker for Windows is renowned for its strong security, which is why we placed it near the top. It provides 256-bit encryption, password protection, and digital signatures with SecurDisc 4.0 technology to safeguard your discs. Its configurable data redundancy feature can improve readability on scratched media (though we remain skeptical about severely damaged discs). It also has unique features for CD burning: with Gracenote® integration, your MP3 CDs and DVDs can display original album art on a car stereo's screen.
Nero Burning ROM excels when you need exacting burns, secure distribution, and advanced file-system control. It does not author DVDs from video files or author DVD menus, so you must supply a ready VIDEO_TS or pair it with a separate authoring tool. That focus is why we consider Nero as a professional DVD burner software rather than an all-in-one suite.
- SecurDisc 4.0 applies 256-bit encryption and password protection to your discs.
- Burn from VIDEO_TS folders or ISO images.
- Supports nearly all CD-R/RW formats.
- Strong media-protection options.
- Efficient handling of oversized jobs.
- Responsive customer support.
- Don't support digital videos as inputs.
- The 15-day free trial has a 100 MB file-size limit.
OS: Windows 11/10/8
Rating: 4.5/5
Ashampoo Burning Studio
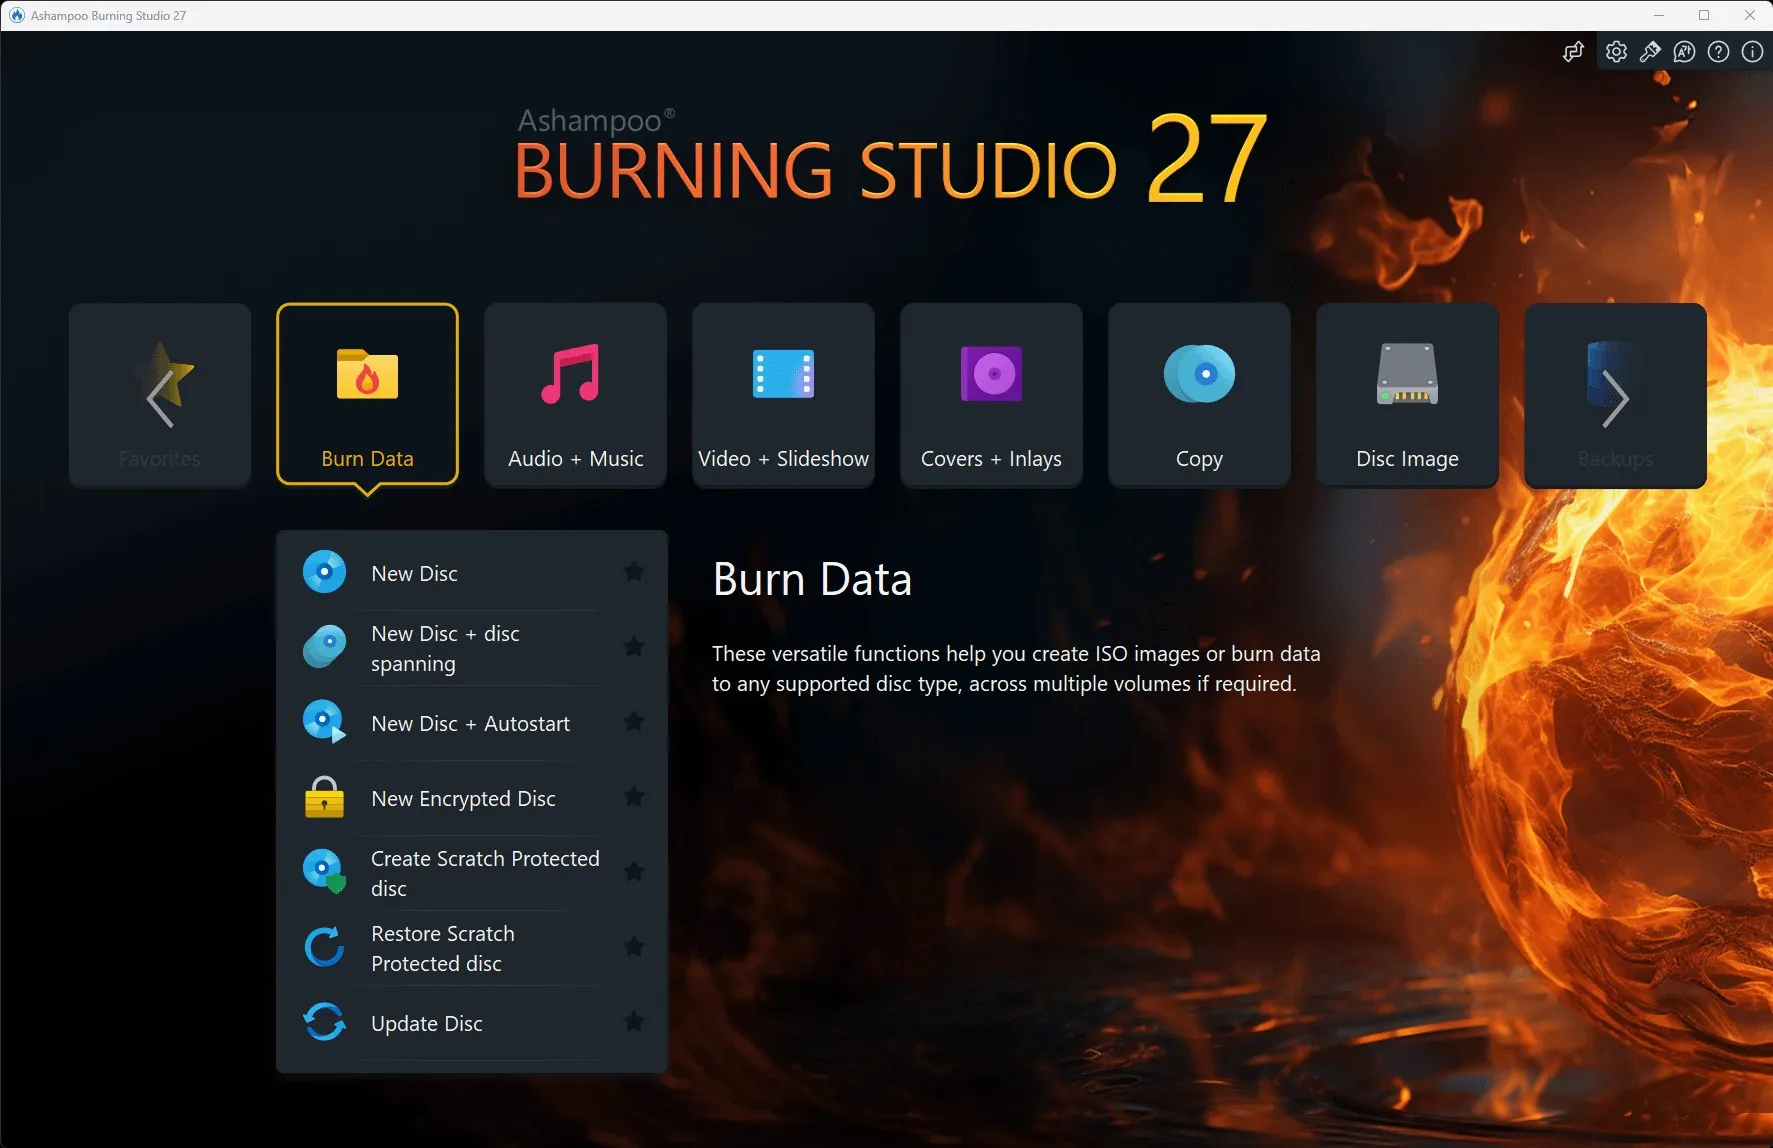
Why we pick it: A dedicated burner for making music DVD/CD for in-car playback.
Ashampoo Burning Studio is a versatile DVD burning software that combines disc burning with multimedia authoring. It creates video DVDs with animated menus and subtitles, burns data discs, and exports to disc, folder, or ISO. Beyond DVD authoring, it can also copy non-DRM-protected CDs, DVDs, and Blu-ray discs for backup. Your backup discs can be password-protected for additional security.
We tested the latest Ashampoo Burning Studio 27 and found significant upgrades. It supports professional-grade audio ripping (up to 48 kHz) and adds AAC format support. We also appreciated the intelligent audiobook detection, which automatically handles multi-part files. Visually, Version 27 introduces a refreshed interface with light and dark skins to suit your preference. Although registration is free, they appear to share your registration email with some affiliates. After signing up we received a large number of spam newsletters. So during installation, watch out to avoid agreeing to multiple newsletters and similar extras, or consider registering with a secondary email address.
All in all, it is a helpful program if you pay for the pro edition which covers burning and copying for video, music, and data DVDs. We like that it adds more features related to audio discs, making it a strong fit for music enthusiasts who like listening on the road. But for video-DVD burning, the playback quality wasn't good enough, with some pixelated frames. It isn't a pro-level menu designer, and its video-DVD output is less clear than that of dedicated free DVD burner software like DVDFab.
- Modern H.265 decoder for stunning video quality.
- Copy non-DRM-protected CDs, DVDs, and Blu-ray Discs for backup.
- Back up data and password-protect your files.
- Guided prompts that help you get started.
- Car-stereo profile database for reliable in-car playback.
- Automatic segmentation (disc spanning) for large files.
- Offers only basic editing tools.
- The free edition handles only basic burning and doesn't support DVD authoring.
OS: Windows 10/11
Rating: 4.5/5
PowerISO
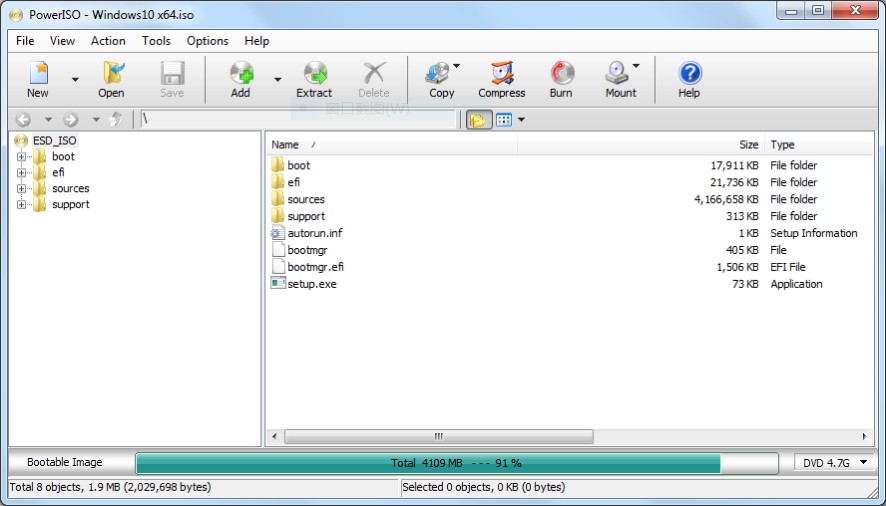
Why we pick it: Suitable for burning a DVD to create a backup copy of the software
If your main goal is burning DVDs from disc image files, PowerISO is the best fit for you. It can burn video image files to DVD discs and burn audio CDs from MP3, WMA, and FLAC, and it supports bootable and multisession projects. It also includes a virtual CD/DVD-ROM drive so you can mount ISO files. Taken together, it's better described as a professional "image-file processing tool." In addition, it can serve as an alternative to the Windows USB/DVD Download Tool by providing a Windows-to-Go–style USB-installer feature, capable of creating bootable USB drives for Windows 7/10/11.
We tested PowerISO's video-ISO burning. To create a playable disc, we used a 1-hour-13-minute movie in ISO format and wrote it to a DVD with PowerISO. There was no way to do any video editing, choose subtitles or audio tracks, or design menus during this process, which means this DVD burning software burns image files as-is rather than authoring new DVD-Video structures. The burn took about 37 minutes, and the resulting disc played normally on a set-top player.
Beyond ISO, PowerISO can open and burn image formats that typical file managers can't, such as BIN, CUE, and DAA, which is useful when you need to duplicate older software media or niche archives. Thus, compared with other top DVD burners, it's not very efficient for making playable DVDs from raw video files such as MP4. Given its strong image-format and bootable-media support, it's best used to burn discs or create backups from existing software images.
- Burn CDs, DVDs, and BDs.
- Offers proprietary DAA format.
- Make bootable USB installers.
- Mount multiple virtual drives.
- Create both playable DVDs and bootables DVDs from ISO files.
- Mount several images at once with built-in virtual drives.
- The free version only creates or edits images less than 300 MB.
- Install unwanted software to your PC without permission.
OS: Windows, Linux, OSX, Arm64
Rating: 4.3/5
ImgBurn
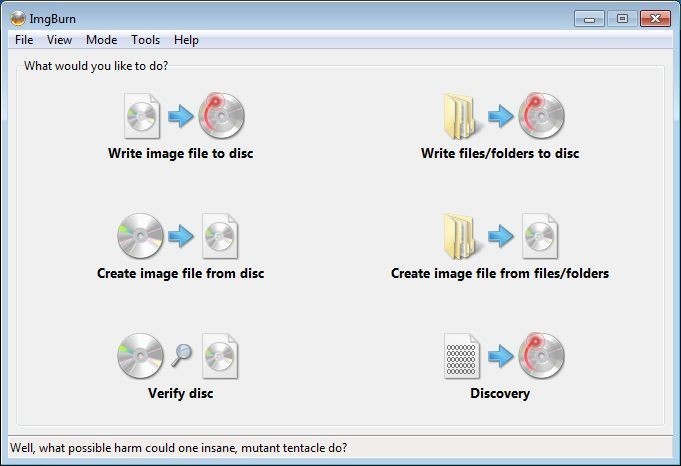
Why we pick it: The most lightweight tool to burn DVD/HD-DVD/BD/CD on Windows
ImgBurn is widely regarded as one of the best free DVD burning software built for precise, basic writing with full control over CD/DVD authoring. It burns ISO and many other image formats, writes a ready VIDEO_TS folder as a proper video DVD, and can build images from files and folders before you write them.
This DVD burner software has five working modes: Read (reading discs into images), Build (packaging files into images or writing directly to disc), Write (writing images to discs), Verify (checking the disc surface), and Discovery (testing hardware and media). It added an "Advanced" Build mode that lets you create any file and folder layout you want for a disc or image from v2.5.0.0. Verify mode compares the burned disc to the source to catch silent errors, which is very useful for large archival jobs.
ImgBurn remains a top pick when you need a quick burn from ISO images or folders to DVD. It takes just five steps (Load → select Write mode → insert disc → select image → click Write). Besides, in our tests, ImgBurn was the most stable among the completely free DVD burners, with no stuttering or crashes. It's also one of the most frequently recommended and well-reviewed options by Reddit users. The official release stopped at version 2.5.8.0 (2013), and some installers have included bundled adware like OpenCandy, so be cautious about where you download it.
- Support CD/DVD/HD-DVD/BD burning.
- Burn VIDEO_TS folder to a playable DVD/BD.
- Layer-break selection for DVD+R DL.
- Excellent verify workflow for data integrity.
- Compact and lightweight.
- Compatible for both old and new Windows OS.
- No DVD menu creation or transcoding.
- Extremely daunting UI.
OS: Almost all Windows OS, Linux with Wine
Rating: 4/5
DVDStyler
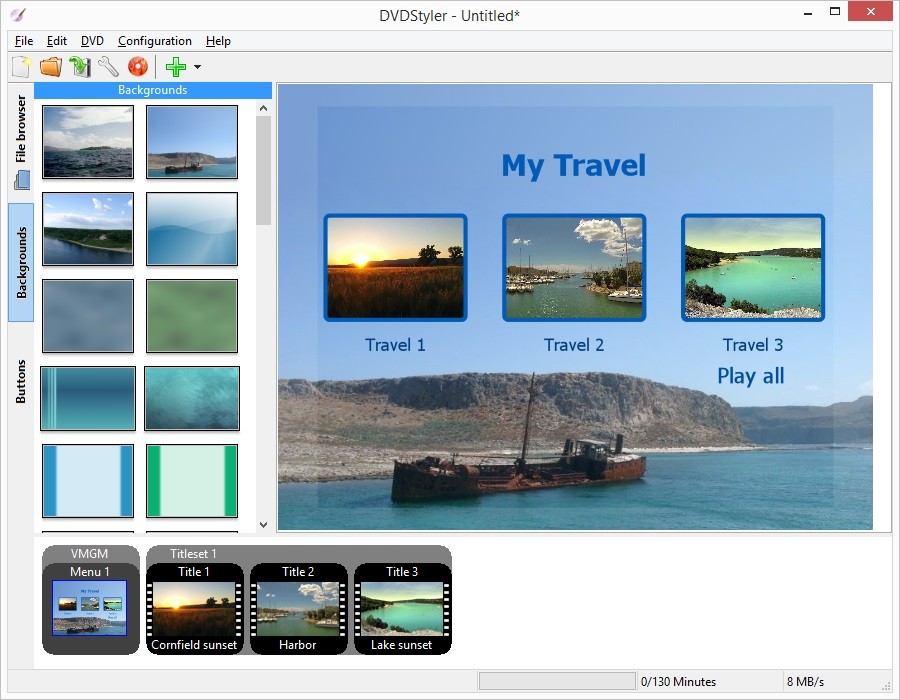
Why we pick it: An open-source and free DVD maker with basic menu design feature
DVDStyler is free, open-source DVD burning software that lets you turn videos into playable DVDs with basic menu navigation. In other words, this free DVD burner also includes full authoring: you can drag in clips, design menus with templates, buttons, text, and images, set chapters, and output to disc, folder, or ISO. When needed, it re-encodes videos such as AVI, MOV and MP4 to DVD standards via FFmpeg, and it can skip re-encoding for DVD-compliant MPEG or VOB source.
What we like most is menu control at no cost. You can put files with different audio and video formats on one DVD, add menu buttons, and even change the color and other parameters of buttons and graphic objects. Here is the thing you need to watch out when using this free DVD maker: it uses a multi-core processor, but when we used DVDStyler (v3.2.1) to burn a disc from an MP4 input for the first time, it crashed. We switched to ISO as the input format and were able to complete the task normally. So for better success and control, we suggest exporting an ISO first and, if the built-in burner fails, write that ISO with another burner. For example, you can author a DVD in DVDStyler and burn it with ImgBurn.
DVDStyler stands out among the best free DVD burner software for users who is on tight budget but still want to author DVDs with menu options, which is why it ranks highly in the best free DVD burner group. Although the menu styles look a bit dated and it does not burn Blu-ray, the fact that it is completely free still puts it ahead of many competitors. To be honest, in terms of features, it can fully rival the paid iSkysoft DVD Creator.
- Free DVD maker with customizable DVD menus.
- Add multiple subtitles and audio tracks.
- Burn several different video and audio formats to one DVD.
- 100% free and open-source.
- Handle chapters, audio, and subtitles.
- Can skip re-encode for MPEG/VOB files.
- Very outdated menu design.
- Has compatibility issues on newer versions of Windows (e.g., often crashes when adding videos or click on "Configurations\Settings").
OS: Windows 10/7/XP/Vista, macOS, Linux
Rating: 4/5
CDBurnerXP
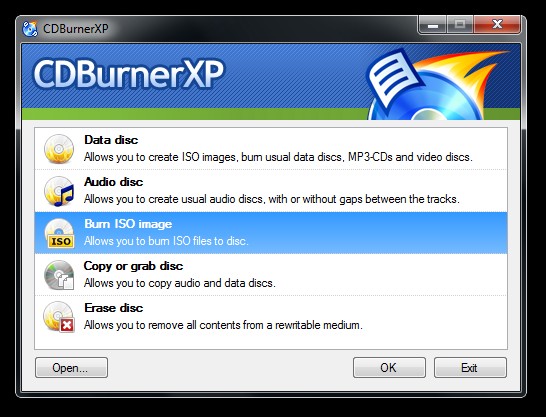
Why we pick it: A free DVD burner that lets you erase disc contents.
Not limited to the "CD" in its name, CDBurnerXP is one of the best DVD burner programs for all kinds of discs. It handles data CD/DVD/BD projects and can write a DVD folder to disc for a playable video DVD. That said, it doesn't let you drag MP4 or similar files onto a disc for direct playback. If you want to burn MP4 or MOV files with it, you'll get a non-playable data DVD. If you're a CD enthusiast, though, it can create discs from formats like MP3, WAV, and OGG with or without gaps between tracks.
We created an ISO file with it and then burned that ISO to a blank disc; aside from being slow (a common issue with free tools), the finished disc played without any problems on a Sony player. We also found an extra feature "erase disc" which clears all content from rewritable media so you don't waste discs if anything goes wrong.
CDBurnerXP supports almost all versions of Windows; although the official site doesn't list Windows 11, it worked in our testing. However, CDBurnerXP requires you to install the Windows .NET Framework on your PC first. Please note that it burns existing files in DVD structure (ISO/VIDEO_TS), so many users pair it with a DVD menu creator like DVDStyler.
- Supports both data and playable CD/DVD/BD burning.
- Burn audio CDs from MP3, WAV, and OGG.
- Copy non-protected audio and data discs.
- Free, lightweight and open-source.
- Supports post-burn verification to ensure data integrity.
- Lacks advanced video-burning features (e.g., bitrate and aspect-ratio adjustments).
- Requires the Windows .NET Framework to be installed beforehand.
- Not a DVD menu creator.
OS: Windows 2000/XP/2003 Server/Vista/2008 Server/Win7/Win8/2012 Server/Win10 (x86 / x64)
Rating: 3.9/5
BurnAware
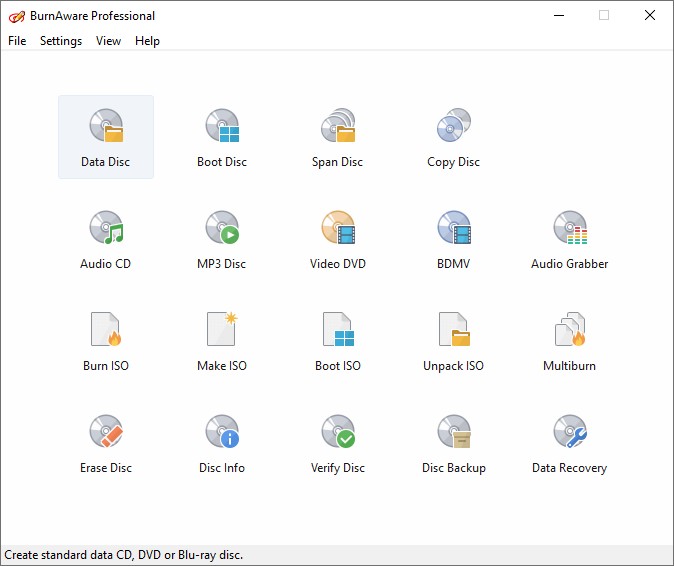
Why we pick it: The easiest DVD burning program that can be used by anyone
BurnAware is a full-featured burning suite that excels at creating playable DVDs, Blu-rays, and MP3 compilations. Beyond standard media, it supports data and multisession projects across CD, DVD, and Blu-ray formats, including M-Disc for archival-grade storage. It also features a handy Recover tool to salvage files from damaged or unreadable discs.
We tested the latest BurnAware v19.0 (released January 2026) and noted lower CPU usage and better compatibility on Windows 11. The workflow is easy for beginners: pick the task from the start screen and the program takes you through the process from start to finish. However, this free DVD burner doesn't directly burn video files into a playable DVD, so you'll need a dedicated authoring tool like DVDFab DVD Creator to create a DVD from MP4 first. While installation is generally smooth, we saw pop-up prompts for bundled junkware. We recommend paying close attention during setup to decline any unwanted extras.
Actually, the program comes in Free, Premium, and Professional editions; the latter two offer a 7-day trial. The Free edition includes burning data, audio, and video discs, making and burning ISO images, and backing up discs, which is enough for everyday use. Note that BurnAware Free is available on Windows 32-bit only.
- Burn standard and bootable CDs, DVDs, and Blu-ray discs.
- Console Burner for command-line disc burning operations.
- Erase rewritable discs and recover data from unreadable media.
- Fixed memory leaks ensure smoother performance.
- New command-line interface for tech-savvy users.
- Not loaded with unnecessary bloatware.
- Lacks advanced DVD menu authoring features.
- Some advanced features are in Pro version only.
- Free edition is for Windows 32bit only.
OS: Windows 2003/XP/Vista/Server/7/8/10
Rating: 4/5
AnyBurn
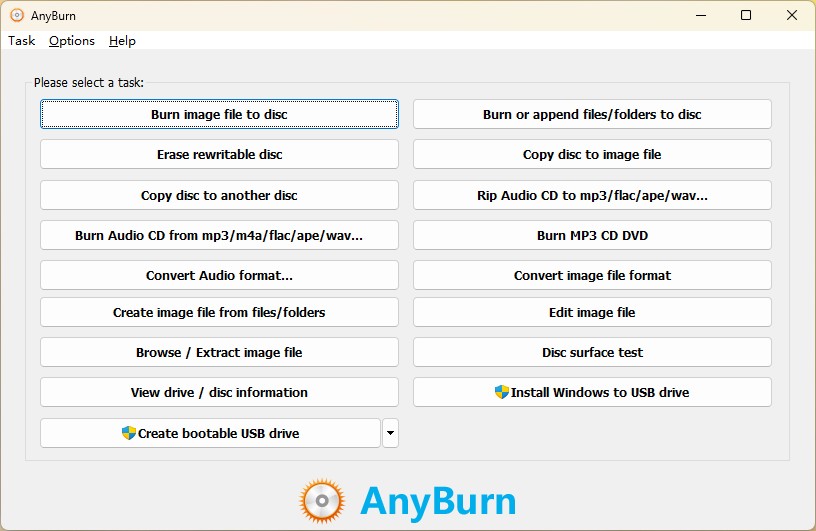
Why we pick it: A lightweight solution for DVD burning on older Windows PCs
AnyBurn is the best free DVD burner software that keeps a small footprint while covering full disc and image burning tasks. What does AnyBurn do? It burns data CD, DVD, and Blu-ray projects, writes DVD folders or ISO images, and creates images from discs or files. Because it doesn't accept digital video files as inputs, you can't edit your footage or adjust quality; it simply acts as a "porter," moving an already authored ISO or VIDEO_TS folder onto a disc.
From our experience, "lightweight" sums up AnyBurn well. First, the installer of the latest version (6.7) is only 4195 KB. The interface is clean, with every function laid out in its own pane, so you can pick the task and run it without special technical knowledge. Moreover, it uses very few system resources. Given its minimal system requirements, it can even run on a Pentium 166 with 64 MB of RAM.
This DVD burner software feels light yet capable, pairing reliable burning with serious image handling and a clear verify step. It comes in free and Pro editions, and the latter has no functional limits.
- Support not only DVD burning but also CD and BD burning.
- Create, extract, convert, and edit image files.
- Make bootable USB installers for Windows or Linux.
- Small and portable.
- Requires minimal hardware requirements.
- No advanced burning features.
- Limited advanced video options.
OS: Windows 10 ~ 98
Rating: 3.1/5
DVD Flick
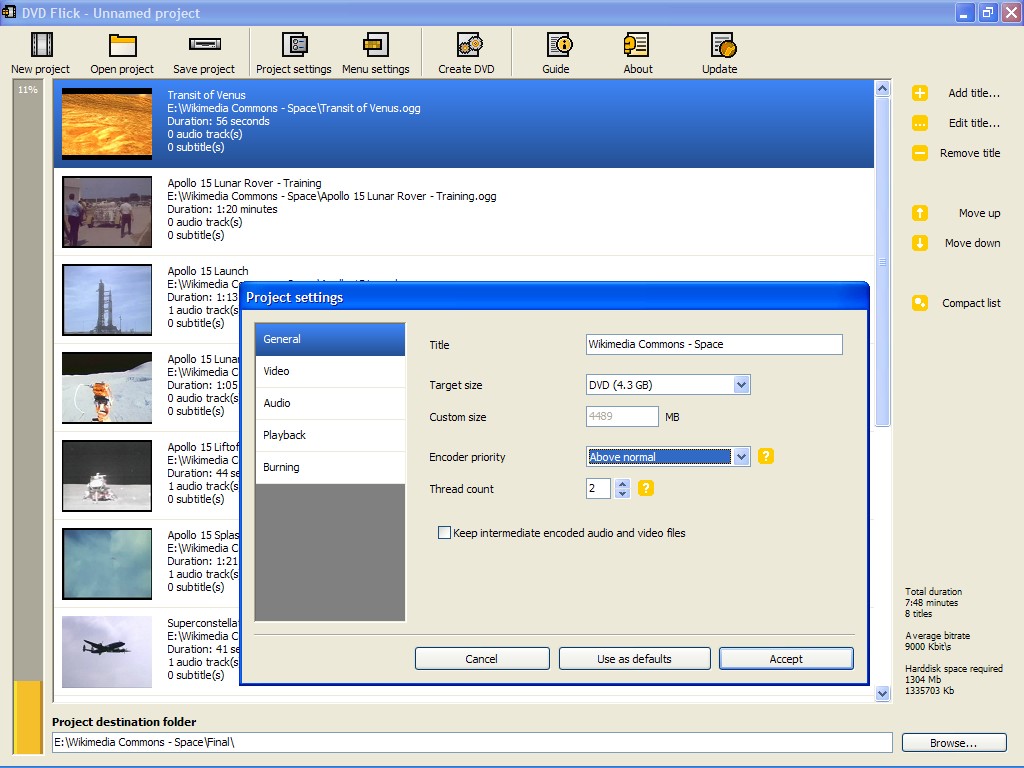
Why we pick it: A DVD authoring software that burns excellent results
DVD Flick is an open-source DVD burner software that converts digital videos to DVD formats with menus, chapters, selectable audio tracks, and subtitles. It utilizes FFmpeg for encoding and can create an ISO or write the finished project to DVD.
Strengths include broad codec and container support. One thoughtful aspect is that the official website provides comprehensive tables listing a large number of supported video and audio codecs, containers, and subtitles, and you can check out if you are interested. We tested DVD Flick 1.3.0.7 on Windows 11; although the official information indicates support only up to Windows 7, the program ran, and the playback quality of the output disc was surprisingly better than that of many other free authoring tools, with no pixelated frames or stutter. Even though we didn't encounter issues in our test, many users on VideoHelp have reported audio/video sync problems. In any case, since it's completely free, you can give it a try.
Although this free DVD burning software lacks advanced features such as high-definition support, advanced menu creation, or 3D DVD burning, DVD Flick still produces video DVDs at zero cost. If you encounter errors during use, it may be because it hasn't been updated since 2009, so success with newer video codecs isn't guaranteed. Don't worry. You can first convert the source file to another format with a free video converter such as format factory, then use DVD Flick for burning.
- Encode to DVD-Video with FFmpeg.
- Support for multiple audio tracks and subtitles.
- Build ISO or burn the project.
- True DVD authoring at no cost.
- Broad input format compatibility.
- Has not received updates for many years.
- Extremely slow burning speed.
OS: Windows/7/XP/2000 Professional/Vista
Rating: 4.2/5
True Burner
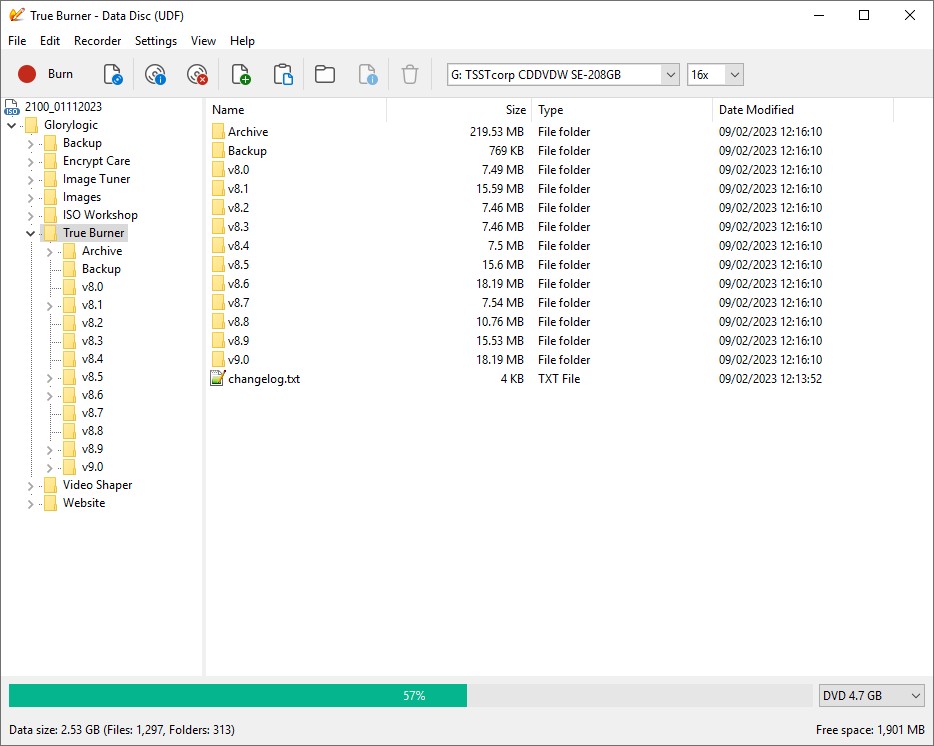
Why we pick it: Expert in M-DISC and BDXL burning without extra bloat
True Burner is a free and dedicated DVD-burning program. It is simple and intuitive, allowing you to burn many kinds of files to CD, DVD, and Blu-ray discs, including data discs, MP3 music discs, and playable DVD-Video discs built from a properly structured VIDEO_TS folder. It also supports creating ISO images, which is useful for backing up or sharing files. You can choose the file system based on your target media, playback device, and file sizes, including UDF, ISO 9660, and ISO 9660 + Joliet.
One standout is its straightforward interface. In our use, we simply find the files we want to burn and drag and drop them into the list, which avoids unnecessary steps. After the burn completes, the app runs a verification pass to ensure the files were written correctly and are not corrupted. If you burn the wrong files, you can erase rewritable CD, DVD, or Blu-ray media with the software. Another advantage is its media compatibility. In addition to common disc formats, it supports M-Disc and XL (BDXL) DVD/Blu-ray, where the former focuses on longevity and the latter provides larger capacity, and not every burning tool supports both. If you want to burn large files or store data long term, this free DVD burning software combines verification with wide media support.
We did find one caution. The workflow is very minimal and there is no confirmation dialog after you press the Burn button, which can increase the chance of a mis-click or starting before you are ready. You also cannot save a disc layout, so you need to complete the job in one go or you will have to rebuild it if you exit the program. If you choose this DVD burner, review the steps carefully to avoid errors.
- Support for M-Disc and XL (BDXL) Blu-ray and DVD discs.
- Burn MP3 Discs and DVD-Video discs.
- Create and burn ISO images and verify written files.
- Intuitive interface.
- Low CPU usage.
- Supports all types of CD/DVD/Blu-ray Recorders.
- No authoring capabilities.
- Feature set is basic compared with some competitors.
- No pre-burn confirmation dialog, which makes accidental starts more likely.
OS: Windows 7, 8, 10, 11 (32 and 64 bit)
Rating: 4/5
1Click DVD Copy
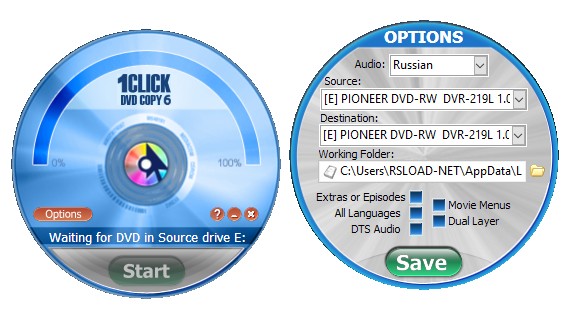
Why we pick it: Suitable for users who need to burn an existing DVD-Video disc to a new disc and can accept quality loss
1Click DVD Copy is the best DVD burner software with free trial, focused on copying playable sources with minimal setup. The program burns from an existing DVD, a ready VIDEO_TS folder, or an ISO image, and it offers one-click presets such as Full Disc, Movie Only, Episodes, Exact Copy, and Custom. The Pro build adds per-title controls for audio, subtitles, and compression.
In testing, our favorite feature was its CPRx technology, which improved burn success on discs with problematic structures. This burner can make 1:1 copies and burns of commercial DVDs with basic protections. It can also compress DVD content to fit smaller blank discs, with a corresponding drop in quality.
This free DVD burner software suits users who mainly burn playable DVD sources to new media and prefer profiles that decide what gets written. This free DVD burning software does not author menus from AVI or other files. However, its price may give you pause, and its compression quality is not outstanding. It also cannot decrypt the newest releases without a separate decrypter. In comparison, we think DVDFab DVD Copy, which offers more features and better overall value, is the better option.
- Burns from DVD, VIDEO_TS folder, or ISO image.
- Offer 5 copy presets: Full Disc, Movie Only, Episodes, Exact, Custom.
- CPRx error-correction to improve write success.
- Preset profiles simplify manual settings.
- Minimal setup for DVD-to-DVD burning.
- No DVD authoring.
- License renewals may be required.
OS: Windows 11, 10, 8, 7
Rating: 4/5
Alcohol 120%
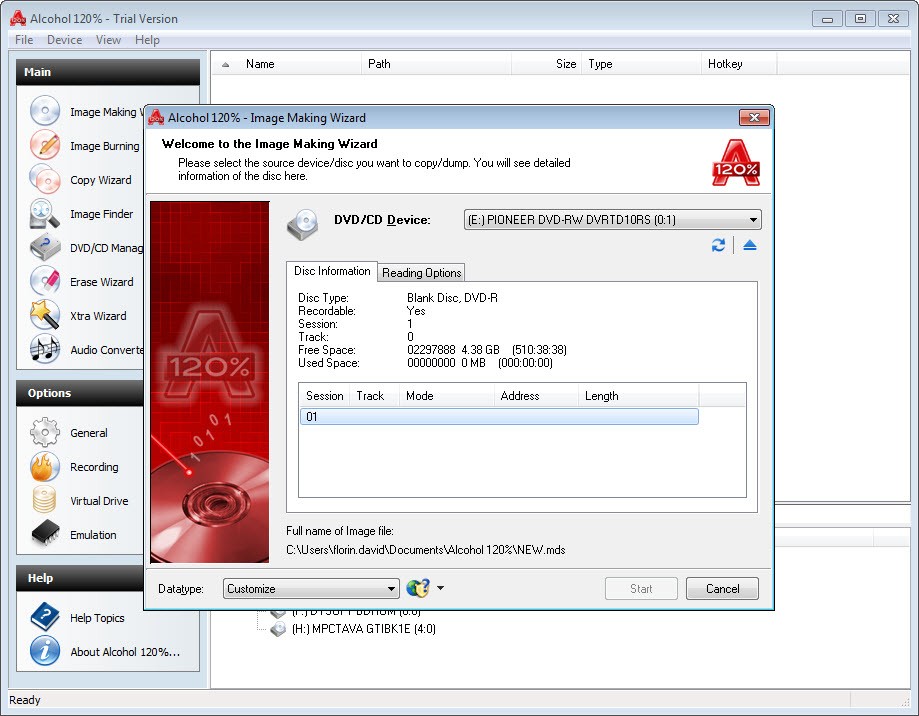
Why we pick it: A tool to burn game CDs and archive large collections
Alcohol 120% is a disc burner with strong image tools. It burns CDs, DVDs, and Blu-ray, writes ready folders or ISO images, and supports bootable and multisession projects. It also handles many image formats, including ISO, MDS/MDF, CUE/BIN, NRG, ISZ, and CCD. It can be used for backups, for example to make backup copies of game CDs and movie DVDs, as long as the DVD has no copy protection. Unlike DVDFab DVD Copy, it does not bypass CSS or other DVD protections.
Mounting and burning are smooth. You can create up to 31 virtual drives, mount an ISO to check the contents, then burn it. The Pre-Mastering feature writes files straight from your drive without building an image first. Alcohol 120% also provides wizard-style guides that help beginners and advanced users perform image creation and burning, disc copying, or drive erasing. The free trial is full-featured, but it limits the number of virtual drives you can create.
Be aware that this free DVD burner bundled or ad-supported components in older trials and the Free Edition. If you need a straightforward tool to copy or mount disc images quickly, it will meet an urgent need. If you want a polished and safe all-in-one DVD authoring and decryption suite, we would not consider it the best choice.
- Mount images on up to 31 virtual drives.
- Make backup copies of game CDs and movie DVDs.
- Supports a wide range of image files.
- Faster duplication with multi-drive burns.
- Broad image format compatibility.
- Easy-to-navigate UI.
- No DVD menu creation from video files.
- Some claims of HD DVD support are dated.
- May install bundled ad-supported components.
OS: Windows 2000/XP/Vista/7/8/10
Rating: 3.8/5
WinX DVD Author
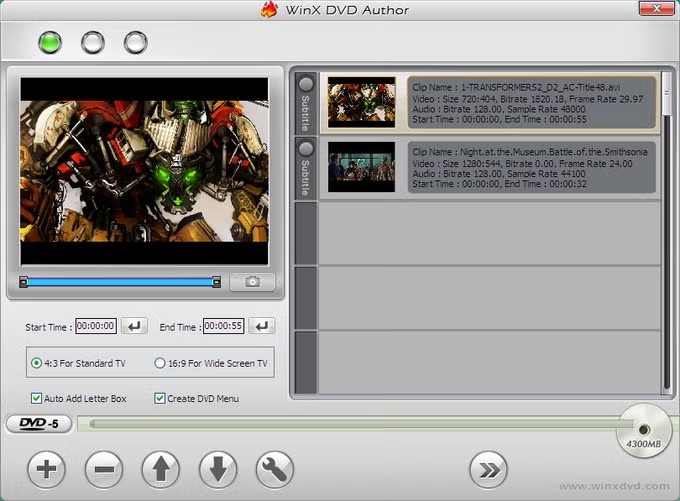
Why we pick it: You can use it to burn YouTube videos to DVDs for free
WinX DVD Author is free DVD burner software with built-in authoring functions, letting you turn common videos into playable discs with menus, chapters, and subtitles. Its output targets a finished disc, a DVD-Video folder, or an ISO image. You can trim and arrange clips, pick a template, place buttons and text, and preview before export.
Since 2011, WinX DVD Author has been free. In addition, my reasons for recommending it include that it supports free DVD burning while also supporting adding menus, and it supports a wide range of video formats. The quality of the produced DVDs is also acceptable. Most important, it includes a built-in module to download YouTube videos, which is convenient if you want to burn YouTube videos to DVD.
There are drawbacks. Compared with the best DVD burner software DVDFab DVD Creator, the menu templates are less refined, the stability is weaker, and the range of supported formats is narrower; in fact, some MP4 videos we've trtied are not supported despite the claimed support for the format. Compared with the free DVD burner software DVDStyler, WinX DVD Author does not allow for highly personalized or creative DVD menus. So although it is among the best free DVD burning software, its position is a bit awkward. Overall, however, its complete feature set fully merits inclusion on the list.
- Built-in downloader to burn YouTube videos.
- Template-based menus, chapters, subtitles.
- Convert common video formats to DVD structure videos.
- Download and burn YouTube videos directly.
- Beginner-friendly interface.
- Free and no watermark.
- Limited freedom for users to create menus
- Few advanced audio options.
- Can become sluggish or freeze when handling bigger video files.
OS: Windows 7/8/XP/2000/Vista/98
Rating: 3.5/5
DeepBurner
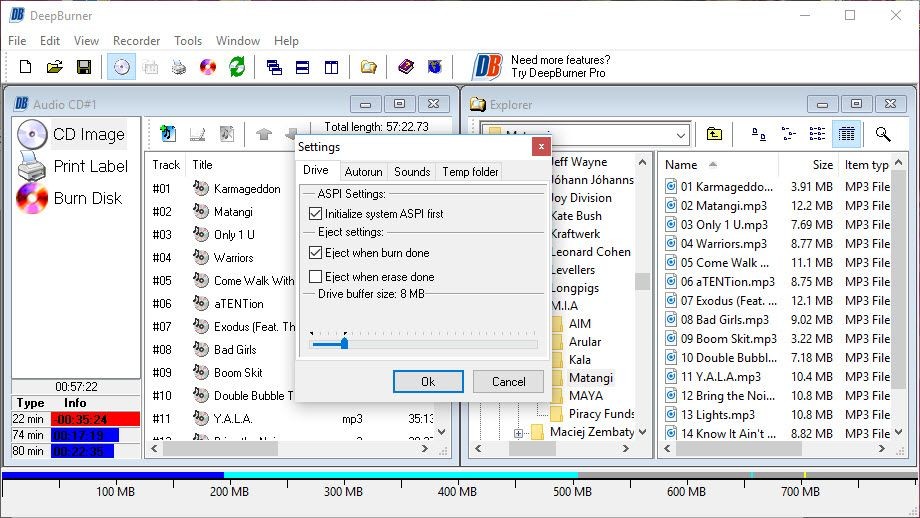
Why we pick it: A portable DVD burner software to create album DVDs
DeepBurner is a lightweight, free DVD burning tool that gets the basics right. It burns data and audio CDs as well as all common DVD types. Each job starts with a simple wizard that asks a few questions and builds the project, so the workflow stays straightforward. The free edition is limited, and the paid Pro edition adds direct disc-to-disc copying and Video-DVD burning projects.
Our favorite touch is its photo album creator. DeepBurner can build personalized photo CD/DVD albums. For power users, it supports command-line burning when you want to script repeatable jobs. There is also a portable free edition that runs from a USB drive without installation.
DeepBurner works well if your focus is simply burning DVDs, CDs, data discs, or ISO images. The free edition does not create menu-based Video-DVDs and does not do DVD-to-DVD copying; those are Pro-only. Because of that split, we treat DeepBurner as a solid burning utility rather than an authoring pick.
- Burn audio CD and movie DVD.
- Burn photo albums into CD Or DVD.
- Burn data CD and DVD.
- Lightweight setup with helpful wizards.
- Handy autorun and artwork tools.
- No Bu-ray support.
- Very old release line and UI.
OS: Windows 7/8/10
Rating: 3/5
Express Burn
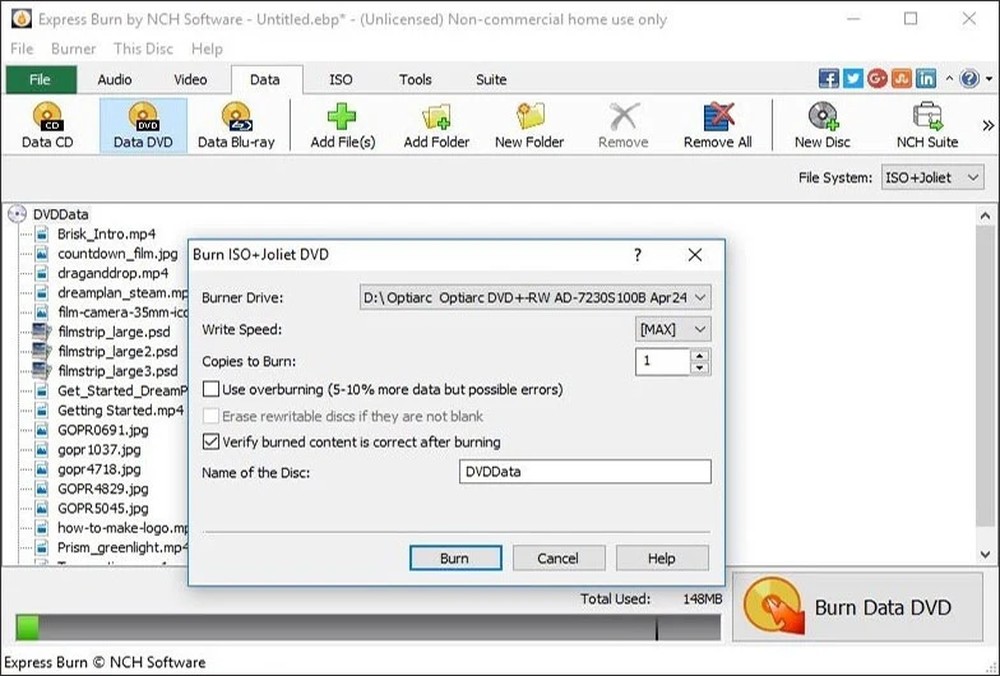
Why we pick it: A free DVD burner allows you to make polished DVDs without complex setup
Express Burn is the best DVD burner software that covers audio, video, and data projects and can also author video DVDs and Blu-ray with menus and chapters. There are more than 20 common menu templates available, but you can also import your own custom images at any time to better match the content of your DVD. It creates and records ISO images, and burns them to other DVDs.
Beyond the primary DVD burning features, it also supports burning to recordable and re-recordable discs (CD-R, CD-RW), supports dual-layer DVD and Blu-ray burning, and can create bootable data discs. The interface is simple to navigate but somewhat dated in appearance.
This DVD burning software is well suited for users who want a visual, template-driven workflow to go from files to authored video discs, as well as basic CD burning. However, note the edition limits: the free edition is CD-only for non-commercial use, while video DVD and Blu-ray authoring plus support for a broader range of disc types require purchasing the paid Plus version.
- Burn CD, DVD and Blu-ray with menus and chapters.
- Create ISO images and burn them to DVDs.
- Over 20 menu templates to use and customize.
- Supports both DVD and Blu-ray.
- Fast burning speed.
- Clean and simple interface.
- Free tier burns CDs only.
- Does not support reordering tracks.
- No preview function.
OS: Windows 10/8/7/8.1/Vista/XP
Rating: 3.4/5
InfraRecorder
Why we pick it: The best DVD burner dedicated to creating data DVD and audio CD
InfraRecorder is a free, open-source DVD burning tool for Windows. It burns data and audio to CDs and DVDs, and its Windows Explorer integration plus a portable edition make it convenient for Windows users. It includes many features found in commercial software, such as dual-layer DVD burning, erasing rewritable discs, and image burning, though image formats are limited to ISO and BIN/CUE. Beyond burning, it can extract audio tracks from CDs as WAV files and create ISO images from existing discs.
Because its development has stopped since the last release 0.53 in 2012, we downloaded InfraRecorder 0.53 from third-party mirrors. The layout follows the style of Windows Explorer, so you can drag and drop files into a CD or DVD structure, then click Burn. In our tests, burning an audio CD and a data DVD succeeded and the discs verified on another PC with no errors. A later attempt to burn a playable DVD-Video from a VIDEO_TS folder did not play on a Sony set-top player. Given that experience, this free Windows DVD burner is better described as a data DVD and CD burner rather than a full DVD authoring software. Even so, it proved very stable for data DVD jobs in our experience. Together with its dual-layer DVD support, we are keeping it in our Best DVD Burner 2026 list.
- Reliable for burning audio CDs and data DVDs.
- Burn and create ISO/BIN/CUE images.
- Erase rewritable discs in multiple ways.
- Lightweight and simple for beginners.
- An all-in-one tool for CD burning and ripping
- No longer officially maintained.
- Some users report the process is too fast and may not accurately verify the disc.
OS: Windows 2000 and higher
Rating: 3.3/5
What is the Best Free DVD Burning Software
We introduced 18 picks for the best free DVD burner software, which together cover almost every free DVD-burning need. If you need a single recommendation, DVDFab DVD Creator offers the best overall value for both beginners and power users. This best DVD burning software for mac and Windows converts 200+ video formats and outputs to a playable DVD, ISO, or folder, with a simple interface and fast, reliable burning accelerated by GPU. Click the official download button below and try it free!

FAQs
Yes, Windows still includes built-in DVD burner software for data discs and ISOs.
- File Explorer / Windows Disc Image Burner can write ISO/IMG images to CD, DVD, or Blu-ray. Right-click an ISO → Burn disc image.
- Windows Media Player (Legacy) can burn audio CDs and data CDs/DVDs from your library. It doesn't author DVD-Video menus.
- Windows DVD Maker (the old menu-authoring tool from Windows 7/Vista) isn't provided on Windows 10/11.
You need DVD-Video authoring (to create the VIDEO_TS structure) before the burn. A simple, free workflow:
- Author with a free tool such as DVDStyler or WinX DVD Author: add videos, menu, chapters, and optional subtitles. Export to ISO or a DVD-Video folder.
- Burn the ISO/folder to disc with your burner of choice (e.g., Windows Disc Image Burner, ImgBurn, CDBurnerXP).
Above is the software solution. If you prefer an all-in-one hardware solution, consider a DVD recorder with harddrive: record your footage to the built-in HDD in real time, trim it, and then burn the selected segments to a DVD directly on the unit.
- Download Microsoft's Media Creation Tool and create a Windows 10 ISO.
- Right-click the ISO → Burn disc image to write it with Windows Disc Image Burner. Use a DVD-R/DVD+R with enough capacity.
Notes: Microsoft now emphasizes USB installers, but DVDs still work on PCs that can boot from optical drives. Back up files before installing.
How to fix common DVD burning errors on Windows 11?
Windows 11 has stricter driver verification and security protocols than Windows 10, which often causes older burning software to fail. Here are the quick fixes for the top 3 issues:
The "Invisible Drive" Error: If your software cannot detect the optical drive, it is likely a registry conflict. Open Device Manager, find DVD/CD-ROM drives, right-click your drive and select Uninstall device. Restart your PC, and Windows 11 will automatically reinstall the correct driver.
Burning Stuck at 99% or Failed: This is often caused by Windows Defender blocking the software from creating temporary files. Go to Windows Security > Virus & threat protection > Manage ransomware protection. Turn off "Controlled folder access" temporarily, or add your burning software (e.g., DVDFab) to the Allowed apps list.
External Drive Disconnects: Windows 11 aggressively saves power on laptops, which can cut power to USB burners mid-process. Go to Edit Power Plan > Change advanced power settings > USB settings, and disable "USB selective suspend".
Yes, but they're rare. Current roundups show that models with integrated optical drives are mostly older designs and can be hard to find; reviewers generally recommend buying a modern laptop plus an external USB DVD drive instead.
- Use "Verify after burn." Many burners read the disc back and compare it to the source files. Turn this on in your burning app.
- Checksum files you placed on the disc. Compute a hash (e.g., Get-FileHash in PowerShell) on source files vs. files read from the disc. Matching hashes confirm integrity.
- Test playback on both a PC software player such as VLC media player and a set-top DVD player if you authored a DVD-Video title.
For data BD burning, several free tools we've introduced, such as CDBurnerXP, can write Blu-ray media; for BD-Video, you also need Blu-ray authoring (a separate step) and UDF 2.50 at burn time. If you are looking for more advanced Blu-ray disc burning, you can use DVDFab Blu-ray Creator.
Of course, there are other options on the market. Brands like Cisdem and Wondershare also offer Blu-ray burning tools. If you'd like to learn more, you can read our review of the best Blu-ray burning software: https://www.dvdfab.cn/resource/blu-ray/top-blu-ray-burning-software.
This depends on the copyright laws in your jurisdiction. In general, personal uses such as burning data as a backup or creating DVDs from your own videos are legal. However, burning DVDs for commercial purposes, especially when it involves copyrighted content without authorization, is absolutely illegal. Therefore, check and follow the specific laws in your country before you burn a disc.
Conclusion
We reviewed 18 of the best and free DVD burner software, each with its own standout features. If you need free, no-frills tools for data backups and ISO burning, classics like ImgBurn or CDBurnerXP remain the most trusted choices in the tech community. However, if you want to burn home videos or movies to disc for playback on a DVD player or to share as a keepsake, we recommend DVDFab DVD Creator to help you manage and enrich your physical disc collection.
 How to Burn a DVD on Mac: 5 Methods That Work on macOS SequoiaBy Diana Smith - Jun 3, 2026
 How to Convert WMV to DVD Free and Easily: Windows / Mac / OnlineBy Wenny Yan - May 27, 2026
 How to Burn DVD with Subtitles: Add SRT, ASS, and Selectable CaptionsBy Diana Smith - May 26, 2026
![How to Convert MTS/M2TS Files to DVD: Top 2 Methods [2026 Guide]](https://r4.dvdfab.cn/upload/resource/how-to-burn-mts-files-to-dvd-in-2017-astQ.jpeg) How to Convert MTS/M2TS Files to DVD: Top 2 Methods [2026 Guide]By Wenny Yan - May 25, 2026
How to Convert MTS/M2TS Files to DVD: Top 2 Methods [2026 Guide]By Wenny Yan - May 25, 2026