How to Make DVDs on Mac and Windows with Easy Steps?
Table of Contents
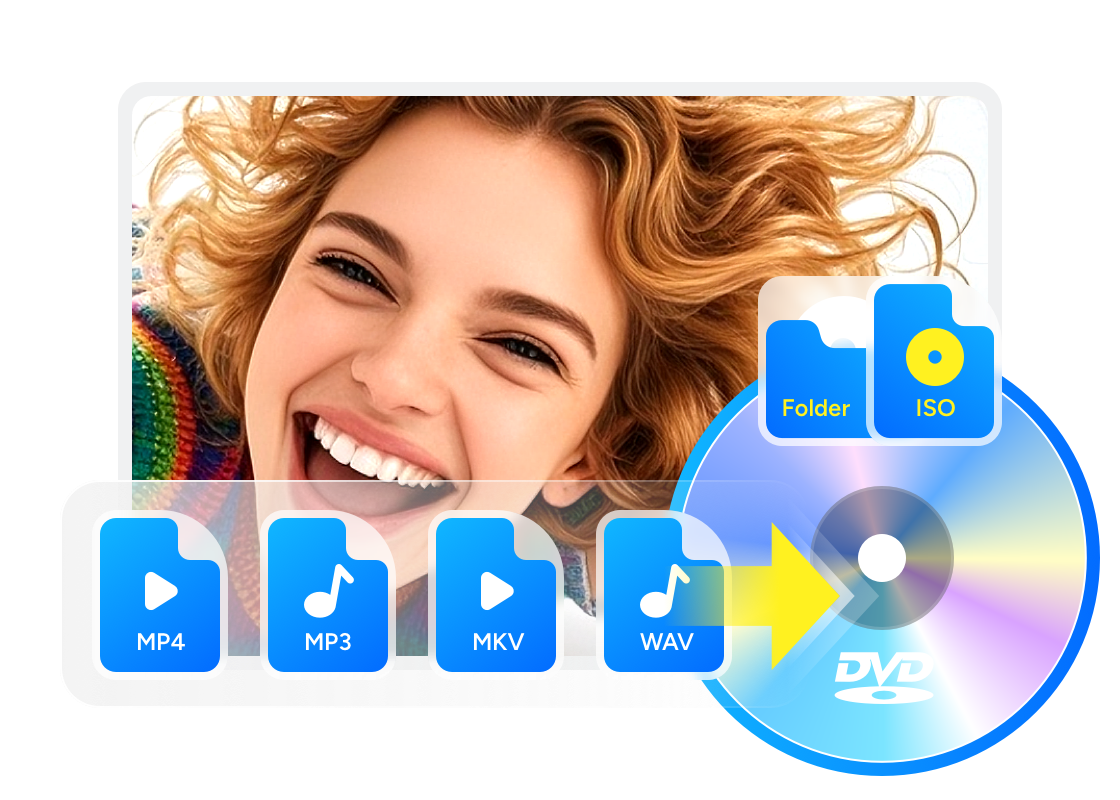
I often find myself needing to burn videos or movies to a DVD, whether it's to preserve special moments, share them with family, or simply watch without an internet connection. While streaming services are convenient, physical DVDs still offer reliable backup options. However, creating a DVD can feel overwhelming without the right tool. In this guide, I will show you how to easily make high-quality DVDs using a simple yet powerful tool, making the process quick and hassle-free.

Before you start creating a DVD, there are a few essential things you'll need to ensure the process goes smoothly.
- • A blank DVD. Depending on your needs, you can choose between a DVD-R (write once) or a DVD-RW (rewritable) disc.
- • Prepare a computer with optical drives, or an external DVD burner.
- • A DVD creation tool, which allows you to easily burn videos to a DVD with customizable menus and settings.
- • Prepare a computer with optical drives, or an external DVD burner.
How to Make a DVD with DVDFab DVD Creator
DVDFab DVD Creator is an excellent tool for anyone looking to make a DVD easily. It allows you to convert a variety of video formats and burn them to high-quality DVDs. With support for GPU acceleration, the software ensures the entire process more efficient. Additionally, DVDFab offers powerful customization features, including the ability to design personalized menus, and edit videos by trimming clips or adjusting the content to suit your preferences.
Step 1: Launch DVDFab software and Load Your Videos
Open DVDFab 13, select the Creator module, and choose "DVD Creator" from the top-left mode switcher. Then, add the videos you want to burn to a DVD or save as digital files. You can also drag and drop the videos into the main window.
Note: DVDFab allows you to burn multiple videos of different formats to one DVD simultaneously and arrange their playback order as desired.

Step 2: Make a DVD Menu and Customize the Output Settings
Customize your DVD by choosing the desired audio tracks and subtitles. Click "Advanced Settings" to adjust the output settings, including selecting DVD-9/5, menu properties, and playback mode.
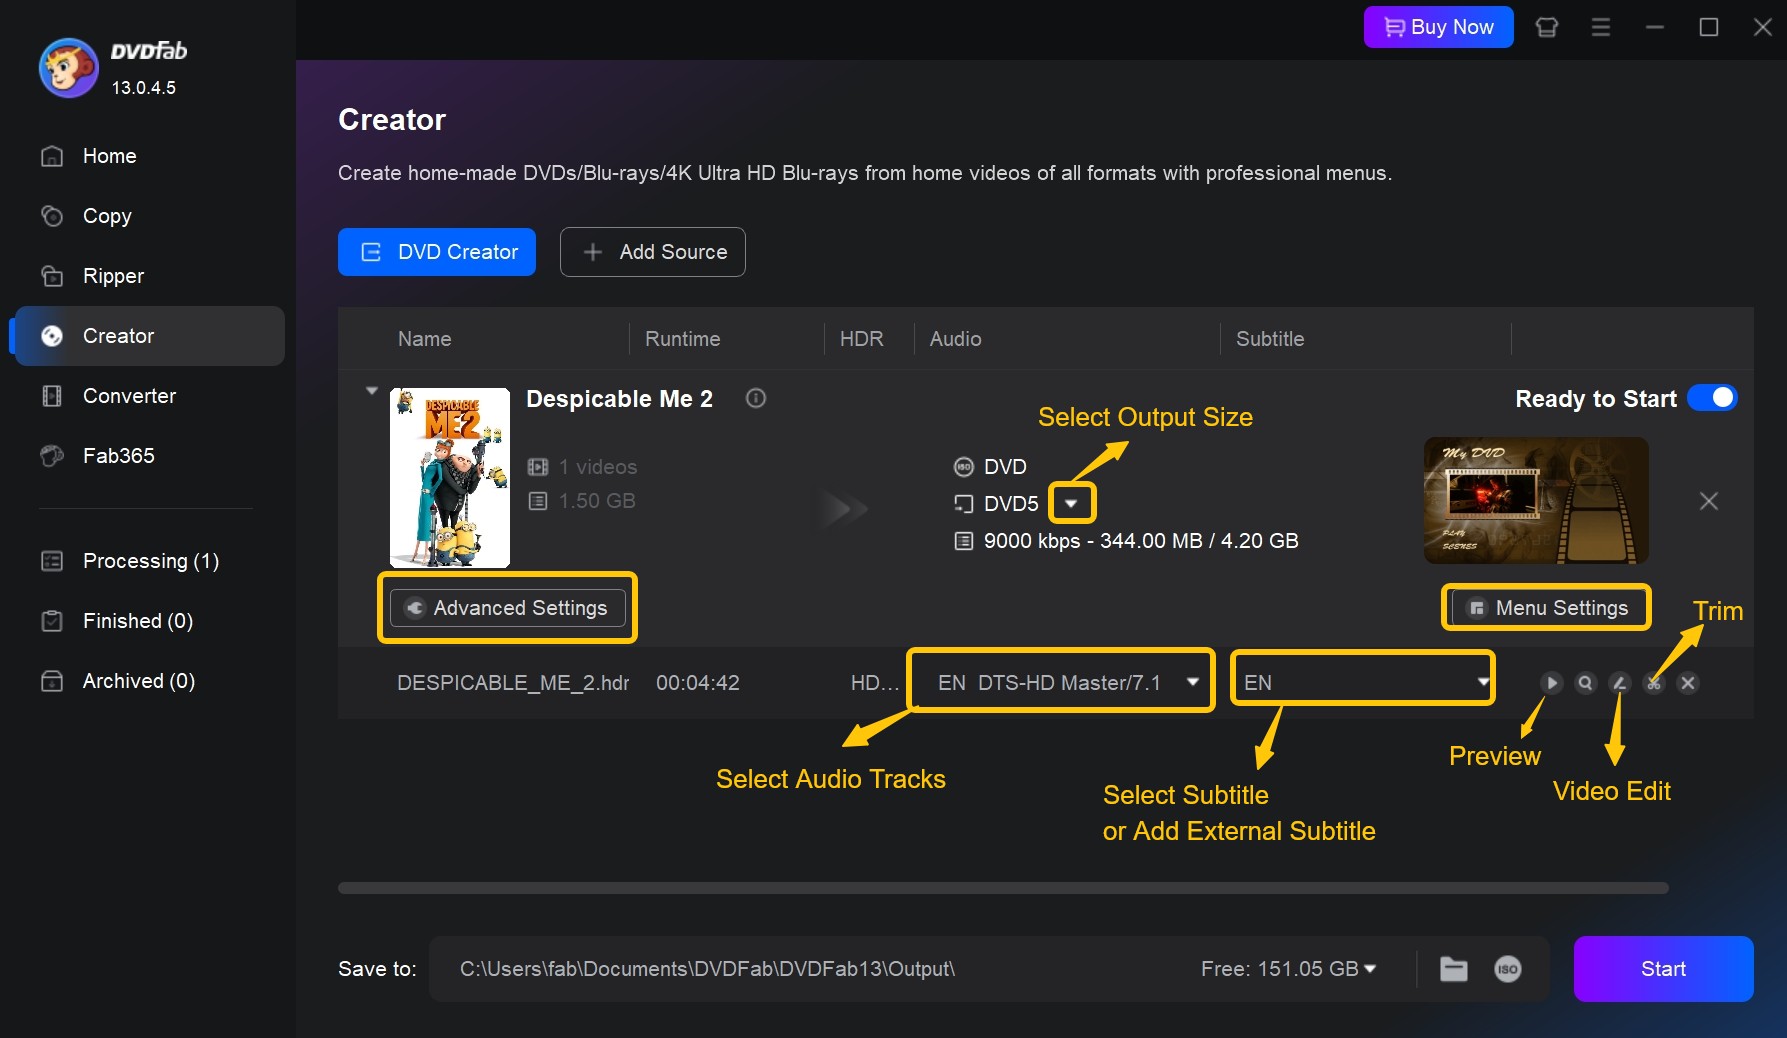
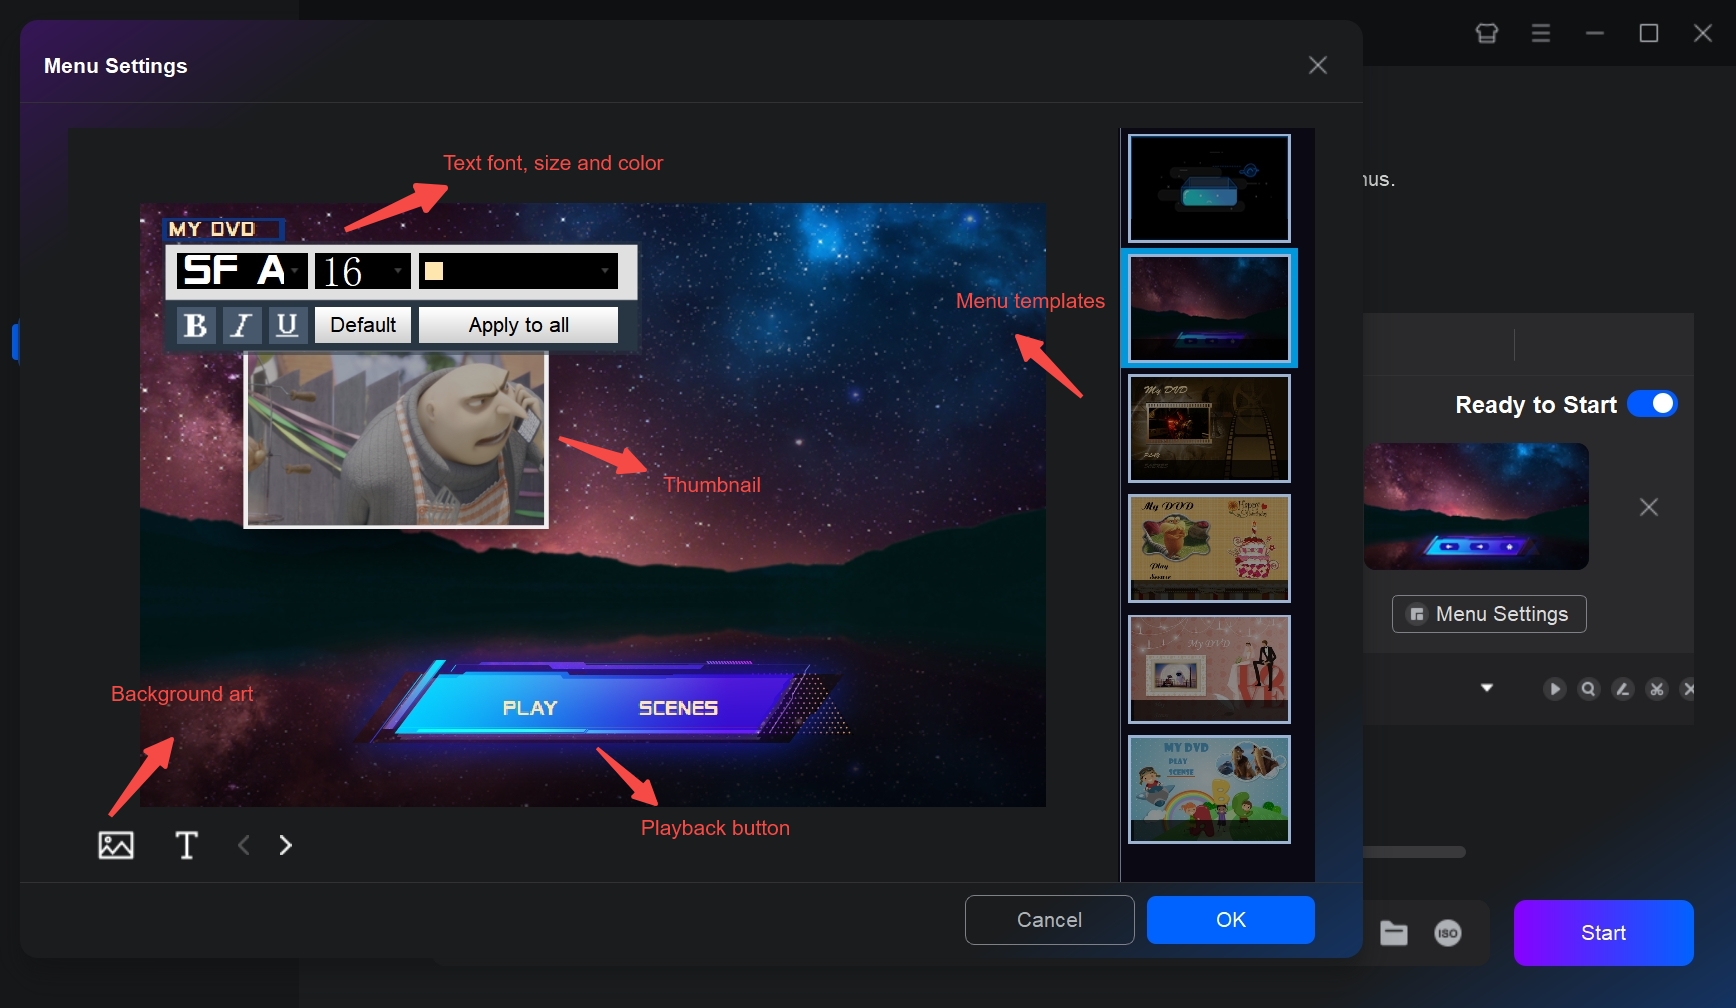
To create DVD menu, click the "Menu Settings" button and choose a template. You can then personalize the menu by editing text (font, size, color), moving elements, and changing the background image.
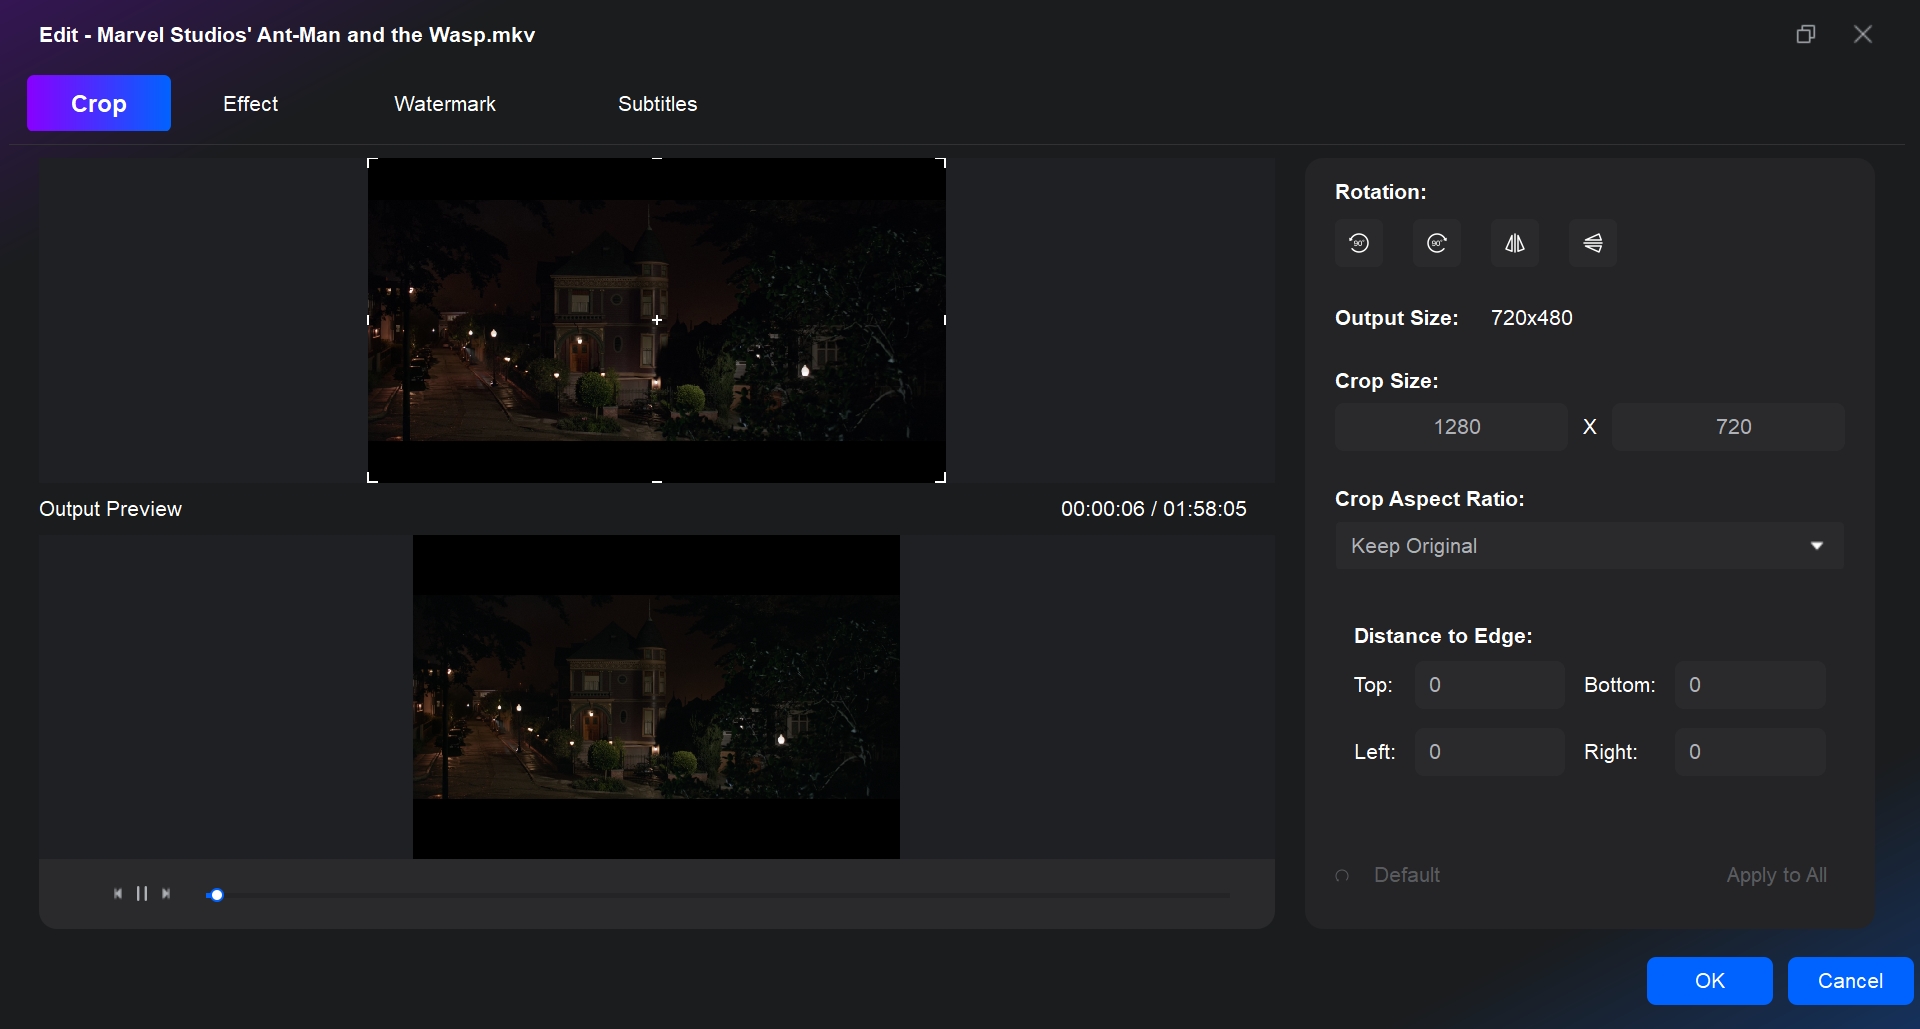
Then, you can use the "Video Edit" and "Trim" features to crop, rotate, flip, or trim your video. It also supports advanced editing features like adjusting brightness, applying filters, and adding watermarks to your video.
Step 3: Select a Directory and Start to Make Your DVD
Move to the bottom of the main interface to select an output directory. If you want to burn to a DVD, choose your optical drive from the drop-down list. To save as a DVD folder, click the Folder icon, or choose the Image icon for an ISO file.
Finally, click the "Start" button to burning videos to DVD. DVDFab's GPU acceleration technology ensures fast burning speeds. In my test, I converted a recorded MTS to DVD, and it only took about 16 minutes. The disc played perfectly on my DVD player.
FAQs
What are the free tools to make your own DVD?
If you're looking to make your own DVD for free, several tools are available that offer essential features for DVD creation.
ImgBurn: A lightweight and free tool for burning DVDs. It supports a variety of video and data formats. While it lacks advanced features like DVD menu creation, it is great for basic burning tasks.
DVD Styler: If you want to create DVDs with custom menus, DVD Styler is a free and open-source tool. It offers the ability to add personalized menus and buttons.
Can I make a DVD using built-in tools on computer?
Yes, you can burn a DVD on Windows 10 or Mac using built-in tool. Here are the detailed steps:
Windows:
- Insert a blank DVD into your computer's DVD burner.
- Open File Explorer and go to the files or folders you want to burn.
- Select the files or folders, right-click, and choose "Burn to disc" or "Send to" > "DVD RW Drive (D:)".
- When the Burn a Disc window appears, choose the disc title and burning speed.
- Click "Next" and follow the on-screen prompts to finish burning.
macOS:
- Insert a blank DVD into your Mac's DVD burner.
- Open Finder and go to the files or folders you want to burn.
- Select the files or folders, right-click, and choose "Burn [X] Items to Disc".
- When the Burn Disc window appears, choose the disc title, burning speed, and format (usually DVD-ROM).
- Click "Burn" and follow the on-screen prompts to complete the process.
Note: The built-in tools have limited features, so you may want third-party software for more DVD authoring options.
Conclusion
Making a DVD on Windows and Mac using DVDFab DVD Creator allows users to easily burn high-quality video discs with customizable menus and settings. The tool supports a wide range of video file formats, ensuring compatibility with most media. By adjusting key parameters such as burn speed and menu templates, users can achieve consistent and reliable results, whether creating DVDs for personal use or professional distribution.
For those who also need to work with ISO files, here's a guide to the Best ISO Burner tools available.
 How to Burn Video_TS to DVD on Windows and Mac: 4 Methods That WorkBy Diana Smith - Jul 1, 2026
 Top 9 Free DVD Burners for Mac in 2026: Tested & ReviewedBy Diana Smith - Jun 23, 2026
![How to Convert MKV to DVD with Stylish Menu? [2026 Updated]](https://r3.dvdfab.cn/upload/resource/mkv-to-dvd-yO3k.jpeg) How to Convert MKV to DVD with Stylish Menu? [2026 Updated]By Wenny Yan - Jun 17, 2026
How to Convert MKV to DVD with Stylish Menu? [2026 Updated]By Wenny Yan - Jun 17, 2026 Convert Video to DVD: 8 Best and Free Video to DVD Converters in 2026By Diana Smith - Jun 15, 2026