How to Convert VHS to DVD: Top 4 Simple Ways [2026 Updated]

Summary: The best way to convert VHS to DVD is to capture the tape as a digital video first, then burn it to DVD with DVD authoring software. A USB capture card with a computer gives the most control, a standalone converter box is easier without a PC, a VCR/DVD recorder works only if you already own reliable legacy hardware, and a professional service is better for many or fragile tapes.
Table of Contents
![How to Convert VHS to DVD: Top 4 Simple Ways [2026 Updated]](https://images.dvdfab.cn/artifact/2026/10/08/4TPrivZs0ZG-JTTHb9vah0LDKDLULpor/feature_cover.jpg)
Aging family VHS tapes can become harder to play as both the media and VCRs deteriorate. To convert VHS to DVD, you need a working playback source, a capture or recording device, and a plan for creating a playable disc without losing the digital master.
Transferring VHS to DVD still makes sense if you want a physical disc for playback, storage, or sharing recordings you have permission to share. The process can be simple or more technical depending on what you already have: a working VCR, a capture device, a DVD recorder, a computer, or only the tapes themselves. In this guide, I will explain the main ways to convert VHS to DVD, what each method requires, and how to burn a DVD after your VHS tape has already been captured as a digital video file.
Quick Answer: Best Ways to Convert VHS to DVD
The right way to convert VHS to DVD depends on what equipment you have and how much control you want over the final disc. If you want a flexible workflow, start by capturing the VHS tape to a digital video file with a USB capture card, then edit, back up, and burn that file to DVD with DVD authoring software.
| Method | Best For | What You Need | Computer Required | Output |
|---|---|---|---|---|
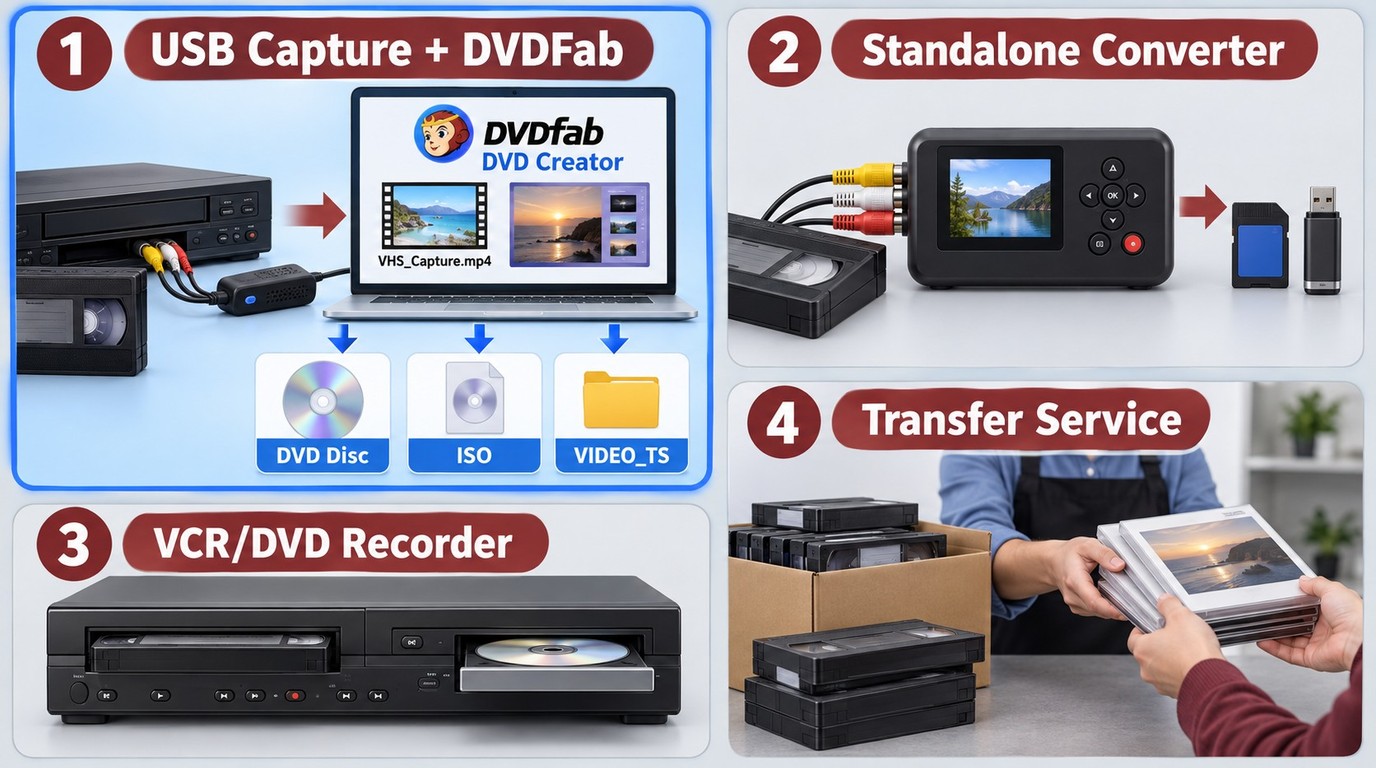
| USB capture card + computer + DVDFab DVD Creator | Editing, backups, and DVD menus | VCR, RCA or S-Video cable, USB capture card, computer, DVD authoring software | Yes | Digital video file, DVD disc, ISO, DVD folder |
| Standalone VHS-to-digital converter box | Recording without a computer | VCR, RCA or S-Video cable, standalone converter box, SD card or USB drive | No during recording | Digital file on SD card or USB drive |
| VCR/DVD recorder combo or separate DVD recorder | A direct physical DVD | VCR/DVD recorder combo, or VCR + DVD recorder + RCA/S-Video cables + blank DVD | No | Physical DVD |
| Professional VHS transfer service | Many tapes or no working VCR | Your VHS tapes and a selected transfer service | No | DVD, USB drive, cloud download, or digital files |
What You Need Before Transferring VHS to DVD
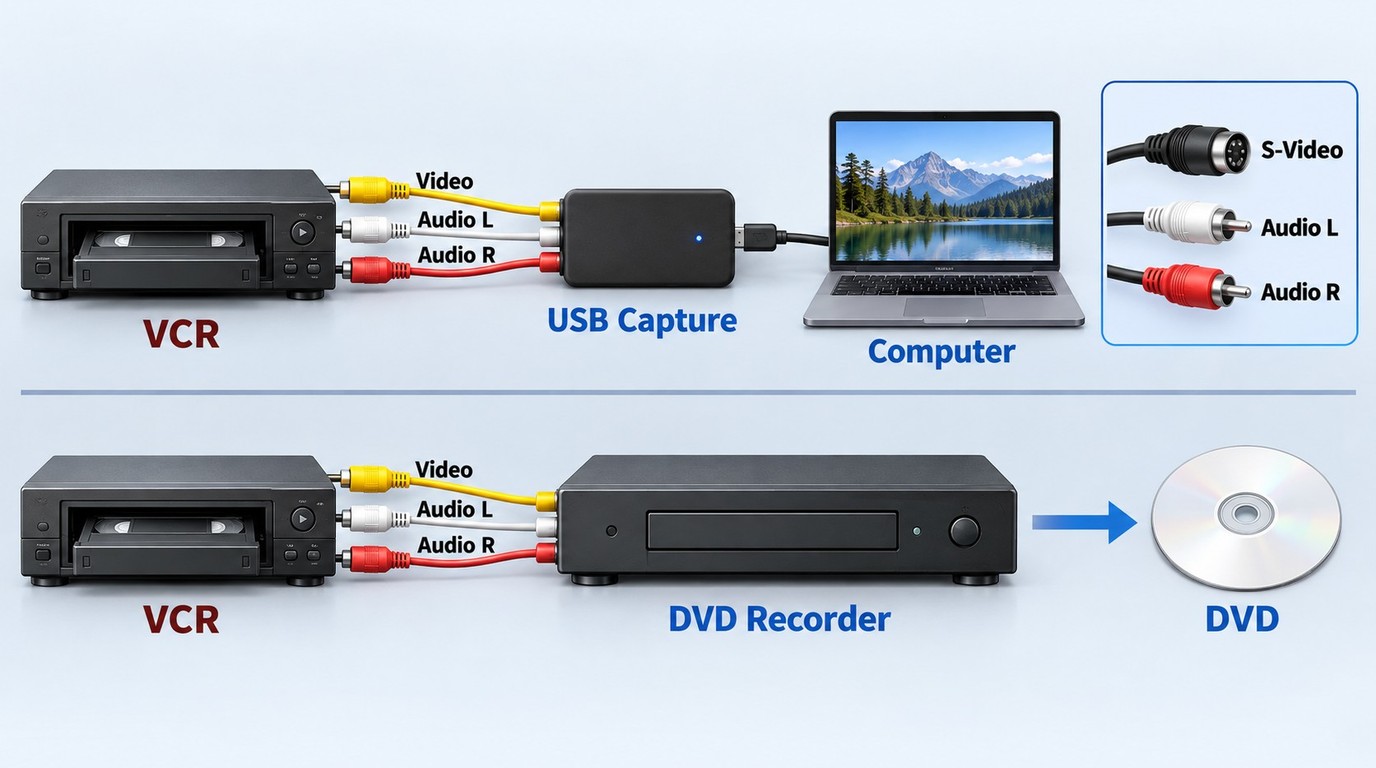
Before starting the VHS to DVD transfer, check your equipment and decide whether you want to create a digital file first or record directly to a DVD. This step prevents the most common problems, such as no signal, no audio, or a DVD that will not play on other players.
Basic Equipment Checklist
- VHS tape: Check whether the tape is physically damaged, moldy, or badly warped before playing it.
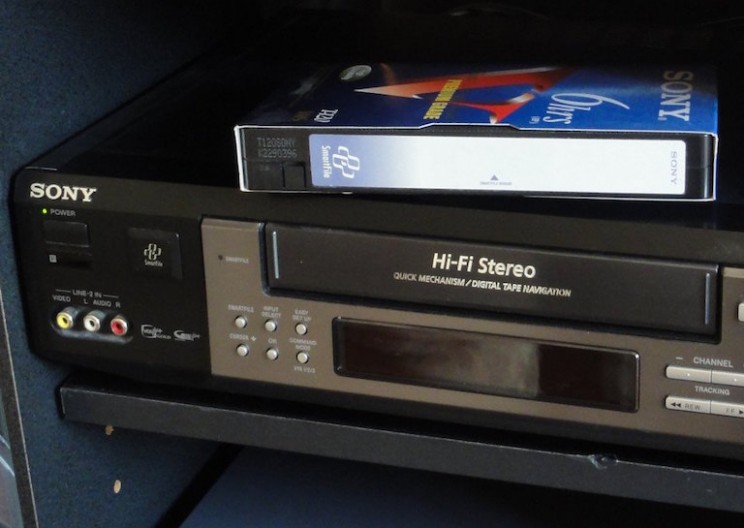
- Working VCR: You need a VCR to play the tape. Test it with a short tape before transferring important videos.
- RCA or S-Video cable: RCA composite cables are common. S-Video may give a cleaner picture if both the VCR and capture device support it.
- Capture device or DVD recorder: Use a USB capture card, standalone converter box, or DVD recorder depending on the method.
- Computer: Required for the USB capture card method and for burning captured video files to DVD.
- Blank DVD: Use a reliable DVD-R or DVD+R disc if you want a physical DVD.
- DVD authoring software: Needed when you capture the VHS tape as a digital video and want to create a playable DVD.
Connection Types: RCA, S-Video, and USB Capture Card
Most VHS players use RCA composite output: yellow for video, red and white for audio. Some better VCRs also provide S-Video, which can reduce color bleeding and preserve a cleaner image. A USB capture card takes the analog signal from the VCR and sends it to a computer as a digital video feed.
Do not confuse a USB capture card with a DVD recorder. A USB capture card connects the VCR to a computer. A DVD recorder connects directly to the VCR and records the tape to a blank DVD without creating a computer video file first.
An AV-to-HDMI adapter alone is not a computer capture input. For computer recording, use a capture device that exposes the video and audio signal to the recording software. Before buying or connecting an S-Video setup, check the device manual for signal direction and confirm that the VCR supports playback through that port. S-Video carries video only, so connect the red and white RCA cables separately for audio.
Should You Convert VHS to Digital First or DVD Directly?
Converting VHS to digital first is better if you want to edit the video, remove unwanted parts, keep an MP4 backup, upload the file to cloud storage, or burn more than one DVD later. Direct DVD recording is simpler, but it gives you less control and usually requires older hardware.
For most home users, the digital-first method is more practical today. You can keep the captured file as a backup and still create a DVD disc, ISO file, or DVD folder afterward. If your main goal is long-term file storage instead of disc playback, a VHS to digital workflow may be a better first step before DVD authoring.
How to Convert VHS to DVD: 4 Practical Methods
Method 1: Use a USB Capture Card and DVD Creator
The USB capture card and DVDFab DVD Creator method turns an analog VHS tape into a DVD through a digital middle step. The VCR plays the tape, the capture card sends the analog signal to a computer, and capture software saves the recording as a video file. After that, DVDFab DVD Creator can author the captured file as a playable DVD-Video disc, ISO image, or VIDEO_TS folder.
A computer-based VHS to DVD workflow gives you more control than direct DVD recording. You can trim unwanted parts, keep an MP4 backup, rename files by tape date, add a DVD menu, or burn more than one DVD for personal use. The trade-off is setup time: you need a working VCR, a USB capture card, a computer, capture software, and enough storage for the recorded video.
Important: DVDFab DVD Creator does not capture analog VHS tapes directly from a VCR. First, use a USB capture card or analog-to-digital converter to record the VHS video as a digital file. Then use DVDFab DVD Creator to burn that captured file to a DVD disc, ISO file, or DVD folder.
Copying or redistributing recordings without authorization may be illegal, so use this process only for content you own or have permission to copy, and follow applicable law and relevant platform terms.
How to convert VHS to DVD with a USB capture card
Step 1: Connect the VCR to a USB capture card. Use the yellow RCA cable for video and the red/white RCA cables for audio. If both devices support S-Video, use S-Video for video and RCA red/white for audio.
Step 2: Connect the capture card to your computer. Install the driver and capture software if your device requires it. Open the capture software and select the correct video and audio input.
Step 3: Insert the VHS tape and play a short test clip. Check whether the picture, sound, and aspect ratio look correct. Most VHS tapes should be captured in 4:3. Play the sample from beginning to end and check that the sound stays synchronized with the picture.
Step 4: Record the full tape and save the file to your computer. MP4 or MPEG is usually easier to work with than a raw capture file. Keep this captured file as a separate backup, and check audio synchronization near both the beginning and end before authoring the DVD.
Step 5: Open DVD authoring software such as DVDFab DVD Creator and burn the captured VHS video to a playable DVD, ISO file, or DVD folder.
Method 2: Use a Standalone VHS-to-Digital Converter Box
A standalone VHS-to-digital converter box records the VCR signal to an SD card or USB flash drive, so you do not need a computer during capture. The VCR connects to the box through RCA or S-Video cables, and the box saves the tape as a digital video file while the tape plays.
Standalone converter boxes suit users who want to digitize tapes first and decide what to do with the files later. The saved video can stay on a USB drive, move to a computer, or become a DVD through DVD authoring software. Compared with a computer-based capture setup, most standalone boxes offer fewer controls for editing, menus, file naming, and quality checks.
How to use a standalone VHS-to-digital converter box
Step 1: Connect the VCR to the standalone converter box with RCA or S-Video cables.
Step 2: Insert an SD card or USB flash drive into the converter box. Make sure it has enough storage for the full tape.
Step 3: Play the VHS tape and press Record on the converter box. Some models include a small screen, so you can monitor the picture while recording.
Step 4: Stop the recording when the tape ends. Check the saved video file before putting the VHS tape away.
Step 5: Move the saved video to a computer if you want to edit it or burn it to DVD.
Method 3: Use a VCR/DVD Recorder Combo or Separate DVD Recorder
A VCR/DVD recorder combo or a separate VCR plus DVD recorder is the most direct method if you want a physical DVD and already own the hardware. The equipment must support DVD recording and VHS-to-DVD dubbing; a player-only VHS/DVD combo cannot create the disc. It records the VHS playback to a blank DVD in real time, so a two-hour tape usually takes about two hours to transfer.
This is now a legacy hardware method. New VCR/DVD recorder combo units are hard to find, and many users rely on used or refurbished devices. If you already have a working unit, this method is simple. If you need to buy one now, check the condition carefully before using it for valuable tapes. Confirm the manual's signal direction, supported blank media, DVD recording mode, VHS-to-DVD dubbing function, remote control, and finalization menu. Count the recorder, remote, cables, blank media, and real-time playback when comparing the total setup cost with other methods. Besides, the finished disc often must be finalized before it can play on other DVD players.
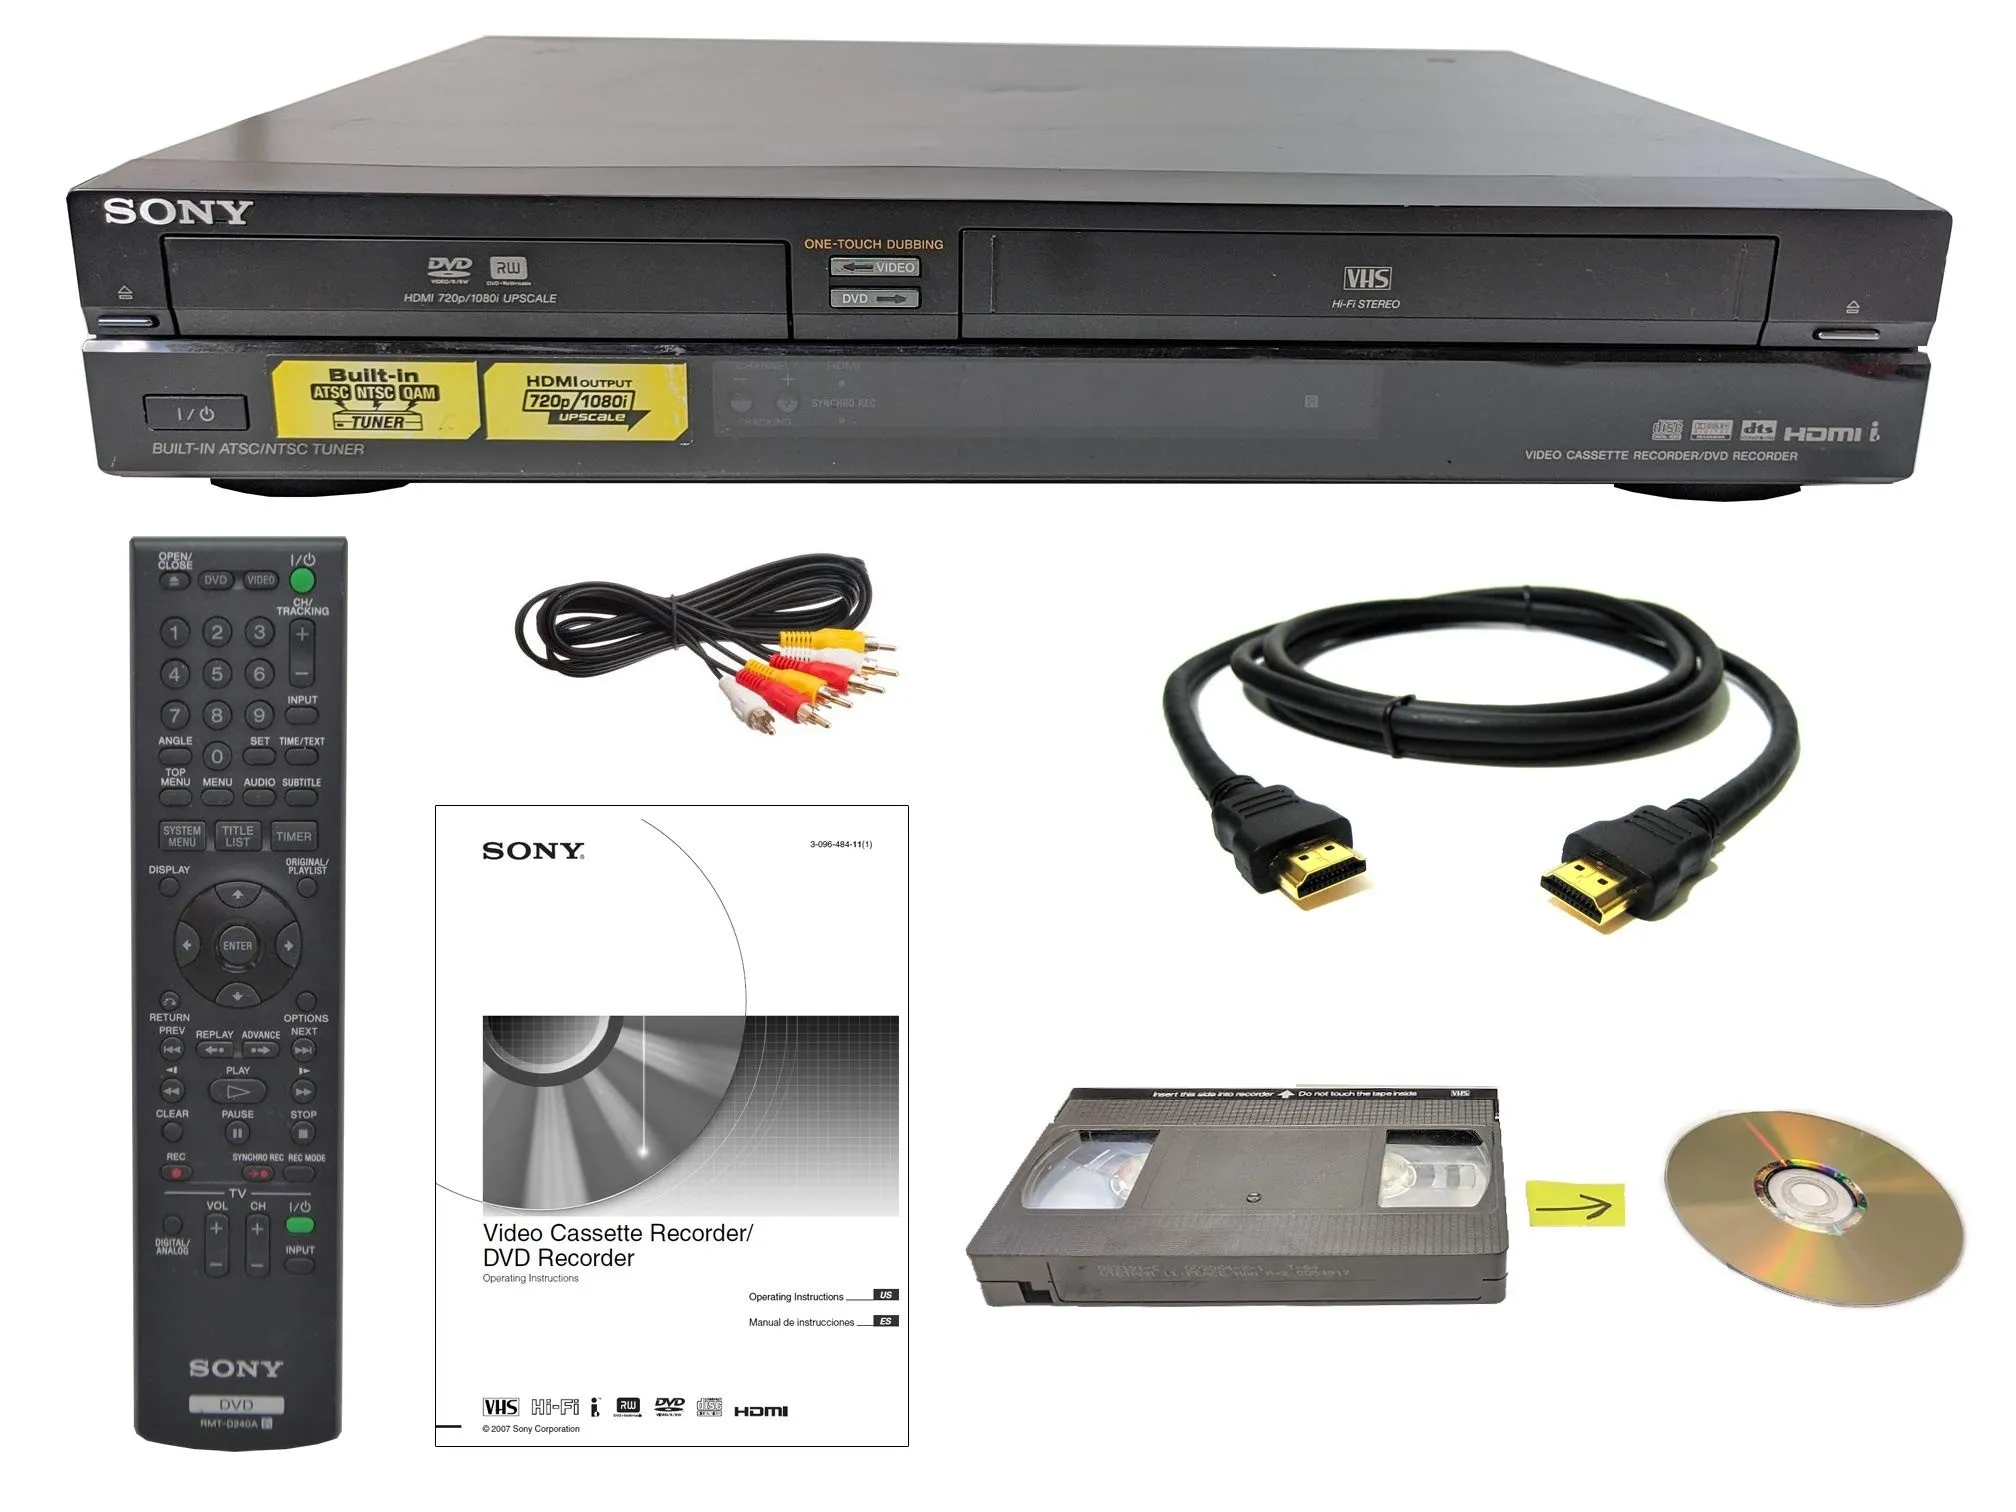
How to transfer VHS to DVD with a DVD recorder
Step 1: If you use separate devices, connect the VCR to the DVD recorder with RCA or S-Video cables. If you use a combo unit, insert the VHS tape and a blank recordable DVD into the same device.
Step 2: Select the correct input on the DVD recorder. Play the VHS tape for a few seconds to confirm the video and audio signal.
Step 3: Press Play on the VCR and Record on the DVD recorder. Let the tape play in real time while the DVD recorder records it.
Step 4: Stop recording when the tape ends or when the part you want has been recorded.
Step 5: Finalize the DVD in the DVD recorder menu. This step is important because many recorded DVDs will not play on other DVD players until they are finalized.
Method 4: Use a Professional VHS Transfer Service
A professional VHS transfer service handles the capture process for you. You send or drop off the tapes, and the provider returns the videos as DVDs, USB files, cloud downloads, or other digital formats depending on the service package.
Professional transfer services are better for fragile tapes, large collections, or users who no longer have a working VCR. A service can also reduce setup mistakes such as no signal, missing audio, or failed DVD recording. Cost is the main limitation, so check the price per tape, turnaround time, accepted formats, copyright policy, and whether tape cleaning or repair is included before ordering. If your collection also includes 8mm film or Hi8 videotapes, confirm that the provider supports the specific format; for film, compare its 8mm film transfer options before placing an order.
Capture, formerly YesVideo, fulfills Walmart in-store and mail-in videotape transfers. A digital download is included, with optional DVD or USB delivery. Processing takes approximately three weeks from receipt. The in-store route provides 60 days of online access, so save the download within that window.
Capture direct typically processes videotape orders within 2–3 weeks after receipt. Walgreens also accepts videotapes and delivers the transferred recording on DVD; its USB transfer offer applies to photos rather than videotapes.
| Provider | Videotape starting price |
|---|---|
| Capture direct | $19.99 |
| Walgreens | $34.99 |
DVDFab DVD Creator: Burn Captured VHS Videos with Menus
DVDFab DVD Creator works well after the VHS tape has already been captured as a digital video file, though it does not read VHS tapes directly from a VCR. DVDFab DVD Creator can take the captured video file and author it as a playable DVD-Video disc, ISO image, or VIDEO_TS folder. Standard DVD-Video authoring normally re-encodes the captured video. It also lets you add a DVD menu, adjust subtitles, and edit recordings that you have permission to store or share.
Step 1: Load the Captured VHS Video
Launch DVDFab and choose Creator. Select DVD Creator, then add the VHS video file that has already been captured and saved on your computer. You can load several family recordings, trim unwanted footage from the beginning or end, arrange the clips in playback order, and label them by event or date. Insert a blank DVD if you want to burn a physical disc.
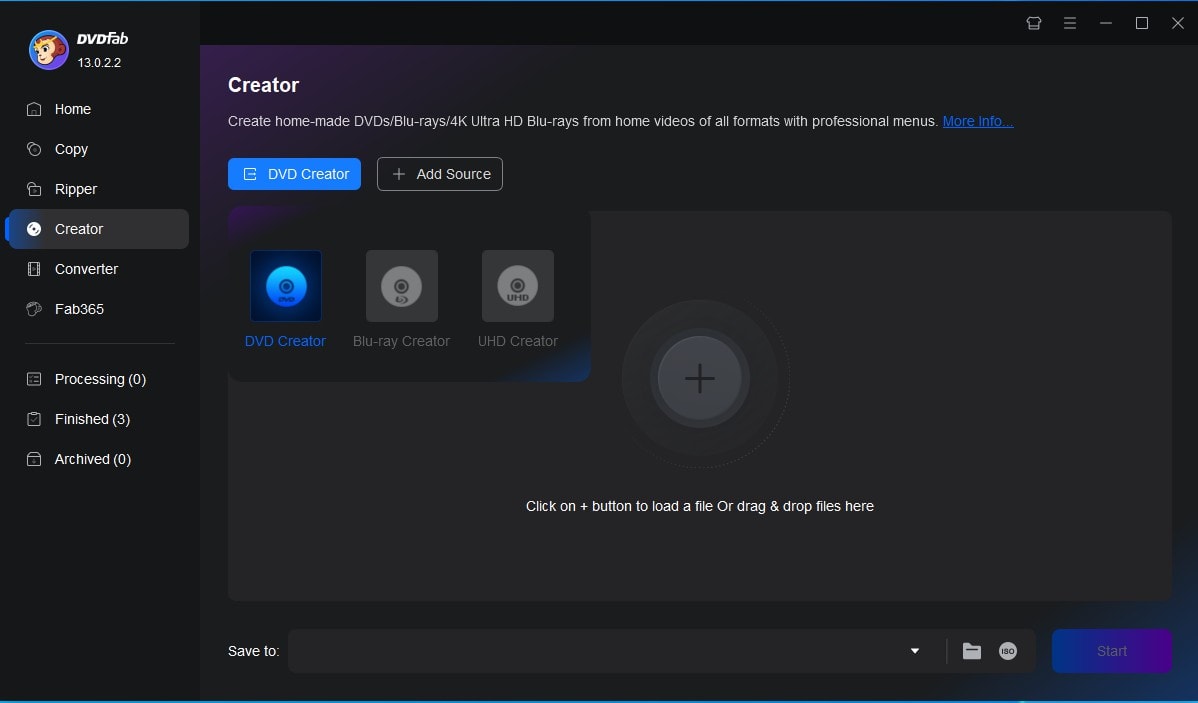
Step 2: Choose DVD-5, DVD-9, Folder, ISO, or Disc Output
Open Advanced Settings and choose the output size and quality. Select DVD-5 or DVD-9 based on your blank disc and video length. The captured video remains your editable source file, while DVD-Video creates a disc structure for compatible DVD players. An ISO image retains the authored disc image for later copies, and a VIDEO_TS folder stores the authored DVD files without immediately burning a disc. Standard DVD-Video authoring normally re-encodes the captured video to meet DVD specifications.
Step 3: Add a DVD Menu, Audio, and Subtitle Settings
Use Menu Settings to choose a DVD menu template and adjust the background, title, buttons, and navigation. For example, label a family recording by its event and date, add chapter navigation for separate clips or moments, and use menu text and thumbnails to make each section easy to identify. Preview every menu button before burning. If the captured video includes subtitles or multiple audio tracks, check the settings before burning. You can also edit the video with the built-in Video Editor.
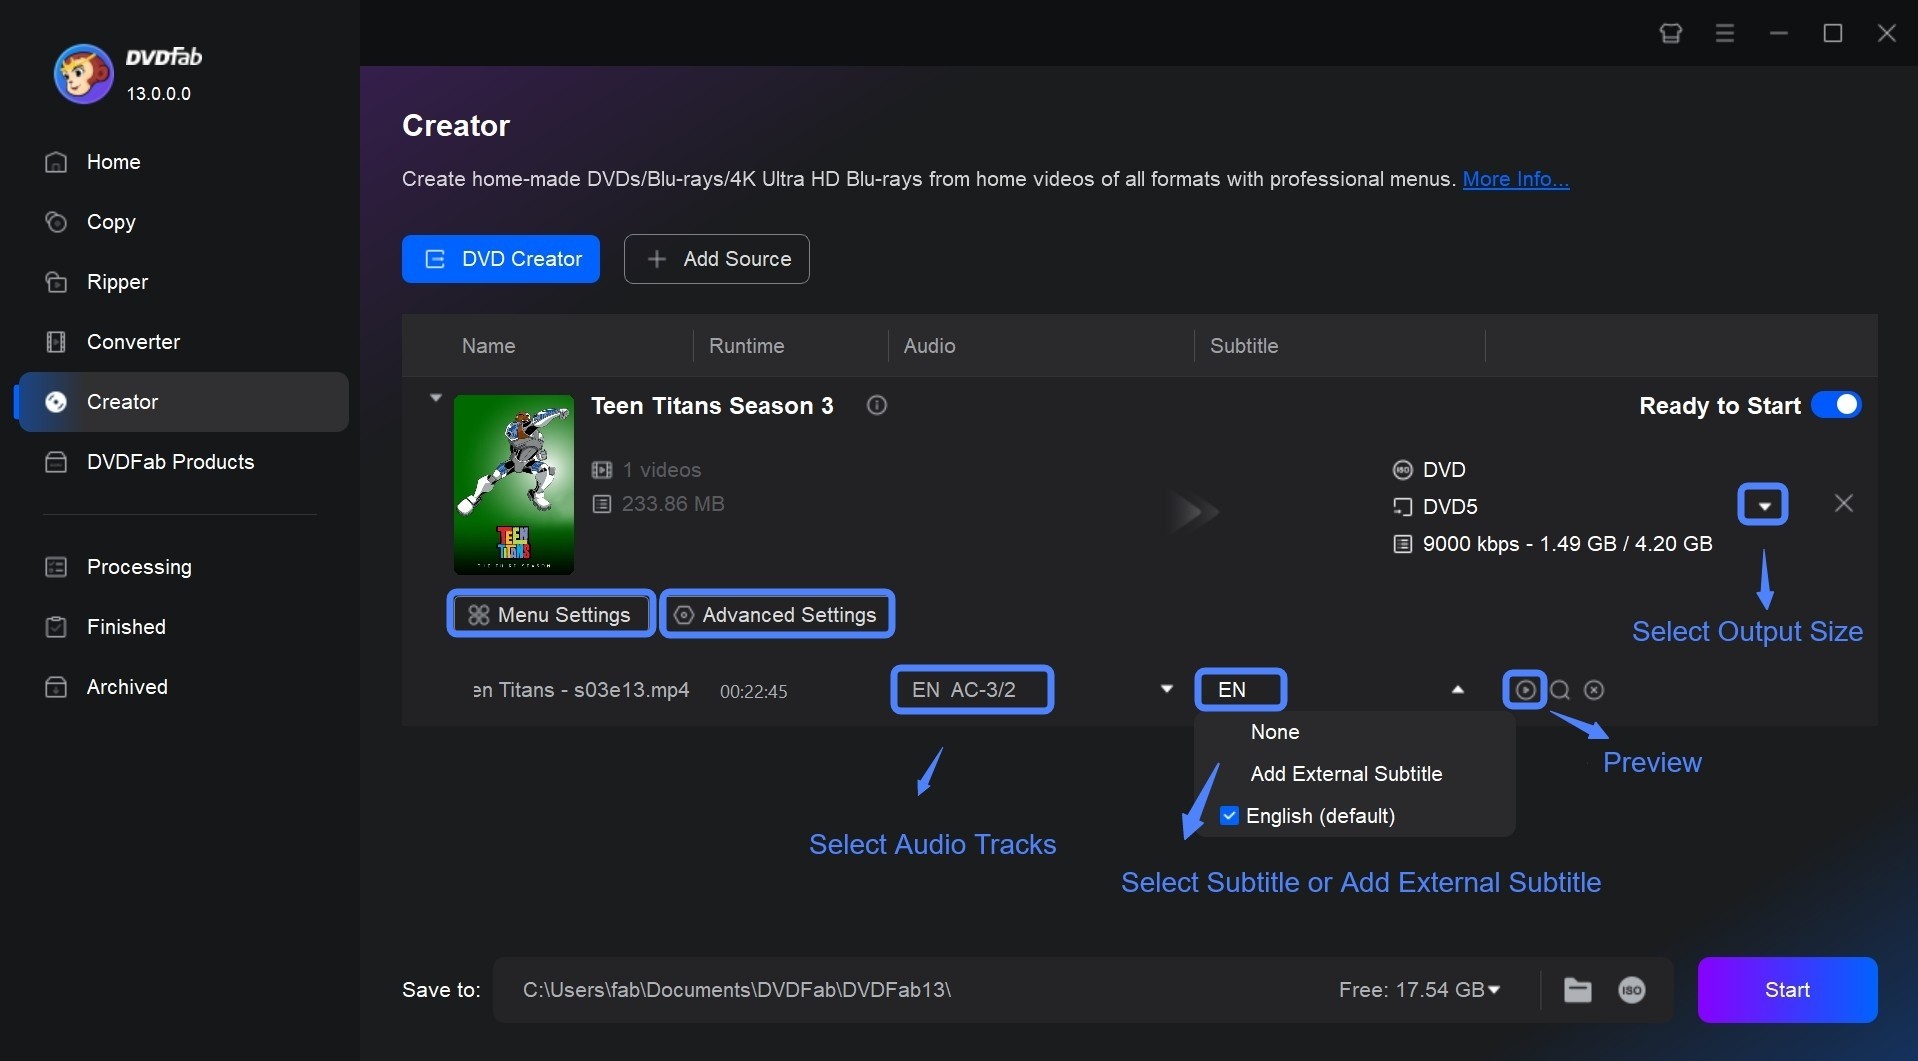
Step 4: Preview and Start Burning the Captured VHS Video to DVD
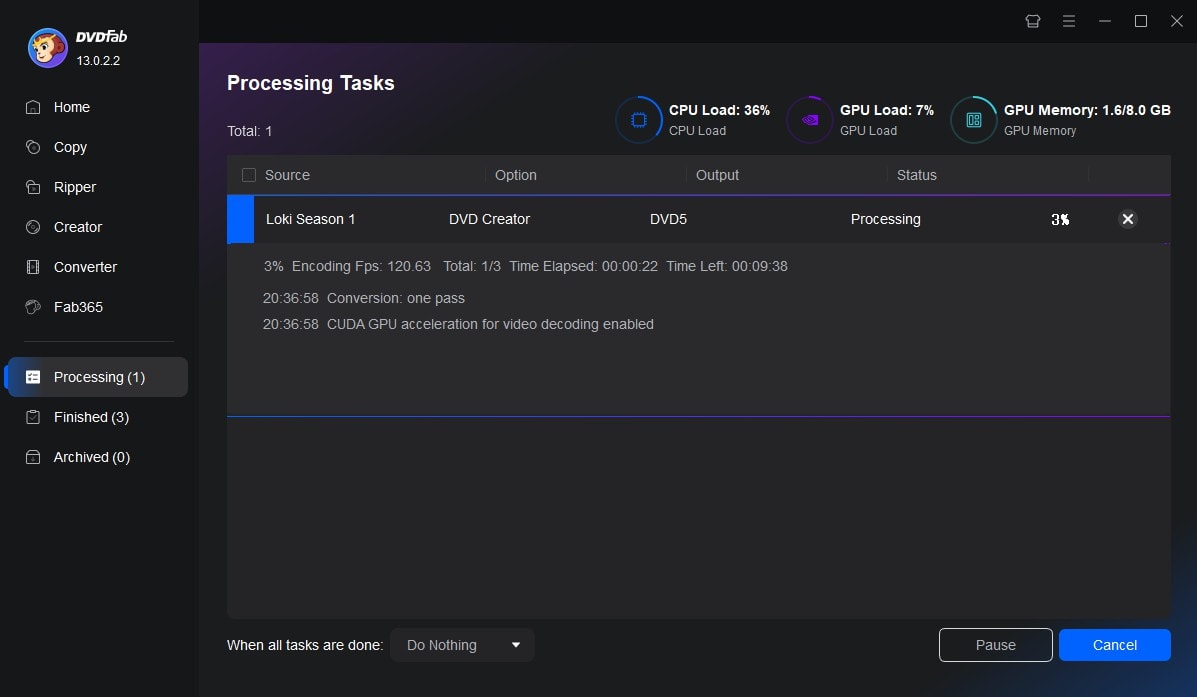
Preview the DVD structure before burning. After confirming the menu, video, audio, and output path, click Start to create the DVD disc, ISO file, or folder.
After creation, check the menu navigation, audio synchronization at the beginning and end, and playback on the DVD player you plan to use. If physical burning fails, create an ISO file or DVD folder first to separate an authoring problem from a disc, drive, or media compatibility issue.
FAQs
What is the easiest way to convert VHS to DVD?
The easiest method is a professional VHS transfer service if you do not want to handle equipment. For DIY users, a standalone VHS-to-digital converter box is a simple way to capture without a computer, but creating a DVD from that file still requires an authoring and burning step. If you want editing control, use a USB capture card with a computer and then burn the captured file to DVD.
Can I convert VHS to DVD without a computer?
Yes. You can use a VCR/DVD recorder combo that supports DVD recording and VHS-to-DVD dubbing, or connect a VCR to a separate DVD recorder. A standalone converter box can record without a computer, but it usually creates a digital file on an SD card or USB drive rather than a DVD.
Do I need to finalize a recorded DVD?
Yes, in most DVD recorder workflows you should finalize the DVD after recording. Finalizing writes the disc information needed for playback on other DVD players. Without finalizing, the disc may only play on the recorder that created it.
Should I convert VHS to DVD or MP4?
MP4 is better for long-term digital backup, editing, cloud storage, and playback on phones, TVs, or media servers. DVD is better if you want a physical disc that works in a DVD player. Many users capture VHS to MP4 first, then burn a DVD copy if needed.
Why does my captured VHS video have no sound?
No sound usually means the red and white RCA audio cables are not connected correctly, the capture software selected the wrong audio input, or the audio track was muted. S-Video carries video only, so it still requires separate red and white RCA audio cables. Reconnect the audio cables, choose the capture-card audio input, and record and play a short test clip with sound.
Can I still buy a new VCR/DVD recorder combo?
New VCR/DVD recorder combo units are very hard to find because VCR hardware is no longer widely manufactured. Most available units are used, refurbished, or old stock. Check the device condition, remote control, DVD recording and VHS-to-DVD dubbing support, compatible blank media, and disc finalization menu before relying on it for important tapes.
How long does it take to transfer VHS to DVD?
VHS transfer usually happens in real time. A two-hour tape takes about two hours to capture or record, plus extra time for setup, testing, DVD authoring, burning, and finalizing the disc.
Can Walgreens convert VHS to DVD, and what does it cost?
Yes. Walgreens offers videotape transfers starting at $34.99 and delivers transferred videotapes on DVD. Its USB transfer option applies to photos, not VHS tapes.
Conclusion
Converting VHS to DVD is really about protecting recordings that may not have another copy. The best method depends on the tape condition, the playback device you still have, and how you want to watch the video later. Before recording a full tape, play a short section first to check the image, audio, and signal stability. If you capture the VHS tape as a digital file, keep that file as a backup before burning it to DVD. If you record directly to a disc, choose compatible blank media and finalize the DVD after recording. For valuable family tapes, the safest choice is the one that reduces tape handling and leaves you with a copy that can still be played years from now.

![5 Top AVI to DVD Converters for Windows and Mac [2026]](https://images.dvdfab.cn/artifact/2026/10/19/HsCx2t8W3VyD6wHfogzkhte4XqgpBqdz/feature_cover.jpg) 5 Top AVI to DVD Converters for Windows and Mac [2026]By Diana Smith - Oct 20, 2026
5 Top AVI to DVD Converters for Windows and Mac [2026]By Diana Smith - Oct 20, 2026 How to Burn MP3 to DVD: Best Audio DVD Creators Compared (2026)By Wenny Yan - Oct 15, 2026
 How to Burn Video_TS to DVD on Windows and Mac: 4 Methods That WorkBy Diana Smith - Oct 15, 2026
![Convert Video to DVD: 5 Free & Paid Video to DVD Converters [2026]](https://images.dvdfab.cn/media/convert_vidoe_to_dvd_dza0f3.png/public) Convert Video to DVD: 5 Free & Paid Video to DVD Converters [2026]By Diana Smith - Oct 14, 2026
Convert Video to DVD: 5 Free & Paid Video to DVD Converters [2026]By Diana Smith - Oct 14, 2026