Offer the most complete All-In-One DVD/Blu-ray/4K UHD Solution for you.
Topics
If technology/DVD/Video have you confused, this is the place to be. We'll do our best to break down complex topics, and convey them in a way everyone can understand. Click here to get the best answer to your questions and know the most recommended products/ways.
JacobApr 7, 2025
How to Watch Free Movies on Apple TV Online & Offline [2025]
Here are just a few of the most popular options for you to subscribe to the Apple TV Plus service, which already has more than 40 million subscribers. This article also offers a replacement method to watch free movies on Apple TV offline.
MarciaFeb 13, 2025
Sidify Music Converter Review: Everything About This Software
This article gives a complete review of Sidify, including its popular products, the usage of them, pros and cons of them, and more. Besides, this article also compares MusicFab with Sidify to help you pick out the better one.
JacobSep 25, 2024
What Channel is CW on Spectrum? 2025 New
The CW features a number of highly popular shows, which you can watch through Spectrum. However, the channel number for CW may vary depending on your location. In this guide, we will provide you with information on the CW channel available on Spectrum.
JacobSep 25, 2024
What Channel is the CW on Dish? How to Watch? 2025
If you're looking to watch classic shows on a daily basis, CW is a channel to tune into your dish. The network offers a variety of shows, primarily dramas, that are geared towards viewers aged 18 to 35.
JacobSep 25, 2024
What Channel Is CBS On DIRECTV? [2025 Update]
Depending on your viewing location, the CBS channel number may vary. I hope you can find the CBS channel number for your area on this page.
JacobSep 23, 2024
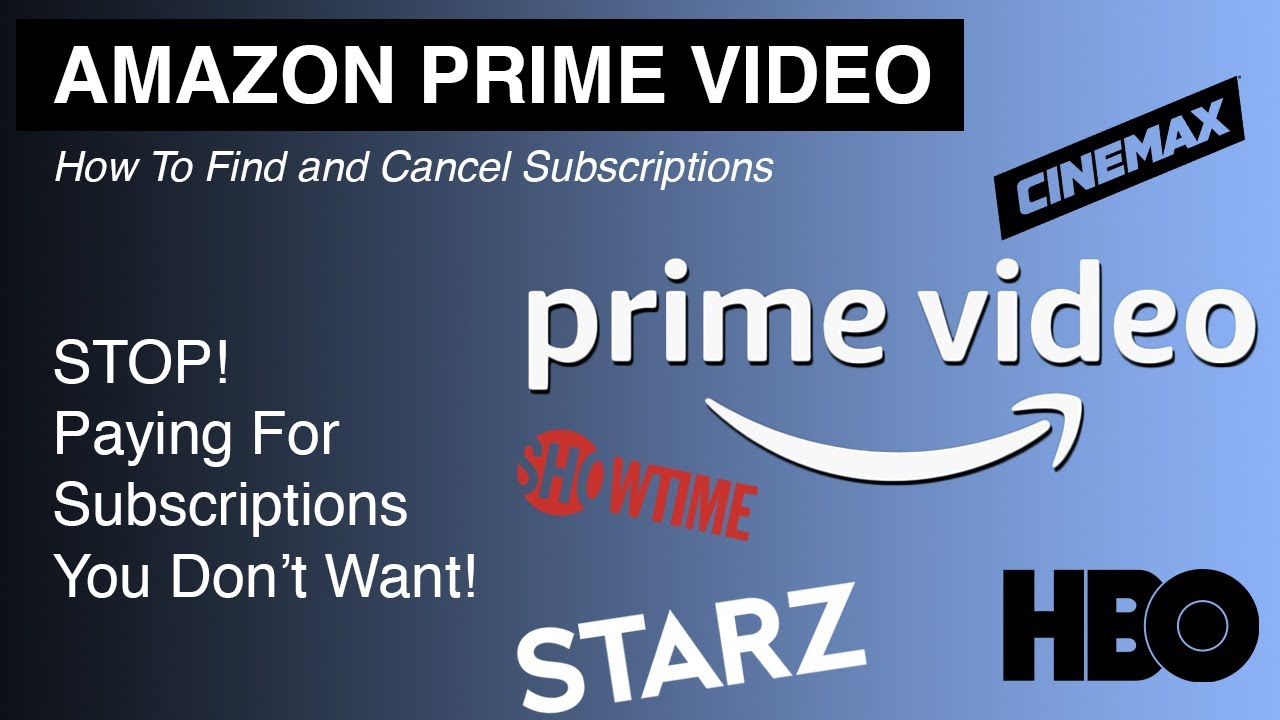
Guide: How to Cancel a CBS All Access Subscription?
If you are still paying for CBS All Access and if you want to cancel it now, this post offer a guide on how to cancel cbs all access subscription.
NicoleSep 23, 2024
How to Add HBO to Kodi
In this article, I will guide you through the process of installing the HBO Max plugin.
JacobSep 23, 2024
Can I Watch Dubbed Anime on Crunchyroll | 2025 NEW
Crunchyroll is a popular anime streaming platform, but can you watch dubbed anime on Crunchyroll with Japanese or Englishi subtitles? Read on to learn more.
ErikaSep 21, 2024
James Cameron: Movies and Ranks
James Cameron's movies often explore themes of science fiction, action, and adventure, and have been praised for their visual and technical achievements.
ErikaSep 21, 2024
Sweet Tooth Season 2: Release Date on 27 April 2023!
This new season will consist of eight episodes, with Robert Downey Jr. executive producing the series. Netflix has announced that Sweet Tooth will return with Season 2 on April 27. Read to know more!
JacobSep 21, 2024
How to Watch and Download The Grand Tour Season 4
Great news for all car enthusiasts! Your favorite automotive reality show is back with an exciting new special edition. Discover everything you need to know about "Grand Tour," including where to catch all the action!
ErikaSep 21, 2024
Does HBO Max Have a Student Discount?
In the past, HBO Max did offer a student discount for College students. As of 2025, however, there is no current option for a discounted monthly rate.
NicoleSep 21, 2024
How to Change Netflix Region Without VPN | Comprehensive Guide
A VPN is often the most effective way to bypass geographical restrictions. However, you can also alter your location and access content from other regions on Netflix without relying on a VPN.
ErikaSep 21, 2024
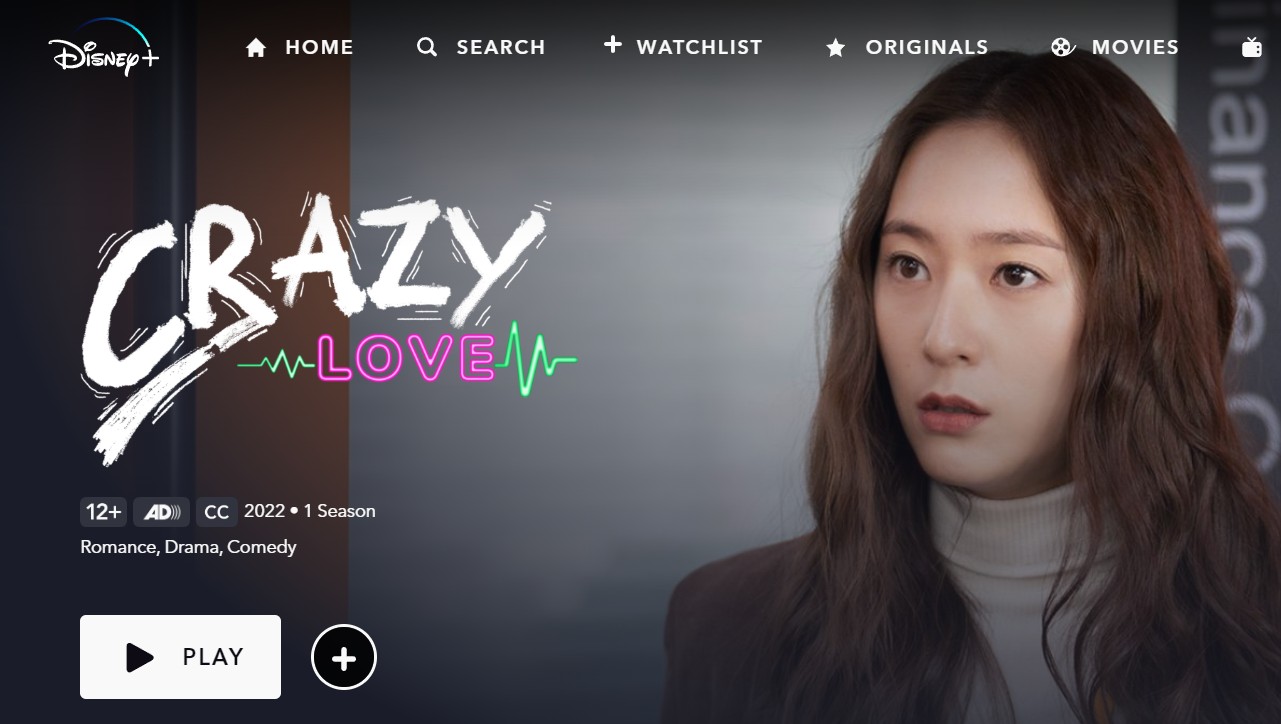
Crazy Love - K-Drama Where to Watch
We have compiled a summary of the plot and cast details for the exclusive Korean drama "Crazy Love," which is currently available on Disney+.
JacobSep 20, 2024
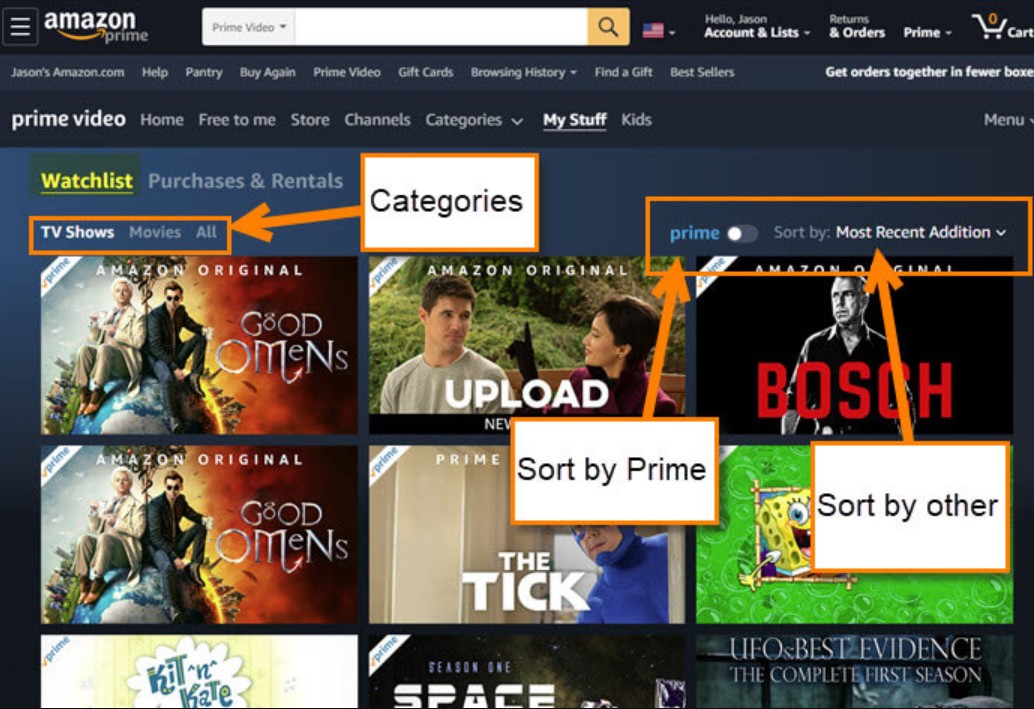
Explained: What is Amazon Watchlist and How to Manage?
Once you've created an Amazon Prime Video watchlist, you can manage it by viewing your watchlist history and deleting items.
JacobSep 20, 2024
Where to Watch IT Chapter 1: Online & Offline Solutions
You can also buy Chapter 1 on iTunes, Google Play, YouTube, and Cinemax. If you're a fan of Stephen King, it's easy to find and watch this horror movie.
ErikaSep 20, 2024
Detail Gudie on How to Watch CODA Without Apple TV+
"CODA" is undoubtedly one of the finest films ever made. It has truly captured the hearts, minds, and spirits of audiences everywhere. This emotional resonance is precisely why viewers find themselves returning to this Oscar-winning film time and again. A
NicoleSep 20, 2024
Disney Plus Not Working on Fire TV? Here's How to Fix It
We'll also look at how to check if your device is compatible with Disney+, and we'll discuss troubleshooting. Keep reading to discover the best ways to fix Disney+ on your Fire TV. Once you've read this, you'll be better equipped to fix the problem.
NicoleSep 20, 2024
Explore How to Download Stranger Things Season 4 with Ease 2025
The season has been a hit with fans, but there appears to be a growing interest among them in finding out if they can download Stranger Things season 4 volume 2 now that the episodes have been added on Netflix.
NicoleSep 20, 2024
Best Ways to Watch 1883 on Amazon Prime - Here’s How!
1883 is available on Amazon Prime as a streaming service and is free.It follows the story of the Dutton family, who owned the land that became the Yellowstone Ranch. This gripping tale is sure to please fans of the earlier seasons.
NicoleSep 20, 2024
When Can I Watch Yellowstone Season 4 on Amazon Prime?
The show's fourth season has been on Amazon Prime on November 7, 2021. Yellowstone fans can now watch the fourth season of the classic western online. Read to know more details.
ErikaSep 20, 2024
How to Watch Gujarati Movies Online
The demand for Gujarati movies has significantly grown since the COVID-19 epidemic, which has caused the Gujarati film industry to expand quickly. You've come to the correct place if you're looking for free websites to download Gujarati movies.
ErikaSep 20, 2024
Get TOP BL Anime to Watch on Netflix Online and Offline Solution 2025
The amount of LGBTQ+ content in the media has multiplied over the past several decades. Queer tales, which were previously only alluded to or intimated, have recently gained popularity in the worlds of film and television, and for good cause.
ErikaAug 6, 2024
The Best 8 Myanmar Website Movies | Safe & Legal
Myanmar is a country in South East Asia and its history is through watching Myanmar movies. Below are the best 8 Myanmar Website movies that you simply cannot miss.
JacobJul 25, 2024
Can You Download HBO Max For Roku?
This article will answer all your questions, including compatibility with older roku models, Dolby Atmos sound, and compatibility with Chromebooks.
JacobMar 12, 2024
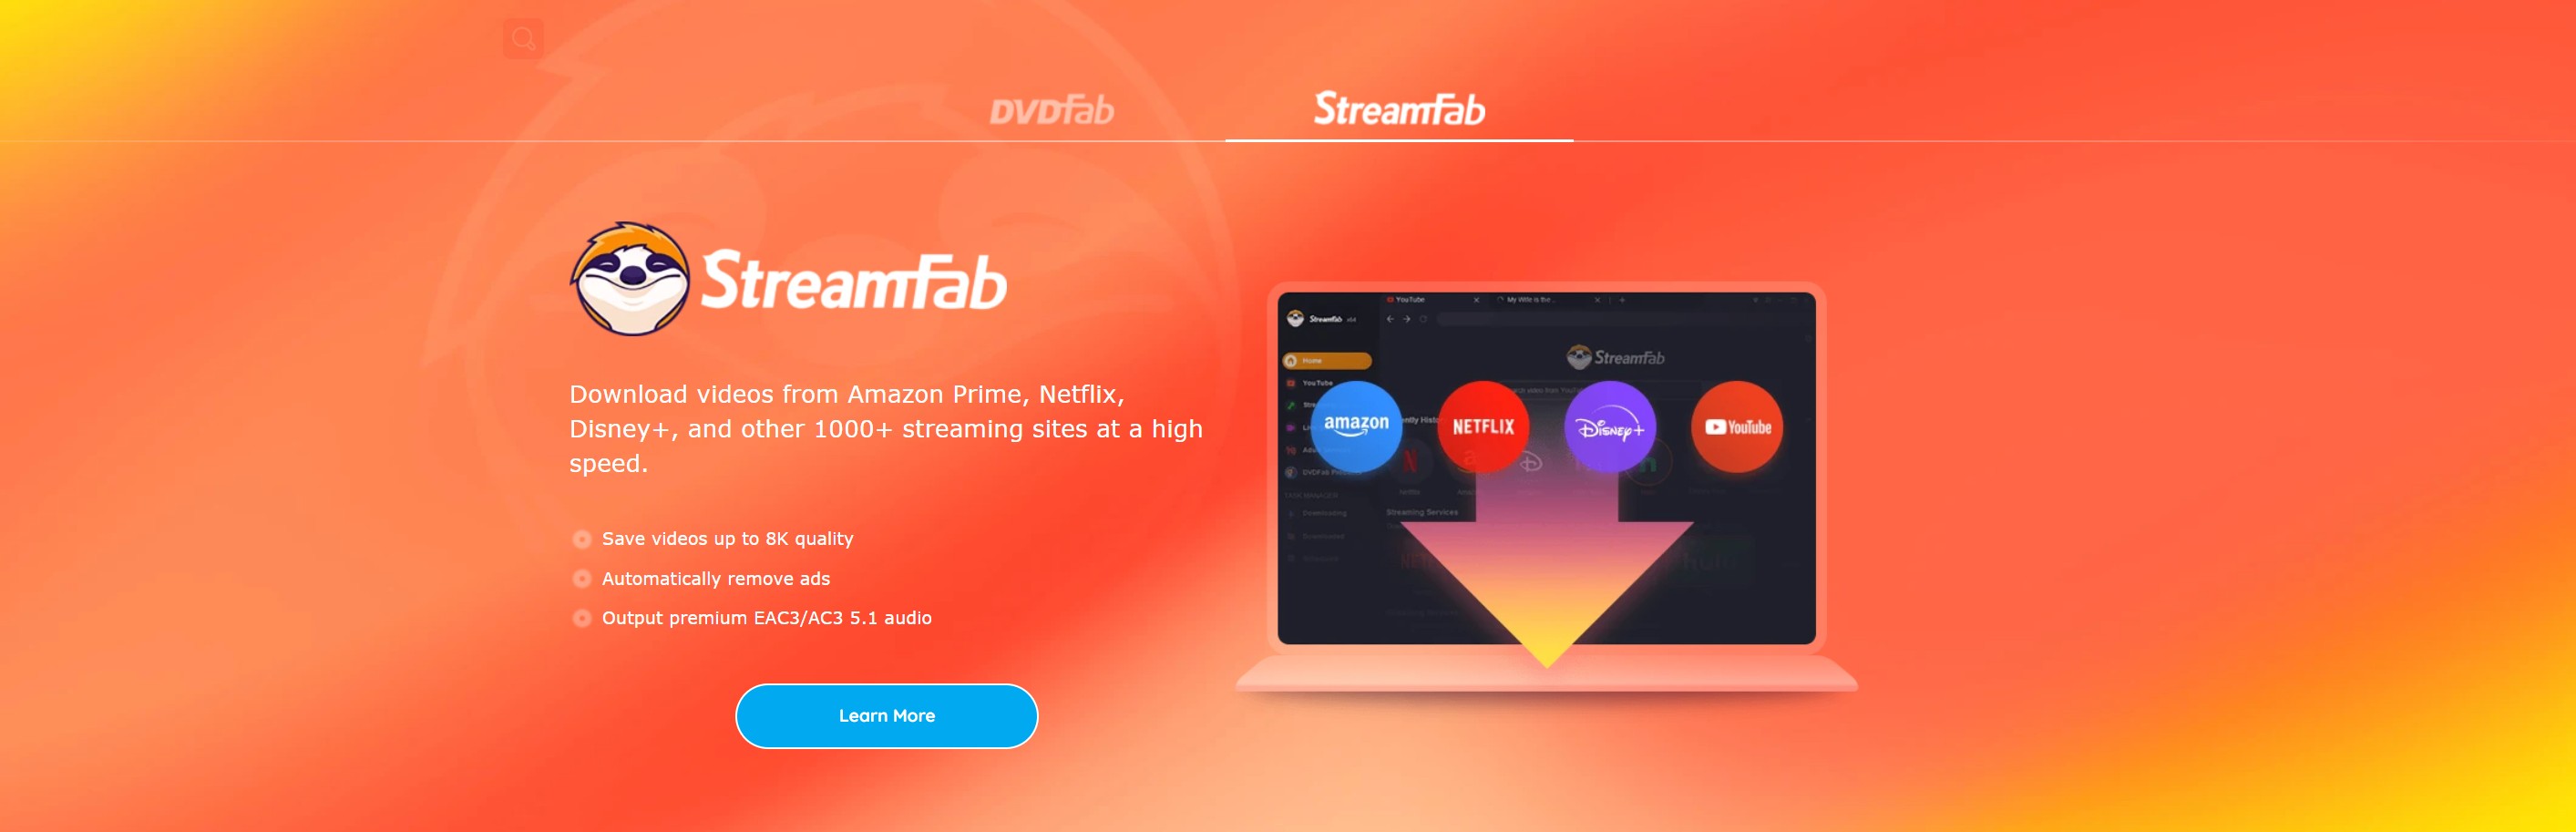
How to Download Videos From Beachbody on Demand to Your Computer
To download BeachBody On Demand videos to your computer, you will need to use a third-party application. StreamFab DRM M3U8 Downloader is one such application. It is very simple to use and will help you get the videos on your computer in no time.
ErikaJan 19, 2024
Best Shows on Showtime 2024
With so much emphasis on these streaming services and emerging ones like Peacock and Discovery+, many people overlook the fact that premium television networks like Showtime and Starz are wonderful locations to find terrific programs worth binge-watching.
ErikaJan 19, 2024
6 Thanksgiving Movies For Kids 2025
Here we list 15 Thanksgiving movies for kids. These movies are not only entertaining, but they teach kids about the importance of giving thanks. Get inside to know them.
ErikaJan 19, 2024
Demon Slayer Season 2 Release Date on Netflix
Netflix subscribers could be waiting until June 2025 for the second season of Demon Slayer. With the second season of Demon Slayer now over, we can now begin the possibility of when more episodes of the anime could be making its way over to Netflix.
ErikaJan 19, 2024
Chainsaw Man Anime Release Date
MAPPA's most-awaited anime series of 2025, Chainsaw Man, is finally close to its official release. The upcoming anime series will feature the journey of Denji, a poor boy who makes a contract with Pochita, the Chainsaw Devil.
MarciaOct 31, 2023
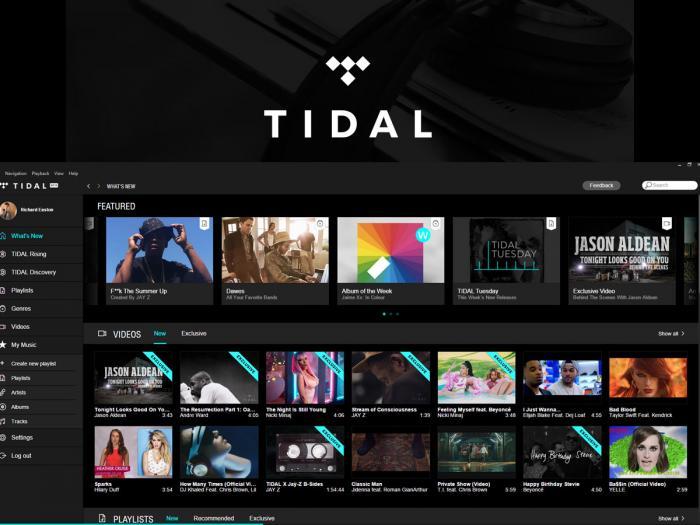
Unlock the Power of TIDAL Music with the Best TIDAL Downloaders
Are you a music enthusiast who loves to listen to your favorite tunes on Tidal? Imagine being able to enjoy your favorite tracks anytime, anywhere, without worrying about internet connectivity. With the help of a reliable Tidal downloader, you can make th
MarciaOct 31, 2023
Top 5 Best Spotify Playlist Downloader You Can Rely On
Want to download Spotify Playlist so that you can listen to your favorite music at a time? A good Spotify Playlist Downloader can help you. Read this article to learn more.
ErikaOct 12, 2023
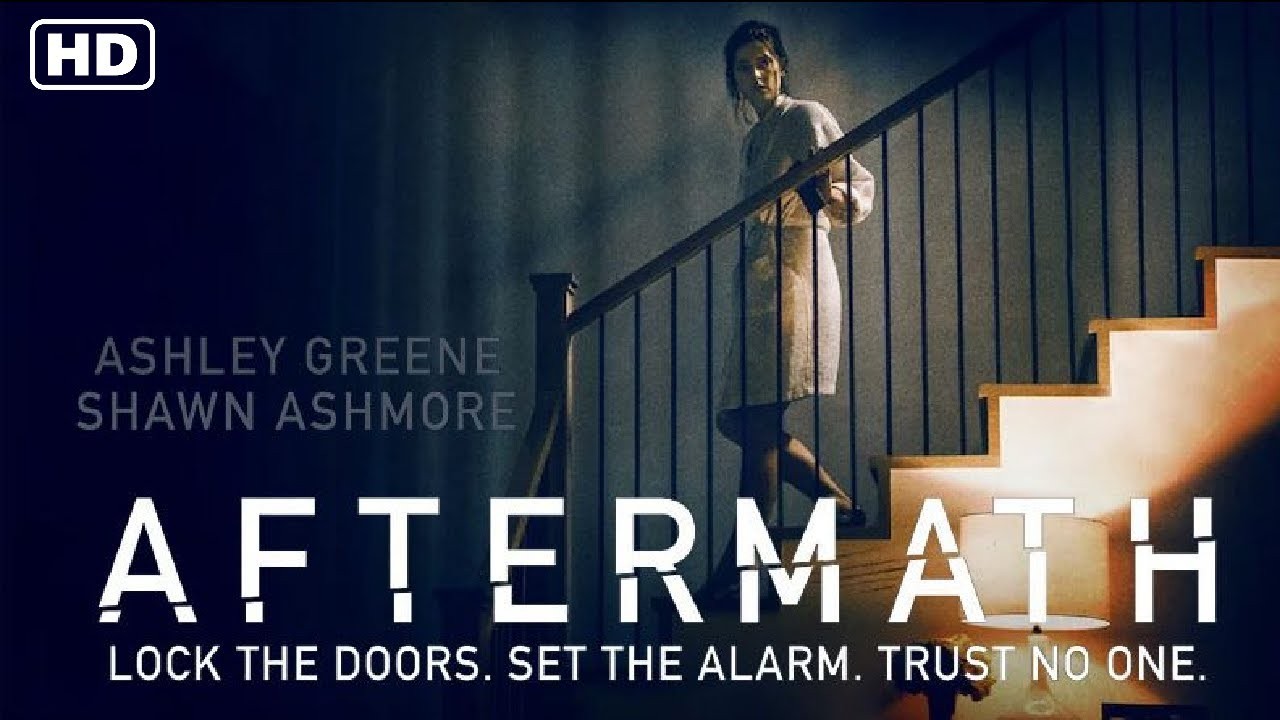
Aftermath - A Netflix Movie Based on a True Story
Aftermath is a horror film based on a true story. This article gives you a detailed introduction to Aftermath and the story behind it. Additionally, we listed more horror movies on Netflix, as well as the best Netflix downloader.
ErikaJun 6, 2023
Watch and Download Friends: The Reunion Online Free
Whether you have a longtime friend who's moving away or are meeting a new one, there's nothing like spending a reunion weekend with your friends, watching a few episodes of Friends, and enjoying the experience of reconnecting
JacobJun 4, 2023
Watch Disney Princess Movies in Order
After you've finished reading this article, you can choose which films you want to watch next. Now, it's time to find the best Disney Princess movies! But how do you pick which ones to see first?
ErikaMay 5, 2023
Where to Watch Naruto Shippuden Dubbed Online
Many people may have questions like “Where can I watch Naruto Shippuden dubbed?” Below is the list with a detailed descriptions of these websites.
ErikaMay 5, 2023
Watch Rick and Morty Season 5 Online Free
There is a fairly easy method to view all of your favorite episodes, regardless of the parallel reality Rick and Morty visit. This tutorial explains how to watch Rick and Morty online and where you can watch it.
JacobMar 7, 2023
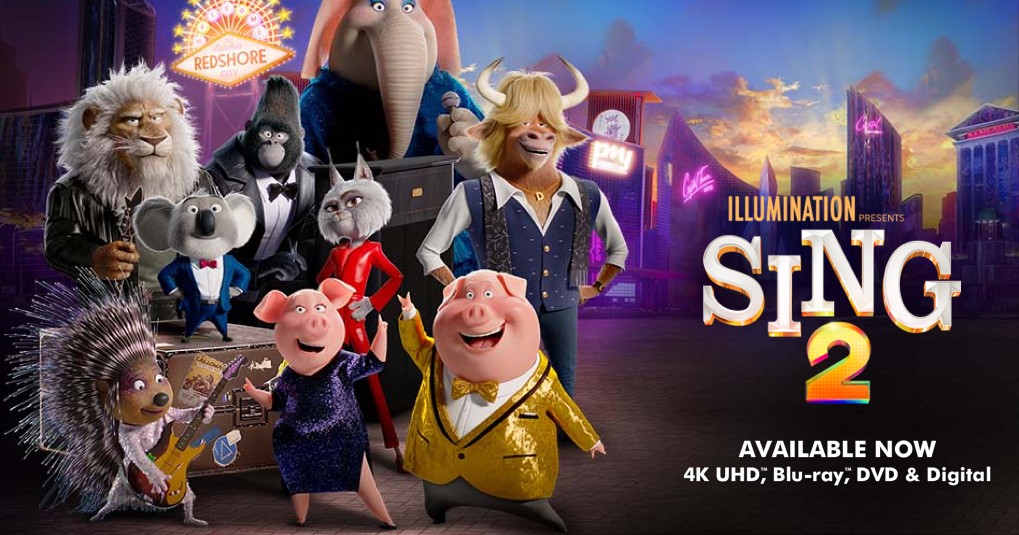
Will Sing 2 Be Streamed on Disney Plus or Other Platforms?
Sing 2 is an American Computer Animated musical comedy movie following the efforts of a theatre owner and his extraordinary team to present their performance in the famous fictional city of Redshore. Many people are asking is Sing 2 on Disney Plus? In thi
JacobFeb 20, 2023
Discover New Free Movies on Amazon Prime
These new free movies on Amazon Prime are added regularly, making it easy to find new movies that you might enjoy. You can also find new movies on Amazon Prime by signing up for the free trial, which will last for 30 days.
NicoleFeb 20, 2023
How to Cancel HBO on Amazon
There are also ways to get free stuff on Amazon without having to subscribe to the service. In this article, we will share some of these methods. Just make sure that you follow all the steps thoroughly!
JacobJan 10, 2023
Watch and Download Spider-Man: No Way Home on Amazon Prime Video
Good news! Spider man no way home is available on some streaming service now, including Amazon Prime! Here we are going to present the most popular way to stream and download Spider Man: No Way Home.
ErikaDec 23, 2022
What Does AS Mean on TikTok?
'AS' is used as a hashtag and appears in the videos themselves, but what exactly does it mean? What exactly does 'AS' stand for, and why are individuals utilizing it in the first place.
ErikaDec 20, 2022
Where Can I Watch Euphoria For Free?
Euphoria reveals varied possible problems experienced by Gen Z and throws thought-provoking points. Today we'll show you the alternatives to watching it for free.
JacobDec 8, 2022
Christmas Movies on HBO
If you're looking for a new Christmas movie to watch this season, there are some excellent choices available on HBO.
ErikaNov 22, 2022
Thanksgiving Horror Movies
Even though there aren't many Thanksgiving-themed horror films, the ones that are available are excellent.
ErikaNov 22, 2022
Christmas Movies to Watch on Paramount Plus
Are there any movies I missed this month that will also be available to stream on Paramount+? Here maybe the answer you are looking for.
ErikaNov 14, 2022
Manifest Season 4 Episode 1 Teaser
In this episode, Michaela investigates the Calling and finds a mysterious stowaway. Meanwhile, Ben struggles to protect his beliefs, and Cal comes out of hiding to pursue a lead.
JacobNov 10, 2022
The Best Inside No 9 Episodes
In this article, we will discuss the most spectacular, violent, and cliched episodes of the show. It's worth noting that Inside No. 9 is currently airing its sixth season.
ErikaOct 27, 2022
Halloween Movie Pumpkins
Jack Skellington, the pumpkin king of Halloweentown, decides to travel to the eve of Christmas. In the classic 1984 movie, Monsters, Inc., two monsters are responsible for protecting a young girl.
ErikaOct 27, 2022
Choosing a Halloween Party Movie
There are many attractive Halloween movies. Take Halloween Party as an example, it is an enjoyable if not entirely scary film about a killer email.
JacobOct 25, 2022
The Dragon Prince Season 4 Revealed
In this article, we'll look at how the characters from the previous seasons return, the fate of Xadia, and Ezran's quest to bring peace to the warring lands.
ErikaOct 20, 2022
Is The Nightmare Before Christmas A Halloween Or Christmas Movie?
You may have developed your own thoughts about this 1993 classic. But for many viewers, this movie has been the catalyst for some contention.
ErikaOct 19, 2022
Halloween Kills Full Movie Free Download
Here are options for downloading or watching Halloween Kills streaming full movies online. Read to know more.
JacobOct 18, 2022
Watch Modern Love Season 2 Online
Modern Love is currently available on Amazon Prime Video. This rom-com series is based on a true story and stars Anne Hathaway. It is one of the best rom-coms in years, so you're definitely going to enjoy watching it.
JacobOct 18, 2022
Best Comedies on Amazon Prime
Whether you're looking to laugh out loud or laugh with the family, you've come to the right place!
JacobOct 12, 2022
Watching Westerns on Netflix
If you enjoy westerns and are looking for new films to watch, you've come to the right place.
JacobOct 11, 2022
Christian Movies on Netflix
If you are looking for a movie for the whole family to watch, you've come to the right place. You can find a wide variety of Christian movies on Netflix.
JacobOct 11, 2022
10 Must-See Sports Movies on Netflix
If you love sports, there are several great sports movies on Netflix. Some of these include Mark Wahlberg's The Fighter and Woody Harrelson's Icarus. Others are made for the more dramatic side of sports.
ErikaOct 11, 2022
How Long Is Dune On HBO Max?
In late July, HBO Max seemingly confirmed the blockbuster would be headed to the streaming service the same day it premieres in theaters.
ErikaSep 25, 2022
A Robbery at an Adult Video Store Near Me
These sex shops near you have all the fun stuff to make your deepest dreams a reality. Read on to know more.
JacobSep 22, 2022
Arrow CW Season 8
It is an action-packed show about a vigilante who fights crime and protects the people he loves. It is produced by Warner Bros. and is available on Netflix.
JacobSep 22, 2022
Viki - K-Drama Series
Cinema is a popular form of entertainment, and K-drama series have captured a growing number of viewers from all over the world.
ErikaSep 15, 2022
What Movie is Coming Out on Thanksgiving?
Raise your hand if your yearly Thanksgiving tradition is to eat a good Thanksgiving lunch, and then go to a movie with your family. This article may provide some help.
ErikaSep 15, 2022
Patra Petika Part 2 of Ulla Web Series Download
Lata was a simple girl from a small village. Sharad, the local postman, gets attracted to her and starts writing letters in her husband Sudhir’s name. He also read those letters for her.
JacobSep 15, 2022
Best Action Movies on Amazon Prime
You can find a variety of action movies on Amazon Prime. The catalog is constantly changing, so you can find new and old movies at any time.
JacobSep 15, 2022
Romantic Comedies You Can Watch on Amazon Prime
If you're in the mood for a romantic film, you'll be pleased to know that Amazon Prime has a good selection of rom-coms available for free streaming.
JacobSep 15, 2022
What Are the Best Movies to Watch on Tubi?
Almost a thousand movies can be seen on Tubi. Unfortunately, the site does not allow further refinement by genre, subgenre, or other categories.
JacobAug 29, 2022
Best Shows on Apple TV
The best shows on Apple TV are those that focus on quality over quantity. That's why the streaming service invests in award-winning dramas, feel-good anthologies, and boundary-pushing storytelling.
![How to Watch Free Movies on Apple TV Online & Offline [2025]](https://c3.dvdfab.cn/upload/topic/free-movies-on-apple-tv-c1aW.jpeg) JacobApr 7, 2025
JacobApr 7, 2025 MarciaFeb 13, 2025
 JacobSep 25, 2024
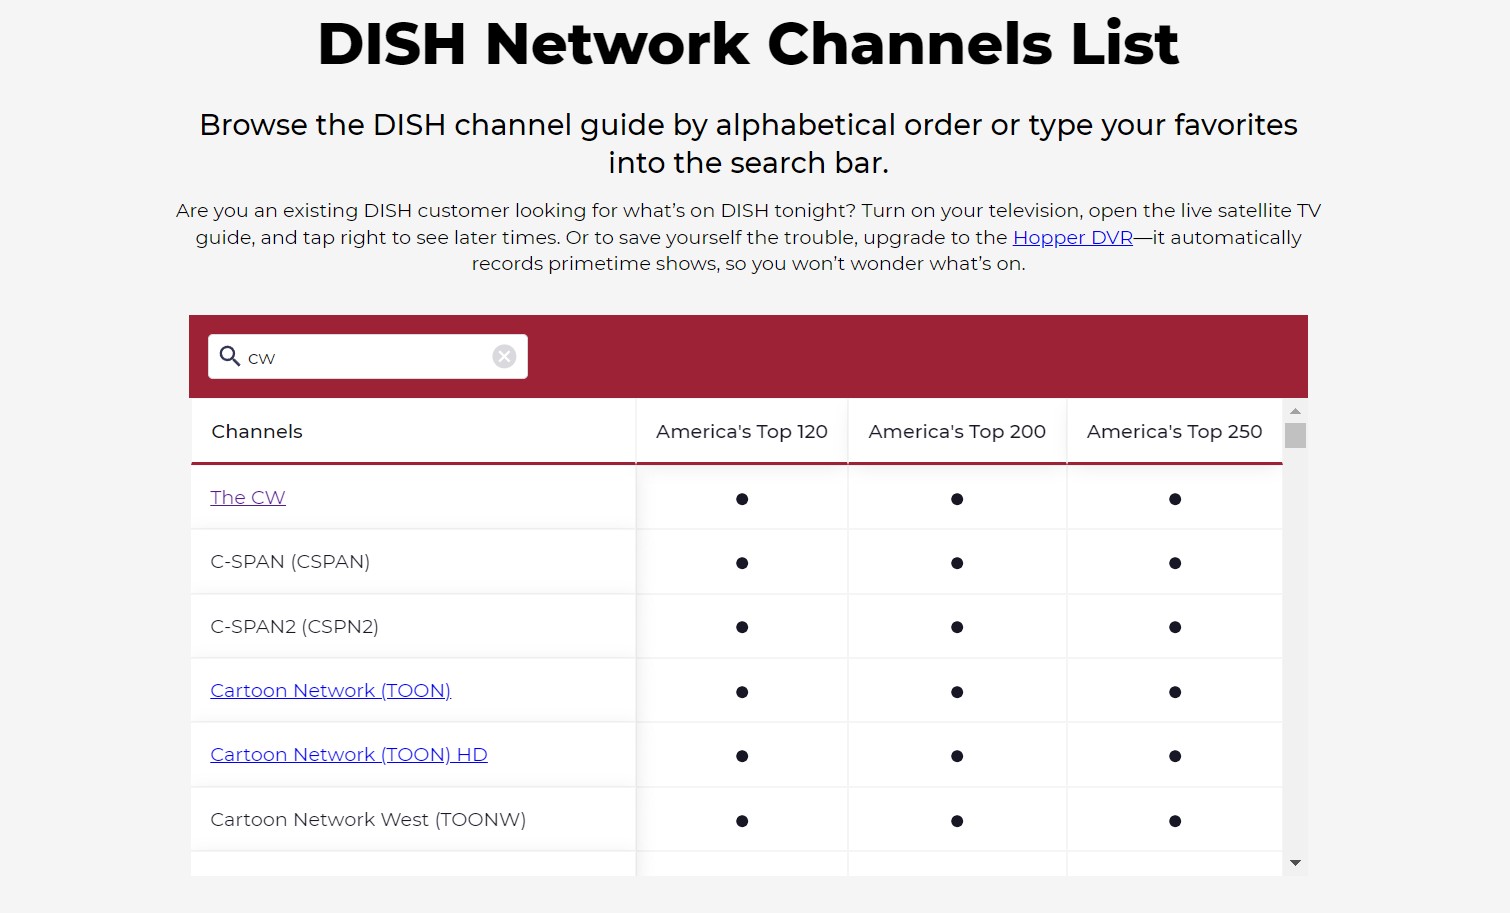 JacobSep 25, 2024
![What Channel Is CBS On DIRECTV? [2025 Update]](https://c6.dvdfab.cn/upload/topic/what-channel-is-cbs-on-directv-jS9q.jpeg) JacobSep 25, 2024
JacobSep 25, 2024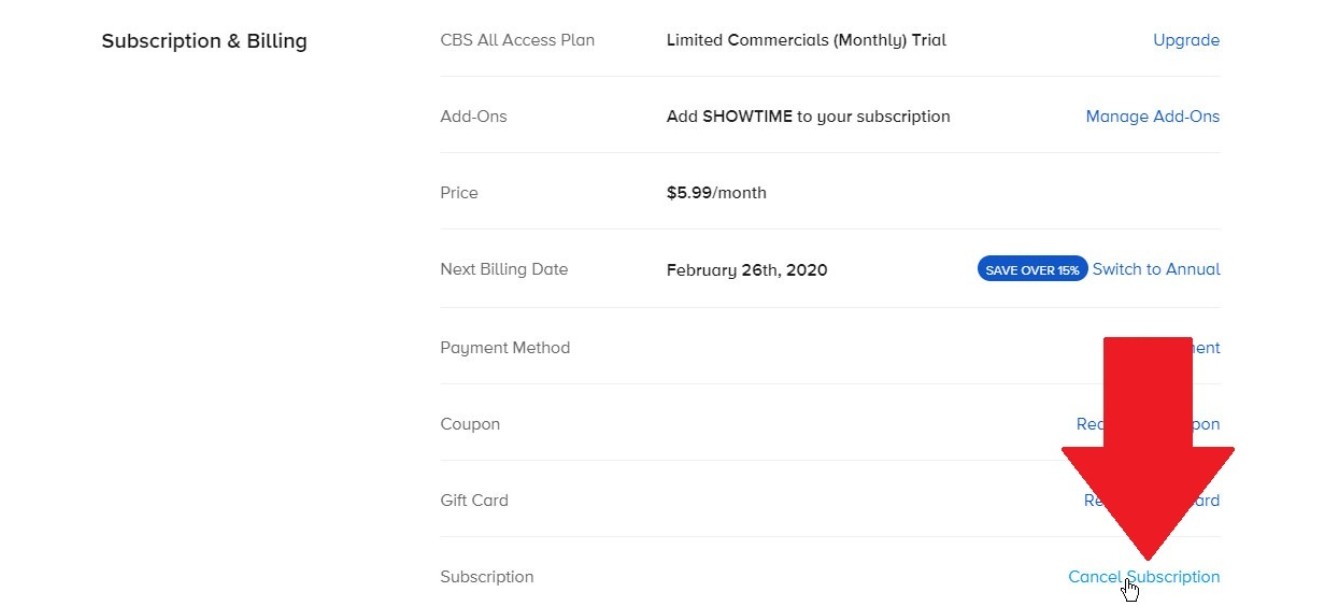 JacobSep 23, 2024
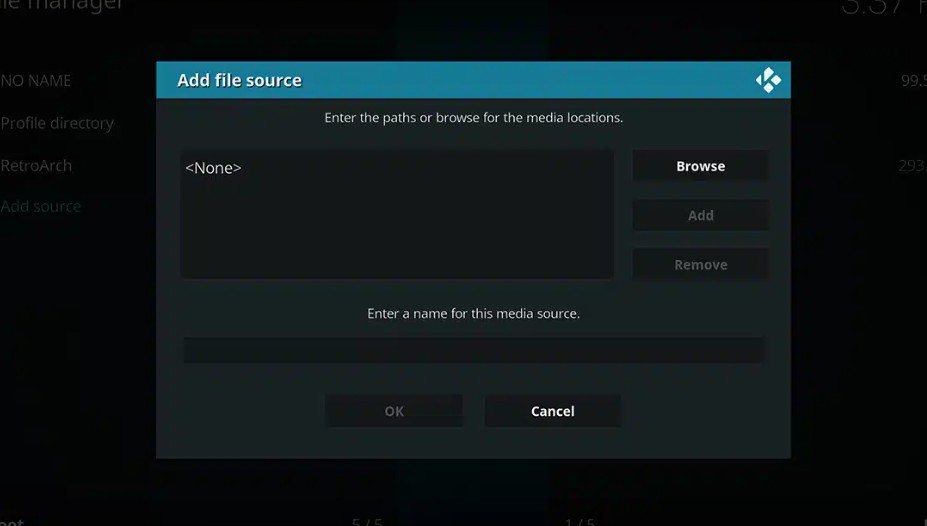 NicoleSep 23, 2024
 JacobSep 23, 2024
 ErikaSep 21, 2024
 ErikaSep 21, 2024
 JacobSep 21, 2024
 ErikaSep 21, 2024