
How to Clean DVD and Blu-ray Discs: Safe Methods That Work
Summary: DVD discs can easily get scratched, damaging the data. If you have a collection of old DVDs and CDs, it's important to know how to clean them. This article explains simple methods to clean dirty discs at home using common household items.
Table of Contents
When a DVD disc is covered with dust, fingerprints, stains, or scratches, the laser struggles to read the data. This can cause freezing, skipping, pixelation, or even a "cannot read disc" error. Over time, built-up dirt can scratch the surface further and put extra strain on the drive and DVD player.
For collectors like us, gentle cleaning and proper storage are essential to protect our discs and avoid permanent data loss. Based on more than 20 years of collecting DVDs (and yes, none of my discs have completely failed yet), here is the useful tutorial on how to clean a DVD disc.
How to Clean a DVD with Scratches
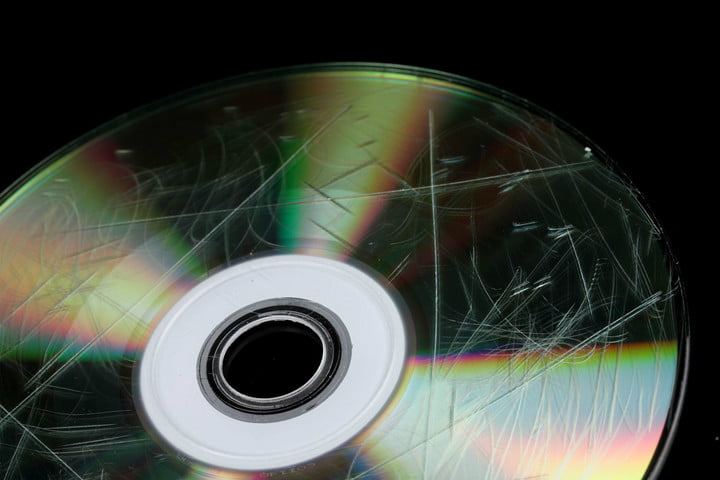
Scratches are a form of physical damage, so no method can restore a disc 100 percent. The best that can be done is to reduce the impact of light scratches on laser reading so the drive has an easier time accessing the data. Deep scratches or severe radial scratches sometimes cannot be fixed even after trying various methods. If you're wondering how to fix scratched DVD, keep reading to learn the best way.
DVD cleaners you can use:
- Toothpaste (non-gel type, without large whitening particles)
- Furniture polish
- DVD/CD repair kits
- Banana or petroleum jelly (more of a "home remedy," best for discs that are not very valuable)
- Windex or a similar glass cleaner (preferably ammonia free)
Reminders:
- Only treat the data side (the shiny side). Do not rub the label side. On many discs, the reflective and data layers are located just beneath the label, and scratches there are often irreversible.
- If the disc already has cracks, do not put it back into a drive. It may shatter while spinning at high speed.
Step-by-step cleaning process
Step 1: Rinse the DVD under warm water
Hold the disc by its edges and gently rinse it under warm running water. This helps wash away loose dust and grit on the surface so that later wiping does not create new scratches.
Step 2: Apply toothpaste
Squeeze a small amount of non-gel toothpaste onto the disc, as shown in the first picture. Draw a few thin lines from the center of the disc outward. Do not use too much. Then, using your fingertips or a soft cloth, gently spread the toothpaste. Try to move in straight lines from the center toward the outer edge instead of rubbing in circles along the disc's circumference. The goal is to form a thin, even layer of toothpaste, not to scrub hard.
Step 3: Remove the toothpaste
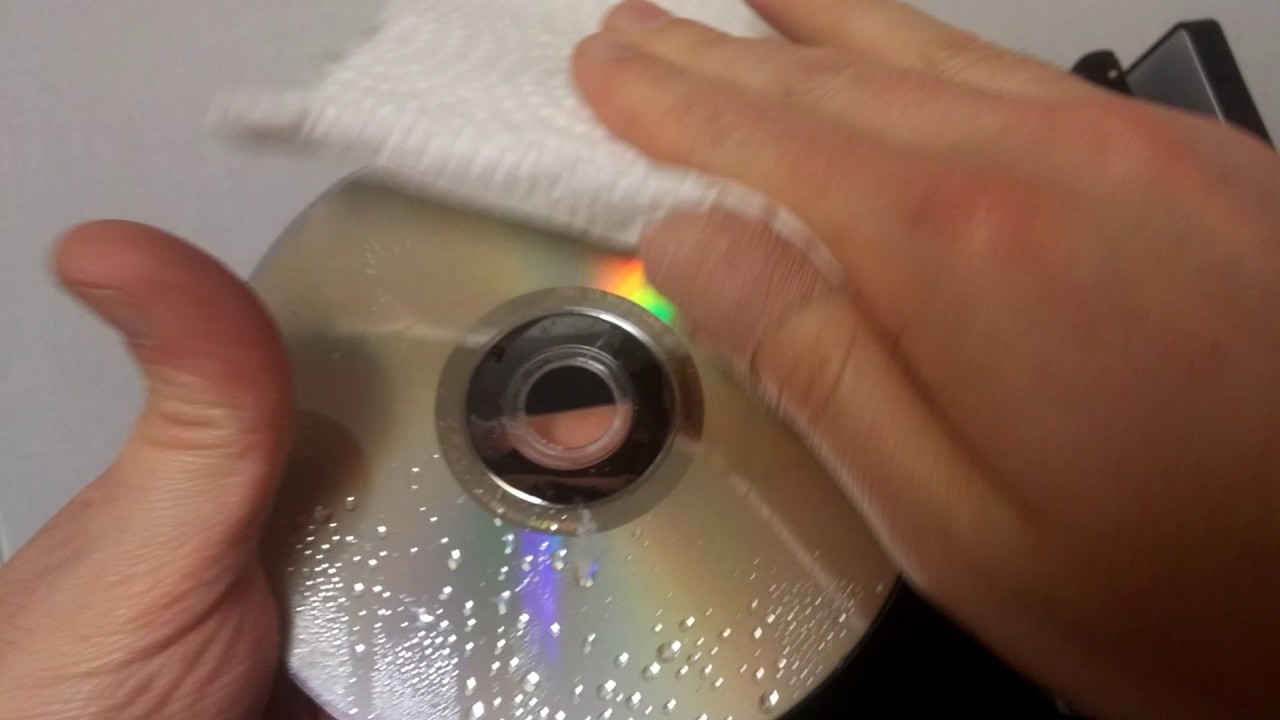
Rinse the DVD again under warm water, gently rubbing to wash away all the toothpaste. Then hold the disc as shown in the picture and lightly shake it back and forth for about a minute so it can air dry. Any remaining paste can interfere with reading, so it is important to rinse it off completely.
Step 4: Dry the disc
Shake the disc a few times to remove most of the water, then place it in a clean area to air dry. Alternatively, use a microfiber cloth to gently dry it with straight strokes from the center outward. Remember, do not use a hairdryer, since heat can cause the disc to warp.
Step 5: Apply the Windex
If you want to further improve the clarity of the surface, spray a small amount of Windex or furniture polish onto a cloth, then lightly wipe the disc a few times from the center outward. Let it air dry at the end. At this point, the disc has been successfully cleaned.
How to Clean DVDs with Heavier Grime and Stains
Fingerprints, grease, drink residue, food splatters, and built up dust are usually best handled with a gentle wet cleaning method. If you don't know what to do with old DVDs with stains, read the following DVD cleaning tutorial. Below I focus on safer, more universal materials.
Materials you can use:
- Soft microfiber cloth (or a lint-free, soft cotton cloth)
- Distilled water (to avoid mineral buildup)
- Isopropyl alcohol (preferably 70% or higher)
- Mild dish soap (optional for heavy stains)
- A soft-bristled brush (optional for stubborn grime)
- Compressed air (optional, for removing dust)
For light fingerprints and dust
Dampen a microfiber cloth with distilled water and wring it until barely moist. Wipe from the center hole outward in straight lines, rotating the disc slightly after each stroke until the full surface is covered. Follow with a dry section of the same cloth.
For heavy grease or sticky residue
Mix isopropyl alcohol with distilled water at roughly 70/30. Dampen a cloth corner, wring it out, and wipe in the same radial pattern. Alcohol evaporates quickly and rarely needs rinsing. For residue that still won't come off, add a few drops of mild dish soap to distilled water, apply with a damp cloth, then follow with a lightly dampened clean cloth to rinse.
For stubborn spots, a soft-bristled brush used with the same center-to-edge stroke direction can help. Do not scrub across the disc.
Drying: Pat the disc with a dry microfiber cloth from center to edge, then leave it in a ventilated area for a few minutes. The disc must be completely dry before it goes into a player or case. Playing a damp disc can leave moisture on the laser lens, which causes read errors and, over time, lens damage.
When to stop cleaning: If a disc has been cleaned twice and still does not play correctly, more cleaning is unlikely to help. The problem at that point is either a scratch rather than surface grime, or damage to the reflective layer that no surface treatment can reach. Digitizing the disc while it still partially plays is a more productive use of effort.
How to Clean a Blu-ray Disc Safely
Blu-ray discs look identical to DVDs from a distance, but the internal structure is meaningfully different. On a DVD, the data layer sits toward the middle of the disc, giving it reasonable protection. On a Blu-ray disc, the data layer is much closer to the reading surface, protected only by a thin hard coating (called a hard coat). That coating resists everyday scratches reasonably well, but it does not hold up against abrasive cleaning agents.
The practical rule: do not use toothpaste, furniture polish, or any paste-type abrasive on a Blu-ray disc. These materials wear through the hard coat and can damage the data layer directly underneath. The same applies to petroleum jelly and baking soda pastes. Stick to liquids only.
What is safe to use:
- Soft microfiber cloth
- Distilled water
- Isopropyl alcohol, 90% or higher (higher concentration evaporates faster, leaving less water residue)
- Mild dish soap solution (for heavy grime only)
Step 1: Remove loose dust with compressed air
Hold a can of compressed air upright at about 6 inches from the disc and use short bursts. Keeping the can upright is important: tilting it causes liquid propellant to spray out, which can freeze the disc surface and cause cracking. Compressed air removes loose particles before any cloth contact, reducing the risk of dragging grit across the hard coat.
Step 2: Inspect the disc
Hold it at an angle under a light. Fingerprints and smudges appear as dull patches. Identifying where the grime is concentrated before you start helps you work more efficiently with less total wiping.
Step 3: Wipe with a damp microfiber cloth
Dampen a microfiber cloth with distilled water or 90%+ isopropyl alcohol and wring it until barely moist. Starting from the center hole, wipe outward in a straight line to the outer edge. Rotate the disc slightly, then repeat around the full surface. Do not rub in circles.
Step 4: Dry the disc
For alcohol: allow 1 to 2 minutes of air drying. Alcohol evaporates cleanly without rinsing.
For water or dish soap: pat with a dry microfiber cloth using the same radial strokes, then air dry fully before use.
Step 5: Repeat if needed
If smudges remain, dampen a fresh section of cloth and repeat. One or two passes with light, even pressure is enough. Pressing harder does not clean more effectively and increases scratch risk on the hard coat.
What You Should Never Use to Clean a Disc
DVD discs are very delicate. Some people may be tempted to use stronger cleaning methods for "better" results, but harsher cleaners and rougher cloths do not make the disc any cleaner. Instead, they are far more likely to scratch and permanently damage the disc surface. Below is the What NOT to Do list.
- Do not use organic solvents such as acetone or benzene
- Do not use kitchen paper towels, tissues, or any rough cloth
- Do not use strong household cleaners (strong alkalis, strong acids, heavy-duty degreasers, abrasive cleaners)
- Do not use a high-heat hair dryer
- Do not clean the disc too frequently (every wipe carries a small risk of micro-scratches)
- Do not use canned compressed air designed for electronics
- Do not use hard water when cleaning discs
DVDFab DVD Ripper: A Digital Backup Alternative
Cleaning removes what is on the disc surface. It cannot repair a disc where the reflective or data layer has already been damaged, and it does not prevent further deterioration over time. Disc rot, a gradual oxidation of the reflective layer, can eventually make a disc unreadable regardless of storage conditions or cleaning history.
Many collectors address this by digitizing discs while they still play reliably, rather than waiting until there is a problem. A ripped copy on a hard drive does not degrade, cannot be scratched, and plays without depending on the physical condition of the disc.
The best software to digitize your DVDs is DVDFab DVD Ripper. It handles most commercial protection schemes, including CSS, APS, RC, and Sony DADC. The software can also retry problem sectors during the rip, which means it sometimes successfully reads discs that skip or stutter in a standard player.
How to Rip a DVD with DVDFab DVD Ripper
Step 1: Download and install the tool on your PC. Open the tool and select Ripper module.

Step 2: Insert the DVD into the drive. Allow DVDFab to access the disc automatically from your drive.
Step 3: After the disc is loaded, click the Folder option at the output selection box to select your USB drive as the output folder. Go to the profile library through the Choose Other Profile button.
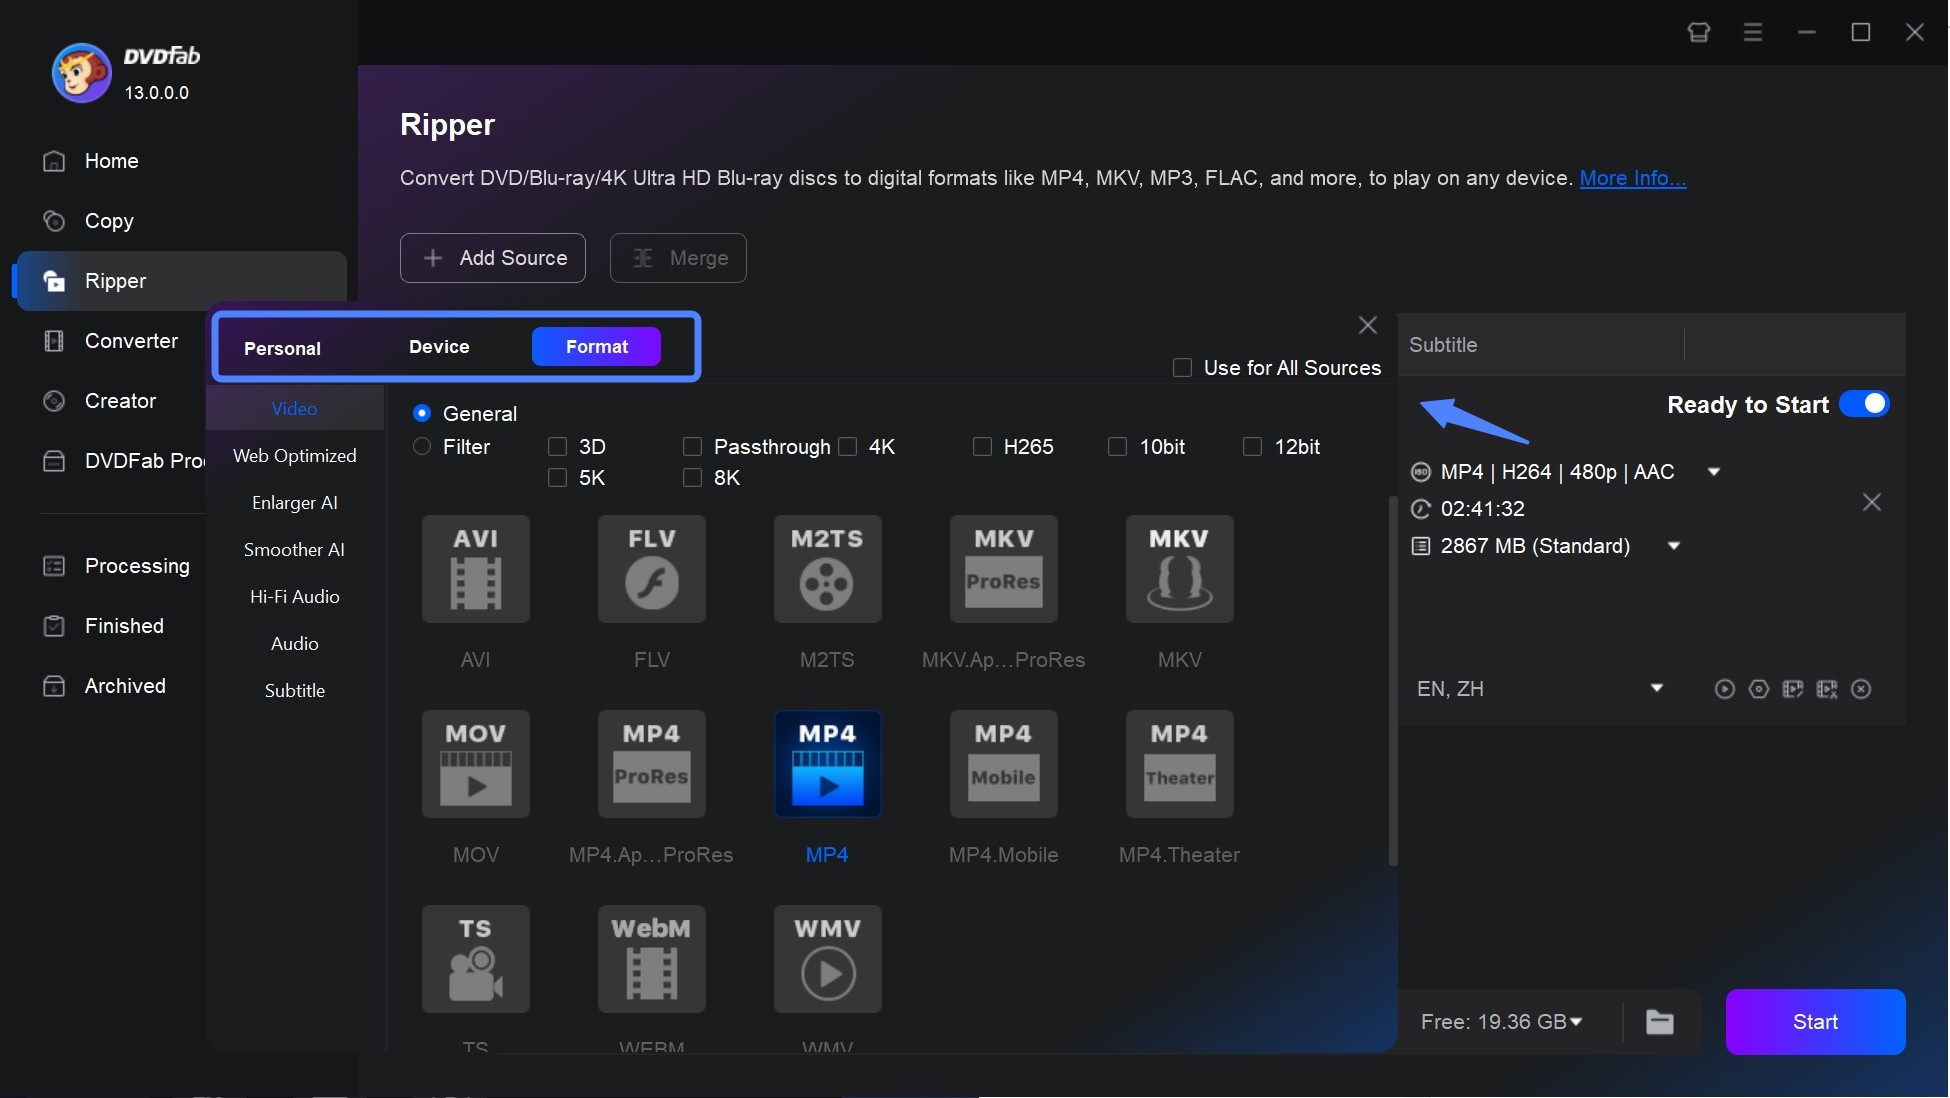
Step 4: Next, select the desired format from Format >> Video >> General section. Choose the output video directory and tap the Start option to begin copying the DVD to the selected USB drive.
FAQs
Can a scratched DVD be repaired?
It depends on the scratch type and location. A light surface scratch on the data side (the shiny bottom) can sometimes be reduced enough to restore playback, particularly if it runs radially rather than in a circle. Toothpaste or a commercial repair kit like the SkipDr can help in these cases. A scratch on the label side is more serious: the reflective and data layers on a DVD sit just beneath the label, and damage there is typically permanent. Deep scratches that cut through the reflective layer on either side are not recoverable. If the disc still skips after two cleaning attempts, professional disc resurfacing is the next practical option.
Does toothpaste really fix scratches on a disc?
On DVDs, yes, in limited cases. Toothpaste functions as a mild abrasive that can smooth light surface scratches on the polycarbonate layer, reducing interference with the laser. It does not fill or remove scratches that reach into the data or reflective layer. Use non-gel toothpaste without whitening agents, apply a small amount, wipe radially from center to edge, and rinse completely. Results depend on scratch depth and location. Do not use toothpaste on Blu-ray discs.
When should I use a professional disc cleaning machine?
After two or three rounds of hand cleaning have not resolved the playback issue. Machines like the SkipDr use a controlled resurfacing process that removes a thin, uniform layer from the disc surface, reaching scratches that hand polishing cannot. Libraries and some used media stores offer resurfacing as a service at low cost. Note that resurfacing is more effective on DVDs than on Blu-ray discs, where the thinner protective coating limits how much material can be safely removed. If a disc has already been resurfaced once and still does not play, further passes are unlikely to help.
Conclusion
For dust, fingerprints, and surface grime on a DVD, a microfiber cloth with distilled water or isopropyl alcohol handles most cases without any abrasive treatment. For light scratches on a DVD, toothpaste applied radially and rinsed completely is a reasonable first attempt before moving to a repair kit or resurfacing machine. Blu-ray discs require the same radial technique but with isopropyl alcohol only.
If the disc plays partially but continues to skip, ripping it to a digital file while it still reads is the more reliable path to preserving the content than continued cleaning.
![How to Rip Copy-Protected DVDs: 6 Tested Methods [2026]](https://r3.dvdfab.cn/upload/resource/copy-protected-dvd-cnQ8.jpeg) How to Rip Copy-Protected DVDs: 6 Tested Methods [2026]By Wenny Yan - Jul 22, 2026
How to Rip Copy-Protected DVDs: 6 Tested Methods [2026]By Wenny Yan - Jul 22, 2026 How to Rip and Transfer DVD to iPad/iPhone: Free and Paid Options in 2026By Wenny Yan - Jun 24, 2026
 Top 6 ISO to MP4 Converters in 2026: Tested & GuideBy Diana Smith - Jun 18, 2026
 Best DVD to USB Converter in 2026: Tested WaysBy Diana Smith - Jun 18, 2026