VCR to DVD: 3 Ways to Transfer Tapes Without Losing Quality

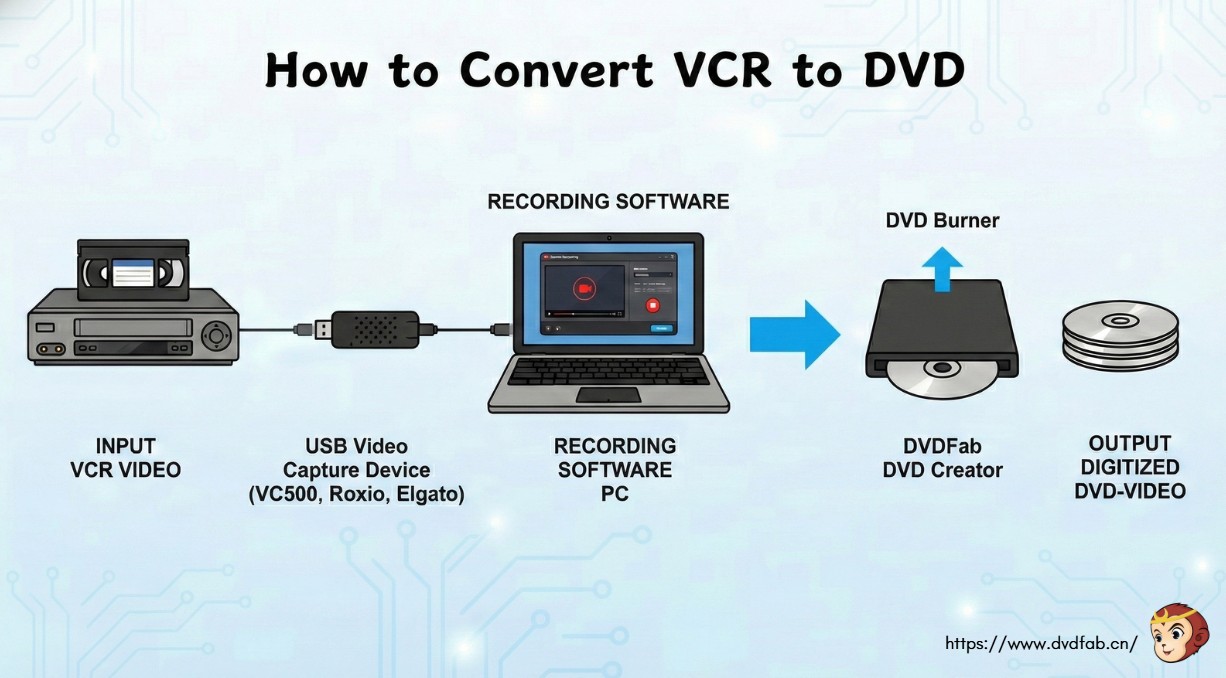
Summary: To convert vcr to dvd, use a USB video capture device (such as Diamond Video Capture VC500, Roxio, or Elgato) to connect your VCR to a computer. Then, use the included software to record the video and burn it to a DVD. You can also use professional software like DVDFab DVD Creator to burn the digitized video to a standard DVD.
If you've pulled a box of old tapes out of a closet, the first worry isn't which disc to buy, it's whether the tape still plays cleanly enough to save. I hit that exact problem: an old deck that grabbed at the tape, and colors that had drifted toward pink. Deciding how to convert VCR tapes to DVD comes down to one early choice, not a single product you drop in a cart.
I've spent years moving analog and disc formats into files that actually keep, so this guide skips the sales pitch. It lays out three ways to burn VCR to DVD, why you should save a digital master first, the hardware to check before you start, and how to fix a capture that comes out blank or blocky.
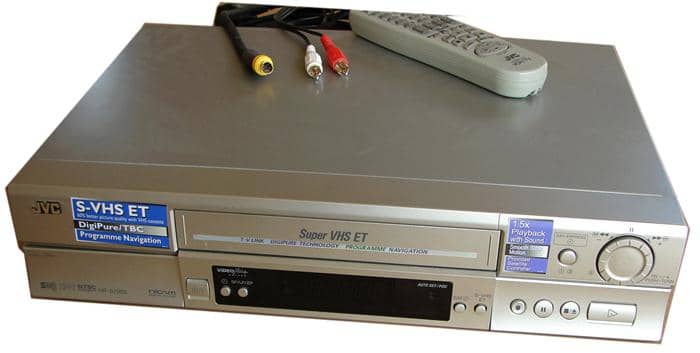
A quick note on terms before the methods: a VCR is the player and VHS is the tape format it reads, so every path below starts the same way, by getting a clean signal off that cassette.
VHS (Video Home System) is the analog tape format JVC introduced in 1976, and the one most home recordings use. It holds standard-definition video, which is why a captured file looks soft next to modern digital video and why your capture settings matter more than the blank disc you pick.
Choose the Right VCR-to-DVD Workflow
The best method depends on how many tapes you have, their condition, and how hands-on you want to be. Three approaches cover almost every home case: capture on a computer, copy with a standalone recorder, or hand the tapes to a professional service. The table below compares them on the points people actually weigh before starting.
| What matters | Computer capture | Standalone VCR/DVD recorder | Professional transfer service |
| Upfront cost | Low to moderate: a working VCR plus a USB capture device | Moderate: a combo recorder or a separate DVD recorder | Per-tape fee, no gear to buy |
| Best tape volume | A handful up to a few dozen | A few one-off copies | Large collections |
| Technical effort | Hands-on: drivers, capture software, and live monitoring | Low: press play and record | None once the box ships |
| Real-time capture | Yes, plays through in real time | Yes, real time | Handled by the lab |
| Turnaround | Immediate, limited by tape length | Immediate | Days to weeks |
| Privacy | Tapes never leave your desk | Tapes stay with you | Tapes leave your home |
| Damaged-tape support | Limited, depends on your own VCR | Limited | Better, with specialist equipment |
| Output choices | MP4 master plus DVD, USB, or cloud | Mostly DVD | Varies by provider |
| Best fit | Hands-on users with playable tapes | Simple direct copies | Fragile tapes, no VCR, or big batches |
Here is where I land after doing this a lot: for most people with a handful of playable tapes, capturing on a computer and authoring the disc yourself gives more control than a one-box recorder. Once you pass roughly 20 tapes, or a cassette is visibly damaged, a mail-in service usually costs less in lost evenings than it saves in cash.
Computer Capture
A USB video capture device connects the VCR's RCA or S-Video output to a PC, and VHS capture software records the incoming signal in real time to a file on your drive. It gives you the most control over format, bitrate, and cleanup, at the cost of setup and sitting through each tape. This is the path the rest of the guide leans on, because it produces the reusable master file everything else depends on.
Standalone DVD Recording
A combo VCR/DVD recorder, or a separate DVD recorder wired to a VCR, copies the tape straight to a disc with no computer involved. This VCR to DVD converter approach is the simplest to operate: load a blank disc, press record, and play the tape. The trade-off is that you finish with a disc and no editable master, and used recorders vary a lot in condition.
Professional Transfer Service
A VHS transfer service plays and digitizes the tapes for you and returns files or discs. It removes every hardware headache and handles fragile tapes better than home gear, but your originals travel by mail and turnaround runs into weeks. It earns its cost when the collection is large, the tapes are delicate, or you no longer own a working player.
Save a Digital Master Before Burning
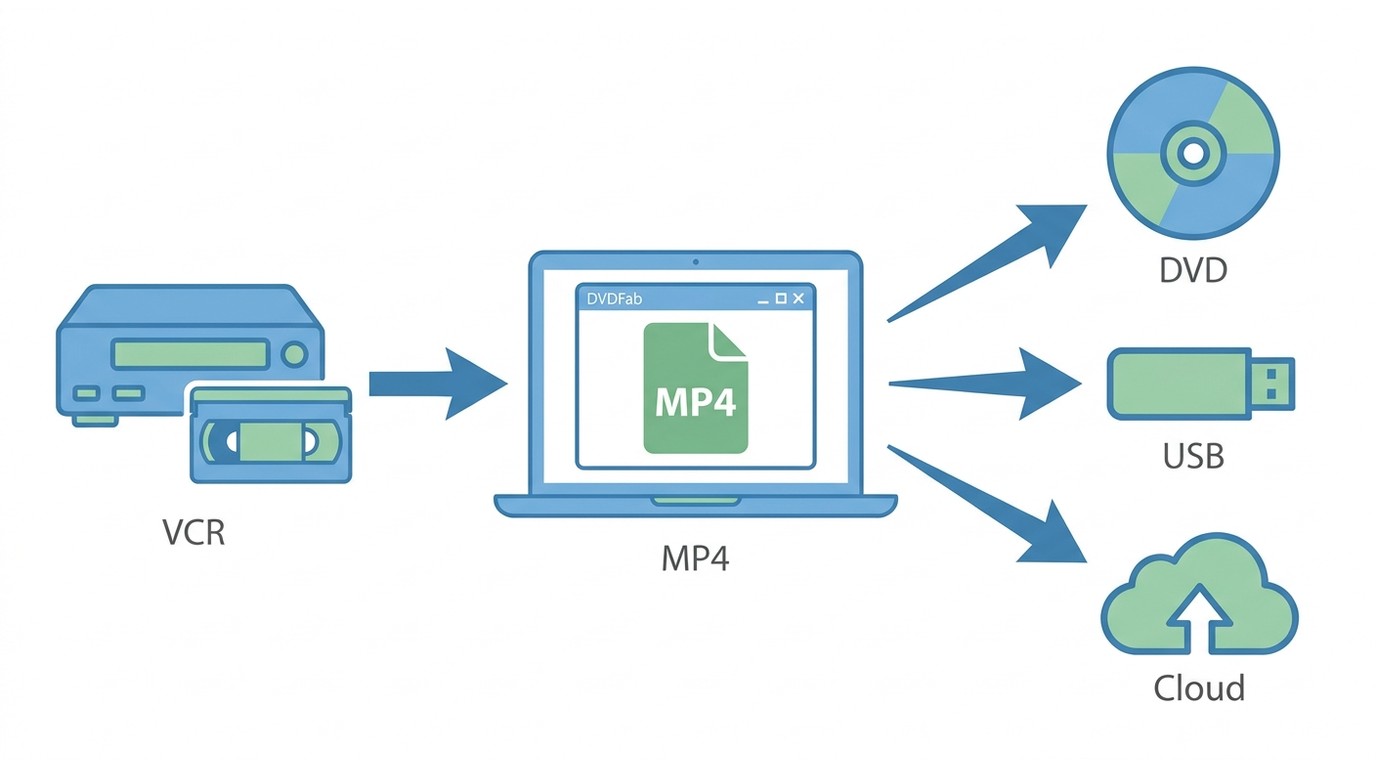
Burn the disc last, not first. Capture each tape to a file you keep, your VHS digital master, and treat the DVD as one convenient copy made from it. A disc is easy to hand to relatives, but it is also the format you are least likely to edit or move later.
The judgment I'd make for almost anyone: keep the master file. If you may later want a USB copy, a cloud upload, light editing, or a replacement disc after one gets scratched, you re-export from the file in minutes instead of re-running the tape through a deck that is only getting older.
MP4 Versus Direct-to-DVD
Recording straight to DVD skips a step but locks your footage into a single disc at whatever quality the recorder chose. Capturing to an MP4 file first keeps a clean source you can burn now and re-use later. For home movies you want to keep, the file-first order is the safer one; the disc becomes a copy, not the original.
DVD, USB, and Cloud Tradeoffs
A DVD plays on any disc player and suits older relatives, but it holds limited runtime and can degrade over years. A USB drive stores far more and copies fast, though it is easy to misplace. Cloud storage adds off-site backup and sharing, with an ongoing account to maintain. Keeping the master means you can serve all three from one source instead of re-capturing.
Check Hardware and Tape Compatibility
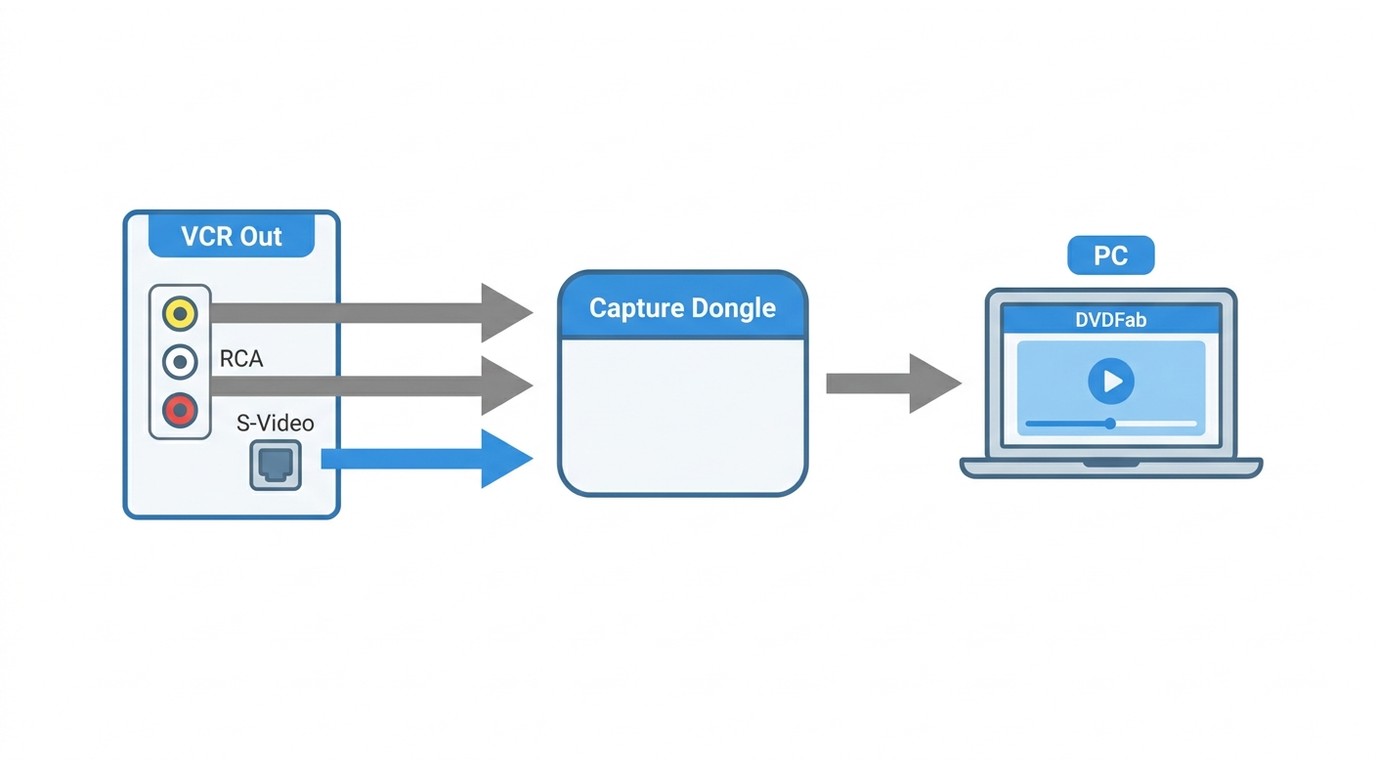
Most failed transfers trace back to something skipped at this stage, not to the software. Before you record a single tape, walk this checklist so a blank screen or a rejected disc doesn't cost you a full playthrough:
- A working VCR that tracks the tape cleanly
- An RCA or S-Video path from the VCR to your capture device
- A USB capture device, or a standalone recorder
- Current drivers and a supported operating system
- Enough free storage, since captures run several gigabytes per tape
- A DVD writer for the authoring step
- Matching blank media, either DVD-5 or DVD-9
- Matched NTSC or PAL playback for the tape's standard
Connections, Drivers, and Disc Types
S-Video carries a cleaner picture than composite RCA when both the VCR and capture device offer it, so use it where you can. On current systems the frequent snag is drivers: an old capture device may not show video until you install the current driver. When I set up a capture device on Windows 11, the usual culprit for a black preview is a legacy driver the installer skipped, and Windows 11 VHS software will not display a picture until the signed driver loads. On the disc side, match the blank to your burner: most writers take DVD-5 and DVD-9, but not every drive burns dual-layer.
NTSC and PAL Playback
In the United States most tapes are NTSC, but PAL cassettes from overseas turn up in family boxes. PAL VHS conversion needs a PAL-capable or multi-system playback device; swapping the cassette shell does nothing, because the video standard is recorded in the signal, not set by the case. If you have PAL tapes and only an NTSC deck, borrow compatible hardware or pick a service that states it handles PAL.
Capture the Tape to Your Computer
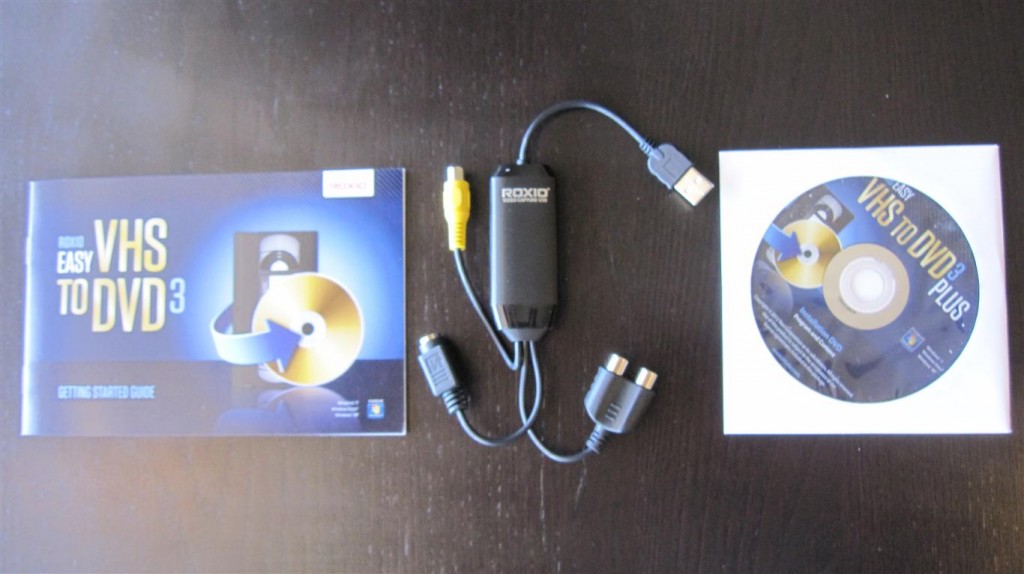
Two active examples show what computer capture looks like in practice: the Diamond VC500 and Roxio Easy VHS to DVD 3 Plus. Both are USB capture bundles that link a VCR to a PC over RCA or S-Video, and both record the signal in real time; neither repairs a weak tape or a failing deck. They suit readers who have a working VCR and can watch a live capture, and they are not the pick for fragile tapes or a machine without compatible drivers. Treat the choice between them as a compatibility question, driver support and your Windows version, rather than a ranking.
Diamond VC500 USB capture device connecting a VCR to a Windows PC
Connect and Configure the Capture Device
Connect the VCR's output to the capture device, plug the USB end into the PC, and confirm the capture app shows live video before you commit to a tape. Set the recording format to MP4 or MPEG-2 and pick the highest quality the device offers. If the preview stays black, stop and fix the driver or cable first; recording a blank pass wastes the whole tape length.
Record and Review the Master File
Start the tape a few seconds before the footage you want, record straight through, and stop after the last usable scene. Because capture is real time, a two-hour tape takes two hours. When it finishes, scrub through the file and check VHS capture quality: watch for audio drift, dropped frames, and tracking noise at the top of the frame. It is far cheaper to re-record now than after you have burned a disc.
Author a Playable DVD with Menus
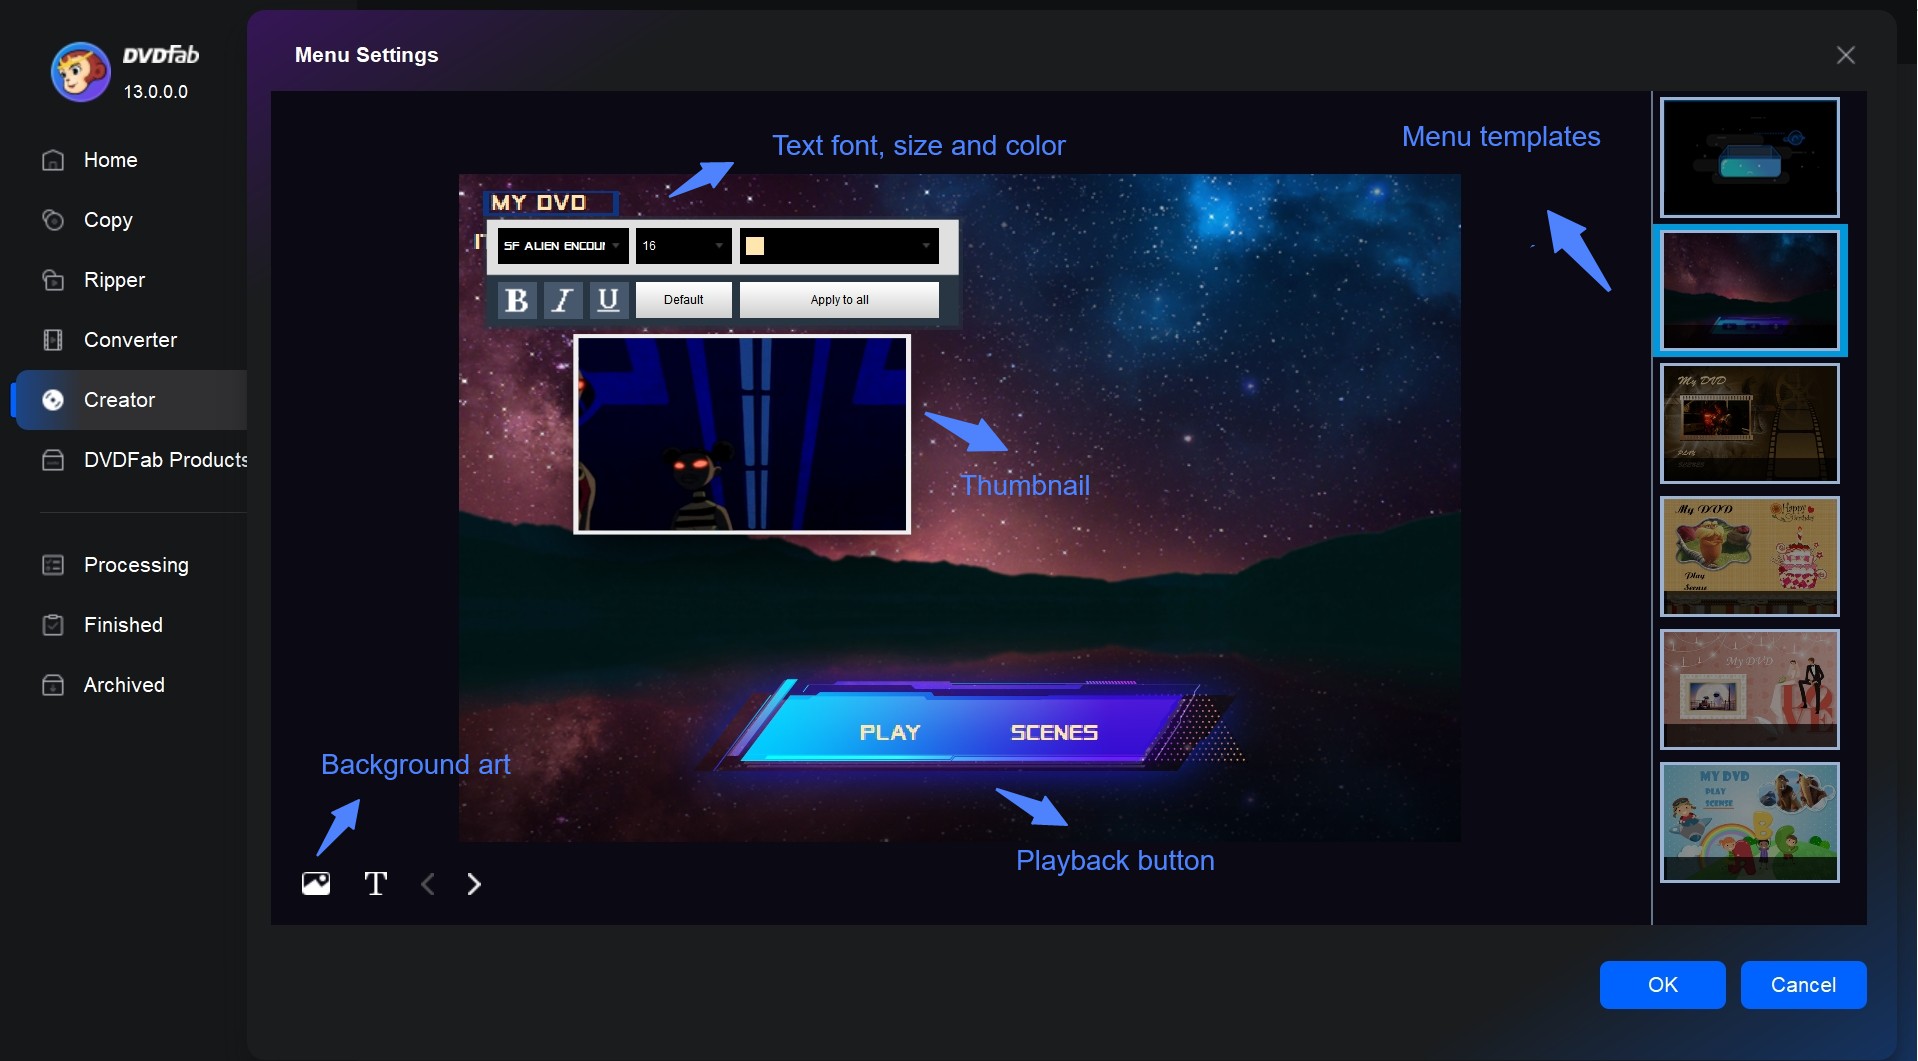
After capturing your analog footage as digital files, you can use DVDFab DVD Creator to complete the final burning process. The software supports over 200 video formats, allowing you to convert your digital recordings into standard DVD structures. To personalize your collection, it provides various menu templates where you can customize background art, thumbnails, and navigation styles.
The software uses GPU hardware acceleration to ensure high-speed conversion without compromising video stability. It also preserves essential metadata from your source files, making it easier to organize and play back your videos on modern media servers or home theaters. Compatible with both Windows and Mac, it offers a practical solution for users looking to transfer their VCR recordings onto physical discs.
Key Features:
- Convert 200+ video formats (including M4V) into DVDs, ISO files, or folders.
- High-quality burning for all standard types, including DVD-5/9 and Dual Layer discs.
- Built-in, professional DVD menu templates with full customization options.
- Easily trim, crop, add subtitles, and manage chapters with the built-in video editor.
- Auto synchronize the source meta info, such as the movie title, cast, and cover.
- Rapid batch conversion of multiple files using GPU hardware acceleration.
- Preview your video before the burning to ensure accuracy.
- User friendly and intuitive interface.
How to use DVDFab DVD Creator to convert your VCR tape to DVD:
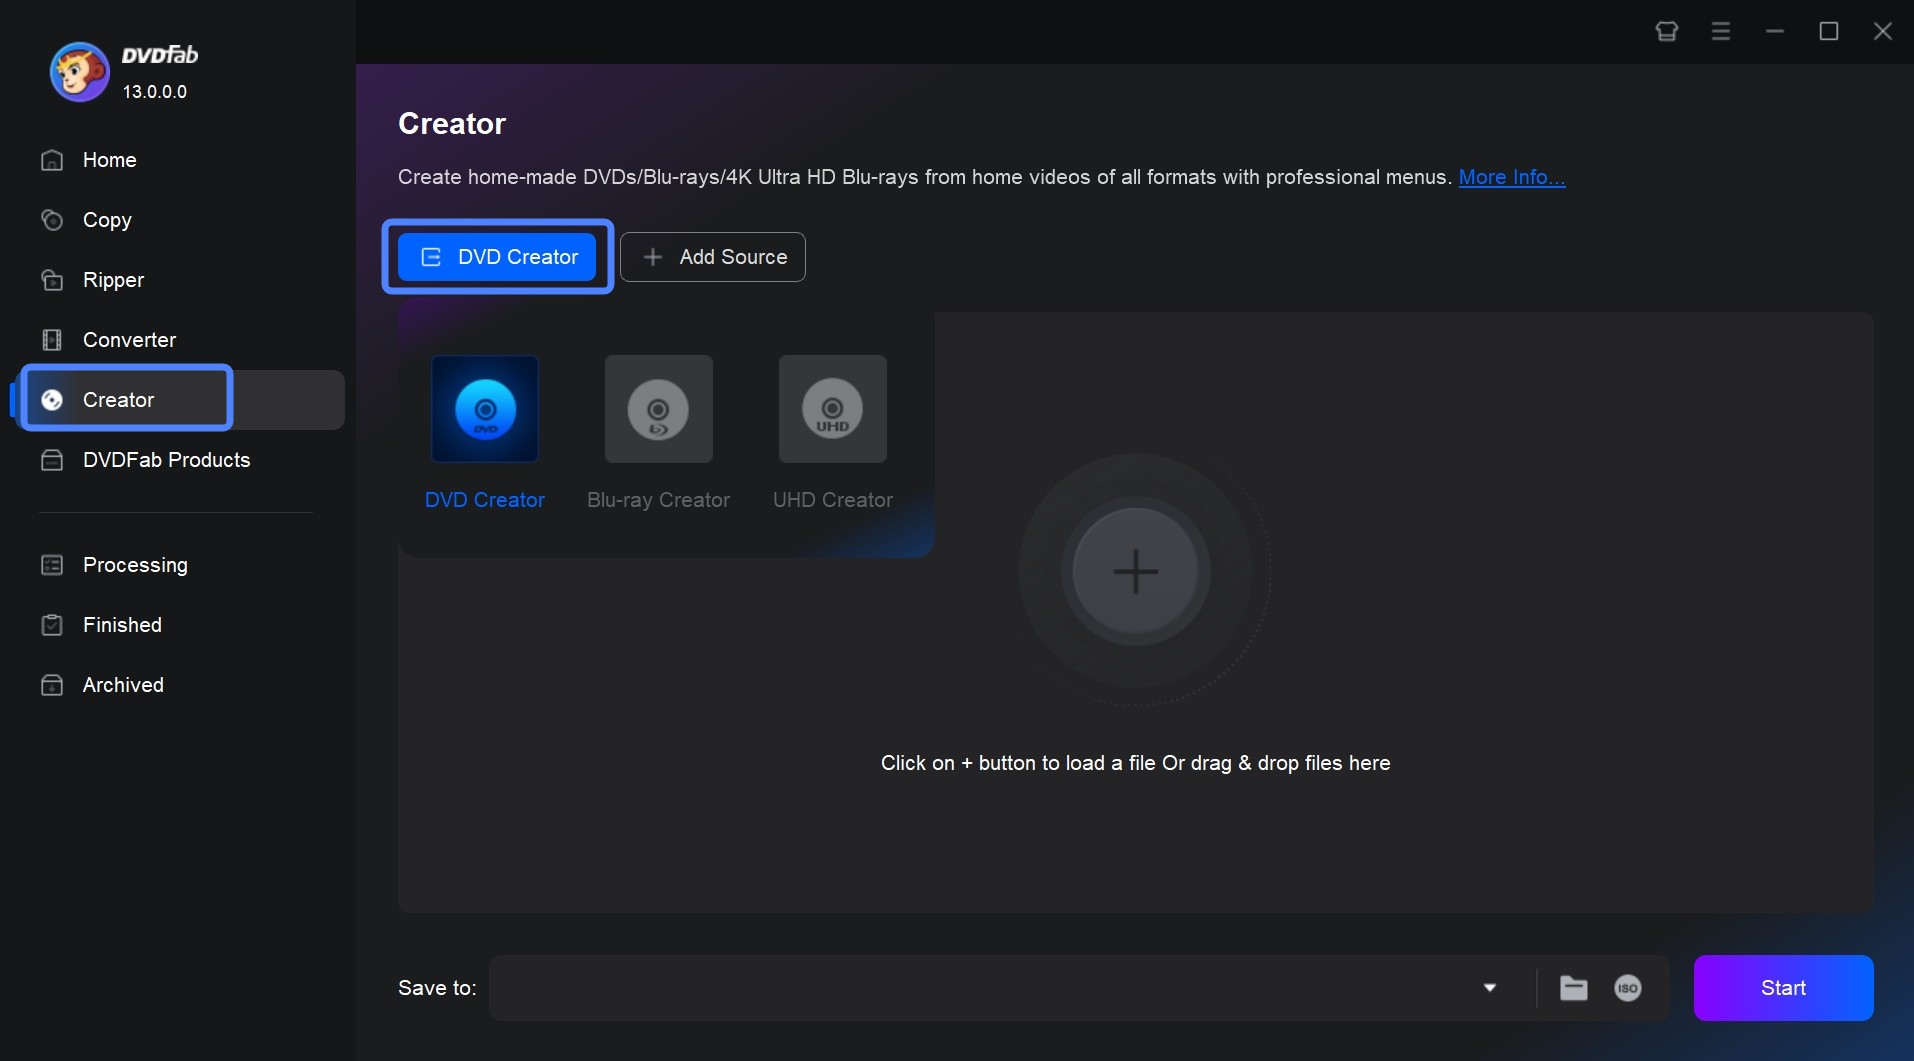
Step 1: Download and install the software on your computer. Launch the software and click on the "Creator- DVD Creator" module. Then load the video file recorded from VCR tape.
Free Download Windows 11/10/8.1/8/7
Free Download macOS 10.13 - 15.x
Step 2: Once the file is loaded, select your preferred audio track, subtitles, output size and other settings.
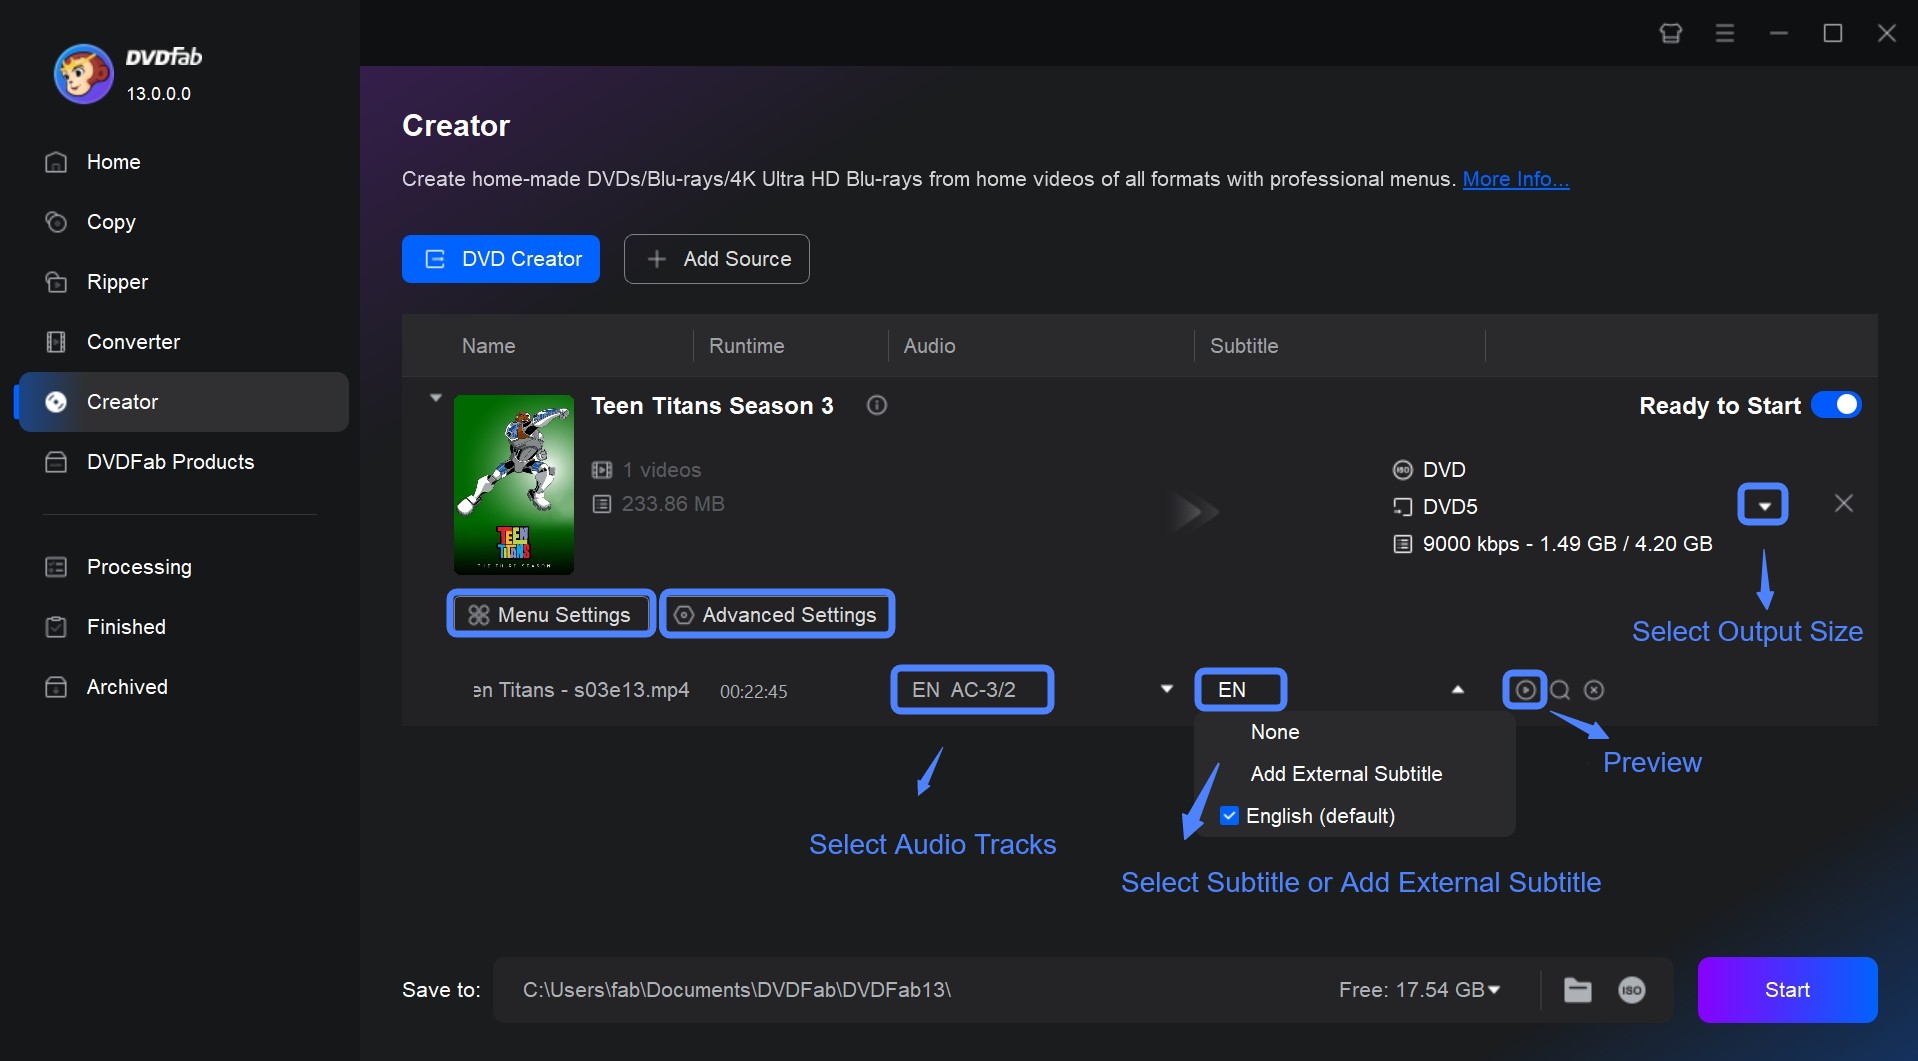
You can also customize the DVD menu templates with built-in DVD menu creator by clicking "Menu Settings".
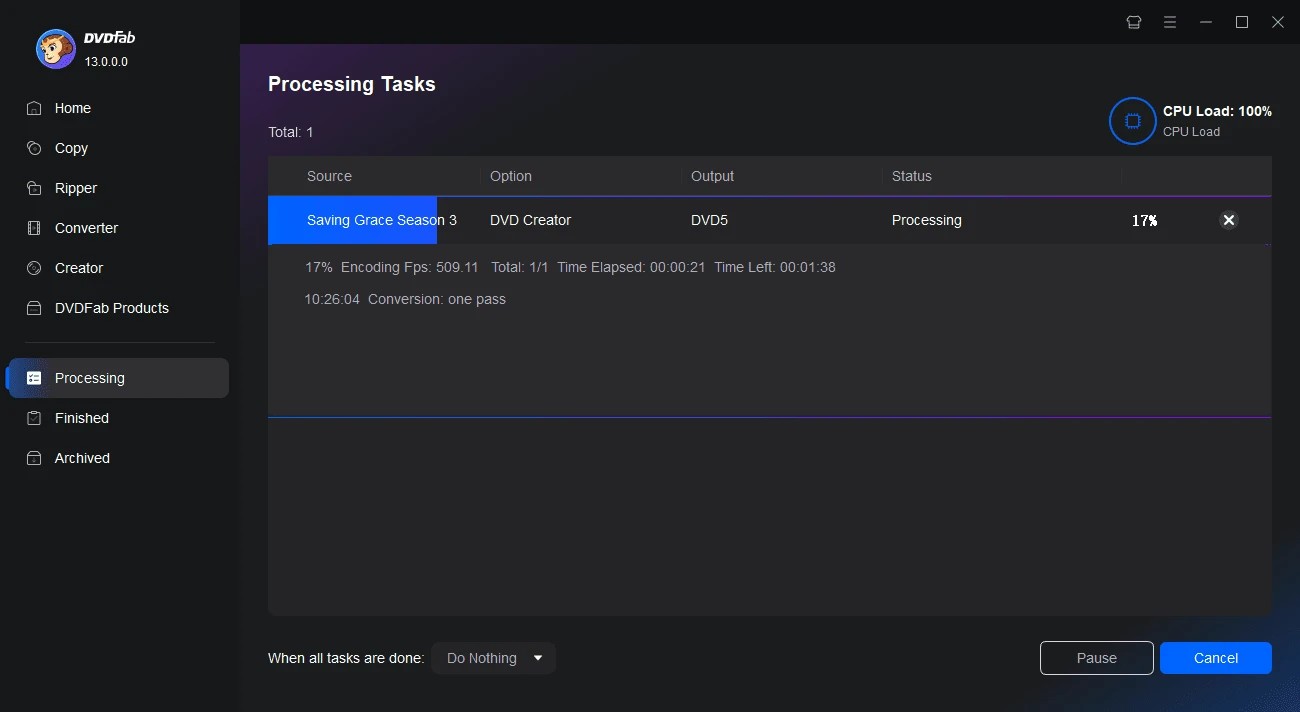
Step 3: Select output directory as blank disc, ISO image file or folder from the Save to option. Finally click on the "Start" button to begin the VCR to DVD conversion process. You can see the detailed progress info during the DVD burning process.
Fix Common VHS Capture Problems
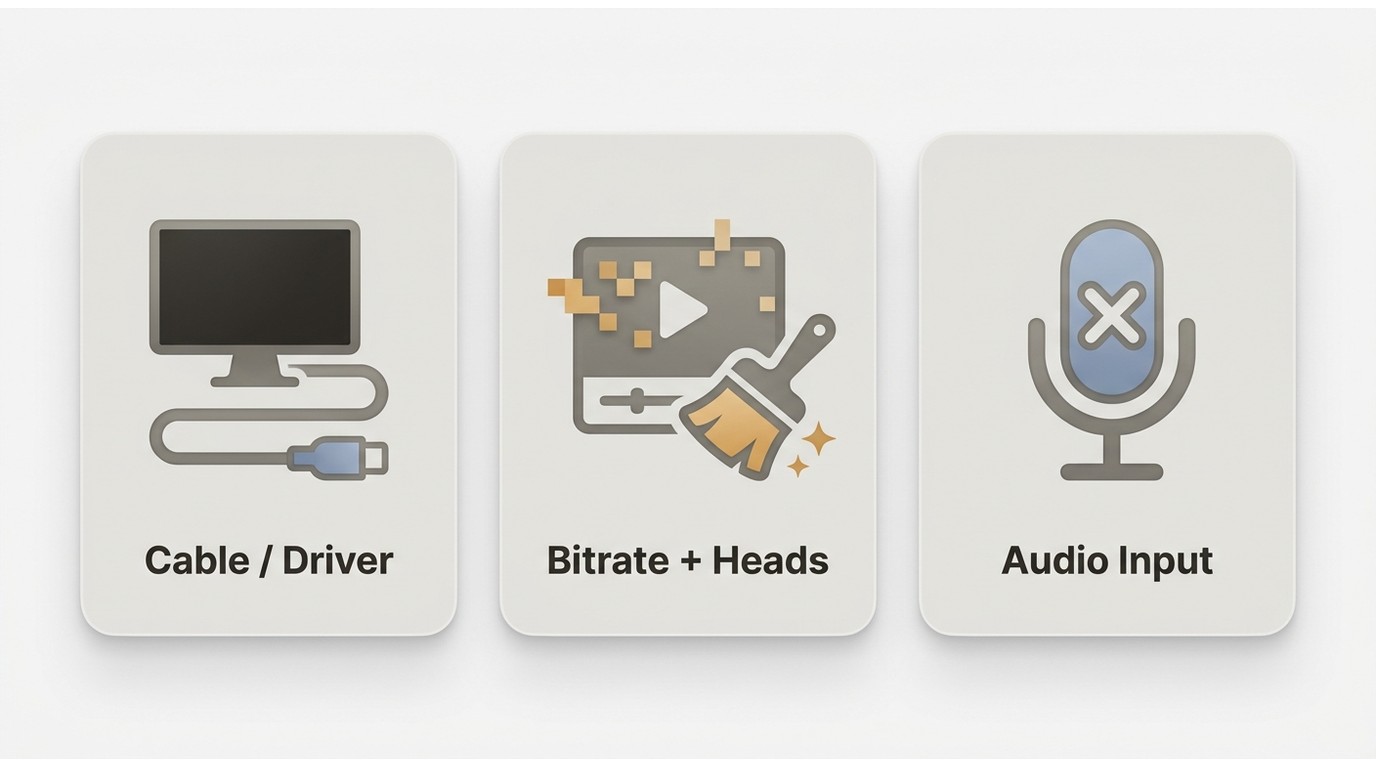
When a capture goes wrong, the fix depends on where the problem started: the source tape, the connection, the driver, the recording settings, or the disc. Separating those saves you from re-recording a good tape to chase a driver bug. The issues below cover what trips up most home transfers.
Blank Video or Missing Audio
A black screen with working audio, or the reverse, almost always points at the connection or driver, not the tape. Confirm the cable is in the VCR's output and the device's input, that the capture app is set to the right source, and that the current driver is installed. Some capture devices carry video and audio on separate inputs, so a loose audio lead leaves you with a silent picture.
Pixelation, Noise, and Quality Loss
Blocky patches and heavy grain usually come from the tape or the bitrate. Clean the VCR heads, let the deck settle its tracking, and try the tape in a second player if you have one. If the picture is fine on playback but the file looks worse, raise the capture bitrate; a low setting throws away detail that no later step recovers. Poor VHS capture quality set here follows the footage all the way to the disc, so it is worth a second pass.
When a Transfer Service Makes Sense
Doing it yourself is not always the cheaper choice once you count your time. A service earns its fee when the numbers or the tapes work against a home setup. If a straight VCR-to-disc job doesn't fit your tapes, a lab can also handle broader VHS-to-DVD transfer options and formats a home rig struggles with.
Cost, Volume, and Turnaround
Home capture has a mostly fixed cost: a capture device and your evenings. Services charge per tape, and pricing varies by provider, output, and order size, with mail-in labs often discounting larger bundles. As of August 2026, current retail and mail-in rates shift often, so treat any single figure as a starting point rather than a fixed quote. For a few tapes, DIY usually wins on cost; for dozens, a bundle can beat the hours you'd otherwise spend babysitting real-time captures.
Fragile Tapes and Missing Equipment
Some jobs favor a service regardless of count. Warped or moldy tapes need careful handling a specialist is set up for, and if you no longer own a working VCR, buying one for a small batch rarely pays off. A service also spares you the gear entirely when the tapes are irreplaceable and you'd rather not risk a first attempt on your own deck.
FAQs
Is it legal to copy my home VHS tapes to DVD?
Personal home recordings you shot yourself are the clearest case, and converting them for your own keeping is the everyday reason people do this. Commercially released or copy-protected material is different, since it can carry copyright and platform restrictions. Keep copies personal rather than for resale or public sharing, and follow the rules that apply where you live.
Can I convert a VHS tape if I no longer own a VCR?
Something has to play the tape, so you have two real choices. Borrow or buy a compatible VCR and capture it yourself, or send the tapes to a transfer service that supplies the playback hardware. A VHS camcorder can stand in as a player if you still have one, paired with a USB capture device.
Do Walmart or Walgreens still transfer VHS tapes?
Retail transfer programs depend on location and vendor, and many storefront services route orders to third-party labs rather than doing the work in-store. Check current availability and pricing with the specific store, and compare it against a dedicated mail-in service, which often handles larger or fragile batches better. Availability and rates change, so confirm before you drop off tapes.
Can one DVD hold an entire VHS tape?
Often yes, but it depends on the tape's runtime and your disc. A DVD-5 fits roughly two hours at reasonable quality, and a DVD-9 about doubles that. A long-play tape can exceed a single disc at good quality, so check the actual runtime, keep the master file, and set the bitrate after you know how much footage you are fitting.
Conclusion
Match the method to your tapes rather than to a product. Use computer capture when you have several playable tapes and want hands-on control over quality; use a standalone recorder for a couple of quick, direct copies; and use a professional service for fragile tapes, missing equipment, or a large collection. Whichever you choose, keep the digital master before you burn, so a scratched disc or a new format request never sends you back to the tape deck. Once your files are captured, authoring a disc with chapters and a menu is the short last step.

 How to Burn a DVD on Mac in 2026: Video, Data, Photos & ISOBy Diana Smith - Sep 28, 2026
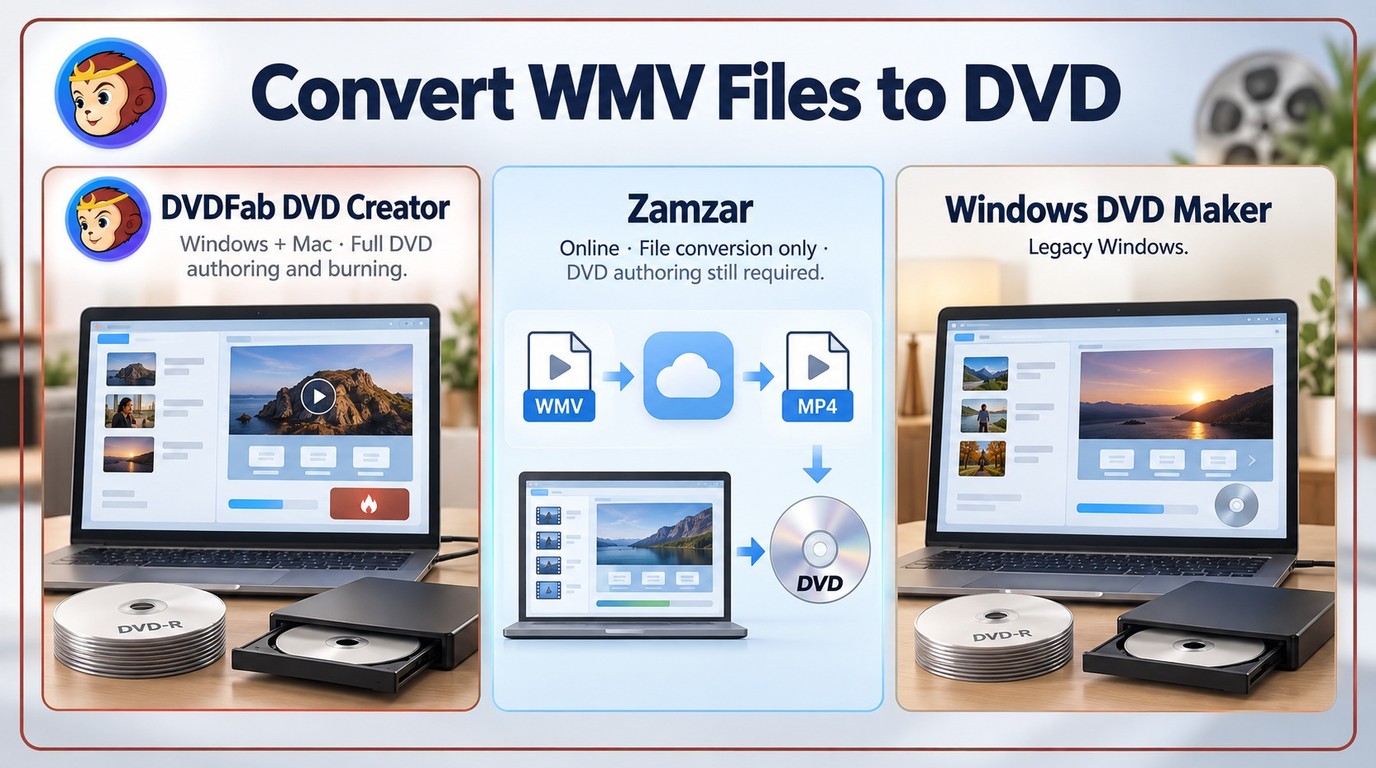 How to Convert WMV to DVD: 3 Methods for Windows and MacBy Wenny Yan - Sep 16, 2026
 How to Convert MP4 to DVD Format for Free on Windows, Mac & OnlineBy Diana Smith - Sep 8, 2026
 How to Burn DVD with Subtitles: Add SRT/ASS or Hardcode CaptionsBy Diana Smith - Sep 3, 2026