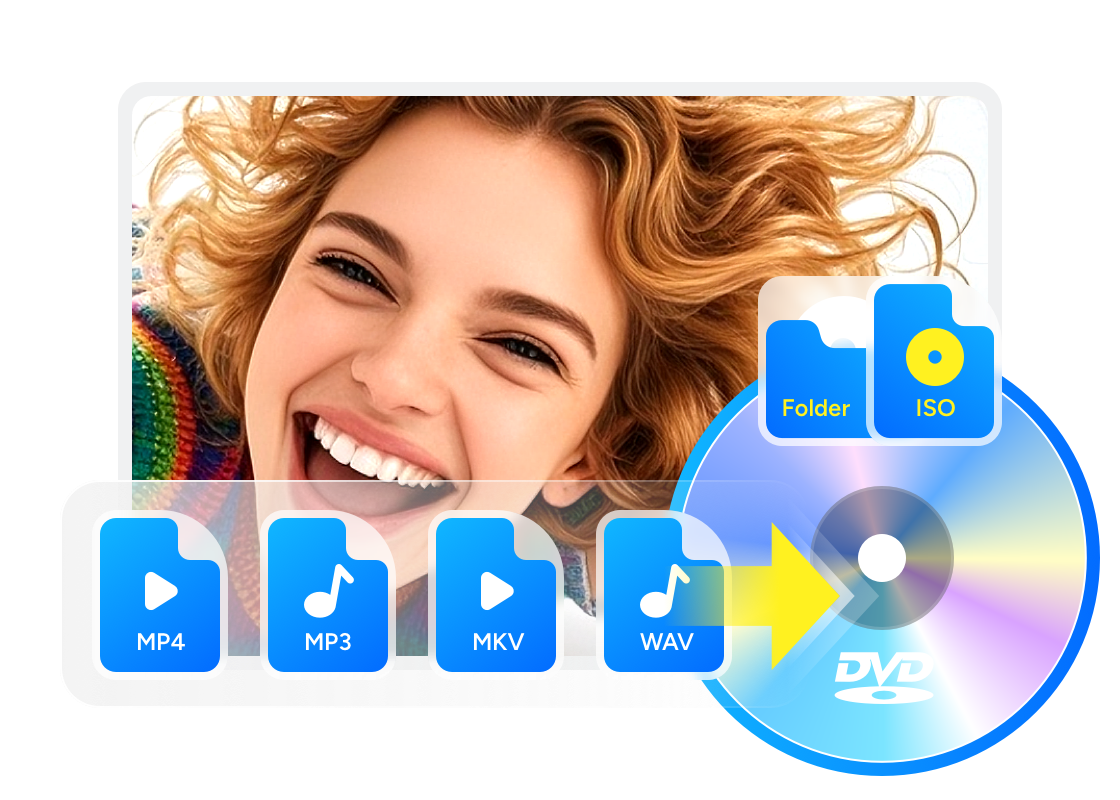
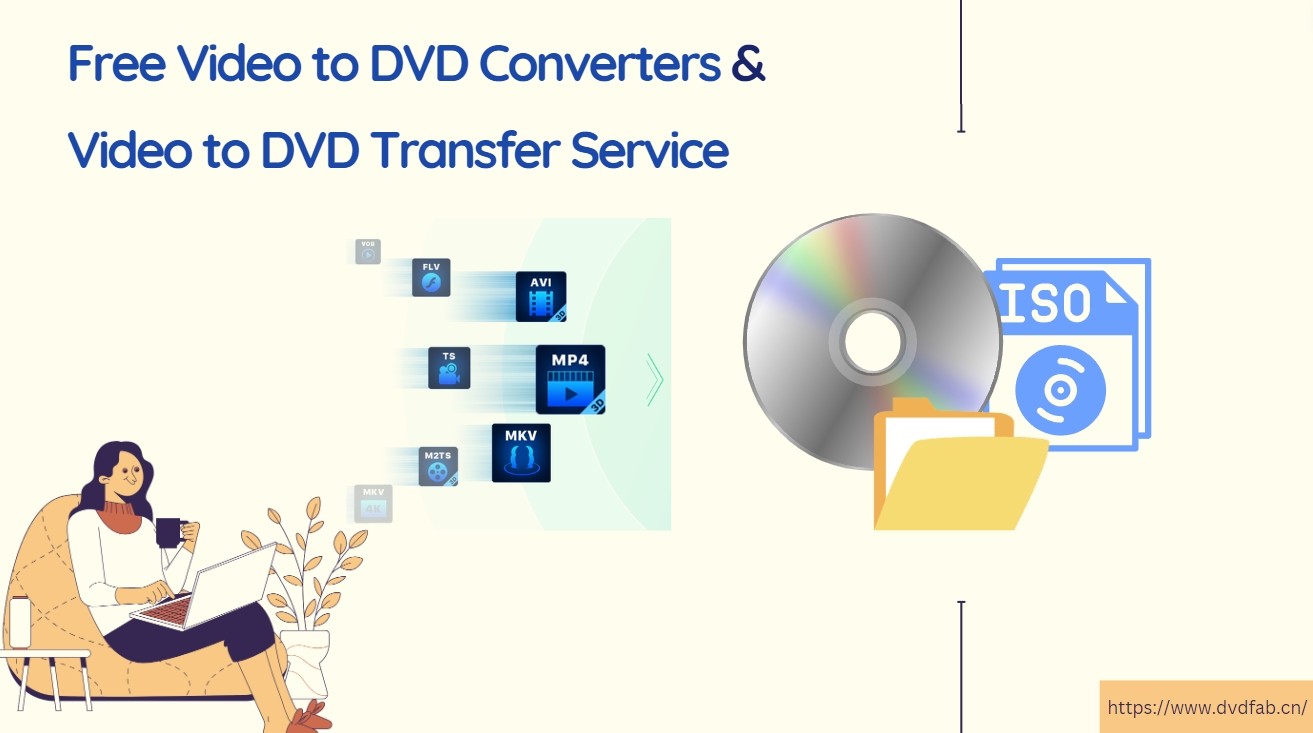
Convert Video to DVD: 8 Best and Free Video to DVD Converters in 2026
Summary: Converting video to DVD involves a platform decision, an input format fit, and for some users an installation safety check. This roundup tests five DVD creation tools across Windows and macOS, covering free and paid options. For most Windows users with standard files, Free Video to DVD Converter handles the task at no cost. DVDFab DVD Creator covers the full range for cross-platform and GPU-accelerated needs. A separate section addresses three professional tape-to-DVD services.
Table of Contents
Adobe Premiere Elements removed its built-in DVD burning module in the 2025 release, which sent a number of video editing users searching for a standalone tool for the first time. Also, DVD output is capped at 480i standard definition (NTSC in the US), so any 1080p or 4K file you bring in will be downscaled. This is a format constraint, not a software limitation. I tested five DVD creation applications across Windows and macOS to map out which handle the full workflow reliably, from video import to disc burn, with honest notes on where each falls short.
A comparison table with scenario guidance appears before the detailed product breakdowns. If your source material is on VHS tape rather than a digital file, the software tools in this article require a capture card as a hardware prerequisite. A separate section covers three professional conversion services for physical tape, including pricing with current verification notes.
Best Video to DVD Converter Software
The table below covers platform availability, pricing model, menu support, and GPU acceleration for each tool, followed by scenario-based guidance.
| Software | Price | Platform | Input Formats | DVD Menu | GPU Accel | Best For |
| DVDFab DVD Creator | Free trial / Paid | Windows, macOS | 200+ formats | ✓ | ✓ | Broadest format and platform coverage |
| Free Video to DVD Converter | Free | Windows | Common formats (AVI, MP4, WMV) | Basic auto-menu | ✗ | Simple no-cost Windows conversion |
| AVS Video Converter | Subscription | Windows | 150+ formats | ✓ | ✓ | Existing AVS4YOU subscribers |
| Freemake Video Converter | Free (watermark) / Paid | Windows | 500+ formats | ✓ | ✗ | Wide format input, install with care |
| Aiseesoft DVD Creator | Paid (suite) | Windows, macOS 10.12+ | Common formats + iOS devices | ✓ | ✓ | Mac users, iOS device import |
Windows PC, broad format needs: DVDFab DVD Creator handles the widest range of input containers (200+) with GPU acceleration and runs on both Windows and macOS. For users who regularly work with MKV, FLV, or less common containers, it removes the need to pre-convert files before burning.
Windows PC, simple files only: Free Video to DVD Converter from DVDVideoSoft covers AVI, MP4, WMV, MOV, and MPG without cost and without bundled software history. For standard files, it gets the job done in five steps.
Mac users: DVDFab or Aiseesoft are the two options in this article that support macOS. Aiseesoft also handles direct import from connected iOS devices and camcorders.
1. DVDFab DVD Creator
DVDFab DVD Creator is the most versatile option in this roundup in terms of platform coverage and input format breadth. The built-in editor handles pre-burn adjustments without requiring a separate application for trimming or color correction before import. For users who regularly encounter less common video containers, the broad format support reduces the pre-conversion steps needed before reaching the DVD authoring stage.
Key features
- Converts 200+ video formats to DVD disc, ISO, or VIDEO_TS folder on Windows and macOS
- GPU-accelerated encoding reduces conversion time significantly on compatible NVIDIA, AMD, and Intel hardware
- DVD menu creation with customizable templates, background images, text styling, and chapter configuration
- Audio track and subtitle selection per title, with external subtitle file import before burning
- Built-in editor handles trim, crop, color adjustment, rotate, and watermark addition in one workflow
- Supports all DVD disc types including DVD+R/RW, DVD-R/RW, DVD+R DL, and DVD-R DL
Worth noting
- Standalone DVD Creator pricing is listed separately on the product page
How to Convert Video to DVD with DVDFab DVD Creator
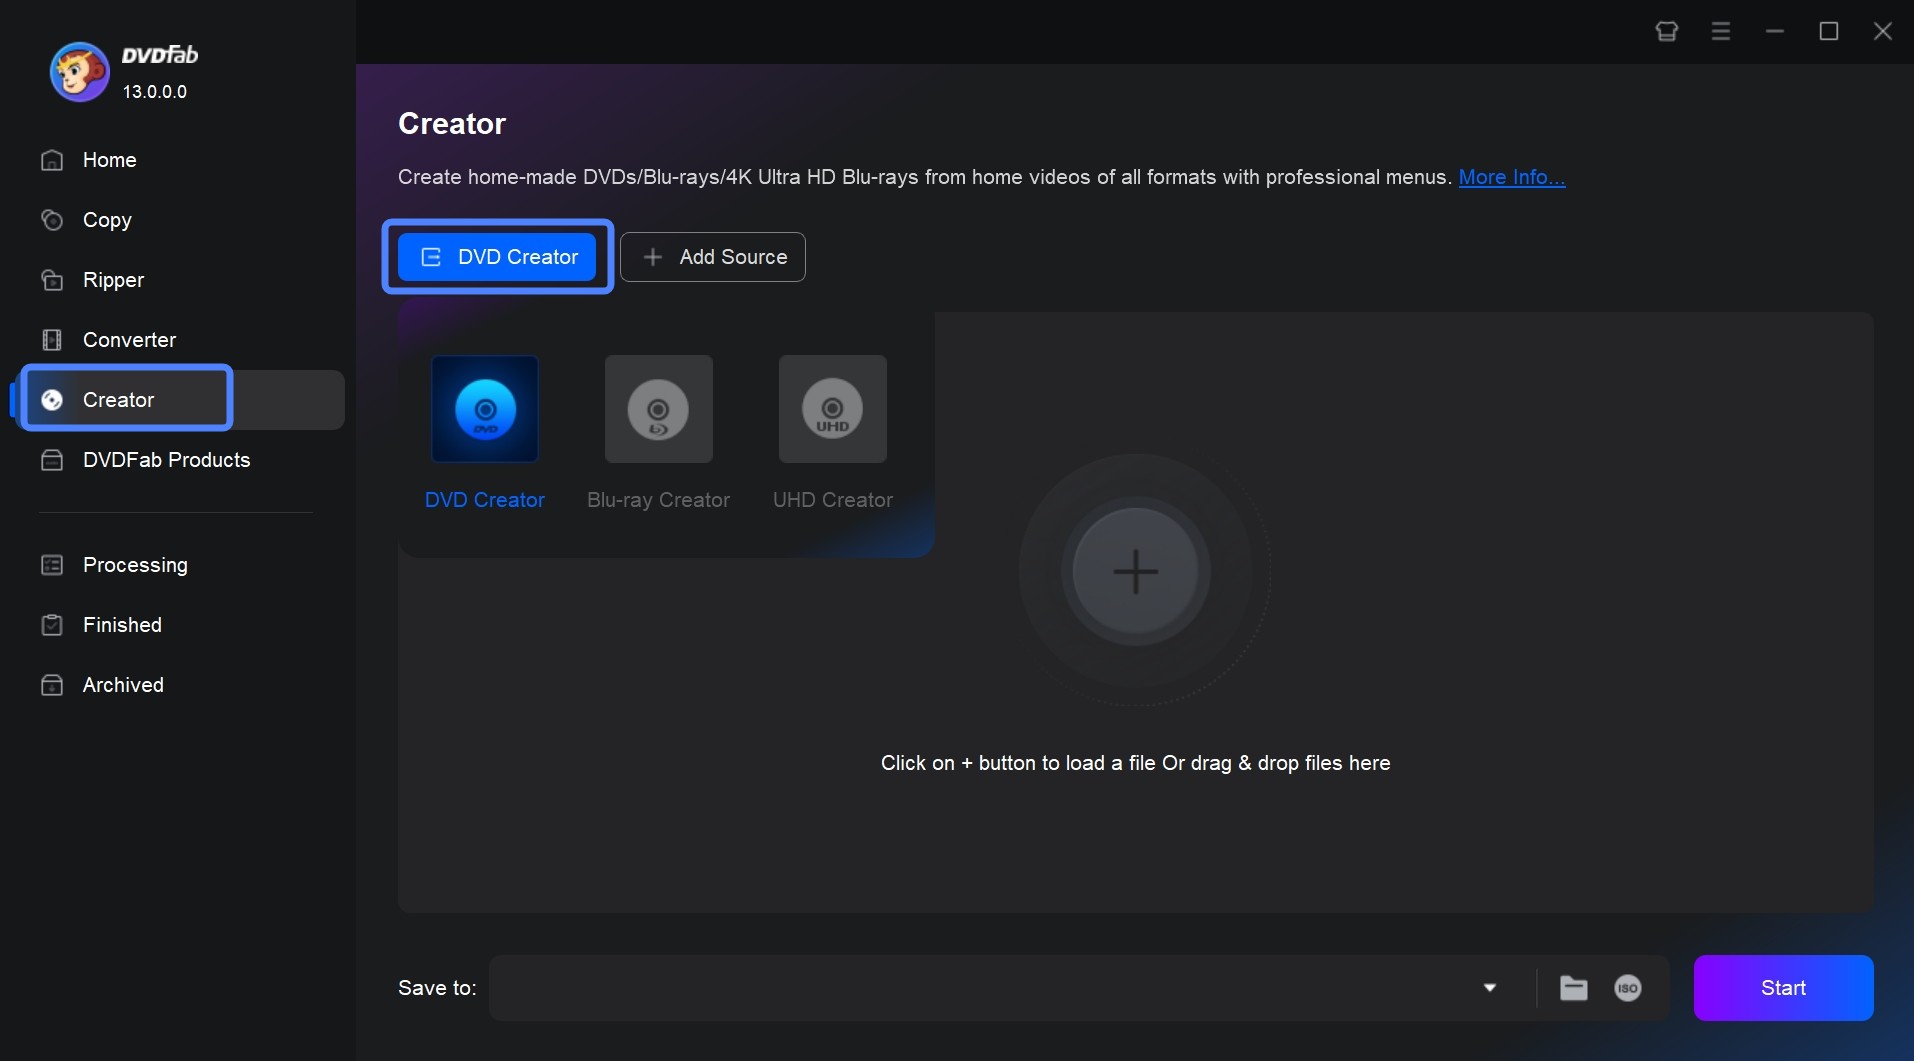
Step 1: Download and launch DVDFab 13, then load your video source
After installation, open DVDFab 13 and select "Creator - DVD Creator" from the module selection screen. Load your video file by dragging it onto the main interface or using the file browser.
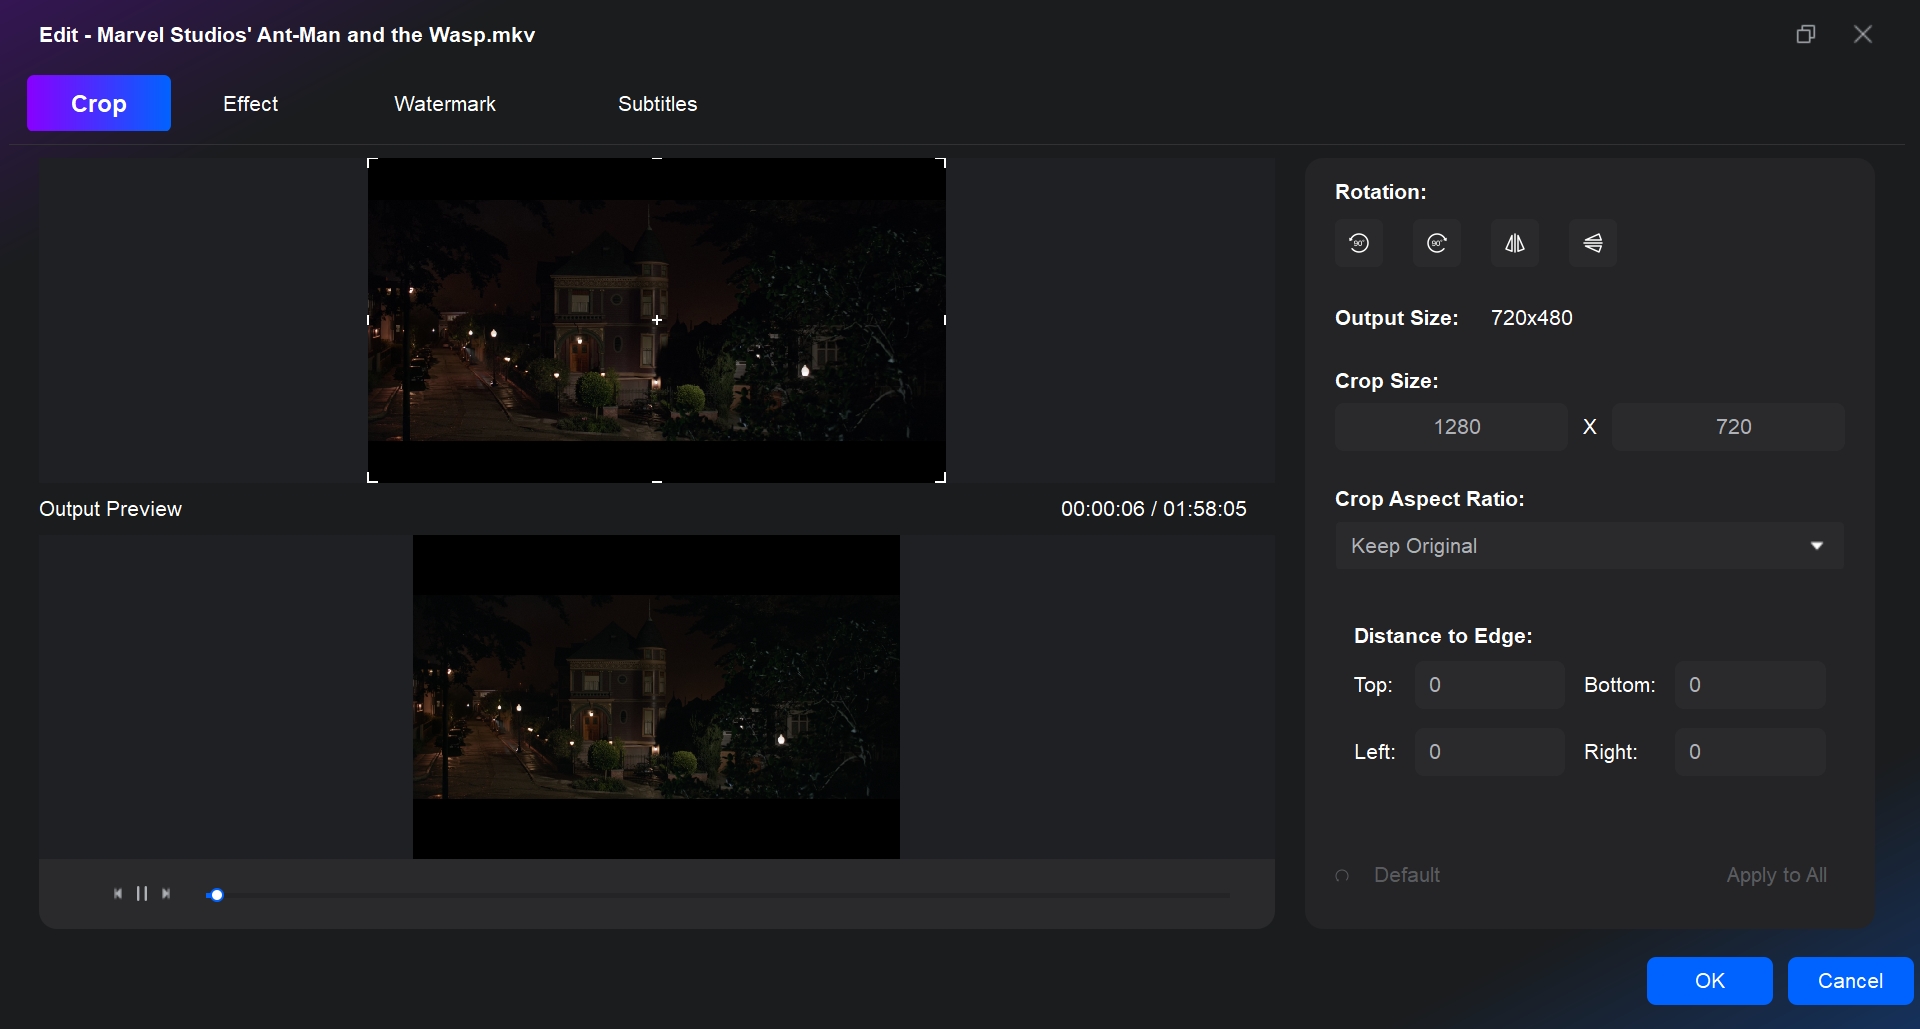
Step 2: Configure disc settings, menu, and optional video edits
With the source file loaded, select audio tracks and subtitles in the main panel; add external subtitle files if needed. Open "Advanced Settings" to choose disc size (DVD-5 at 4.7 GB or DVD-9 at 8.5 GB), TV standard (NTSC for US playback, PAL for Europe), aspect ratio, and playback mode. Use "Menu Setting" to create DVD menu, customize the template, background, and button layout.
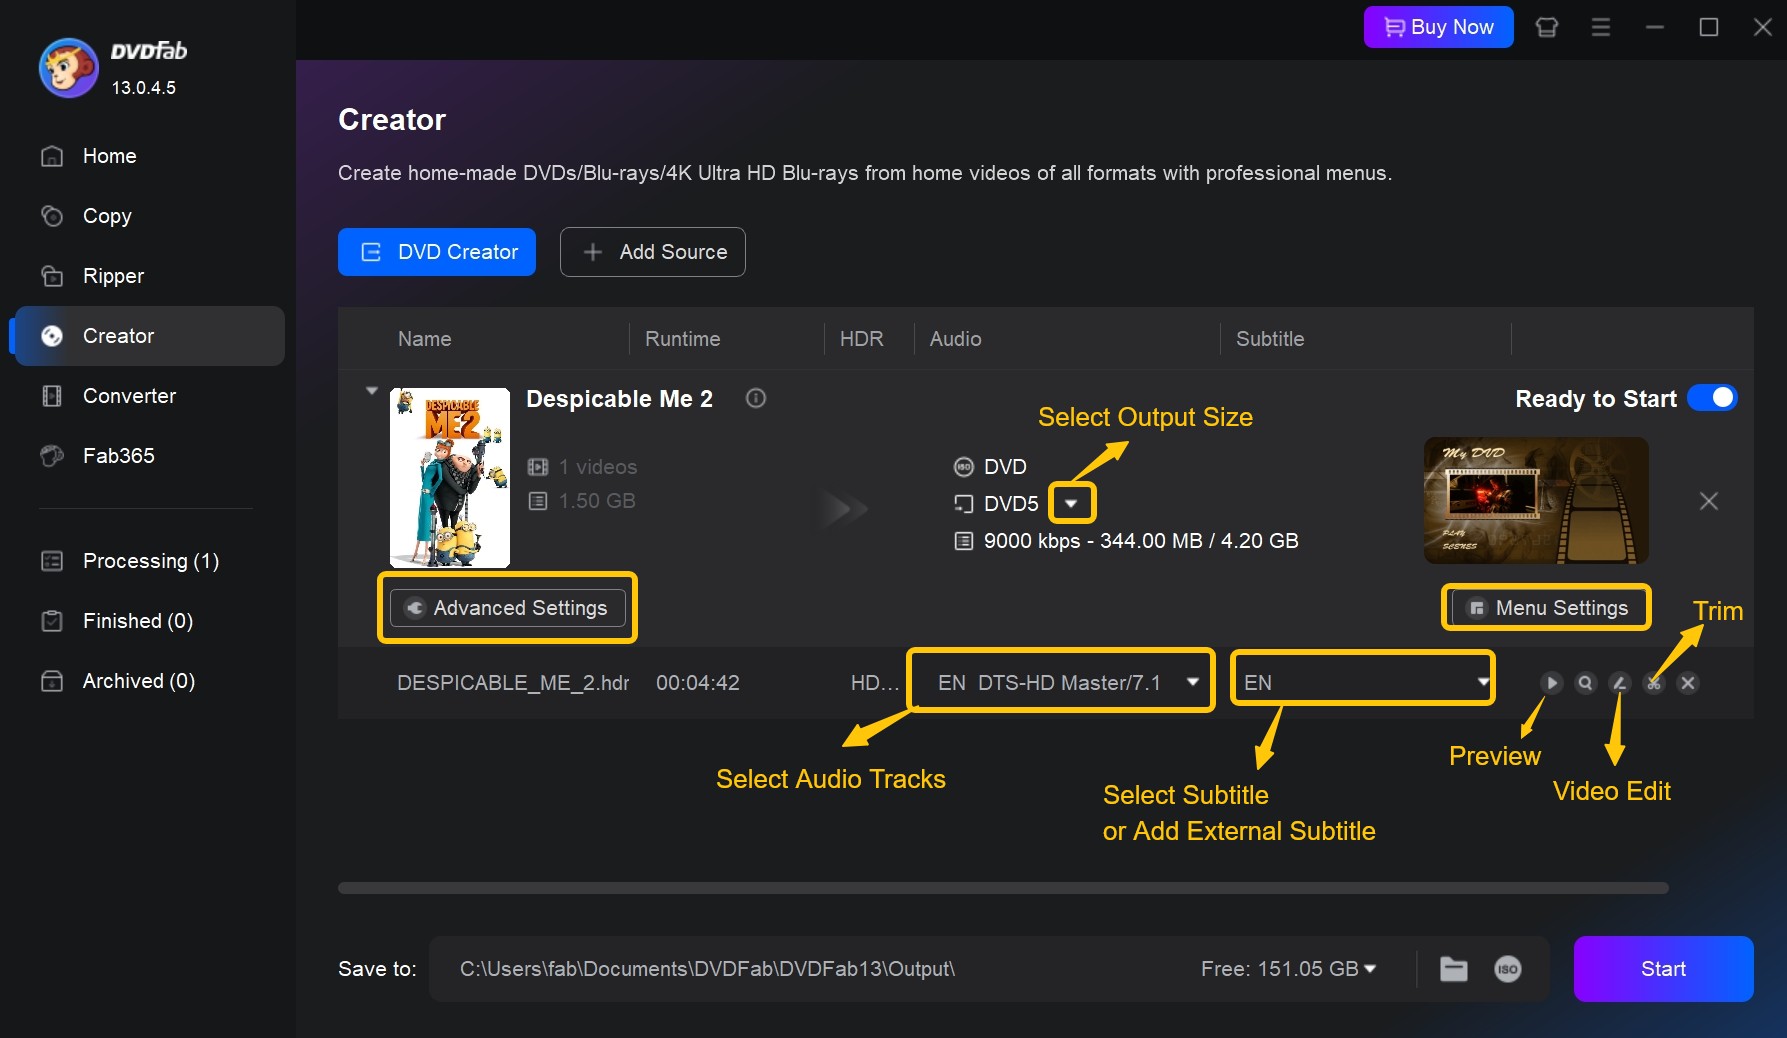
The built-in "Video Edit" and "Trim" modules let you cut segments, adjust colors, rotate, crop, or add watermarks before the final burn.
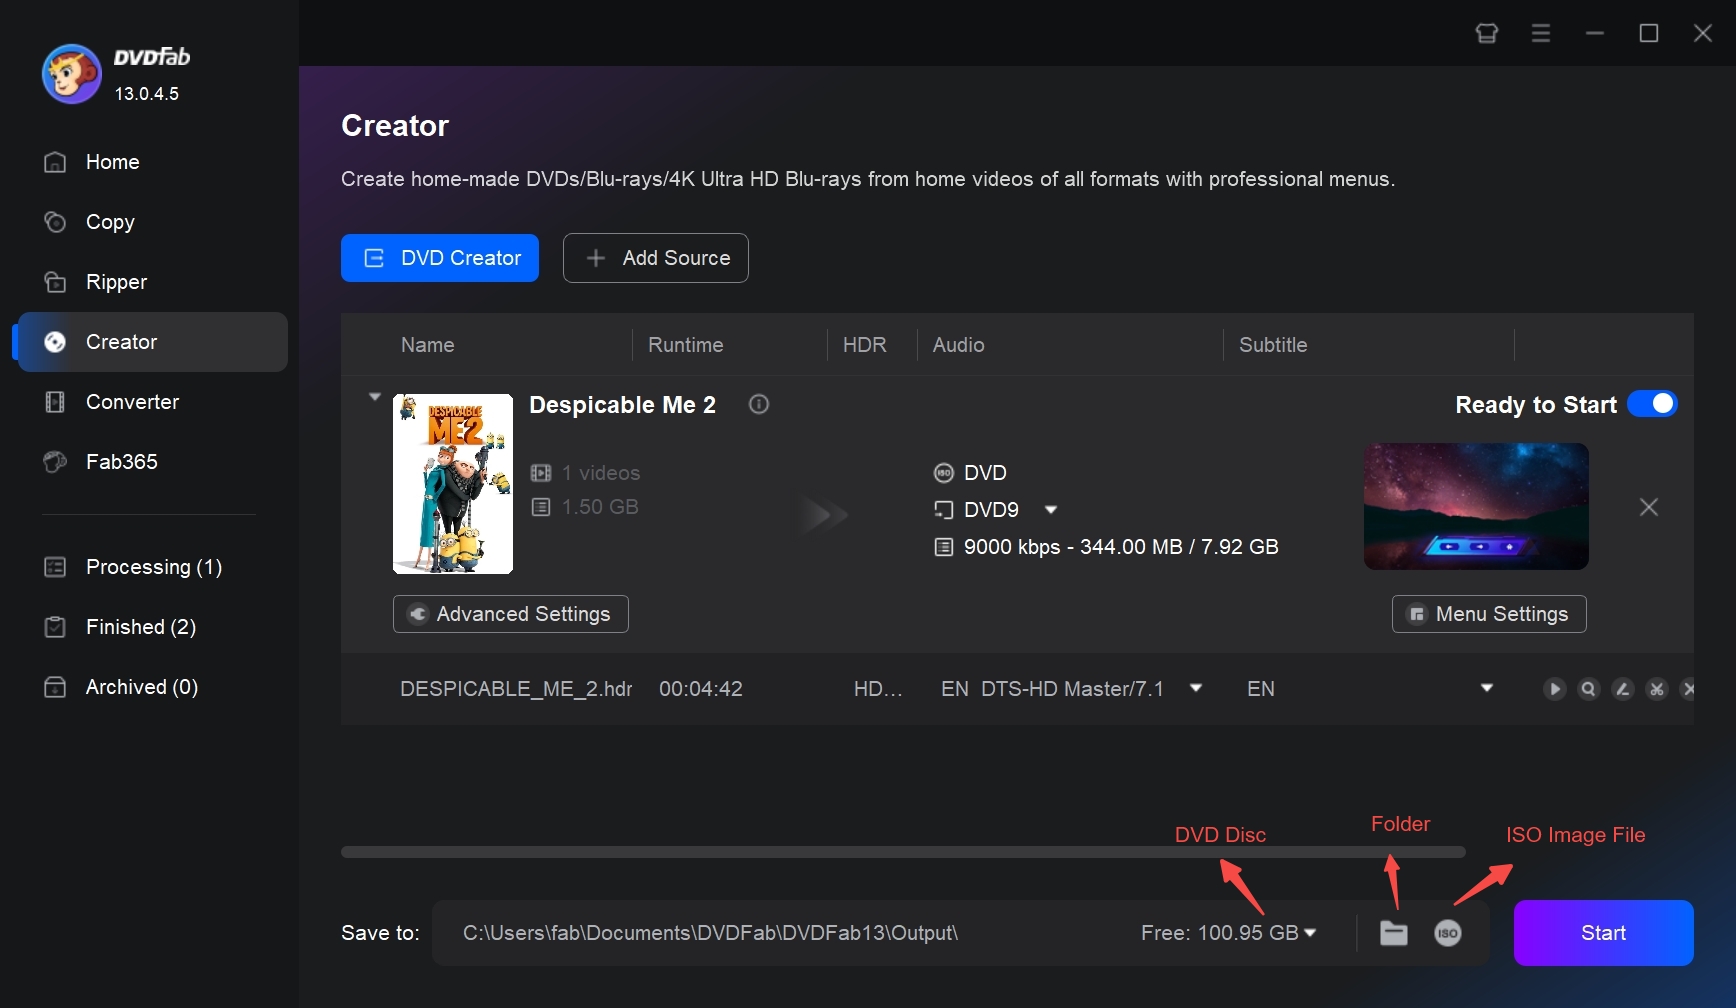
Step 3: Insert a blank disc and start converting M4V to DVD
Insert a blank DVD disc into your optical drive. If no drive is available, set the output to ISO file or VIDEO_TS folder to burn later. Click "Start" to begin encoding and disc writing.
2. Free Video to DVD Converter
Free Video to DVD Converter, developed by DVDVideoSoft, is built for users who need to burn standard home video files to disc without additional tools, subscription costs, or bundled software risk. The interface is queue-based: add files, set an output folder, choose quality, and burn. It does not include a video editor, GPU-accelerated encoding, or configurable menu templates. What it offers is a clean, low-friction workflow at no cost, which is the primary reason to choose it over a more feature-complete tool.
Key features
- Accepts AVI, MP4, WMV, MOV, and MPG formats; supports both DVD-5 and DVD-9 disc sizes
- PAL and NTSC output presets for regional player compatibility without manual configuration
- Disc space indicator shows remaining capacity as files are added to the queue
Worth noting
- No macOS version is available from DVDVideoSoft
- The auto-generated menu cannot be customized beyond basic settings
- Input format range is narrower than other tools in this list
How to Convert Video to DVD with Free Video to DVD Converter
Step 1: Download and install Free Video to DVD Converter from the DVDVideoSoft website.
Step 2: Launch the program and click "Browse" to add your video files to the queue. The disc space bar shows how much capacity each file uses.
Step 3: Set an output folder using the second "Browse" button and select a quality preset from the dropdown list.
Step 4: Choose PAL or NTSC output based on your region and target player.
Step 5: Click "Create DVD" to burn WMV to DVD. When complete, select the VIDEO_TS folder as the source if you want to burn directly to disc using the application's built-in burn option.
3. AVS Video Converter
AVS Video Converter is distributed as part of the AVS4YOU subscription suite, which packages video conversion, DVD and Blu-ray authoring, audio editing, and other utilities under one annual fee. For users already subscribed to AVS4YOU for other tools in the suite, DVD creation is available at no additional cost. For users considering AVS specifically for DVD burning, the subscription model makes it worth comparing against the standalone pricing of dedicated DVD authoring tools before committing.
Key features
- Converts from 150+ input formats to DVD disc or Blu-ray with integrated menu template selection
- GPU-based hardware acceleration available for compatible graphics cards on Windows
- Batch conversion processes multiple files simultaneously without pausing between jobs
- Direct upload option sends completed conversions to YouTube, Facebook, or Vimeo after export
Worth noting
- No macOS version despite being a subscription-based product
- Free version adds a watermark to output; watermark removal requires an active AVS4YOU subscription
- Technical forum users have reported inconsistent performance on large files
How to Convert Video to DVD with AVS Video Converter
Step 1: Download and install AVS Video Converter. Launch the software and click "Browse" to select the source video file.
Step 2: Click the "To DVD" button and choose a conversion profile. Set the output file path using the field next to "Output File Name."
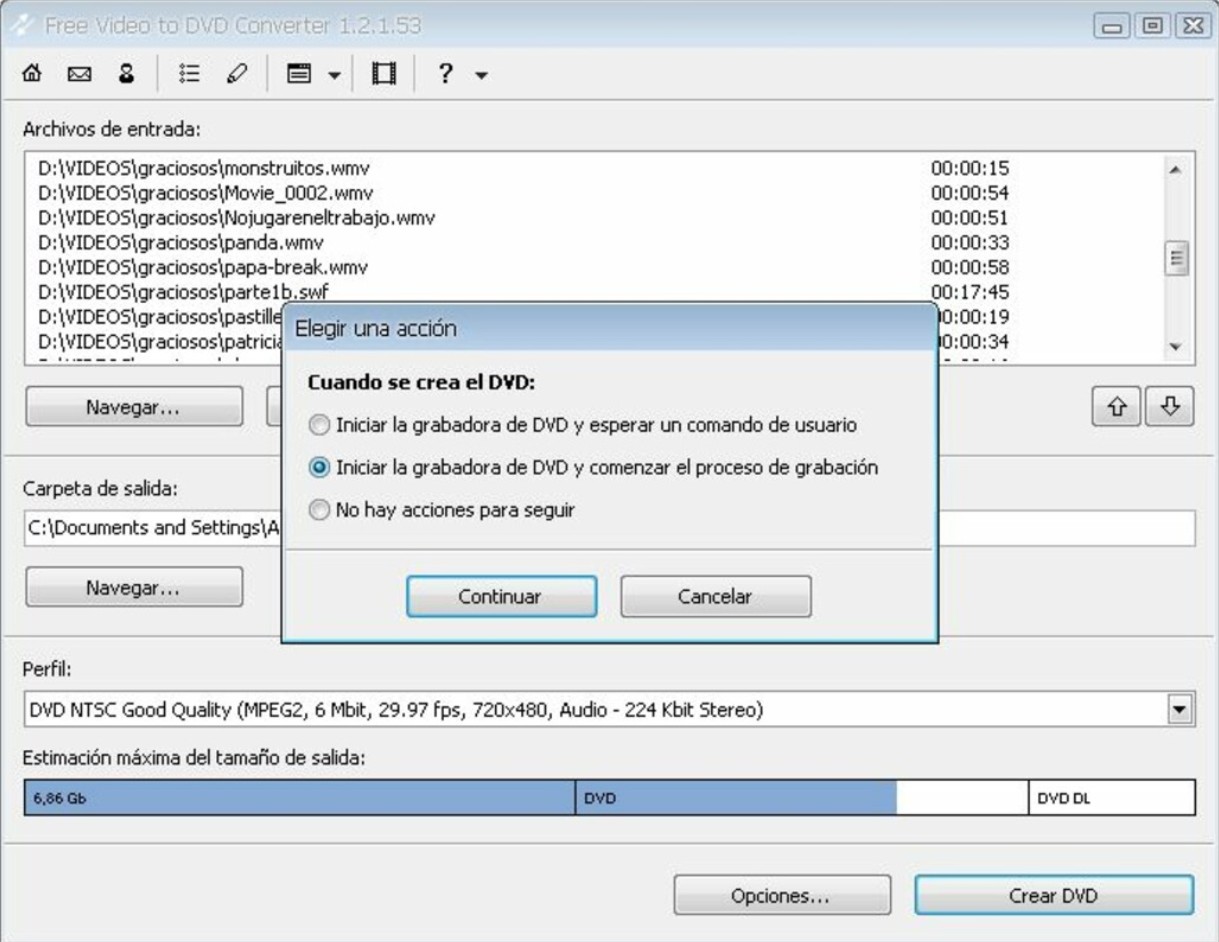
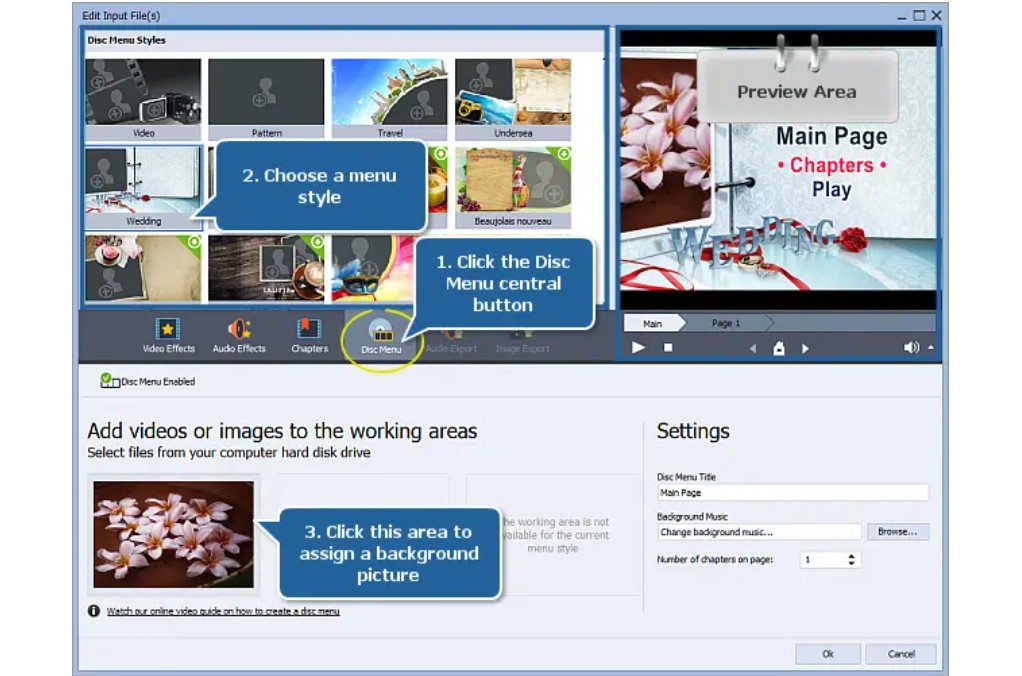
Step 3: Use the disc menu builder to select a menu style from the built-in library. Add chapters, set a background image, and configure background music under the Settings panel.
Step 4: Click "Convert Now!" to begin encoding. The progress window shows estimated time remaining.
Step 5: After conversion completes, click "Convert to Disc," insert a blank DVD, and click "Start converting!" to begin burning. If "Verify disc" is checked, the software confirms the disc recorded correctly after writing.
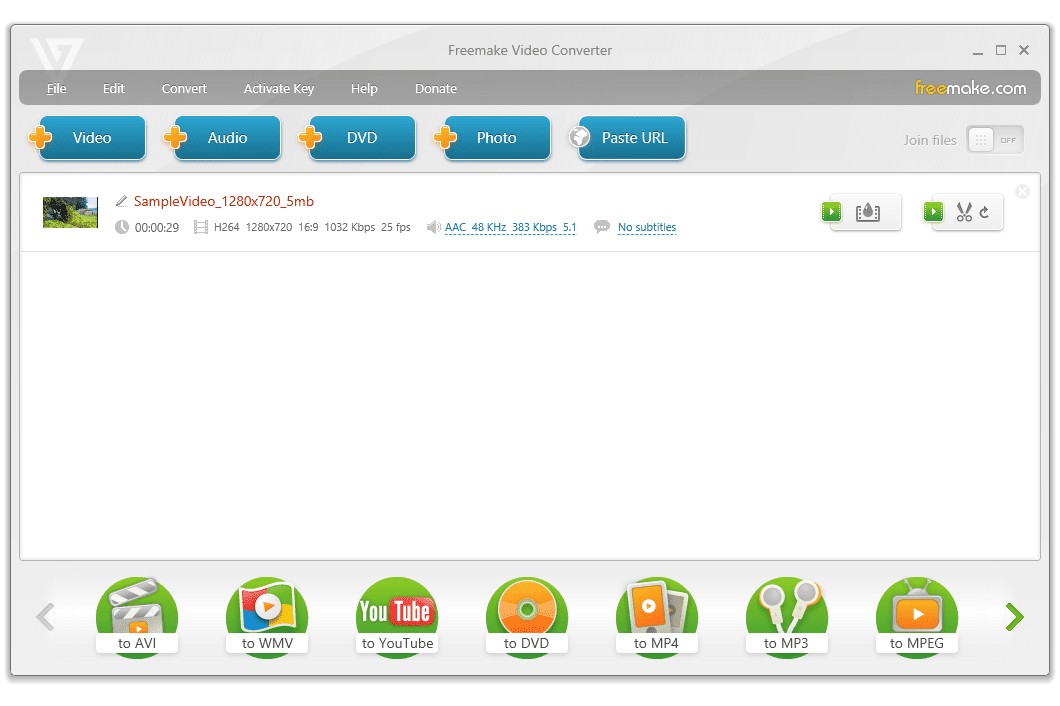
4. Freemake Video Converter
Freemake Video Converter is a Windows application with a broad input format range and DVD authoring capability. Before installing, note its documented history of bundling third-party software with the installer, including OpenCandy, SweetPacks, and Conduit toolbar, which have been flagged as potentially unwanted programs (PUPs) by security tools including Norton and SpyHunter. If you proceed, choose Custom Installation at every prompt and decline all third-party offers before finishing setup. The free tier adds a visible watermark to output; removing it requires a paid license.
Key features
- Accepts 500+ audio and video formats and outputs to DVD disc, ISO image, or VIDEO_TS folder
- DVD menu templates with text, picture, and custom background configuration options
- Basic editing including crop, trim, rotate, flip, and external subtitle addition before burning
- Batch queue burns multiple video files to a single disc in sequence without manual restarts
Worth noting
- Free tier adds a visible watermark to all converted output
- No GPU acceleration; encoding runs on CPU only
- Installer has a documented history of bundling PUP software
How to Use Freemake Video to DVD Converter
Step 1: Download Freemake from the official website. During setup, choose Custom Installation and decline all third-party software offers at each step.
Step 2: Collect your video files in one folder and drag them into the Freemake interface.
Step 3: Click the "to DVD" button and configure disc type (DVD-5 or DVD-9) and output settings.
Step 4: Click "No Menu" to open the menu selection panel. Choose a text menu, picture menu, or custom background menu style.
Step 5: Insert a blank disc and select it as the output destination, then click "Convert" to start burning. Once complete, insert another blank disc to make additional copies if needed.
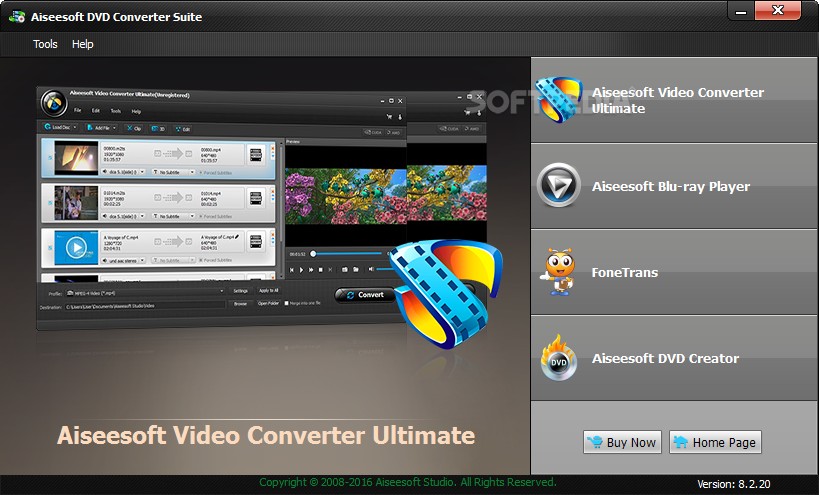
5. Aiseesoft DVD Creator
Aiseesoft DVD Creator is sold as part of the DVD Toolkit suite, a package that combines DVD authoring with utilities for iOS device file management and Blu-ray playback on the same machine. It is relevant to two specific user situations: Mac users who need a macOS-compatible DVD authoring tool with a configurable menu editor, and users who regularly transfer video directly from mobile devices or cameras and want a single application that handles both the import and the disc burn. The suite pricing reflects all bundled tools, which may or may not be worth the cost depending on whether you need the non-DVD components.
Key features
- Imports video from connected iOS devices, camcorders, and external drives alongside local files
- DVD menu templates with configurable audio tracks and external subtitle file support before burning
- GPU hardware acceleration on compatible hardware reduces encoding time for longer source files
- Exports to DVD disc, ISO image, or VIDEO_TS folder for flexible archiving options
Worth noting
- Bundled with iOS file transfer and Blu-ray playback tools most DVD authoring users will not need
- macOS support starts at 10.12 Sierra; macOS 10.11 and earlier versions are not supported
How to Convert Video to DVD with Aiseesoft DVD Creator
Step 1: Open Aiseesoft DVD Creator from the DVD Toolkit suite, click "Add Video," and select your source file from local storage or a connected device.
Step 2: Choose a menu template from the preset library, or select "No Menu" to skip that step, then set the output destination to disc, ISO file, or VIDEO_TS folder.
Step 3: Click "Burn" and monitor the progress window; insert a blank disc when the software prompts for media.
DVD-5 or DVD-9: Which Blank Disc Should You Buy?
Most blank DVDs sold at retail fall into two categories. A DVD-5 is a single-layer disc with 4.7 GB of storage, enough for roughly two hours of standard-definition video at a typical home recording bitrate. A DVD-9 is a dual-layer disc at 8.5 GB, extending that capacity to approximately four hours.
For most home video projects, DVD-5 is the right choice. A 90-minute home video, a feature-length movie file, or a photo slideshow with audio fits on one DVD-5 disc without special settings. DVD-9 becomes relevant when your source exceeds two hours, when you want a higher bitrate output with less compression, or when you need to mirror the layer structure of a commercial disc. One practical caveat: not all optical drives write dual-layer discs reliably. Check that your drive specifically lists DVD+R DL or DVD-R DL write support before purchasing DVD-9 media.
DVD-5 discs are less expensive and more compatible across standalone DVD players. Unless your project has a clear reason to need the extra capacity, DVD-5 is the safer default.
Professional Video-to-DVD Conversion Services
If your source material is on physical tape (VHS, Hi8, Betamax, Super 8 film) rather than a digital file, software-based conversion requires a video capture card as a hardware prerequisite. Professional digitization services handle the capture equipment and ship finished DVDs directly. Three options with broad US coverage are listed below. Pricing is noted as of late 2025; verify current rates before ordering, as service pricing changes frequently.
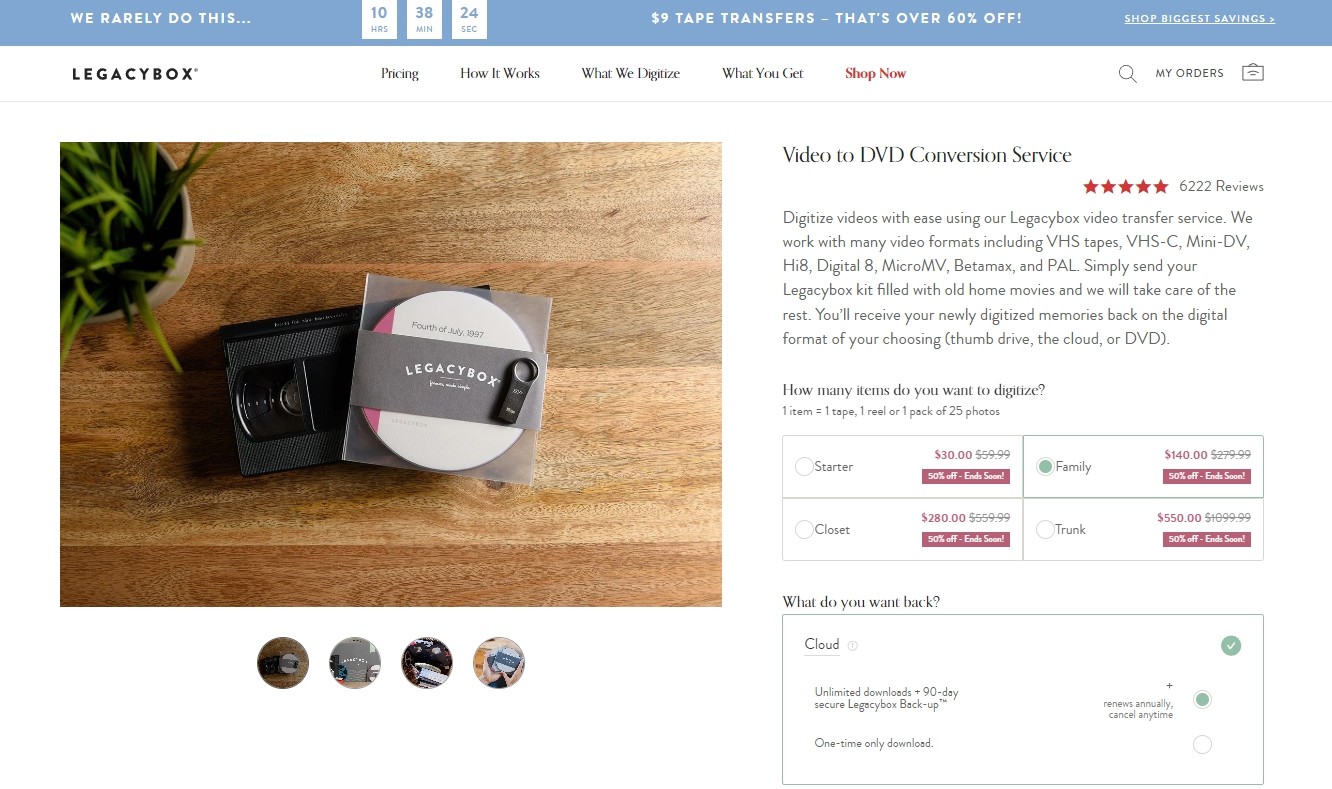
Legacybox
Legacybox is a mail-in digitization service that handles VHS tapes, 8mm and Hi8 cassettes, Super 8 and 8mm film, slides, and photos. You pack your originals in a provided transfer kit, ship it, and receive the originals back along with digital files on USB drive or cloud download, with an optional DVD copy included. Standard turnaround is two to three weeks from receipt at their facility; expedited options are available at additional cost. Legacybox holds a Better Business Bureau accreditation and appears consistently in US consumer digitization discussions as a recognized option in this category.
Pricing (verify before ordering):
| Package | Price | Items Included |
| Starter | $35.98 | Up to 2 items |
| Family | $159.98 | Up to 10 items |
| Closet | $319.98 | Up to 25 items |
| Trunk | $629.99 | Up to 40 items |
One item equals one tape, one reel, or one pack of 25 photographs.
YesVideo (now operating under iMemories)
YesVideo operated for years as an in-store tape digitization partner at Walmart, CVS, and Costco. The company was subsequently acquired by iMemories, which restructured and rebranded the service. As of this writing, the in-store drop-off workflow continues at select Walmart locations under varying branding; availability differs by location, so check with your local store before making a trip. Pricing has been reported at $32.99 per two hours of tape content (as of late 2025; verify at the time of your visit, as rates have changed since the acquisition).
Walmart Photo Center
Select Walmart stores accept VHS tapes and other physical media through an in-store kiosk drop-off process, typically in partnership with YesVideo or a regional digitization provider. You drop off the tapes and receive a notification when DVDs and digital files are ready, usually delivered by mail. The base rate has been listed at $12.96 for the first 30 minutes and $5.46 per additional 30 minutes (as of late 2025; verify before ordering). The advantage over mail-in services is no shipping cost and no packing required. Not all Walmart locations carry the service; the store locator on the Walmart website includes a photo services filter to check availability at a specific address.
How to Choose a Conversion Service
For a small number of tapes (one to five), the Walmart in-store option keeps costs low if a participating location is nearby. For larger collections (ten tapes or more), Legacybox pricing decreases per item at higher volume tiers, making it more cost-effective than per-tape in-store pricing. YesVideo and Walmart Photo Center offer similar workflows at similar price points; the main variable is which service is active at your nearest store.
All three services convert VIDEO_TS to DVD, which matches what the tape source material can deliver. None of them enhance or upscale the original footage beyond what the tape contains.
Frequently Asked Questions
What video formats can I convert to DVD?
Most DVD creation tools in this article accept MP4, MKV, AVI, MOV, WMV, and MPEG-2. DVDFab handle the widest range, including less common containers like FLV, WEBM, and RM. If your source file is in an unusual container and the software rejects it, convert it to MP4 first using a tool like HandBrake; DVD authoring software handles MP4 more reliably than less common format wrappers.
Will converting HD video to DVD reduce quality?
Yes, always. DVD video is limited to standard definition (480i for NTSC, the US broadcast standard), so any source above 480p is downscaled during conversion. A 1080p or 4K file will look noticeably softer on a TV after burning to DVD. This is a DVD format constraint, not a software limitation; no DVD creation tool can output HD resolution to a standard DVD disc. If preserving high resolution matters, consider Blu-ray output, or keep a separate digital copy alongside the DVD.
Do I need a DVD burner to create DVD files?
No. If your goal is a digital DVD archive rather than a physical disc, you can output an ISO image or a VIDEO_TS folder to your hard drive without a burner attached. DVDFab DVD Creator supports ISO and VIDEO_TS as standalone output modes. An ISO file or VIDEO_TS folder can be played back on a PC using software like VLC, stored as a long-term archive, or burned to a physical disc later when you have access to a drive.
Conclusion
DVD creation software in this roundup splits along two practical lines: free DVD burning software for straightforward conversions, and commercial options with broader format coverage and cleaner installation.
For most Windows users with standard MP4 or AVI files and no special requirements, Free Video to DVD Converter from DVDVideoSoft handles the task without cost. DVDFab DVD Creator is worth considering when you need wider input format coverage, GPU-accelerated encoding for longer files, or a single tool that runs on both Windows and macOS. Aiseesoft fills the macOS gap for users who need menu customization and iOS device import within one application, though the suite pricing includes tools most DVD authoring workflows will not use.
If your source is on physical tape rather than a digital file, the five software tools here all require a capture card as a prerequisite. For a handful of tapes, a mail-in service or an in-store drop-off option removes that hardware requirement entirely and delivers finished discs without setup on your end.
 How to Transfer and Burn iPhone Videos to DVD on Windows & MacBy Diana Smith - Jun 11, 2026
 How to Convert AVI to DVD on Windows and Mac in 2026: 6 Best ToolsBy Diana Smith - Jun 10, 2026
 How to Burn a DVD on Mac: 5 Methods That Work on macOS SequoiaBy Diana Smith - Jun 3, 2026
 How to Convert WMV to DVD Free and Easily: Windows / Mac / OnlineBy Wenny Yan - May 27, 2026